There’s nothing more disappointing than digging into a beautiful plate of Loaded Beef Nachos only to find the chips at the bottom have turned into a sad, mushy mess. I used to struggle with that too, but after years of perfecting, I discovered a simple layering trick that changed everything for good. Now, every single chip stays perfectly crisp, loaded with flavor, from the first bite to the last, making these the most reliable and delicious nachos you’ll ever make.
Why These Loaded Beef Nachos Are Your New Go-To
This isn’t just another nacho recipe; it’s a masterclass in texture and taste, designed to deliver maximum satisfaction with minimal fuss. Prepare to impress everyone with your perfectly crafted platter.
The Secret to Never-Soggy Chips: A Game-Changer
The core innovation in this recipe is a strategic layering technique combined with careful ingredient timing. By building thin, even layers of chips, beef, and cheese, we create a protective barrier that keeps moisture at bay, ensuring every chip remains gloriously crisp.
Adding fresh, cold toppings only after baking also plays a crucial role. This prevents them from steaming the chips and preserves their vibrant texture and flavor.
Explosion of Classic Flavors in Every Bite
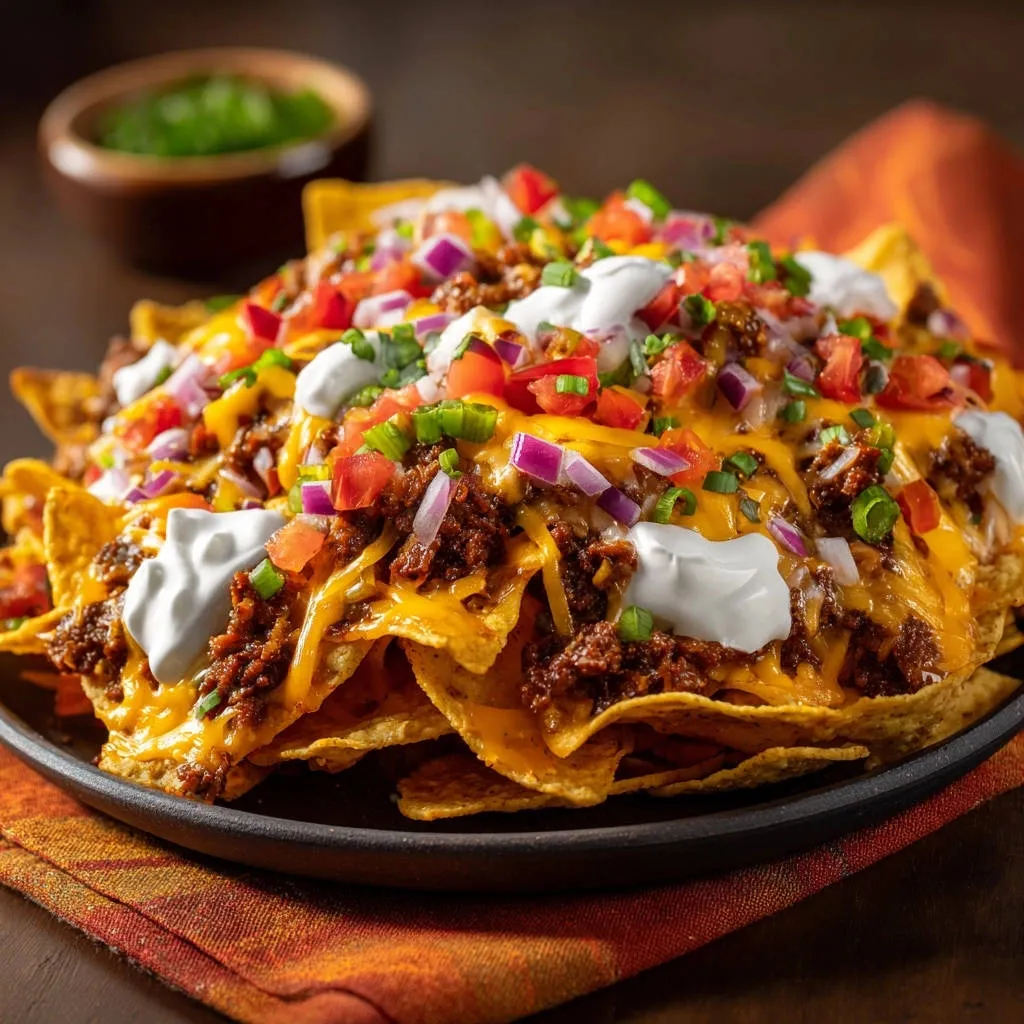
From the savory, perfectly seasoned ground beef to the rich, melted cheddar and the refreshing burst of fresh toppings, these nachos deliver a harmonious blend of classic flavors. Each bite offers a satisfying crunch followed by a medley of tastes.
The balance of warm, spicy beef and cool, creamy sour cream with crisp vegetables creates a truly addictive experience that is perfect for any occasion.
Quick & Easy Weeknight Crowd-Pleaser
Despite their gourmet feel, these Loaded Beef Nachos are surprisingly simple and quick to assemble. They’re ideal for busy weeknights, game days, or casual gatherings where you want big flavor without spending hours in the kitchen.
Their versatility means you can easily customize them, but the core recipe is foolproof and designed for speed and delicious results every time.
Gather Your Flavor Arsenal: What You’ll Need
High-quality ingredients are the starting point for truly exceptional nachos. Here’s what you’ll need, along with why each component matters.
The Foundation: Crispy Chips & Melty Cheese
Tortilla Chips: Choose sturdy, restaurant-style tortilla chips. Thicker chips hold up better under the weight of toppings and prevent breakage, ensuring a robust base for your beef nacho platter.
Cheddar Cheese: While pre-shredded works, shredding your own block of sharp or medium cheddar yields a superior melt and flavor. Pre-shredded often contains anti-caking agents that can hinder smooth melting.
Savory Beef & Aromatic Spice Blend
Ground Beef: One pound of lean ground beef (85-90%) is ideal as it minimizes excess fat, resulting in less draining and a cleaner flavor profile. If using higher fat content, ensure thorough draining.
Chili Powder, Cumin, Garlic Powder, Salt & Pepper: This classic blend creates the signature, warm, and earthy flavor of the seasoned beef. Chili powder provides a foundational warmth, cumin adds depth, and garlic powder enhances the savory notes.
Fresh & Vibrant Toppings for the Finish
Red Onion & Tomato: Diced red onion adds a sharp, piquant crunch, while fresh diced tomato contributes a juicy, slightly acidic burst of freshness. Both provide essential contrast to the richness of the cheese and beef.
Green Onions: Chopped green onions offer a milder oniony kick and a vibrant color, acting as a fresh garnish that brightens the entire dish.
Sour Cream: A dollop of full-fat sour cream provides a creamy, cooling counterpoint to the seasoned beef and spices. Its tanginess balances the richness of the cheesy nachos beautifully.
Simple Tools for Nacho Nirvana
You don’t need fancy equipment to make incredible homemade nachos. These essential tools will ensure a smooth cooking process.
Large Skillet: Essential for browning the ground beef evenly and for distributing the spices throughout the meat. A good skillet ensures consistent cooking.
Large Oven-Safe Platter or Baking Sheet: This is crucial for the strategic layering that prevents sogginess and allows for even heat distribution during baking. A rimmed baking sheet prevents any spills.
Spatula or Wooden Spoon: Ideal for breaking up the ground beef as it browns and for stirring the spices thoroughly into the meat, ensuring every bite is flavorful.
Measuring Spoons & Cups: For accurate ingredient proportions, especially when it comes to the spice blend, which is key to a well-seasoned beef filling.
Crafting Perfection: Your Step-by-Step Guide to Crispy Loaded Beef Nachos
Follow these steps meticulously for a tray of delicious beef nachos that are consistently crisp and incredibly flavorful.
- Prep for Success: Preheat & Gather
Preheat your oven to 375°F (190°C). This ensures the oven is ready for even baking, which is crucial for achieving that desired crispness in your chips. Gather all your ingredients and tools now for a seamless cooking experience.
- Seasoning Your Beef: A Flavorful Base
In a large skillet, brown the ground beef over medium heat, breaking it apart as it cooks with a spatula. Once no pink remains, drain any excess fat thoroughly; this is a critical step to prevent greasy and soggy nachos later.
Stir in the chili powder, cumin, garlic powder, salt, and black pepper. Cook for another 2 minutes, stirring occasionally, allowing the spices to bloom and fully infuse the beef with a rich, aromatic flavor. Remove the seasoned beef from heat once done.
- The Crispy Chip Foundation: First Layer Strategy
Arrange about one third of your tortilla chips in a single, even layer on a large oven-safe platter or baking sheet. This initial, unburdened layer is absolutely crucial for stability, even heat distribution, and directly contributes to our no-soggy chip promise for your nacho supreme.
- Layering Magic: Building Flavor & Texture
Evenly sprinkle one third of the seasoned ground beef over the chips, ensuring good coverage, followed by one third of the shredded cheddar cheese.
Repeat this strategic layering process two more times: another layer of chips, then beef, then cheese. This method ensures every chip receives delicious toppings and creates a protective barrier, preventing the bottom chips from becoming mushy while promoting consistent and even cheese melting.
- Bake to Bubbly Perfection
Place the platter in the preheated oven and bake for 8 to 12 minutes, or until the cheese is completely melted and bubbly, and the edges of the chips are slightly golden. Keep a close eye on them to prevent burning, as oven temperatures can vary.
- Cool & Creamy Finish: Sour Cream Addition
Carefully remove the nachos from the oven using oven mitts. Immediately dollop the sour cream over the melted cheese. The residual heat will gently warm the sour cream without melting it completely into a watery mess.
- Fresh & Vibrant: Adding Your Toppings
Generously sprinkle the diced red onion, diced tomato, and chopped green onions over the top. Serving these fresh toppings cold and adding them after baking helps maintain their crisp texture and prevents them from introducing moisture that could make your chips soft.
- Serve Immediately & Savor
Present your perfectly crispy, loaded beef nachos hot from the oven for the best possible experience. Their optimal texture and flavor are best enjoyed right away; don’t let them sit too long!
Mastering Your Nachos: Expert Tips & Tricks
Take your nacho game to the next level with these insights and customization ideas.
Elevate Your Beef: Flavor Boosters & Variations
Spice It Up: For an extra kick, add a pinch of cayenne pepper or finely diced fresh jalapeños to your beef while it cooks. For a delightful smoky depth, a dash of smoked paprika works wonders, enhancing the overall profile of your beefy nachos.
Onion & Bell Pepper Base: Sauté finely diced onion and bell pepper with the ground beef until softened before adding the spices. This adds extra vegetable content, sweetness, and a more complex aromatic depth to the meat mixture.
Cheese Choices: Beyond Cheddar
Melting Mix: For a richer, creamier melt and more nuanced flavor, combine cheddar with other great melting cheeses like Monterey Jack, Colby, or even a touch of creamy queso blanco. This blend creates a more appealing cheese pull.
Spice Factor: If you enjoy a subtle, built-in heat, consider using pepper jack cheese. It provides a delightful kick without needing to add extra spices directly to the beef or toppings.
The Ultimate Nacho Layering Strategy (Revisited for Max Crispness)
Bottom Barrier: Always start with a single, unadorned layer of chips directly on the baking sheet. This creates your first line of defense against moisture and ensures a sturdy foundation for your towering nacho masterpiece.
Even Distribution: Ensure each layer of seasoned beef and shredded cheese is spread as thinly and evenly as possible. This guarantees that every chip gets delicious toppings and contributes to consistent melting and crispness throughout the batch.
Customizing Your Toppings Extravaganza
Avocado/Guacamole: Add diced fresh avocado or a generous dollop of homemade guacamole just before serving for a creamy, healthy fat that provides a beautiful contrast. A really good perfect pico de gallo can also be a game-changer here.
Salsa & Pickled Jalapeños: Offer a variety of salsas and pickled jalapeños on the side. This allows guests to customize their spice and tang levels, keeping chips crisp longer by controlling moisture.
Other Fresh Herbs: A sprinkle of fresh cilantro, either finely chopped or as whole leaves, can add a bright, herbaceous, and incredibly fresh note to your fully loaded nachos.
Prepping for Speed: Make-Ahead Components
Cooked Beef: The seasoned ground beef can be cooked a day or two in advance and stored in an airtight container in the refrigerator. Reheat gently before layering to ensure it’s warm when baking, which helps with cheese melt.
Chopped Veggies: Dice your red onion, tomato, and green onions ahead of time. Store them separately in airtight containers in the fridge. This significantly cuts down on assembly time just before baking, making weeknight meals a breeze.
Nacho Night Fixes: Common Problems & Solutions
Even seasoned cooks encounter challenges. Here are solutions to common nacho dilemmas.
Why Are My Nachos Soggy?
The most common culprit is too much moisture, either from undrained beef fat or wet toppings added too early. Ensure you drain the beef thoroughly after browning, and critically, add fresh, cold toppings only after the nachos have come out of the oven.
Insufficient layering can also lead to sogginess. Spread your ingredients thinly and evenly across multiple chip layers. This protects the bottom chips by creating a barrier and distributing the moisture and heat more effectively.
My Cheese Isn’t Melting Evenly!
This often happens if the cheese is too cold, if it’s piled too thickly in one spot, or if your oven isn’t fully preheated. Ensure your oven reaches the target temperature before baking. For the best, creamiest melt, use freshly shredded cheese, which lacks the anti-caking agents found in pre-shredded varieties.
Even layering, as emphasized in the recipe, is also key for consistent and uniform melting. Distribute cheese generously but thinly across each layer.
How Do I Get More Flavor into My Beef?
If your beef tastes bland, it might need more seasoning or a longer cook time with the spices. Don’t be shy with salt and pepper; taste and adjust as needed. For deeper umami and a richer sauce, consider adding a splash of beef broth or a tablespoon of tomato paste to the beef as it simmers with the spices. For more inspiration, explore how to create robust flavors in dishes like this hearty beef stew.
Your Loaded Beef Nachos Questions Answered
Here are answers to some frequently asked questions about making the best crispy beef nachos.
Can I Make Loaded Beef Nachos Ahead of Time?
While the actual assembly and baking are best done right before serving to prevent any chance of sogginess, you can absolutely prepare components in advance. Cook and season the ground beef, and chop all your fresh toppings a day or two ahead. Store them separately in the refrigerator, then assemble and bake when ready for a quick meal.
What’s the Best Way to Reheat Leftover Nachos?
Reheating can be tricky to maintain crispness, but it’s certainly possible! Spread a single layer of leftover nachos on a baking sheet and reheat in a preheated oven (around 250-300°F or 120-150°C) for 5-10 minutes, or until warmed through and the chips have re-crisped slightly. Avoid the microwave at all costs, as it will inevitably make them mushy.
Can I Use Different Meats or Make Them Vegetarian?
Absolutely! Ground turkey or shredded chicken can easily substitute the beef for a lighter alternative. For a fantastic vegetarian version, seasoned black beans, refried beans, or a plant-based ground crumble make excellent, hearty alternatives. Remember to adjust the spices slightly to complement your chosen protein, ensuring a flavorful base for your vegetarian nachos.
What Are Some Other Topping Ideas to Consider?
The possibilities for customizing your loaded nachos are truly endless! Other popular additions include black olives, pickled jalapeños for a tangy kick, a vibrant roasted salsa verde, corn kernels, or a drizzle of warm nacho cheese sauce. For a unique touch, consider a sprinkle of crumbled cotija cheese. Always remember to add most wet or cold toppings after baking to maintain chip crispness.
Serving Suggestions & Smart Storage for Leftovers
Make your nacho experience even better with these ideas for sides and responsible storage.
Perfect Pairings: What to Serve Alongside Your Nachos
These Loaded Beef Nachos are hearty enough to be a meal on their own, especially for a casual dinner or party. However, they also pair wonderfully with a light side salad dressed with a vinaigrette for a refreshing contrast, or a cool, creamy coleslaw. For a fun, indulgent twist, serving them alongside classic chili cheese fries creates an epic comfort food spread.
Storing Leftover Nachos (If You Have Any!)
While best enjoyed fresh, if you do happen to have leftovers (a rare occurrence!), allow them to cool completely to room temperature. Store them in an airtight container in the refrigerator for up to 2-3 days. For best results, keep any remaining fresh toppings separate to add just before serving after reheating, ensuring maximum texture and flavor retention.
Ready to Dive In? Share Your Nacho Success!
Now that you’re armed with the secret to perfectly crisp, flavor-packed loaded beef nachos, it’s time to put your culinary skills to the test! Say goodbye to soggy bottoms and hello to a nacho experience that will have everyone asking for your recipe and wondering how you achieved such consistent crispness.
We’d love to see your creations! Share your Loaded Beef Nachos masterpiece on social media and tag us, or leave a comment below with your favorite topping combinations and any unique twists you tried. Happy cooking!

Beef Nachos
Course: Main CourseCuisine: MexicanDifficulty: easy4
servings20
minutes20
minutes750
kcal40
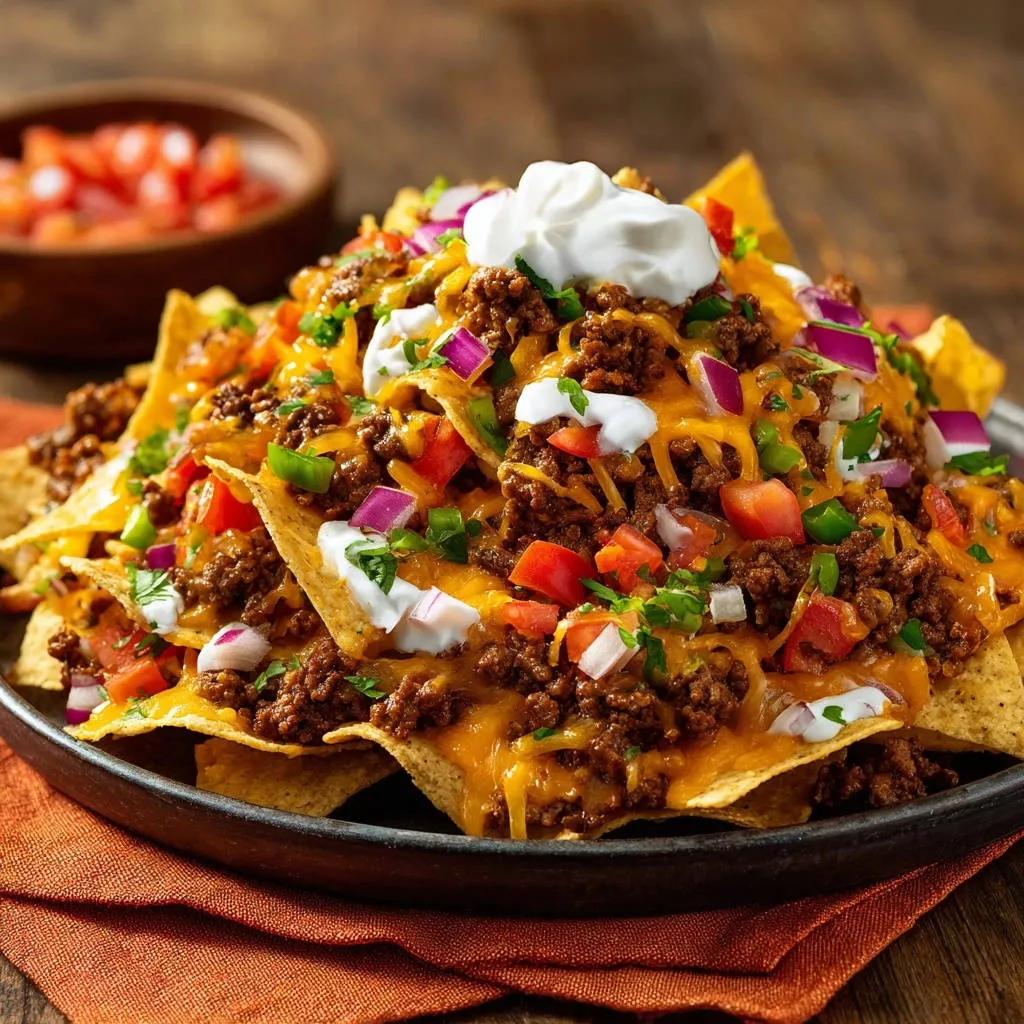
minutesSay goodbye to soggy nachos! This recipe guarantees perfectly crispy chips loaded with seasoned ground beef, melted cheese, and fresh toppings from the first bite to the last. Enjoy a crowd-pleasing dish that’s simple to make and always delicious.
Ingredients
1 pound ground beef
1 tablespoon chili powder
1 teaspoon ground cumin
1/2 teaspoon garlic powder
1/2 teaspoon salt
1/4 teaspoon black pepper
1 (10 ounce) bag tortilla chips
2 cups shredded cheddar cheese
1/2 cup diced red onion
1/2 cup diced tomato
1/4 cup chopped green onions
1/2 cup sour cream
Directions
- Preheat your oven to 375 degrees Fahrenheit.
- In a large skillet, brown the ground beef over medium heat, breaking it apart as it cooks. Once no pink remains, drain any excess fat. Stir in the chili powder, cumin, garlic powder, salt, and black pepper. Cook for another 2 minutes, stirring occasionally, then remove from heat.
- To ensure crispy chips throughout, arrange about one third of your tortilla chips in a single layer on a large oven-safe platter or baking sheet. This initial layer is crucial for stability and even heat distribution.
- Evenly sprinkle one third of the seasoned ground beef over the chips, followed by one third of the shredded cheddar cheese.
- Repeat this layering process two more times: another layer of chips, then beef, then cheese. This strategic layering ensures every chip gets cheese and meat, and helps prevent the bottom chips from getting soggy by providing a protective barrier and allowing even melting.
- Place the platter in the preheated oven and bake for 8 to 12 minutes, or until the cheese is completely melted and bubbly, and the edges of the chips are slightly golden. Keep a close eye on them to prevent burning.
- Carefully remove the nachos from the oven. Immediately dollop the sour cream over the melted cheese.
- Generously sprinkle the diced red onion, diced tomato, and chopped green onions over the top. Serving these fresh toppings cold and adding them after baking helps maintain their texture and prevents them from making your chips soft.
- Serve immediately and enjoy your perfectly crispy, loaded nachos!
Notes
- Strategic layering and adding fresh toppings after baking ensures perfectly crispy nachos every time.