There’s nothing quite like the satisfaction of biting into a perfectly crafted burrito, but I know the frustration of a messy, falling-apart wrap. I’ve spent years perfecting the art of building a sturdy burrito, eager to share a technique that ensures your gooey cheesy chicken burritos or beef versions stay intact.
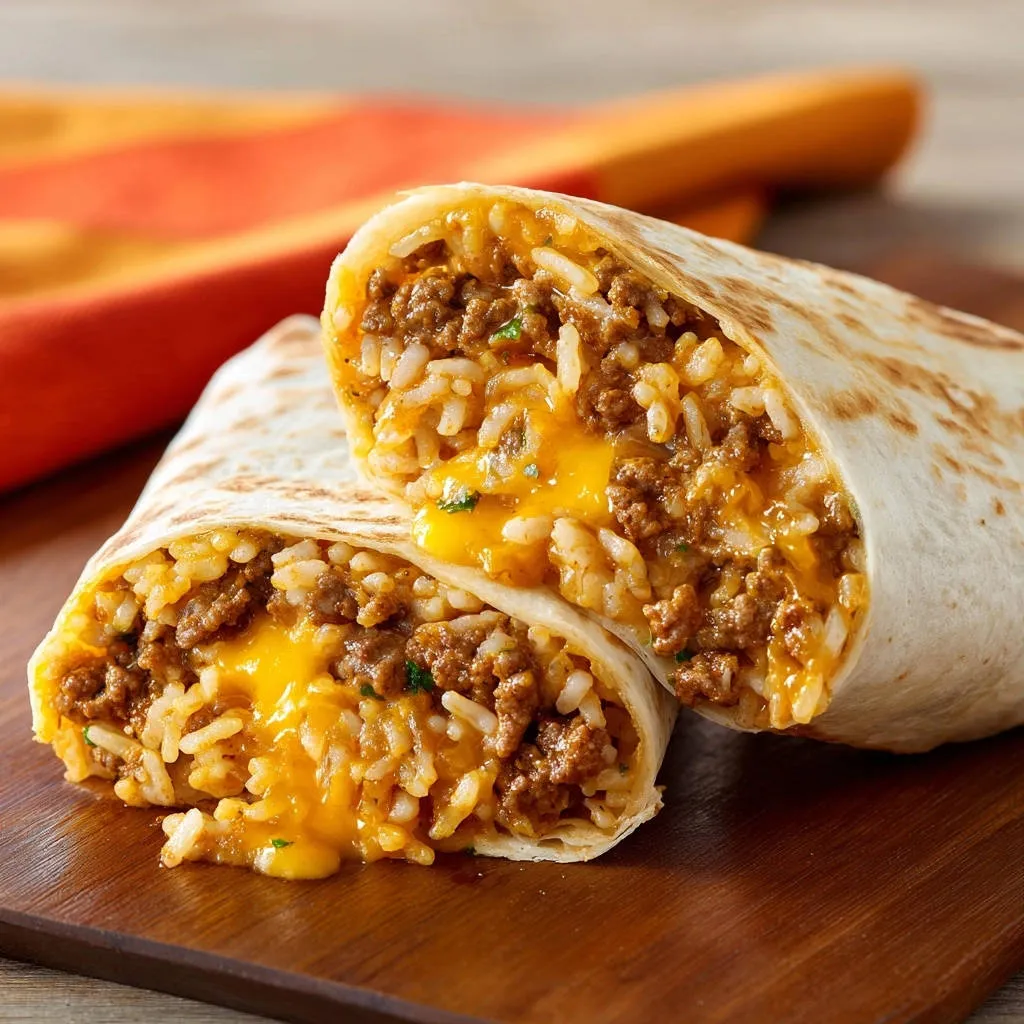
This recipe for Loaded Cheesy Beef Burritos isn’t just about incredible flavor; it’s about a game-changing “No-Burst Wrap!” technique. You’ll enjoy every single bite without a single spill, making these the ultimate family-friendly meal.
Why These Loaded Cheesy Beef Burritos Will Be Your New Go-To
Forget the days of wrestling with torn tortillas and runaway fillings. This recipe empowers you with the confidence to create perfectly wrapped, hearty meals every time.
The “No-Burst Wrap!” technique is truly what sets these Loaded Cheesy Beef Burritos apart, ensuring a clean, enjoyable eating experience.
Beyond the flawless structure, the rich, savory beef filling combined with creamy cheesy rice offers an irresistible balance of textures and robust flavors that satisfy every craving.
They’re incredibly practical, easy to customize, and sure to become a cherished favorite for busy weeknights or casual weekend gatherings.
Essential Ingredients for Your Ultimate Burrito Creation
The Heart of the Filling: Savory Ground Beef
We use lean ground beef for a hearty, flavorful base that isn’t overly greasy. Its texture is ideal for absorbing the aromatic spices.
For a lighter option, you could easily substitute ground turkey or even ground chicken, adjusting cooking times slightly.
Spices That Sing: Flavoring Your Beef Perfectly
A blend of onion powder, garlic powder, cumin, chili powder, salt, and pepper creates a deeply savory and aromatic profile.
These classic Tex-Mex flavors are essential for an authentic taste, building complexity without overwhelming the beef.
The Cheesy Rice Core: Creamy & Comforting
Cooked white rice adds satisfying substance and a neutral base for flavor, while the shredded cheddar or Mexican blend cheese provides gooey richness.
Combining the rice with cheese ensures a creamy, cohesive texture that melts beautifully into the beef filling, offering a delightful contrast.
Tortilla Tactics: Choosing and Prepping Your Wraps
Opt for large (10 to 12-inch) flour tortillas; their size is crucial for accommodating a generous filling and mastering the “No-Burst Wrap!”
Warming the tortillas before filling is a non-negotiable step, making them pliable and significantly reducing the risk of tearing during rolling.
The Liquid Element: Water or Beef Broth
A small amount of water or beef broth is added to the cooked beef, not just for flavor but to create a moist, succulent filling.
This liquid ensures the beef is never dry and helps meld all the spices into a cohesive, juicy mixture, perfect for your Loaded Cheesy Beef Burritos.
Fresh Finish: Optional Cilantro
Freshly chopped cilantro adds a bright, herbaceous note that cuts through the richness of the beef and cheese. It’s an optional but highly recommended addition for a burst of freshness.
Gear Up! Essential Kitchen Tools for Burrito Making
Skillet for Sautéing
A large, heavy-bottomed skillet is perfect for browning the ground beef evenly and developing those rich, infused flavors.
Mixing Bowls
You’ll need at least two: one for preparing your flavorful beef filling and another for combining the cheesy rice mixture.
Measuring Utensils
Standard measuring spoons and cups are essential for precise ingredient quantities, ensuring consistent flavor every time.
Optional: Microwave or Dry Skillet for Tortilla Warming
To achieve pliable tortillas, you’ll need either a microwave for quick bursts or a separate, dry skillet to warm them gently.
Crafting Perfection: Your Loaded Cheesy Beef Burritos Method
Brown the Beef:
Start by heating olive oil in a large skillet over medium heat. Add your lean ground beef and break it apart with a spoon as it cooks.
Continue cooking until the beef is fully browned, then drain any excess fat. This step is crucial for a less greasy, more flavorful filling.
Infuse with Spices:
Stir in the onion powder, garlic powder, cumin, chili powder, salt, and black pepper into the browned beef. Cook for just one minute, stirring constantly.
This quick cook time activates the aromatic oils in the spices, creating a deep, fragrant foundation for your Loaded Cheesy Beef Burritos.
Simmer for Flavor:
Pour in the water or beef broth, bringing the mixture to a gentle simmer. Allow it to cook for 2 to 3 minutes, stirring occasionally.
This simmering process allows the flavors to meld beautifully and ensures the liquid is mostly absorbed, resulting in a perfectly moist and cohesive beef filling. Remove from heat and stir in fresh cilantro, if using, for a burst of brightness.
Prepare Cheesy Rice:
In a separate bowl, simply combine the cooked white rice with half of the shredded cheddar or Mexican blend cheese.
This simple step ensures your creamy, cheesy rice is ready to layer, providing a comforting contrast to the savory beef in your burrito.
Warm the Tortillas:
Warm your large flour tortillas for about 15 to 20 seconds each in a dry skillet or microwave. They should be warm and soft to the touch.
This crucial step dramatically increases their pliability, making them easier to roll and significantly reducing the chances of tearing, which is key for our “No-Burst Wrap!”
Mastering “The No-Burst Wrap!”: The Secret to a Perfect Roll
Lay the Foundation:
Lay a warmed tortilla flat on a clean surface. Spoon about 1/4 of the beef filling in a line across the center of the tortilla.
Critically, leave at least 1.5 to 2 inches clear at the top and bottom edges, and about 1 inch clear on each side. This margin is essential for a proper, secure fold; do not overfill your Loaded Cheesy Beef Burritos!
Layer the Fillings:
Next, spoon about 1/4 of the cheesy rice mixture directly over the beef filling. For an extra touch of decadence, sprinkle with a little additional shredded cheese.
This layering ensures an even distribution of flavor and texture throughout every bite of your burrito.
The Initial Anchor Fold:
Fold the bottom edge of the tortilla up and over the filling. Then, tuck this edge snugly under the filling itself, pulling it back towards you slightly.
This creates a tight, compact cylinder, forming the vital internal anchor that prevents the burrito from unraveling and is the first crucial step of the “No-Burst Wrap!” technique.
Secure the Sides:
Now, fold in the left and right sides of the tortilla over the ends of the filling. Ensure these side flaps are firmly tucked against the filling.
Sealing these ends prevents any delicious filling from escaping as you continue to roll, contributing to a truly no-mess experience.
The Final Tight Roll:
Keeping a firm, constant grip, roll the entire burrito forward from the bottom towards the top. Maintain consistent tension throughout this motion.
Roll it as tightly as possible, ensuring all the beef and cheesy rice filling is encased in a secure, sealed package. This diligent rolling ensures your Loaded Cheesy Beef Burritos hold up perfectly.
Optional Extra Seal:
For an ultimate seal and a touch of textural perfection, briefly place the rolled burritos seam-side down in a dry, hot skillet for about 30 seconds.
This light toasting creates an extra layer of security, sealing the seam, and adds a delightful, slightly crispy exterior to your Loaded Cheesy Beef Burritos.
Elevate Your Burrito Game: Pro Tips & Clever Customizations
Flavor Boosters & Add-Ins
Introduce diced bell peppers or corn to the beef mixture for added sweetness and crunch. Black beans, rinsed and drained, also make an excellent hearty addition.
A dash of your favorite hot sauce or a spoonful of green chiles stirred into the beef can significantly enhance the flavor profile and add a gentle kick.
Perfecting the Tortilla Warm-Up
If using a microwave, cover tortillas with a damp paper towel before heating for optimal steam and softness. For a skillet, warm each side briefly until just pliable, not crispy.
Warm tortillas one at a time as you’re ready to roll to ensure they retain their heat and flexibility, preventing them from cooling and becoming stiff.
Don’t Overfill Your Loaded Cheesy Beef Burritos!
It’s tempting to load up, but remember that portion control is paramount for a successful “No-Burst Wrap!” Stick to about 1/4 of the filling per burrito.
Leaving adequate clear space on the tortilla edges allows for proper folding and tucking, which is critical for a secure seal.
Extra Seal, Extra Security
The optional skillet toast isn’t just for sealing; it also gives the exterior a lovely light crispness, enhancing the overall eating experience of your Loaded Cheesy Beef Burritos.
Ensure the skillet is dry and hot, and only toast until lightly golden. Over-toasting can make the tortilla brittle.
Spice Level Adjustments
To increase the heat, add a pinch of cayenne pepper to the beef mixture, or incorporate finely diced fresh jalapeños (seeds removed for less heat).
For a milder version, simply reduce the amount of chili powder or omit it entirely, relying on the savory cumin and garlic for flavor.
Plan Ahead: Make-Ahead & Storage Solutions
Prepping Components in Advance
The seasoned ground beef filling can be cooked and stored in an airtight container in the refrigerator for up to 3 days. This significantly cuts down on prep time later.
You can also cook your white rice ahead of time. Keep it refrigerated until you’re ready to assemble your Loaded Cheesy Beef Burritos.
Storing Cooked Burritos
Once assembled and optionally toasted, allow the burritos to cool completely. Wrap each individually in parchment paper or foil, then place in an airtight container.
Refrigerated burritos will stay fresh for up to 3-4 days, making them perfect for meal prepping a quick and delicious lunch or dinner.
Freezing for Future Feasts
Wrap each cooled burrito tightly in plastic wrap, then an additional layer of aluminum foil to prevent freezer burn. Store them in a freezer-safe bag or container.
These Loaded Cheesy Beef Burritos can be frozen for up to 2-3 months. Label with the date for best quality.
Reheating for Freshness
From the refrigerator, remove foil/plastic and reheat in a microwave for 1-2 minutes, or in an oven at 350°F (175°C) for 15-20 minutes, or until heated through.
For frozen burritos, remove plastic wrap but keep foil. Bake at 375°F (190°C) for 30-40 minutes, then unwrap and bake for another 5-10 minutes to crisp the tortilla.
What to Serve with Your Loaded Cheesy Beef Burritos
Classic Toppings & Condiments
Offer a spread of creamy sour cream, vibrant guacamole, fresh salsa or homemade pico de gallo, and a selection of your favorite hot sauces. These additions elevate every bite.
Fresh Side Salads
A crisp green salad with a light vinaigrette or a simple refreshing tomato salad provides a perfect counterpoint to the rich, savory burritos.
Rice and Bean Sides
If you’re extra hungry, serve additional black beans or a side of cilantro-lime rice. This rounds out the meal perfectly for a more substantial plate.
Troubleshooting Your Loaded Cheesy Beef Burritos: Common Questions & Solutions
Why is my filling dry?
A dry filling often results from overcooking the beef or not incorporating enough liquid. Ensure you don’t over-drain the beef; some residual moisture is good.
Always add the water or beef broth and simmer briefly as instructed to create that essential moist texture for your Loaded Cheesy Beef Burritos.
My tortillas keep tearing!
The most common culprit is not warming your tortillas sufficiently. Cold or stiff tortillas are prone to cracking when folded.
Ensure they are warm and very pliable, almost steamy. Old tortillas can also be less flexible, so use fresh ones.
How do I prevent overfilling?
It’s all about portion control. Stick to approximately 1/4 of the beef filling and 1/4 of the cheesy rice per large tortilla.
Remember to leave those crucial 1.5-2 inch margins at the top and bottom of the tortilla to allow for proper, secure folding.
My burritos are falling apart during eating.
This indicates the “No-Burst Wrap!” technique wasn’t executed tightly enough. The initial tuck of the bottom flap is paramount for anchoring.
Always roll with consistent, firm tension from bottom to top, ensuring the filling is tightly encased, and consider the optional skillet toast for an extra seal.
Your Top Loaded Cheesy Beef Burrito Questions Answered
Can I use a different type of meat?
Absolutely! Ground turkey or chicken can be excellent leaner alternatives. Just be sure to season them well, as they can be milder in flavor.
For a plant-based option, vegetarian crumbles work wonderfully, just follow package directions for cooking before adding the spices.
Are these burritos freezer-friendly?
Yes, these Loaded Cheesy Beef Burritos are perfect for freezing! They hold up incredibly well, making them ideal for future quick meals.
Just refer back to our “Freezing for Future Feasts” section for detailed instructions on how to wrap and store them correctly.
What are the best cheese options?
While cheddar and Mexican blend are classics, feel free to experiment! Monterey Jack offers a lovely melt, while Pepper Jack adds a subtle heat.
You could also blend cheeses, using a mix of mozzarella for stretch and a sharp cheddar for flavor complexity.
Can I make these gluten-free?
Yes, you certainly can! Simply swap out the standard flour tortillas for large gluten-free flour tortillas.
Always double-check that all your other ingredients, especially your spices, are certified gluten-free to avoid cross-contamination.
How can I make these spicier?
To kick up the heat, stir in a generous pinch of cayenne pepper with your other spices. You can also add finely diced fresh jalapeños or serrano peppers to the beef.
Serving with a fiery hot sauce or a dollop of spicy salsa will allow everyone to customize their individual heat preference.
Ready to Roll? Your Loaded Cheesy Beef Burritos Await!
There you have it – the ultimate recipe for Loaded Cheesy Beef Burritos that promises flavor, satisfaction, and absolutely no mess. With the “No-Burst Wrap!” technique in your arsenal, you’re ready to tackle any burrito challenge with confidence.
Gather your ingredients, ignite your culinary spirit, and prepare to delight yourself and your loved ones with these perfectly packed bundles of joy. Happy cooking!
Beef Burritos
Course: Main CourseCuisine: MexicanDifficulty: easy4
burritos20
minutes15
minutes650
kcal35
minutesSay goodbye to falling-apart burritos with this foolproof recipe. Learn a simple technique to create perfectly sealed, loaded cheesy beef burritos that stay intact from the first bite to the last. Enjoy a delicious and mess-free meal!
Ingredients
1 tablespoon olive oil
1 pound lean ground beef
1 teaspoon onion powder
1 teaspoon garlic powder
1 teaspoon ground cumin
1 teaspoon chili powder
1/2 teaspoon salt
1/4 teaspoon black pepper
1/4 cup water or beef broth
2 cups cooked white rice
1 cup shredded cheddar cheese or Mexican blend
4 large (10 to 12 inch) flour tortillas
2 tablespoons chopped fresh cilantro (optional)
Directions
- Heat olive oil in a large skillet over medium heat. Add ground beef and cook, breaking it apart with a spoon, until fully browned. Drain any excess fat.
- Stir in onion powder, garlic powder, cumin, chili powder, salt, and black pepper. Cook for 1 minute, stirring constantly, until fragrant.
- Pour in the water or beef broth and bring to a simmer. Cook for 2 to 3 minutes, allowing the flavors to meld and the liquid to mostly absorb, creating a moist, flavorful beef filling. Remove from heat and stir in cilantro if using.
- In a separate bowl, combine the cooked white rice with half of the shredded cheese.
- Warm the flour tortillas for about 15 to 20 seconds each in a dry skillet or microwave. This makes them more pliable and less prone to tearing.
- To create The No-Burst Wrap! and prevent your burrito from falling apart: Lay a warmed tortilla flat on a clean surface. Spoon about 1/4 of the beef filling in a line across the center of the tortilla, leaving at least 1.5 to 2 inches clear at the top and bottom, and about 1 inch clear on each side. Do not overfill.
- Add about 1/4 of the cheesy rice mixture over the beef, then sprinkle with a little extra shredded cheese.
- Fold the bottom edge of the tortilla up and over the filling. Tuck this edge snugly under the filling itself, pulling it back towards you slightly to create a tight, compact cylinder. This is key for anchoring the roll.
- Next, fold in the left and right sides of the tortilla over the ends of the filling. Make sure these side flaps are firmly tucked against the filling.
- Finally, keeping a firm grip, roll the entire burrito forward from the bottom towards the top, maintaining constant tension. Roll it as tightly as possible, ensuring all the filling is encased in a secure, sealed package.
- Repeat with the remaining tortillas and filling. For an extra seal, you can briefly place the rolled burritos seam-side down in a dry, hot skillet for about 30 seconds until lightly toasted. Serve immediately.
Notes
- The ‘No-Burst Wrap’ technique ensures your burritos stay perfectly intact.