
Ever bitten into a cauliflower casserole that’s more soup than side? Most flop because they skip the salting step, leaving you with watery disappointment. This loaded cheesy cauliflower casserole fixes that fast. You’ll have creamy, bacon-loaded perfection on the table in 45 minutes, beating takeout every time.
Here’s why it works so well. The simple salting and draining trick pulls out excess moisture through osmosis. That means your sauce clings perfectly, no sogginess in sight. Plus, bacon drippings add that smoky depth everyone craves.
The real secret? Pat those salted florets bone-dry after rinsing. I’ve seen it transform a mushy mess into restaurant-style creaminess. Trust me, one bite and you’ll forget cauliflower’s bad rep. Let’s dive in.
Why Loaded Cheesy Cauliflower Casserole Succeeds
Salting Trick Prevents Soggy Texture
Salt acts like a magnet for water in cauliflower cells. Sprinkle 2 teaspoons on florets in a colander, and in 20 minutes, it draws out 20 to 30 percent of the moisture. That’s the difference between soupy and silky.
Rinse briefly to remove excess salt, then pat dry thoroughly. Skip this, and your loaded cheesy cauliflower casserole pools with liquid. Dry florets absorb sauce better, locking in that creamy texture you want.
Picture it: firm bites coated in cheese, not swimming. This method guarantees success every time.
Bacon Drippings Build Deep Flavor Base
Those 2 tablespoons of bacon drippings do the heavy lifting. They infuse the cauliflower with rich umami, way better than plain oil. It’s a pro trick that amps up the cheesy goodness.
Oil works in a pinch, but drippings add smokiness that ties everything together. Taste as you go; you’ll notice the depth immediately. For your loaded cheesy cauliflower casserole, it’s flavor gold.
Key Ingredients for Creamy Loaded Cheesy Cauliflower Casserole
Cauliflower Florets: Freshness Standards
Grab one large head, about 2 pounds, with firm cores and vibrant white florets. Cut into bite-sized pieces for even cooking in your loaded cheesy cauliflower casserole. Avoid yellowing ones; they turn mushy fast.
Organic holds up better, but conventional’s fine if fresh. Store in the fridge’s crisper, loosely wrapped, up to 5 days. Firm cores mean better texture post-salting.
Cheddar Cheese and Dairy Ratios
Two cups sharp cheddar, divided, gives meltiness and bite. Heavy cream brings richness; don’t swap for half-and-half or it thins out. Sour cream adds tang, balancing the fat.
Melted unsalted butter prevents overseasoning. This combo serves 6 to 8 perfectly, creating a sauce that coats without overwhelming. Freshly shred your cheese for smooth results.
Bacon, Onions, and Seasoning Essentials
Eight ounces thick-cut bacon crisps up nicely for crunch. Chopped green onions or chives add fresh pop at the end. Garlic and onion powders build savory depth without fresh chopping.
Season with salt and pepper after draining to avoid mush. Source quality bacon; it makes your loaded cheesy cauliflower casserole shine. Don’t skimp here.
Science of Moisture Control in Cauliflower Casserole
Osmosis and Draining Fundamentals
Salt creates a hypertonic solution, pulling water from cauliflower cells via osmosis. In 20 minutes, you lose about 25 percent moisture, so sauce clings instead of separating. Steaming skips this and ruins texture.
Visualize clear liquid in the bowl below; that’s your cue. For loaded cheesy cauliflower casserole, this step ensures every floret stays firm yet creamy. No more watery fails.
Sauce Thickening Through Emulsification
Heavy cream, sour cream, and butter emulsify at 375 degrees F, aided by cauliflower’s natural starches. Stir gently for 3 minutes, and it thickens to coat perfectly. Roux? Too fussy for this.
The par-cooked florets release just enough starch for stability. Result: velvety sauce in your cheesy cauliflower casserole that holds up in the oven.
Equipment Choices for Perfect Loaded Cheesy Cauliflower Casserole
Cast Iron Skillet Advantages
A 12-inch cast iron skillet shines here. It renders bacon evenly, retains heat for sautéing, and transitions seamlessly to the oven. Enameled Dutch ovens work too, but cast iron adds subtle flavor.
Keep it seasoned for non-stick results. This one-pan method simplifies cleanup in your loaded cheesy cauliflower casserole.
Colander and Towel Drying Setup
Use a large colander over a bowl to catch up to half a cup of liquid. Microfiber towels absorb better than paper for that final dry. Skip salad spinners; they bruise florets.
Dry in batches if needed. Perfect setup for loaded cheesy cauliflower casserole success.
Step-by-Step: Building Loaded Cheesy Cauliflower Casserole
Prep and Salt Cauliflower Florets
Chop cauliflower into bite-sized florets and place in a colander over a bowl. Toss with 2 teaspoons salt and wait 20 minutes. You’ll see liquid drip out; that’s moisture leaving.
Rinse under cold water, then pat super dry with towels. Florets should feel crisp. This preps them perfectly for your loaded cheesy cauliflower casserole.
Cook Bacon and Sauté Cauliflower
Preheat a cast iron skillet over medium heat. Cook 8 ounces bacon until crisp, about 8 minutes. Remove, leave 2 tablespoons drippings.
Add dried cauliflower, garlic powder, onion powder, and pepper. Sauté 5 minutes until slightly tender and fragrant. Use a 12-inch skillet to avoid crowding.
For another cheesy favorite, check out this creamy baked mac and cheese.
Simmer Sauce and Assemble Layers
Stir in heavy cream, sour cream, melted butter, and half the cheddar. Simmer 3 minutes until thickened and coating evenly. Sauce will bubble gently.
Top with remaining cheese and crumbled bacon. It’s ready for the oven now.
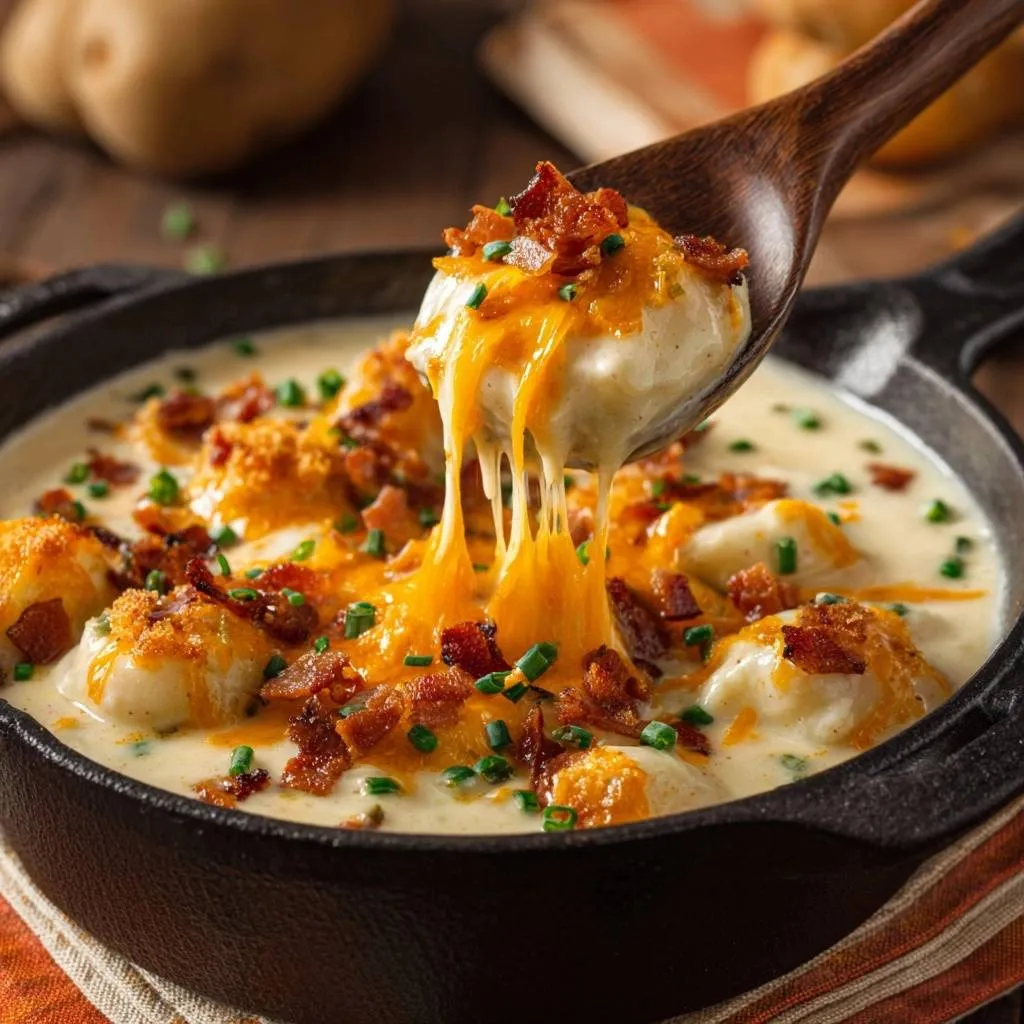
Bake and Garnish for Cheese Pull
Bake at 375 degrees F for 10 to 12 minutes until bubbly and golden. Broil 1 minute for extra char if you like. Let rest 5 minutes for best cheese pull.
Sprinkle green onions post-bake for crunch and color. Serve hot from your loaded cheesy cauliflower casserole.
Avoiding Pitfalls in Cheesy Cauliflower Casserole
Skipping Dry Step Causes Wateriness
Soupy sauce screams skipped drying. Double-pat with towels and squeeze a floret; it should release no water. Fix watery batches by draining and reheating.
Overcooking Leads to Mush
Florets should offer slight fork resistance before sauce. Watch oven time closely; edges firm up fast. Pull at golden to keep loaded cheesy cauliflower casserole textured.
Cheese Clumping Prevention
Shred room-temp cheese blocks yourself. Pre-shredded has anti-caking agents that clump. Stir low and slow into hot sauce.
Make-Ahead and Storage for Loaded Cheesy Cauliflower Casserole
Prep Timeline and Freezer Tips
Salt and dry cauliflower a day ahead. Assemble unbaked casserole, cover airtight, and freeze up to 3 months. Thaw overnight in fridge before baking.
Bake from thawed at 375 degrees F, adding 5 minutes. Great for busy weeks with loaded cheesy cauliflower casserole.
Reheating Without Sogginess
Oven at 350 degrees F covered for 15 minutes beats microwave mush. Add a splash of cream if needed, and crisp new bacon on top. Fridge life is 4 days airtight.
Flavor Twists on Loaded Cheesy Cauliflower Casserole
Spicy Jalapeño Bacon Upgrade
Stir half a cup diced jarred jalapeños into the sauce for heat. Sour cream cools it perfectly. Adjust for mild or wild in your loaded cheesy cauliflower casserole.
Broccoli or Low-Carb Swaps
Mix half broccoli for color and variety. Top with crushed pork rinds for keto crunch. Vegan cream and cheese work but lack that dairy pull.
Pairing Sides with Loaded Cheesy Cauliflower Casserole
Crisp Green Salads
Arugula with vinegar dressing cuts the richness. Toss greens, sliced cucumber, and a quick vinaigrette for balance.
Protein Mains That Complement
Grilled chicken or steak tips pair great. Roasted veggies echo the bacon-cheese vibe without overwhelming.
Troubleshooting Loaded Cheesy Cauliflower Casserole
Sauce Not Thickening?
Simmer longer or whisk in a cornstarch slurry. Smaller florets release more starch too. Taste and adjust.
Bacon Not Crisping?
Start low heat, drain fat midway, finish in oven. Thick-cut helps.
Cheese Browning Too Fast?
Tent foil first 8 minutes, lower rack. Watch closely at the end.
Too Salty After Draining?
Taste before baking, add more cream. Boost powders instead of salt.
FAQ
How do I store leftovers of Loaded Cheesy Cauliflower Casserole?
Store in an airtight container in the fridge for up to 4 days. It reheats well covered at 350 degrees F for 15 minutes. Freezes excellently assembled unbaked for 3 months; thaw overnight and bake as directed, adding 5 minutes. Avoid freezing baked with garnish to prevent sogginess.
Why is my cauliflower casserole watery, and how do I fix it?
Wateriness comes from skipping the salting and thorough drying. Salt draws out 25 percent moisture in 20 minutes; rinse and pat bone-dry with towels. If it happens, drain excess liquid, spread on a sheet pan, and reheat uncovered to evaporate. Always dry well next time for creamy results.
Can I substitute ingredients in Loaded Cheesy Cauliflower Casserole?
Swap half the cauliflower for broccoli for variety, but salt it too. Use pepper jack for spice instead of cheddar. No heavy cream? Coconut cream works for dairy-free, though flavor shifts slightly. Avoid half-and-half; it won’t thicken properly. Thick-cut turkey bacon subs if needed, but pork bacon crisps best.
What’s the best way to reheat Loaded Cheesy Cauliflower Casserole without drying it out?
Oven is king: 350 degrees F covered with foil for 15 to 20 minutes, adding a splash of cream midway. Microwave in short bursts with a damp paper towel over top, stirring halfway. Crisp extra bacon fresh to top. Never reheat from frozen directly; thaw first.
How long does the salting step really take, and what if I’m short on time?
Exactly 20 minutes for optimal moisture removal; don’t rush or you’ll get soup. In a pinch, microwave salted florets 2 minutes, drain, and dry well. Full method yields best texture, but quick version still beats no salting in your loaded cheesy cauliflower casserole.
Can I make Loaded Cheesy Cauliflower Casserole ahead for a party?
Yes, salt and dry florets day before, store dry in fridge. Assemble fully up to 24 hours ahead, cover, and bake fresh. Or freeze unbaked for 3 months. It serves 6 to 8 hot and bubbly, perfect for crowds craving that bacon-cheese pull.

Cheesy Cauliflower Casserole
Course: Main CourseCuisine: AmericanDifficulty: easy6
servings25
minutes25
minutes450
kcal50
MinutesA creamy, cheesy cauliflower casserole with bacon that stays perfectly textured thanks to a simple salting and draining method. Restaurant-worthy results at home.
Ingredients
1 large head cauliflower, cut into bite-sized florets
8 ounces bacon, cooked crisp and crumbled
2 cups shredded cheddar cheese, divided
1 cup heavy cream
1/2 cup sour cream
4 tablespoons unsalted butter, melted
1/4 cup chopped green onions or chives
1 teaspoon garlic powder
1 teaspoon onion powder
Salt and black pepper to taste
Directions
- Place cauliflower florets in a large colander set over a bowl. Sprinkle generously with 2 teaspoons salt, toss to coat, and let sit for 20 minutes. This draws out excess moisture, preventing watery sauce. Rinse briefly under cold water, then pat completely dry with paper towels or a clean kitchen towel. The drying step is key, it guarantees ultra-creamy texture.
- Preheat oven to 375 degrees F. In a large cast iron skillet over medium heat, cook bacon until crisp, about 8 minutes. Remove bacon, leave 2 tablespoons drippings in skillet.
- Add dried cauliflower to skillet with drippings. Stir in garlic powder, onion powder, and pepper. Cook 5 minutes until slightly tender.
- Stir in heavy cream, sour cream, melted butter, and half the cheddar cheese. Cook 3 minutes until sauce thickens and coats cauliflower evenly.
- Top with remaining cheddar and crumbled bacon. Bake 10 to 12 minutes until cheese is bubbly and golden.
- Garnish with green onions. Serve hot for maximum cheese pull.
Notes
- The salting and draining step is crucial to prevent a watery casserole. Pat the cauliflower completely dry for the best creamy texture. Use a cast iron skillet for even cooking and great presentation.