Remember that sinking feeling when your cheesecake cracks right down the middle? You’ve beaten the batter perfectly, but those ugly fissures ruin the look and texture. This marbled chocolate cheesecake fixes that forever with a foolproof water bath and slow-cooling trick. You’ll get stunning chocolate swirls in a creamy, crack-free slice every time.
So why does this method stand out? Most recipes skip the science behind even baking and temperature control. Here, steam from the water bath gently cooks the edges without drying the center. In addition, gradual cooling prevents the top from contracting too fast.
The real secret lies in adding eggs one at a time on low speed. This minimizes air bubbles that expand and crack the surface during baking. You’ll see smooth, jiggle-perfect results that wow at any gathering.
Assembling the Graham Cracker Base
Start with 2 cups graham cracker crumbs, 1/2 cup melted unsalted butter, and 1/4 cup granulated sugar for the crust. The crumbs provide structure, butter binds everything without sogginess, and sugar adds just enough sweetness to balance the rich filling. Press this mix firmly into a 9-inch springform pan, going 1 inch up the sides for extra support.
Bake at 325°F for 10 minutes until it smells toasty and sets firm. This quick bake locks in the shape so the cheesecake holds up during its long chill. Cool it on a wire rack while you prep the filling; it’ll crisp up nicely.
Therefore, don’t skip pressing up the sides. It catches any batter leaks and makes slicing cleaner later.
Choosing Quality Graham Crumbs
Fine crumbs create a tighter crust that won’t crumble under the heavy filling. Coarse ones add crunch but can fall apart. Store-bought work fine, but homemade from whole crackers give fresher flavor without additives.
Sugar binds without making it soggy because it caramelizes lightly during baking. Use light brown sugar if you want deeper notes, but stick to granulated for classic taste.
Melting Butter Precisely
Melt butter on the stovetop over low heat, stirring constantly, or microwave in 20-second bursts. This prevents separation into oily pools. Always use unsalted to control salt in the crust perfectly.
Pour it hot over crumbs for even coating. Let it absorb a minute before pressing; you’ll get a uniform base that tastes buttery and holds firm.
Science of Smooth Cheesecake Filling
Soften 4 packages of cream cheese to room temperature, then beat with 1 1/4 cups sugar until silky. Add 4 eggs one by one, beating just until blended. Mix in 1 cup sour cream, 2 teaspoons vanilla, and 1/4 cup flour on low speed.
Sour cream brings tang to cut the richness, vanilla adds warmth, and flour stabilizes without toughness. This combo creates a batter that’s pourable yet holds shape. However, overbeating introduces air, so keep it gentle.
Pro tip: Scrape the bowl after each egg. It ensures even distribution for consistent texture in every bite.
Why Room-Temperature Ingredients Matter
Room-temp cream cheese blends smoothly into a lump-free batter. Cold stuff leads to curdled looks and uneven baking. Warm eggs emulsify better, preventing those pesky cracks from temperature shocks.
Picture this: cold batter fights the mixer, trapping air bubbles. Room-temp? It flows like velvet, setting you up for pro results.
Flour’s Role in Texture Stability
That 1/4 cup flour absorbs excess moisture, keeping the cheesecake firm yet creamy. It prevents weeping after chilling. Cornstarch works too, but flour gives subtle structure without gumminess.
Don’t increase it; more makes a dry, cakey texture. This amount hits perfect balance.
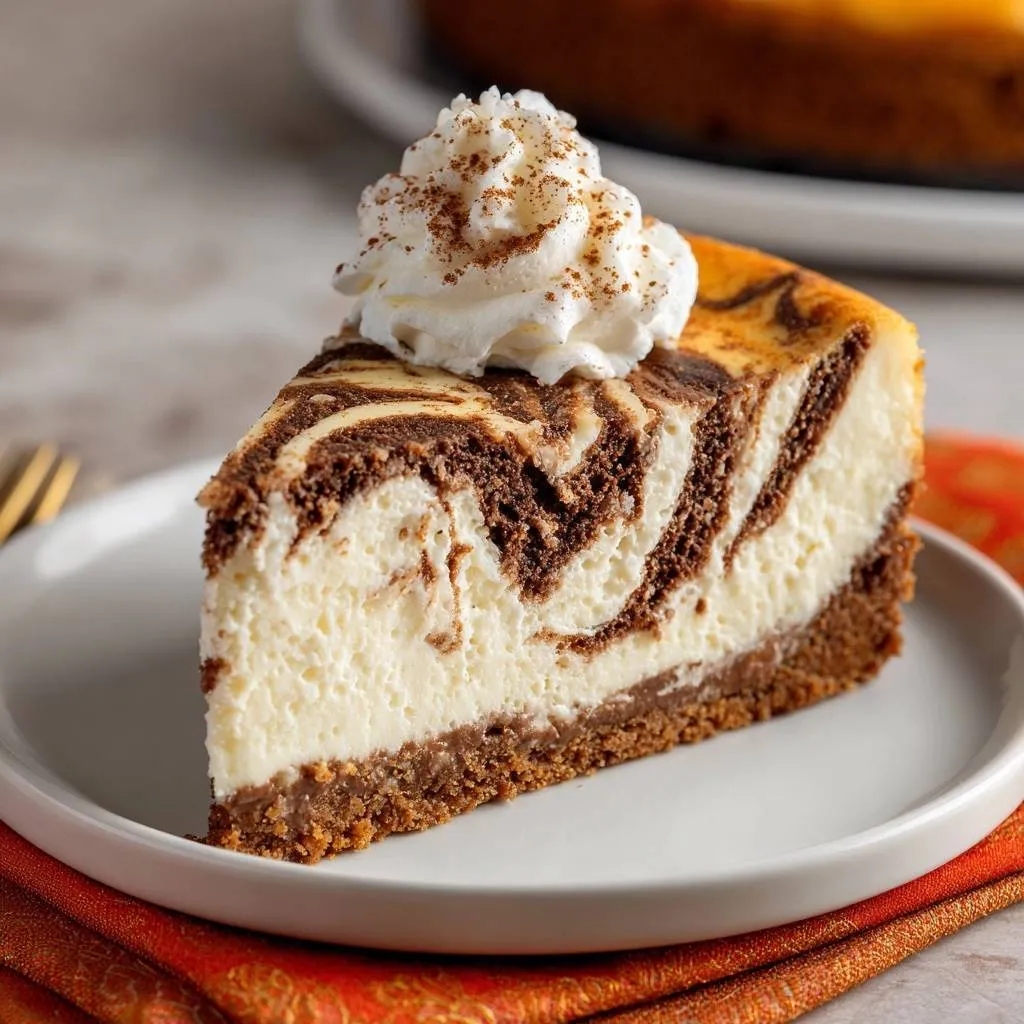
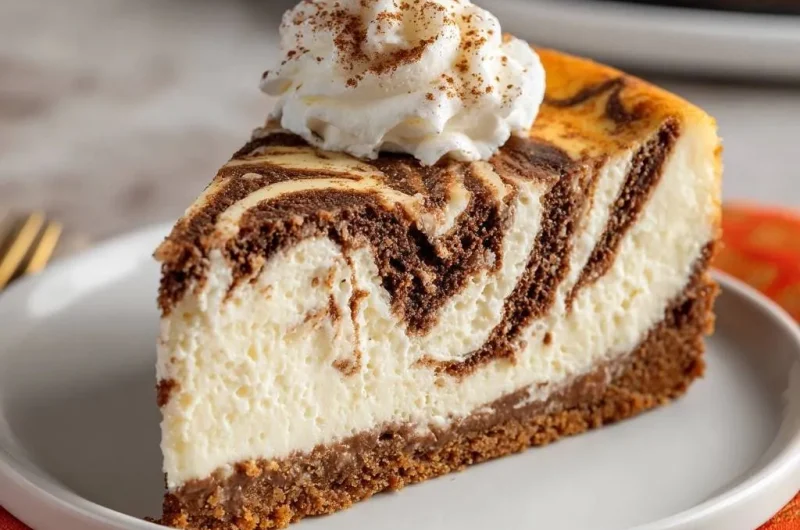
Mastering Chocolate Marble Swirls
Melt 4 ounces semisweet chocolate, cool slightly, then stir into half the batter. Pour plain batter into the crust first. Spoon chocolate batter over it in dollops, then swirl gently with a knife tip.
For a similar cheesecake delight, explore the red velvet cheesecake cookies.
Go for figure-eights without overdoing it; you want distinct swirls, not muddy brown. This creates those eye-catching patterns that make your marbled chocolate cheesecake Instagram-worthy. The contrast pops after baking.
For more chocolatey goodness, discover creamy pumpkin swirl cheesecake.
Therefore, cool the chocolate 5 minutes before mixing. Hot chocolate curdles the dairy.
Perfect Chocolate Melting Technique
Use a double boiler: simmer water, melt chocolate over indirect heat below 110°F. Stir every 30 seconds until glossy. Cool 5-10 minutes so it integrates without seizing the batter.
Microwave alternative: 15-second bursts on 50% power. It stays smooth for perfect ribbons.
Swirling for Visual Appeal
Spoon chocolate batter in even blobs across the plain layer. Drag a knife tip through in S-shapes, alternating directions. Start shallow for surface swirls, go deeper for marbled layers below.
Avoid scraping the crust; it pulls up crumbs. Gentle swirls give elegant waves that hold through baking.
Water Bath Secrets for Even Baking
Wrap the springform pan tightly in heavy-duty foil. Place it in a large roasting pan, add 1 inch hot water around it. Bake at 325°F for 60 minutes; edges set, center jiggles like Jell-O.
The steam circulates gentle heat, mimicking a pro oven for even cooking. No dry spots or cracks. Carefully rotate halfway if your oven heats unevenly.
Pro tip: Test water level post-bake; top off if needed for consistent results.
Foil Wrapping to Prevent Leaks
Double-layer heavy-duty foil crimps tight around the pan bottom and sides. Press seams flat, test by submerging in sink water. Oven bags work as leak-proof alternatives.
This keeps water out and cheesecake intact. Single foil often fails under long bakes.
Slow Cooling to Lock Creaminess
Turn off the oven, crack the door 1 inch, cool inside for 1 hour. Then room-temp cool, and chill 6 hours or overnight. Gradual drops prevent the top from shrinking and cracking.
You’ll hear faint pops as it settles. This method locks in that silky texture. Rush it, and watch cracks form.
Gradual Temperature Management
Hour 1 in oven: 200°F to 100°F. Room temp: 2 hours more. Fridge overnight firms it perfectly. High humidity helps topping stick later; dry air? Cover loosely.
Rushing to fridge shocks the surface. Patience pays off in flawless slices.
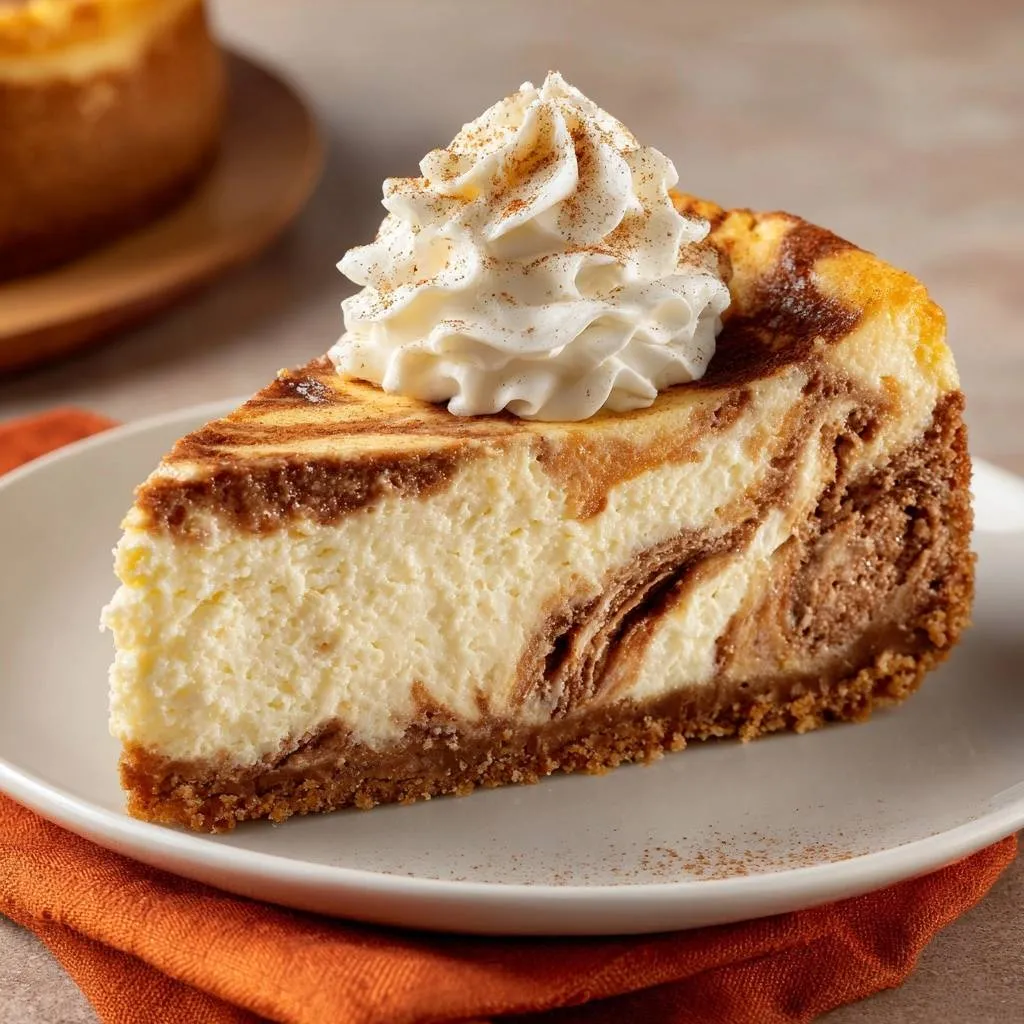
Whipped Cream and Cinnamon Finish
Whip 1 cup heavy cream with 2 tablespoons powdered sugar to stiff peaks. Dollop on chilled slices, dust with 1/2 teaspoon cinnamon. The spice warms the chocolate without overpowering.
Cream adds airy lightness to the dense cheesecake. Serve fresh; it melts into creamy pools. Cinnamon ties flavors together beautifully.
What to Enjoy Alongside
To complement your Marbled Chocolate Cheesecake, consider these sweet and savory options.
- For a refreshing contrast to the rich chocolate, whip up a Creamy Copycat Iced Coffee for a delightful beverage pairing.
- If you’re in the mood for something warm and comforting, try these Golden Cottage Cheese Fritters, offering a different kind of sweet treat.
Achieving Stable Whipped Peaks
Chill bowl and beaters first for faster volume. Add sugar once soft peaks form. Optional vanilla boosts aroma. Store extra in fridge up to 2 days; re-whip if needed.
Cold tools trap air better, giving tall, stable dollops that hold shape.
Equipment Essentials for Success
You need a 9-inch springform pan, heavy-duty foil, large roasting pan, stand or hand mixer, and offset spatula. The springform releases cleanly, foil waterproofs, roasting pan fits the bath. Mixer aerates batter just right; spatula swirls precisely.
Without these, leaks or uneven mixing happen. Invest in quality for repeatable wins. A thermometer checks water bath heat too.
Springform Pan Selection Guide
Choose leak-proof with tight latch; nonstick eases release. 9-inch exact size prevents thin or overflow edges. Avoid cheap ones that warp.
Traditional aluminum conducts heat evenly for perfect bakes.
Avoiding Cracks and Pitfalls
Common mistakes: overbeating eggs adds air, skipping water bath dries edges, rapid cooling contracts top, underbaking leaves mushy center, foil leaks soak crust. Fix by following steps exactly: low-speed eggs, full bath, slow cool, jiggle test, double foil.
Tap pan pre-bake to pop bubbles. These tweaks guarantee success.
Troubleshooting Jiggly Centers
Done when 2-inch center jiggles but edges puff. Overbake shows dry cracks; underbake sags post-chill. Recover overbaked by extra fridge time; it firms up.
Use oven light peek, no toothpick test here.
Expert Tips for Flawless Results
Mix low post-eggs to limit air. Tap pan on counter 5 times pre-bath. Line crust bottom with parchment for easy lift. These ensure air-free, clean-release cheesecake.
Humidity high? Fan dry top before topping.
Storage and Make-Ahead Strategies
Store whole cheesecake wrapped in plastic up to 5 days in fridge. Slices on plate, covered, same time. Texture stays creamy; swirls hold sharp.
Make ahead: bake, chill, wrap tight. Revive day-olds at room temp 30 minutes for best creaminess.
Freezing Marbled Chocolate Cheesecake
Chill fully, wrap whole or slices airtight in plastic then foil. Freeze up to 2 months. Thaw overnight in fridge; swirls stay vivid, texture creamy.
Portion slices for grab-and-go. Avoid refreezing.
Flavor Variations for Marbled Chocolate Cheesecake
Swap semisweet for white chocolate swirls, add 1 teaspoon espresso powder to batter for depth, raspberry puree in place of some chocolate, or almond flour crust. Keep water bath and cooling intact for no cracks.
These tweaks personalize without risking structure. Espresso amps chocolate intensity beautifully.
Dark Chocolate Intensity Boost
Use 4 ounces 70% dark, up sour cream to 1 1/4 cups for balance. Bitterness cuts richness perfectly. Swirls deepen in color and flavor.
Melt same way; it sets firmer.
Perfect Pairings for Slices
Fresh raspberries or strawberries add tart pop to cut density. Strong coffee balances sweetness. Nut brittle crunches nicely. Berry coulis drizzles vibrant color.
Acidic fruits brighten each creamy bite. Simple and stunning.
Marbled Chocolate Cheesecake FAQ
Can I Skip the Water Bath?
No, it creates steam for even, gentle heat that prevents cracks and dry edges. Without it, dry oven air causes uneven baking, sunken centers, or fissures. Alternatives like placing a pan of water nearby fail to circulate humidity effectively.
Why Does My Cheesecake Crack?
Cracks come from air bubbles expanding in overbeaten eggs, rapid cooling shocks, or no water bath for temp spikes. This recipe fixes it with one-at-a-time eggs on low, 1-hour oven cool, and steam bath. Follow exactly for smooth tops.
How Long Does It Last?
Fridge storage up to 5 days in airtight wrap keeps it creamy; watch for drying edges. Freeze slices or whole up to 2 months, thaw in fridge overnight. Discard if watery or off-smelling.
Gluten-Free Crust Options?
Swap graham crumbs for 2 cups almond or gluten-free cookie crumbs, same butter and sugar. Press firmly; it holds well but tastes nuttier. Add 1/4 teaspoon xanthan gum if too crumbly.
Best Chocolate Type?
Semisweet melts smoothly at 100-110°F, balances sweet-tart filling for clear swirls. Good brands like Ghirardelli or Guittard avoid milk solids that seize. Dark works for intensity, white for contrast.
Chocolate Cheesecake
Course: DessertCuisine: AmericanDifficulty: medium12
servings30
minutes1
hour10
minutes450
kcal480
MinutesCracked cheesecakes are a thing of the past with this foolproof water bath and slow-cooling method that locks in creamy texture while creating stunning chocolate swirls. Perfect for home bakers frustrated by ruined desserts.
Ingredients
Crust:
2 cups graham cracker crumbs
1/2 cup unsalted butter, melted
1/4 cup granulated sugar
Filling:
4 (8-ounce) packages cream cheese, softened
1 1/4 cups granulated sugar
4 large eggs
1 cup sour cream
2 teaspoons vanilla extract
1/4 cup all-purpose flour
4 ounces semisweet chocolate, melted and cooled
Topping:
1 cup heavy whipping cream
2 tablespoons powdered sugar
1/2 teaspoon ground cinnamon
Directions
- Preheat oven to 325 degrees F. Wrap the outside of a 9-inch springform pan with heavy-duty foil to make it waterproof.
- Mix graham cracker crumbs, melted butter, and sugar. Press firmly into the bottom and 1 inch up the sides of the prepared pan. Bake 10 minutes, then cool on a wire rack.
- Beat cream cheese and sugar until smooth. Add eggs one at a time, beating just until blended after each (this prevents cracks by minimizing air bubbles). Mix in sour cream, vanilla, and flour on low speed.
- Pour half the batter into crust. Stir melted chocolate into remaining batter. Drop chocolate batter by spoonfuls over plain batter, then swirl gently with a knife for marbled effect.
- Place springform pan in a large baking dish. Fill dish with 1 inch hot water (the water bath steams the cheesecake for even baking and no cracks). Bake 60 minutes until edges are set but center jiggles slightly.
- Turn off oven, crack door open, and cool cheesecake inside 1 hour (gradual cooling prevents sudden temperature drops that cause cracks). Remove from oven, cool to room temperature, then chill 6 hours or overnight.
- Whip heavy cream and powdered sugar to stiff peaks. Dollop on slices and dust with cinnamon before serving.
Notes
- Use heavy-duty foil for waterproofing. Minimize air bubbles by not overbeating eggs. Cool gradually to prevent cracks.