Pelmeni are more than just a meal; they’re a cornerstone of comfort that brings people together around a floured kitchen table. These tiny, meat-filled dumplings carry a rich history, traditionally prepared in massive batches to survive long winters. However, the heartbreak of a burst dumpling is a common struggle for many home cooks. You spend an hour folding dough only to watch the skins split in the pot, losing all that precious juice to the boiling water.
This guide transforms your approach by focusing on the structural integrity of the dough and the science of the seal. We aren’t just making dinner; we’re engineering a “burst-proof” vessel that captures every drop of savory broth. By mastering the elasticity of the skin and the moisture of the filling, you’ll create a dumpling that stands up to the heat while remaining tender to the bite.
For more ideas on delicious noodle dishes, explore garlic butter meatball pasta.
The secret to this recipe lies in the temperature of your water. Using hot water partially cooks the flour’s starch, creating a dough that is incredibly pliable and easy to stretch without tearing. This “hot water method” is the professional’s trick for a thin, translucent skin that stays strong enough to hold a generous portion of beef.
The Anatomy of a Perfect Beef Pelmeni
A superior pelmeni is defined by the balance between a delicate, silky exterior and a robust, juicy interior. The dough should be rolled thin enough to see the shadow of the meat through it, yet it must possess enough “snap” to resist breaking. When you bite into a perfect specimen, you should experience a small explosion of hot broth before reaching the tender meatball inside.
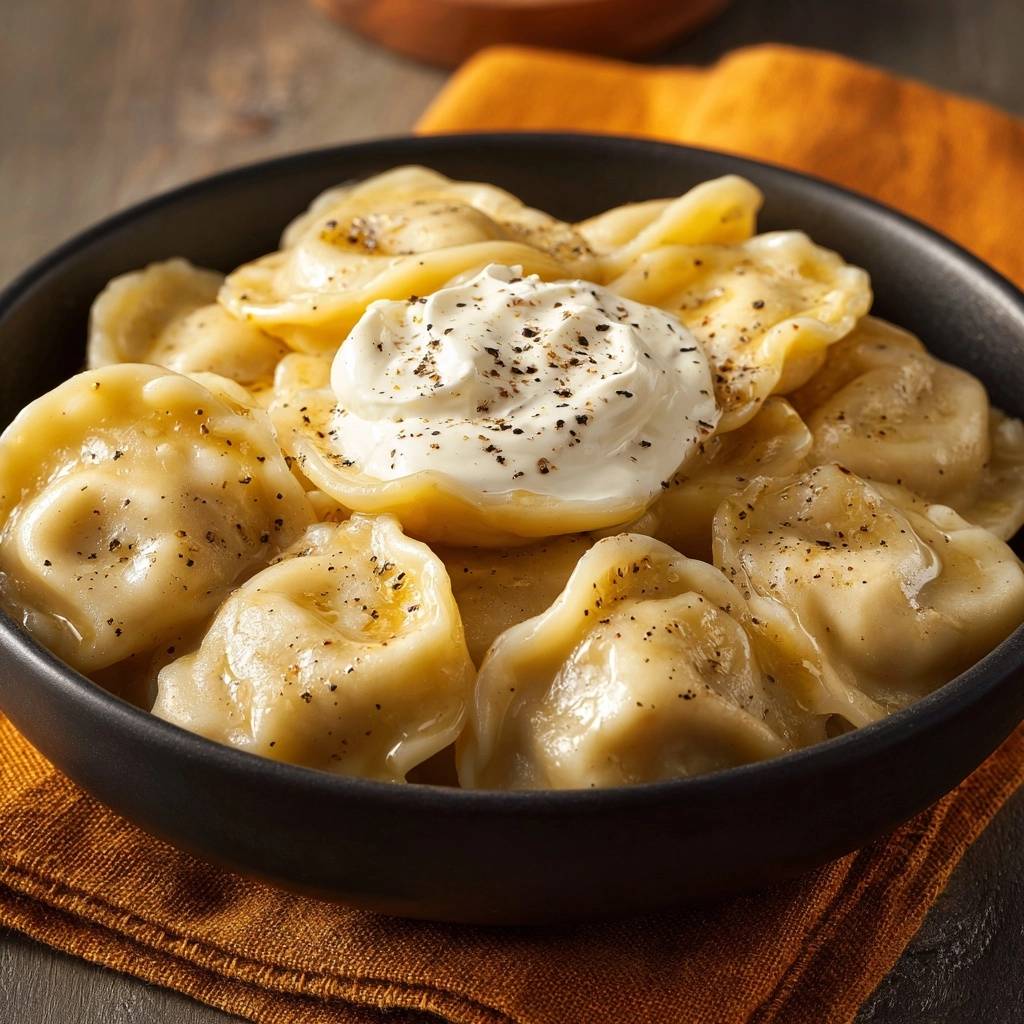
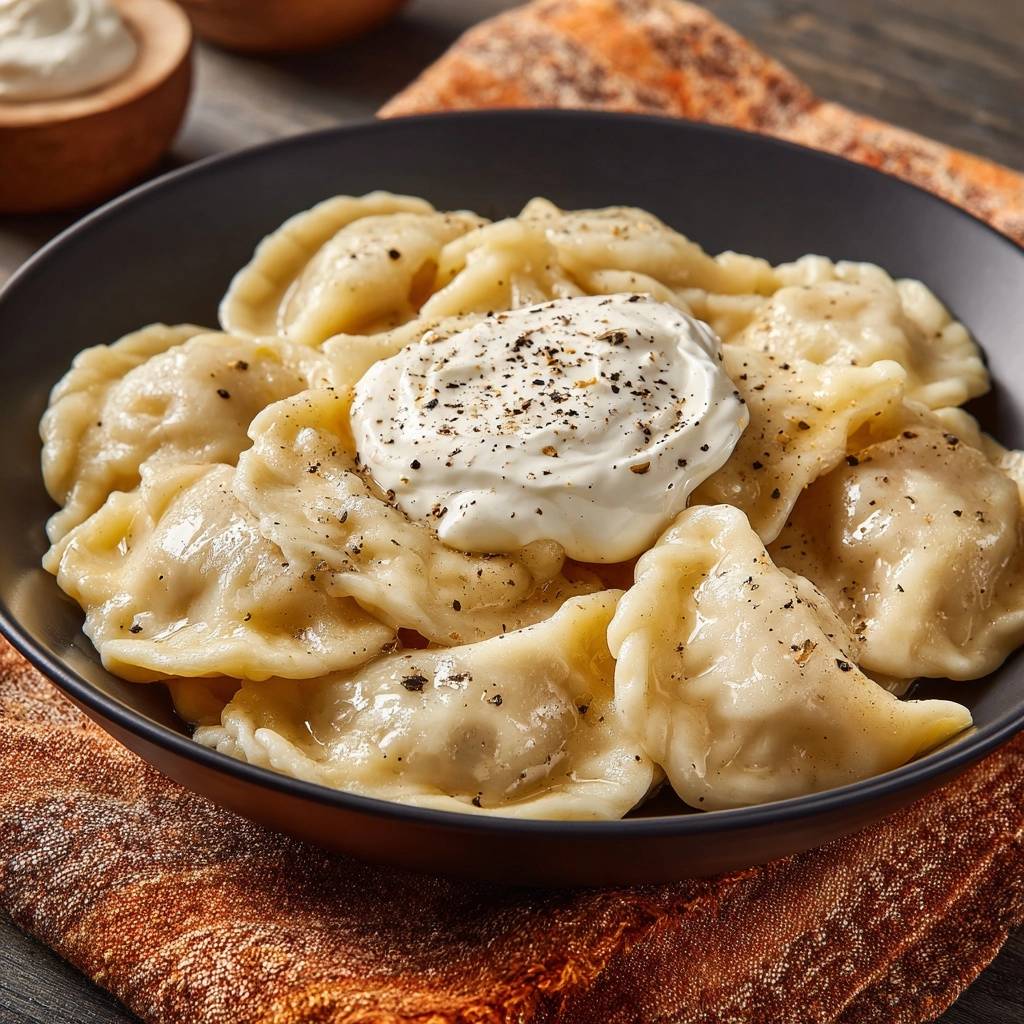
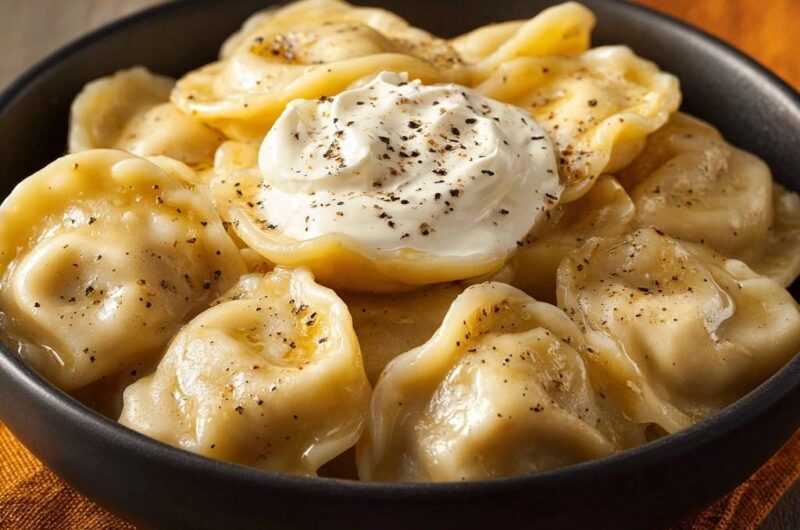
The finish is just as vital as the construction. A coating of melted butter provides a slippery, luxurious mouthfeel that prevents the dumplings from clumping together. When that butter meets a cold dollop of thick sour cream, it creates a rich sauce that clings to the curves of the “ear-shaped” dough. This contrast of temperatures and textures is what makes the dish truly addictive.
Essential Components for Elastic Dough and Juicy Filling
Quality ingredients are the foundation of a successful batch. For the filling, 80/20 ground beef is the gold standard because the fat content is what creates the internal “soup.” If you use meat that is too lean, the filling will shrink into a dry, rubbery puck. The fat melts during the boiling process, mixing with the other aromatics to create a built-in sauce.
Onions are equally important, but the technique matters more than the quantity. Grating the onion instead of chopping it releases all the natural juices, which act as a chemical tenderizer for the beef. This ensures the meat stays soft and flavorful. Additionally, using unsalted butter for the final toss allows you to control the seasoning precisely, ensuring the dish is savory without becoming overly salty.
Why Hot Water and Eggs Change Everything
Using water heated to 120°F is a game-changer for dough texture. This specific temperature initiates starch gelatinization, which makes the dough feel more like modeling clay and less like stiff bread dough. It becomes “plastic,” meaning you can roll it incredibly thin without it springing back or developing tiny holes that lead to leaks.
For more ideas on how to achieve perfectly cooked dough, check out this cheesy baked spaghetti casserole.
The egg serves as the structural backbone of the recipe. While some doughs rely only on flour and water, the proteins in the egg act as a binder that reinforces the flour’s gluten. This creates a “shield” that prevents the skin from dissolving or becoming mushy when it hits the boiling water. It’s the difference between a soggy dumpling and one with a perfect al dente bite.
The Secret Ingredient: Ice-Cold Water in the Meat
Adding two tablespoons of ice-cold water to your beef mixture might seem counterintuitive, but it is the key to a juicy interior. When you mix cold water into the meat, you are creating a loose emulsion. As the pelmeni cooks, this water is trapped inside the sealed dough, steaming the meat from the inside out and turning into a rich broth.
Without this extra moisture, the meat proteins bind tightly together as they heat up, squeezing out their natural juices. By adding water beforehand, you provide a buffer. The result is a tender, loose meatball surrounded by a spoonful of savory liquid, which is the hallmark of an authentic, high-quality pelmeni.
Step-by-Step: Engineering the Burst-Proof Pelmeni
Success in the kitchen often comes down to the details of the process. To ensure your pelmeni are indestructible, you must focus on the physical transformation of the dough. It starts with a shaggy mess in a bowl and ends with a smooth, satin-like sheet that is ready to be filled and folded.
Kneading for Gluten Development and Resilience
Kneading is not a step you can rush. You need to work the dough for a full 8 to 10 minutes to develop the gluten network. At first, the dough will feel heavy and perhaps a bit sticky, but as you work it, the texture will shift. You are looking for a surface that is completely smooth and slightly tacky, like an earlobe.
This resilience is what allows the dough to stretch around the meat filling without snapping. If you under-knead, the dough will be brittle. A well-kneaded dough can be pulled and pinched tightly, creating a vacuum seal that keeps the juices in and the boiling water out.
The 30-Minute Rest: Why Patience Prevents Shrinkage
After the workout of kneading, the gluten in the dough is tight and “angry.” If you try to roll it out immediately, it will constantly shrink back, making it impossible to achieve that desired 1/16th-inch thickness. Resting the dough for 30 minutes under plastic wrap allows those gluten strands to relax.
During this rest period, the flour also fully hydrates, which evens out the texture. When you return to the dough, you’ll find it much more cooperative. It will roll out effortlessly into a large, thin sheet, allowing you to cut clean circles that won’t deform or pull away from the meat once they are filled.
Precision Rolling and the “Double-Pinch” Sealing Technique
Aim for a thickness of about 1/16th of an inch; you want it thin but not transparent. Once you’ve cut your 2-inch rounds, place a small teaspoon of meat in the center. Be careful not to overfill, as meat touching the edges will prevent a proper seal. Fold the circle into a half-moon and pinch the edges firmly.
The “double-pinch” is the secret to a leak-proof dumpling. Go around the edge once to seal it, then go back a second time with a firmer press to flatten the seam. Finally, bring the two corners of the half-moon together and pinch them into the classic “ear” shape. This secondary pinch creates a structural fold that reinforces the entire dumpling.
The Gentle Boil: Cooking Without Turbulence
Many people make the mistake of dropping dumplings into a violent, rolling boil. This turbulence acts like a washing machine, physically battering the dough against the sides of the pot. Instead, bring your salted water to a boil and then turn it down to a gentle simmer before adding the pelmeni.
Stir them once very gently with a wooden spoon to make sure none are sticking to the bottom. Once they float to the surface, they aren’t quite done yet. Let them swim for another 3 to 4 minutes. This extra time ensures the raw beef inside is fully cooked and the dough has reached its perfect, tender consistency.
Troubleshooting Common Pelmeni Pitfalls
If your dough feels too sticky to handle, add flour one tablespoon at a time until it clears the sides of the bowl. Conversely, if the edges of your circles won’t stick together, your dough might have dried out. Simply dab a tiny bit of water on your finger and run it along the edge of the circle to act as “glue.”
Dry meat is usually the result of using beef that is too lean or skipping the grated onion juice. If you find your meat is shrinking into a hard ball, remember to add that ice-cold water next time. It’s the most common mistake, but also the easiest one to fix for your next batch.
Serving Traditions: Butter, Smetana, and Pepper
As soon as you lift the pelmeni out of the water with a slotted spoon, move them into a warm bowl with melted butter. Toss them immediately. This creates a glossy sheen that looks beautiful and ensures the dumplings don’t fuse into one giant lump as they cool slightly.
The traditional way to enjoy these is with a massive dollop of Smetana, a very thick and tangy sour cream. The coolness of the cream against the hot, buttery dough is a sensory delight. Finish the dish with a heavy hand of coarse-ground black pepper. The large flakes of pepper provide a sharp, spicy bite that cuts through the richness of the beef and butter.
Round Out Your Meal
To complement your buttery beef pelmeni, consider these sweet finishes.
- For a bright citrus note to balance the richness, prepare the Glazed Orange Bundt Cake.
- If you prefer a different citrus tang, the Glazed Lemon Bundt Cake offers a similar delightful sweetness.
Make-Ahead Strategy: Freezing Pelmeni Like a Pro
Pelmeni are the ultimate “fast food” if you keep a stash in the freezer. To freeze them properly, lay the raw dumplings out in a single layer on a parchment-lined baking sheet. Make sure they aren’t touching, or they will freeze into a solid block. Place the tray in the freezer for about two hours until they are rock hard.
Once they are “flash-frozen,” you can transfer them into a zip-top bag. They will stay fresh for up to three months. When you’re ready to eat, don’t thaw them! Drop the frozen pelmeni directly into simmering water. They will take about 2 to 3 minutes longer to cook than fresh ones, but the quality will be just as high.
Expert Tips for Flavor Variations
While the classic beef filling is hard to beat, you can easily customize the flavor profile. Try adding a handful of finely chopped fresh dill to the melted butter for a bright, herbal finish. Some families also swear by adding a tablespoon of white vinegar to the boiling water, which adds a subtle tang to the dough skins.
For an umami boost, you can mix finely minced sautéed mushrooms into the beef filling. This adds a deep, earthy flavor and even more moisture to the interior. Regardless of the variation, the core techniques of the hot water dough and the double-pinch seal remain the keys to your success.
Frequently Asked Questions
Can I use a stand mixer for the dough?
Yes, you can definitely use a stand mixer fitted with a dough hook. Mix on low speed for about 5 to 7 minutes until the dough is smooth and elastic. However, you should still give it a final minute of hand-kneading to truly feel the texture and ensure the gluten is properly developed.
Why is my dough tough instead of soft?
Tough dough is usually caused by over-flouring or not letting the dough rest long enough. If you add too much flour during the kneading process, the dough becomes dense. Always make sure to give the dough its full 30-minute rest so the gluten can relax, which results in a much softer bite after boiling.
Can I use lean beef for the filling?
It is not recommended to use lean beef (like 90/10 or 95/5). Without enough fat, the meat will become a dry, hard lump inside the dumpling. If you only have lean beef, you must add a tablespoon of softened butter or a bit more grated onion juice to the mix to compensate for the lack of fat.
How long do these stay fresh in the freezer?
When stored in an airtight, heavy-duty freezer bag, pelmeni will maintain their best quality for about 3 months. They are still safe to eat after that, but the dough may start to develop freezer burn or pick up scents from other foods in the freezer. Always ensure the bag is tightly sealed.
What if I don’t have a circular cutter?
You don’t need fancy equipment to make great pelmeni. A standard drinking glass with a thin rim works perfectly as a cutter. Simply press the inverted glass into the rolled-out dough to create uniform circles. Just make sure to flour the rim of the glass occasionally so it doesn’t stick to the dough.
Beef Pelmeni
Course: Main CourseCuisine: RussianDifficulty: medium4
servings45
minutes10
minutes480
kcal55
MinutesA traditional meat dumpling recipe featuring a specialized elastic dough and a juicy beef filling, served with melted butter and sour cream.
Ingredients
3 cups all-purpose flour
1 cup very warm water (approx. 120°F/50°C)
1 large egg
1/2 teaspoon salt
1 pound ground beef (80/20 blend for juiciness)
1 small onion, grated (with juices)
2 cloves garlic, minced
1/2 teaspoon black pepper
1/2 teaspoon salt (for filling)
2 tablespoons ice-cold water (for filling)
4 tablespoons unsalted butter, melted
1/2 cup thick sour cream (Smetana style)
Extra coarse-ground black pepper for garnish
Directions
- To solve the bursting skin issue, start by mixing the flour and salt in a large bowl. Create a well and add the egg and the hot water. The heat in the water partially gelatinizes the starch, making the dough much more pliable and less likely to tear.
- Knead the dough for at least 8 to 10 minutes until it is completely smooth and elastic. Cover it with plastic wrap and let it rest for 30 minutes. This rest period is crucial for gluten relaxation, which prevents the dough from shrinking back and pulling away from the seams.
- While the dough rests, prepare the filling. Mix the ground beef, grated onion (and its juice), garlic, salt, and pepper. Add 2 tablespoons of ice-cold water to the meat and mix until a tacky paste forms; this creates the “soup” inside the dumpling and prevents the meat from shrinking into a hard ball.
- Roll the dough out very thin (about 1/16th inch) on a lightly floured surface. Use a small circular cutter (about 2 inches) to make rounds.
- Place a small teaspoon of meat in the center of each round. Fold the dough over and pinch the edges firmly to create a half-moon. To ensure they never leak, press the edges together twice, then bring the two corners of the half-moon together and pinch them firmly to create the classic “ear” shape seen in the image.
- Bring a large pot of salted water to a gentle boil. Do not use a violent rolling boil, as the turbulence can physically break the dumplings.
- Drop the pelmeni in and stir gently once to prevent sticking to the bottom. Cook until they float to the surface, then continue cooking for 3 to 4 minutes.
- Use a slotted spoon to remove the pelmeni and drain them well. Immediately toss in a bowl with melted butter to create the glossy sheen shown in the photo.
- Serve in a shallow bowl with a large dollop of thick sour cream in the center and a generous dusting of coarse-ground black pepper over the top.
Notes
- The hot water dough method and the addition of ice water to the meat are the secrets to preventing bursting and ensuring a juicy interior.