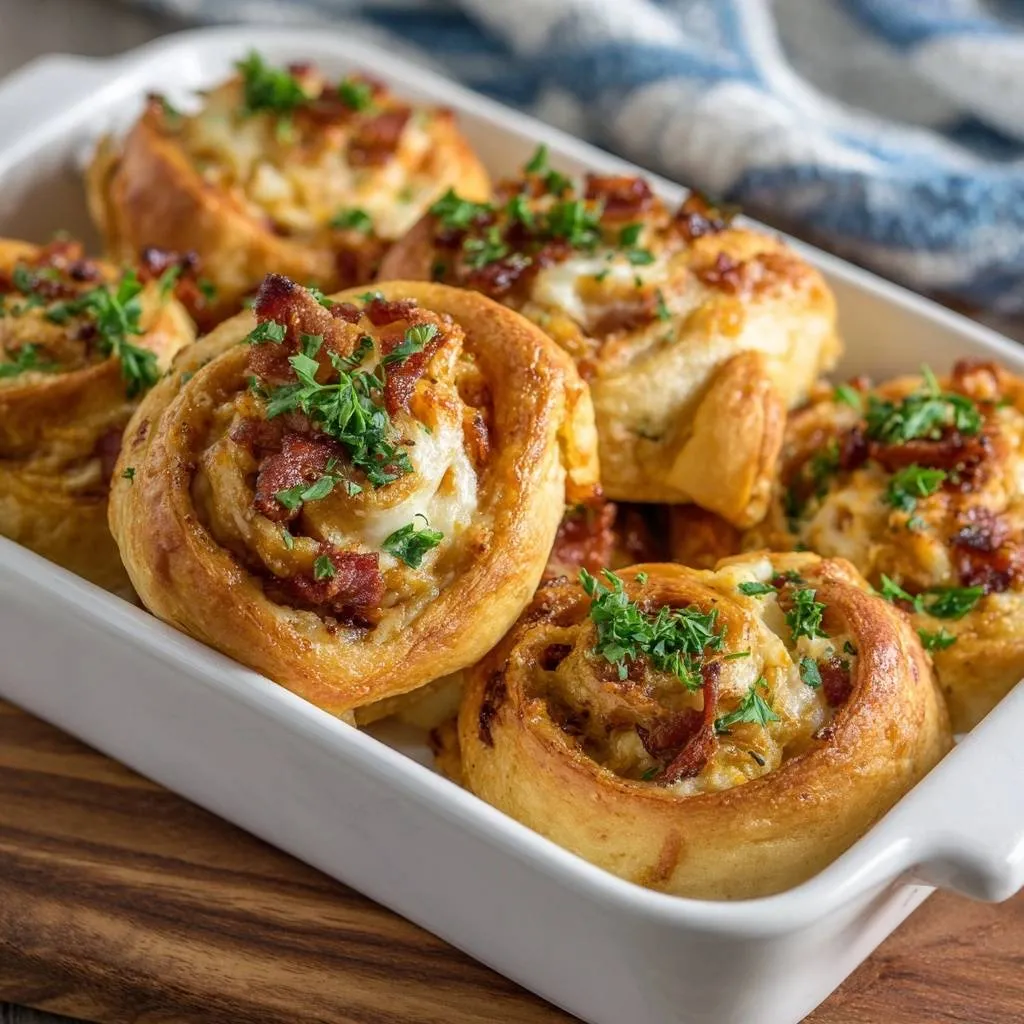
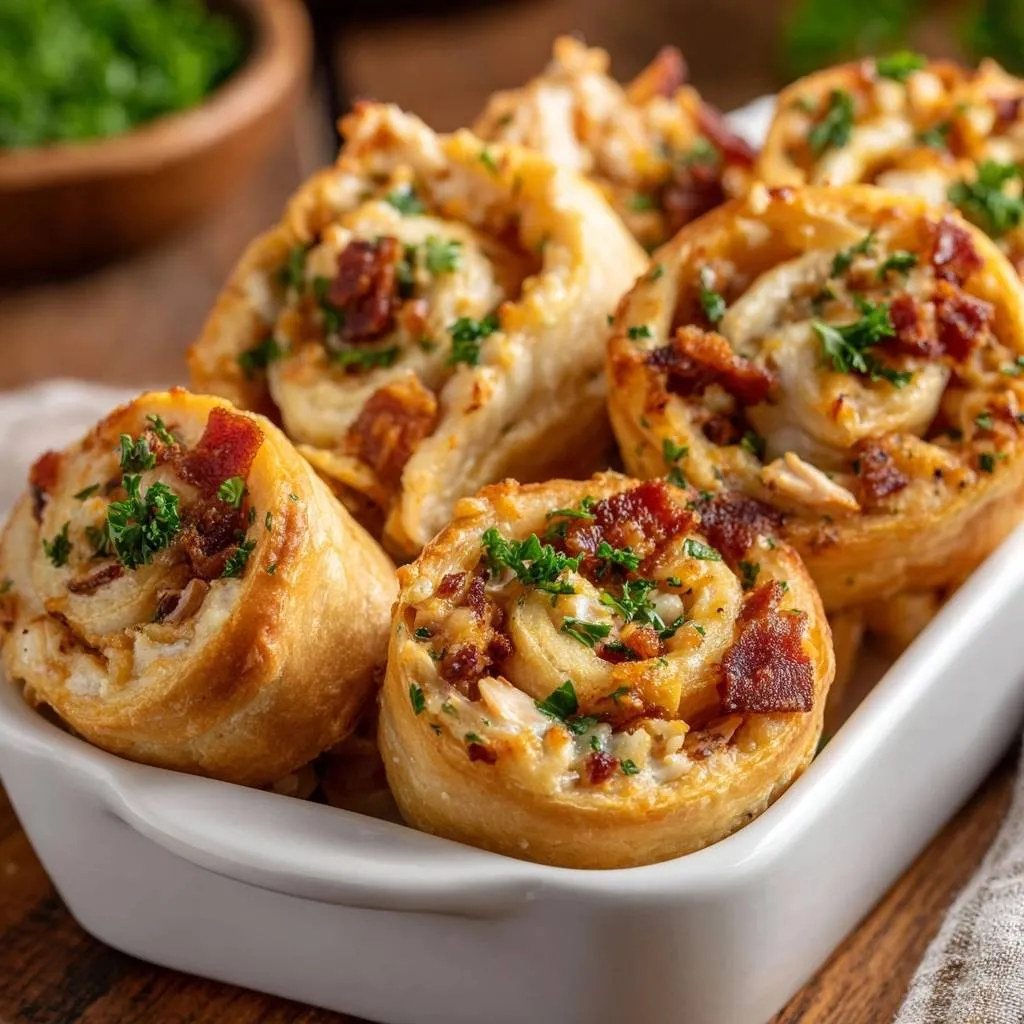
Imagine pulling a tray of golden, spiraled pastries from the oven, the scent of toasted garlic and melted cheddar filling your kitchen. You reach for one, expecting the usual struggle with a limp, greasy bottom, but instead, you feel a sturdy, shatteringly crisp crust. These Cheesy Bacon Garlic Swirls aren’t your average soggy appetizer; they’re a masterclass in structural baking.
The secret to a perfect savory roll lies in managing moisture and heat distribution. Most recipes fail because the fats from the cheese and bacon pool at the bottom, steaming the dough rather than searing it. By utilizing a specific “Anti-Soggy Bottom Hack,” we ensure that every bite offers a contrast between a crunchy exterior and a pillowy, soft interior.
I’ve found that the real trick to professional-grade results is the temperature of your equipment before the dough even touches it. If you place cold dough into a cold pan, the butter melts and soaks into the flour before the crust can set. We’re going to change that by using residual heat to lock in the shape and texture immediately.
The Science of the Anti-Soggy Bottom Hack
Thermodynamics plays a massive role in how these swirls turn out. When you preheat a ceramic dish to 425°F, you’re creating a high-energy surface that initiates the Maillard reaction the second the dough makes contact. This immediate blast of heat creates a waterproof barrier of browned crust that prevents oils from the bacon and cheese from migrating into the center of the dough.
Furthermore, positioning your oven rack in the bottom third is essential for directional heat. Most ovens are hotter at the bottom near the heating element. By placing the rolls closer to the source, you prioritize the browning of the base, ensuring it can support the weight of the heavy fillings without sagging or becoming gummy.
Why Ceramic Retains Heat Better Than Metal
Metal pans are excellent conductors, meaning they heat up fast and cool down fast. However, in high-fat recipes like these, metal often leads to uneven browning or scorched edges before the center is cooked. Ceramic acts as a heat reservoir, providing a steady, radiating warmth that penetrates the thickest part of the swirl.
Because ceramic holds onto its temperature so well, it continues to “fry” the bottom of the rolls even after you pull them out of the oven. This carry-over cooking is what transforms a good roll into a great one. You get a consistent, deep golden hue across the entire batch rather than just the ones near the corners of the pan.
Essential Components for Cheesy Bacon Garlic Swirls
Quality ingredients are the backbone of this dish. Since we’re using refrigerated pizza dough or crescent sheets, the elasticity is already dialed in for us. This dough provides the necessary “spring” to expand around the fillings without tearing, creating those beautiful, distinct layers you see in high-end bakeries.
I always recommend using unsalted butter for the garlic spread. Between the salt in the dough, the sharpness of the cheddar, and the cured nature of the bacon, you want total control over the sodium levels. This allows the sweetness of the roasted garlic and the earthiness of the oregano to shine through without being masked by salt.
Selecting the Right Cheese Blend for Melting
The ratio of mozzarella to cheddar is a deliberate choice for both flavor and physics. Mozzarella provides that iconic, stretchy pull and acts as a mild base. Sharp cheddar, however, releases more oil and provides a punchy flavor. Together, they create a “cheese glue” that keeps the bacon bits suspended within the swirl.
Always grate your cheese fresh from the block if you can. Pre-shredded bags are coated in potato starch or cellulose to prevent clumping, which also prevents the cheese from melting into a smooth, cohesive layer. Freshly grated cheese melts faster and more evenly, ensuring a silky texture inside the roll.
The Role of Thick-Cut Bacon and Aromatics
Standard thin bacon often disappears into the dough, but thick-cut beef or turkey bacon maintains its bite. You want that textural contrast between the soft bread and the crunchy protein. Pre-searing the bacon until it’s very crisp is non-negotiable; if it goes in soft, it will stay soft, adding unwanted moisture to the pastry.
The aromatic trio of garlic, onion powder, and dried oregano creates a savory profile that mimics a high-end garlic knot. Using fresh garlic cloves is vital here. The oils in fresh garlic bloom beautifully in the melted butter, infusing the entire roll with a sweet, pungent aroma that dried garlic powder simply can’t replicate.
Step-by-Step: Engineering the Perfect Pastry Roll
Success starts with how you handle the dough. When you roll it out, aim for a consistent 1/4-inch thickness. If the dough is too thick, the center won’t cook through; if it’s too thin, it won’t have the strength to hold the heavy cheese and bacon. Use a light touch and a floured rolling pin to keep things moving smoothly.
If you’re enjoying this cheesy combination, you might also appreciate the creamy filling in butternut squash stuffed shells.
Tension is your best friend when creating the log. You want to roll the dough tightly enough that there are no large air pockets, but not so tight that the dough can’t expand during the bake. Think of it like rolling a sleeping bag—firm, even pressure from one end to the other ensures the fillings stay put when you start slicing.
Phase 1: Preheating and Dough Preparation
Start by cranking your oven to 425°F and sliding that ceramic dish inside. While that’s getting screaming hot, prep your workspace. Lightly flour your counter, but don’t go overboard. Too much extra flour can make the dough tough and dry. You just want enough to prevent sticking as you shape your rectangle.
Once the dough is rolled out, take a second to square off the edges. A neat rectangle leads to even rolls. If the dough feels too springy and keeps shrinking back, let it rest for two minutes to relax the gluten, then try again. It should be pliable and easy to work with.
Phase 2: Layering the Garlic Butter and Fillings
When brushing on your garlic butter, leave a half-inch border around the entire perimeter. This “clean zone” is crucial because it allows the dough to stick to itself when you finish the roll, creating a seal. If butter gets on the edges, the roll might unravel in the oven like a blooming onion.
Spread your cheeses and 3/4 of your bacon bits evenly. I like to lightly press the toppings into the dough with the palms of my hands. This “anchors” the ingredients so they don’t go flying when you use your knife. It also ensures that every single bite has a bit of everything.
Phase 3: The Slicing and Searing Technique
Forget a standard chef’s knife for this part. A serrated bread knife or even unflavored dental floss is the way to go. A straight blade tends to squash the dough, ruining those beautiful concentric circles. If using a knife, use a gentle sawing motion without pressing down too hard.
Now comes the exciting part. Carefully pull that hot ceramic dish out and grease it quickly. As you drop the rounds in, you should hear a distinct sizzle. That sound is the bottom of your pastry instantly searing. This is the moment the “Anti-Soggy Bottom” magic happens, setting the stage for a perfect crunch.
Troubleshooting Common Savory Pastry Obstacles
If you find your dough is becoming too soft or sticky to handle, it’s likely gotten too warm. Don’t fight it! Pop the whole sheet into the fridge for ten minutes. Cold dough is much easier to roll and slice cleanly. This is especially true if your kitchen is running hot from the preheating oven.
Another common issue is the cheese browning too quickly while the dough is still pale. If this happens, loosely tent a piece of foil over the dish for the last five minutes of baking. This reflects the direct heat away from the cheese while allowing the ambient heat to finish cooking the bread through to the center.
Preventing Oil Leakage During the Bake
Some oil leakage is natural, but if your rolls are swimming in grease, the bacon might not have been drained well enough after frying. Always pat your crispy bacon bits with a paper towel before adding them to the dough. This removes excess fat that would otherwise soak into the pastry.
The 5-minute rest after baking is a functional requirement. During this time, the starches in the bread stabilize and re-absorb some of the flavorful fats from the cheese. If you move them too soon, the structure might collapse. Letting them sit ensures they stay upright and proud when served.
Flavor Variations and Ingredient Substitutions
While the bacon and cheddar combo is a classic, you can easily pivot this recipe. For a Mediterranean twist, swap the bacon for chopped sun-dried tomatoes and use feta mixed with mozzarella. The salty tang of the feta pairs beautifully with the garlic butter base.
If you want some heat, finely diced jalapeños or a sprinkle of red pepper flakes in the butter mixture will do the trick. For those avoiding certain meats, high-quality beef bacon or smoked turkey strips provide that essential smoky flavor and crunch without any pork products. Just ensure they are cooked until very crisp before assembly.
Optimal Equipment for Successful Baking
A high-quality ceramic baker is the MVP of this recipe. Its thick walls provide the insulation needed for that perfect rise. If you don’t have one, a heavy cast-iron skillet is a fantastic alternative, as it also boasts incredible heat retention and will produce a similarly crispy bottom.
I also recommend using a microplane for your garlic and parmesan. Grating the garlic into a paste ensures it distributes evenly through the butter, so you don’t end up with a giant chunk of raw garlic in one bite. Similarly, finely grated parmesan on top creates a delicate, lacy crust rather than heavy clumps.
Expert Tips for Make-Ahead and Storage
You can absolutely prep these in advance. Assemble the rolls, slice them, and place them on a parchment-lined tray in the freezer. Once frozen solid, transfer them to a bag. When you’re ready to bake, let them thaw in the fridge overnight and then proceed with the preheated dish method as usual.
To reheat leftovers, stay away from the microwave, which will turn the crust into rubber. Instead, use an air fryer at 350°F for 3-4 minutes or a toaster oven. This reactivates the fats and crisps the bottom back up to its original glory, making them taste just as good as the moment they first came out.
Frequently Asked Questions
Can I use homemade pizza dough instead?
Yes, you certainly can! However, keep an eye on the hydration level. A very wet, sticky dough (high hydration) might struggle to hold the “swirl” shape and could lead to a messier assembly. If using homemade dough, use a slightly lower water-to-flour ratio to ensure the rolls stay structurally sound during the rise and bake.
How do I prevent the garlic from burning?
Garlic burns when it’s exposed to direct, dry heat for too long. In this recipe, the garlic is protected because it’s mixed into the butter and tucked between the layers of dough. The moisture in the butter and the steam from the bread keep the garlic at a safe temperature, allowing it to mellow and sweeten rather than char.
What is the best substitute for thick-cut bacon?
If you aren’t using pork, beef bacon is the gold standard for this recipe because it has a similar fat content and a deep, smoky flavor. Smoked turkey bacon also works well, though you may need to add a tiny bit more butter to the pan since turkey is much leaner. The key is to fry it until it’s very brittle before chopping.
Why is my dough still doughy in the center?
This usually happens if the rolls are crowded too tightly in the dish. If they are squeezed together with no breathing room, the heat can’t circulate around the sides, leading to a “steamed” texture. Make sure there is a little bit of space between each round when you first place them in the hot dish; they will expand to touch each other as they bake.
Can I make these in a metal muffin tin?
You can, but you’ll need to adjust your technique. Metal doesn’t hold heat like ceramic, so you won’t get the same “sear” on the bottom. If using a muffin tin, grease the wells heavily and consider baking at 400°F for a slightly longer time to ensure the centers cook through without the edges burning. The result will be softer and less “shatteringly crisp” than the ceramic method.
How should I store and reheat leftovers?
Store any leftover swirls in an airtight container in the refrigerator for up to 3 days. To get that “just-baked” crunch back, reheat them in a 350°F oven or air fryer for about 5 minutes. Avoid the microwave, as it will make the pastry soft and chewy rather than crisp.

Cheesy Bacon Garlic Swirls
Course: AppetizerCuisine: AmericanDifficulty: easy8
rolls15
minutes20
minutes320
kcal35
MinutesThese savory rolls combine mozzarella, sharp cheddar, and crispy bacon inside a pillowy dough. By using a specific rack-positioning and preheated dish method, these swirls achieve a perfectly crisp base and a soft, cheesy center.
Ingredients
1 pound refrigerated pizza dough or crescent sheet
1 cup shredded mozzarella cheese
1/2 cup sharp cheddar cheese
8 slices thick-cut bacon, cooked until crisp and chopped
4 tablespoons unsalted butter, melted
3 cloves garlic, minced
1 teaspoon dried oregano
1/2 teaspoon onion powder
2 tablespoons fresh parsley, finely chopped
1/4 cup grated parmesan cheese
Directions
- Preheat your oven to 425°F (218°C). Place your baking rack in the bottom third of the oven. Place your empty ceramic baking dish inside the oven while it preheats; a hot dish is the secret to searing the bottom of the dough immediately upon contact.
- Roll out your dough on a lightly floured surface into a large rectangle, approximately 1/4 inch thick.
- In a small bowl, combine the melted butter, minced garlic, onion powder, and oregano. Brush two-thirds of this mixture evenly over the dough, leaving a half-inch border at the edges.
- Sprinkle the mozzarella, cheddar, and 3/4 of the crispy bacon bits over the buttered dough.
- Roll the dough tightly starting from the long edge to create a log. Use a sharp serrated knife or unflavored dental floss to slice the log into 8 even rounds.
- Carefully remove the hot baking dish from the oven. Lightly grease with butter or cooking spray. Immediately place the rounds into the dish-you should hear a slight sizzle.
- Brush the tops with the remaining garlic butter and sprinkle with the remaining bacon and the parmesan cheese.
- Bake for 18 to 22 minutes on the lower rack until the tops are deep golden brown and the cheese is bubbling.
- Remove from the oven and immediately garnish with a generous amount of fresh parsley. Let them sit in the pan for 5 minutes; this allows the carry-over heat to finish crisping the base while the cheese sets, ensuring the rolls stay upright and structurally sound.
Notes
- The secret to the ‘Anti-Soggy Bottom’ is preheating the ceramic dish and baking on the bottom rack. Use unflavored dental floss for the cleanest cuts when slicing the dough log.