Forget everything you know about those dry, rubbery meatballs that require a gallon of marinara just to swallow. We’re moving beyond the traditional Italian red sauce territory and into a bold, savory world where the meatball is the undisputed star. These Cheesy Loaded Beef Meatballs are designed for those who crave a serious protein punch paired with a molten, gooey finish.
The magic of this dish lies in the contrast of textures. You get a deeply browned, savory crust from a high-heat sear that gives way to a center so tender it practically melts. By the time you top them with a thick blanket of sharp cheddar and Monterey Jack, you’ve created a comfort food masterpiece that works just as well as a game-day appetizer as it does a main course.
The secret to that incredible mouthfeel isn’t just the beef; it’s the science of the binder. Most people overwork their meat or skip the soaking step, resulting in a dense “meat puck.” I’m going to show you how a simple starch-and-liquid paste keeps the beef fibers from tightening up, ensuring every single bite is dripping with juice.
The Science of the Panade: Why These Beef Meatballs Never Dry Out
If you’ve ever wondered why restaurant meatballs are so much softer than homemade ones, the answer is the panade. A panade is a mixture of a starch—in this case, panko breadcrumbs—and a liquid like whole milk. When you let these two sit for five minutes, they form a thick, glue-like paste that acts as a moisture reservoir inside the meatball.
As beef cooks, the muscle proteins begin to coil and shrink, squeezing out their natural juices like a wrung-out sponge. However, when you fold a panade into the mix, the starch molecules physically stand in the way of those proteins. They prevent the beef from bonding too tightly, which keeps the texture light and airy rather than tough and rubbery.
Furthermore, the panko breadcrumbs are excellent at trapping the rendered fat from the 80/20 beef blend. Instead of that flavorful fat leaking out into your skillet, it stays locked inside the meatball. This results in a rich, velvety interior that stays moist even after a trip through a hot oven.
Essential Components for Cheesy Loaded Beef Meatballs
Quality ingredients are the foundation of this dish, starting with the beef. You absolutely must use an 80/20 ground beef blend. While lean beef might seem healthier, it lacks the fat necessary to survive a high-heat sear and an oven finish without turning into sawdust. That 20% fat content provides the flavor and the “slip” that makes these meatballs feel indulgent.
Beyond the beef, the seasonings do the heavy lifting. Smoked paprika is the unsung hero here, providing a subtle, wood-fired aroma that mimics the flavor of a backyard grill. It adds a layer of complexity that pairs perfectly with the sharpness of the cheese. Always use fresh garlic and onion powders to ensure the flavor is evenly distributed throughout the meat without the moisture pockets that fresh onions can sometimes create.
Selecting the Right Cheese Blend for Maximum Melt
For the ultimate “cheese pull,” we use a combination of sharp cheddar and Monterey Jack. Sharp cheddar brings the punchy, salty bite that stands up to the richness of the beef. However, cheddar on its own can sometimes become oily when melted. That’s where the Monterey Jack comes in; it has a high moisture content and a superior “stretch” factor.
For another take on cheesy goodness, check out this jalapeno feta meatloaf.
I highly recommend grating your cheese fresh from the block. Pre-shredded bagged cheeses are coated in potato starch or cellulose to prevent clumping in the bag. Unfortunately, those anti-caking agents also prevent the cheese from melting into a smooth, cohesive drape. For that professional, molten look, take the extra two minutes to shred it yourself.
Aromatic Additions: Red Peppers and Green Onions
Texture is just as important as flavor, which is why the red bell peppers need to be finely minced. You want them small enough to soften quickly but large enough to provide a tiny pop of sweetness. They add a bright visual contrast against the golden cheese that makes the dish look as good as it tastes.
The green onions are added at the very end to preserve their crispness. They provide a necessary sulfuric “snap” and a fresh, grassy finish that cuts right through the heavy fats of the beef and cheese. Without this hit of freshness, the dish can feel a bit one-note; with it, every flavor is elevated.
Step-by-Step: Preparing the Loaded Beef Base
When you’re ready to mix, remember the golden rule: use a light touch. Once you’ve added your beef and seasonings to the panade, use your fingertips to gently toss the ingredients together. You want to stop the moment everything looks uniform. If you squeeze the meat through your fingers or knead it like bread dough, you’ll develop too much myosin.
Myosin is a protein that creates a springy, sausage-like texture. While that’s great for a hot dog, it’s the enemy of a tender meatball. Your mixture should look slightly shaggy and loose, not like a smooth paste. When rolling them into 1.5-inch balls, don’t pack them too tightly; just enough pressure to hold the shape is plenty.
If you have the time, let the rolled meatballs chill in the fridge for 15 minutes before cooking. This helps the fat firm back up, which ensures they hold their perfectly round shape the moment they hit the hot oil. It also makes them much easier to handle during the searing process.
The Maillard Reaction: Searing for Deep Flavor
The stovetop sear is where the real flavor is born, thanks to the Maillard reaction. This is the chemical dance between amino acids and sugars that happens when food hits high heat. It creates that dark, savory crust that provides a bitter-sweet counterpoint to the rich interior. Without a good sear, your meatballs will taste “boiled” rather than roasted.
Use a heavy-bottomed skillet, like cast iron, because it holds heat better than thin stainless steel. Get your oil shimmering hot before adding the meat. You should hear a loud, aggressive sizzle the second the beef touches the pan. If it’s just a quiet hiss, your pan isn’t hot enough, and you’ll end up steaming the meat instead of browning it.
Don’t crowd the pan! If you put too many meatballs in at once, the temperature of the skillet will drop, and the meat will release moisture. Work in batches so each ball has enough space for the heat to circulate. You’re looking for a deep, mahogany brown on at least two or three sides before they move to the oven.
Precision Finishing: Oven Timing and Temperature
Once the exterior is beautifully browned, the oven takes over to finish the centers gently. A 400°F oven is hot enough to cook the beef through quickly without drying out the edges. This transition from direct heat to ambient heat is the best way to ensure the meat is cooked evenly from edge to center.
Use a meat thermometer to check for an internal temperature of 160°F. This is the sweet spot for food safety and peak juiciness. If you go much higher, the proteins will tighten and the juices will evaporate. Remember that the meatballs will continue to cook for a minute or two after you pull them out, a process known as carryover cooking.
Because we are finishing these with cheese, you want to pull them just as they hit that target temperature. The residual heat from the skillet and the meat will help jumpstart the melting process the moment the cheese hits the surface. This ensures the beef doesn’t overcook while you’re waiting for the topping to get gooey.
The Loading Technique: Achieving the Perfect Cheese Drape
To get that picture-perfect “drape” where the cheese hugs the curves of the meatball, you need to work quickly. As soon as the skillet comes out of the oven, pile a generous pinch of the cheese blend onto each ball. Don’t be stingy; you want enough cheese so that it overflows and creates little crispy “cheese skirts” on the bottom of the pan.
Place the minced red peppers directly on top of the cheese before you put the pan back in the oven. This allows the peppers to nestle into the melting cheese, which acts as a delicious glue. It also prevents the peppers from drying out or burning, as they are protected by the moisture of the cheese.
The final minute in the oven is just to achieve that molten state. You aren’t looking to brown the cheese—you want it glossy, fluid, and vibrant. Once you see it start to bubble and slide down the sides of the beef, pull the pan out immediately. The contrast of the bright red peppers against the white and yellow cheese is stunning.
Troubleshooting Common Meatball Mistakes
If your meatballs are falling apart in the skillet, it’s usually because the panade was too wet or you didn’t let the meat chill. Ensure your breadcrumb-to-milk ratio is thick, like a paste. If the mixture feels too loose, you can add an extra tablespoon of panko to help bind everything together before rolling.
A greasy skillet can happen if your beef has a particularly high fat content. If you see more than a thin layer of oil in the pan after searing, carefully spoon out the excess before putting the skillet in the oven. This prevents the cheese from sliding right off the meat and into a pool of grease, which keeps the final presentation clean.
Tough centers are almost always the result of over-mixing or over-cooking. If you find the meat is too dense, try using a lighter hand next time. If the meat is dry, check your oven calibration; it might be running hotter than the dial suggests. Using a digital thermometer is the only foolproof way to avoid this mistake.
Optimal Pairings for Loaded Beef Meatballs
Since these meatballs are so rich and “loaded,” they pair best with sides that can soak up the extra cheese and juice. Garlic mashed potatoes are a natural fit, providing a creamy, neutral base that lets the beef shine. Alternatively, a pile of buttery smashed potatoes offers a nice textural echo to the crispy sear on the meat.
What to Try Next
Round out your meal with these dishes featuring similar comforting flavors.
- For a delightful breakfast or brunch addition, consider this Cheesy Green Onion Frittata, perfect for its fluffy texture and savory notes.
- If you’re craving more cheesy goodness, this Loaded Cheesy Potato Casserole offers a rich, satisfying experience with its smooth sauce.
To balance the heaviness, I love serving these alongside a crisp wedge salad. The cold, crunchy iceberg lettuce and a tangy dressing provide a sharp acidic contrast that cleanses the palate between bites. Avoid heavy pasta dishes, as the “loaded” profile of these meatballs is meant to be the star of the plate rather than a topping for noodles.
If you’re serving these as an appetizer, keep the sides simple. A few toasted baguette slices are perfect for scooping up any cheese that melted onto the skillet. The bread provides a crunch that complements the tender meat and molten topping perfectly.
Make-Ahead Strategies and Storage Logistics
You can easily prep these ahead of time to save stress on a busy weeknight. Roll the meatballs and store them in an airtight container in the fridge for up to 24 hours before cooking. This actually helps the flavors meld and makes the meatballs hold their shape even better during the sear.
For long-term storage, you can freeze the raw meatballs on a baking sheet until solid, then transfer them to a freezer bag for up to three months. When you’re ready to eat, thaw them in the fridge overnight before searing. I don’t recommend freezing them after the cheese has been added, as the texture of the melted cheese can become grainy upon reheating.
Leftovers will stay fresh in the refrigerator for about three days. To reheat, place them in a covered dish with a splash of beef broth or water and microwave on medium power. The steam will help keep the meat juicy and remelt the cheese without toughening the beef. Avoid high-heat reheating, which will turn the fat oily.
Expert Tips for Scaling and Customization
If you’re cooking for a large crowd, you can double the recipe easily. Just be sure to sear in multiple batches so you don’t steam the meat. You can also customize the flavor profile by swapping the smoked paprika for chipotle powder if you want a “Tex-Mex” kick. This version tastes incredible when topped with a little extra cilantro.
Another great tweak is to hide a small cube of mozzarella inside the center of each beef ball before rolling. This creates a “stuffed” effect that surprises your guests when they bite in. No matter how you tweak it, as long as you stick to the panade method and the high-heat sear, you’ll have a winner every time.
For a similar comforting experience, explore this classic glazed meatloaf.
How do I keep the meatballs from sticking to the skillet?
The key to a stick-free sear is patience and heat. Make sure your oil is shimmering and near its smoke point before adding the meat. Once the meatballs are in the pan, do not try to move them for at least two minutes. The meat will naturally “release” from the pan once a proper crust has formed. If you try to flip them too early, the delicate exterior will tear and stick to the metal.
Can I use a different type of meat like ground turkey or chicken?
You can, but you’ll need to be extra careful. Poultry is much leaner than 80/20 beef, so it dries out significantly faster. If you use turkey or chicken, I recommend adding a tablespoon of olive oil directly into the meat mixture to compensate for the lack of fat. You should also pull them from the oven the very second they hit 165°F to prevent them from becoming chalky.
Why did my cheese slide off the meatballs?
Cheese usually slides off if the surface of the meatball is too oily or if the cheese was added too late. If your meatballs look very greasy after the oven finish, gently pat the tops with a paper towel before adding the cheese. Also, make sure you are using a blend that includes a good “melter” like Monterey Jack, which tends to grip the meat better than oily, aged cheddars.
What is the best way to store and reheat leftovers?
Store your leftovers in an airtight glass container in the fridge for up to three days. To reheat them while keeping them juicy, place them in a skillet with a few tablespoons of water or broth. Cover the pan with a lid and heat over medium-low. The steam will gently warm the meat and remelt the cheese without the harsh, drying heat of a microwave.
Can I make these without a panade if I’m out of milk?
If you don’t have milk, you can substitute it with beef broth, heavy cream, or even plain water in the panade. The goal is to hydrate the breadcrumbs so they can provide that moisture barrier. Do not skip the panade entirely, or you will end up with the tough, dense texture we are trying to avoid. The starch-liquid combo is the most important part of the “Never Dry” promise.

Cheesy Loaded Beef Meatballs
Course: Main CourseCuisine: AmericanDifficulty: easy6
servings15
minutes20
minutes450
kcal35
MinutesThese meatballs utilize a milk and breadcrumb panade to ensure a moist texture. Searing them at high heat creates a flavorful crust, while a quick oven finish with a blend of cheeses and peppers adds a rich, loaded topping.
Ingredients
2 pounds ground beef (80/20 blend for maximum juiciness)
1/2 cup panko breadcrumbs
1/3 cup whole milk
1 large egg, beaten
1 teaspoon garlic powder
1 teaspoon onion powder
1 teaspoon smoked paprika
1 teaspoon salt
1/2 teaspoon black pepper
1 cup shredded sharp cheddar cheese
1/2 cup shredded Monterey Jack cheese
2 tablespoons finely minced red bell pepper (or pimento)
1/4 cup sliced green onions
2 tablespoons neutral oil (vegetable or canola)
Directions
- In a large mixing bowl, combine the breadcrumbs and milk. Stir and let sit for 5 minutes until it forms a thick paste (the panade).
- Add the ground beef, egg, garlic powder, onion powder, smoked paprika, salt, and pepper to the bowl.
- Using your hands, gently mix the ingredients until just combined. Do not overwork the meat, as this will make the meatballs dense and rubbery.
- Roll the mixture into 1.5-inch balls (about the size of a golf ball).
- Heat the oil in a large, heavy-bottomed oven-safe skillet over medium-high heat.
- Working in batches if necessary, sear the meatballs for 2-3 minutes per side. You are looking for a deep, golden-brown crust on all sides.
- Once seared, ensure all meatballs are in the skillet and transfer to an oven preheated to 400°F (200°C). Bake for 5-7 minutes or until the internal temperature reaches 160°F.
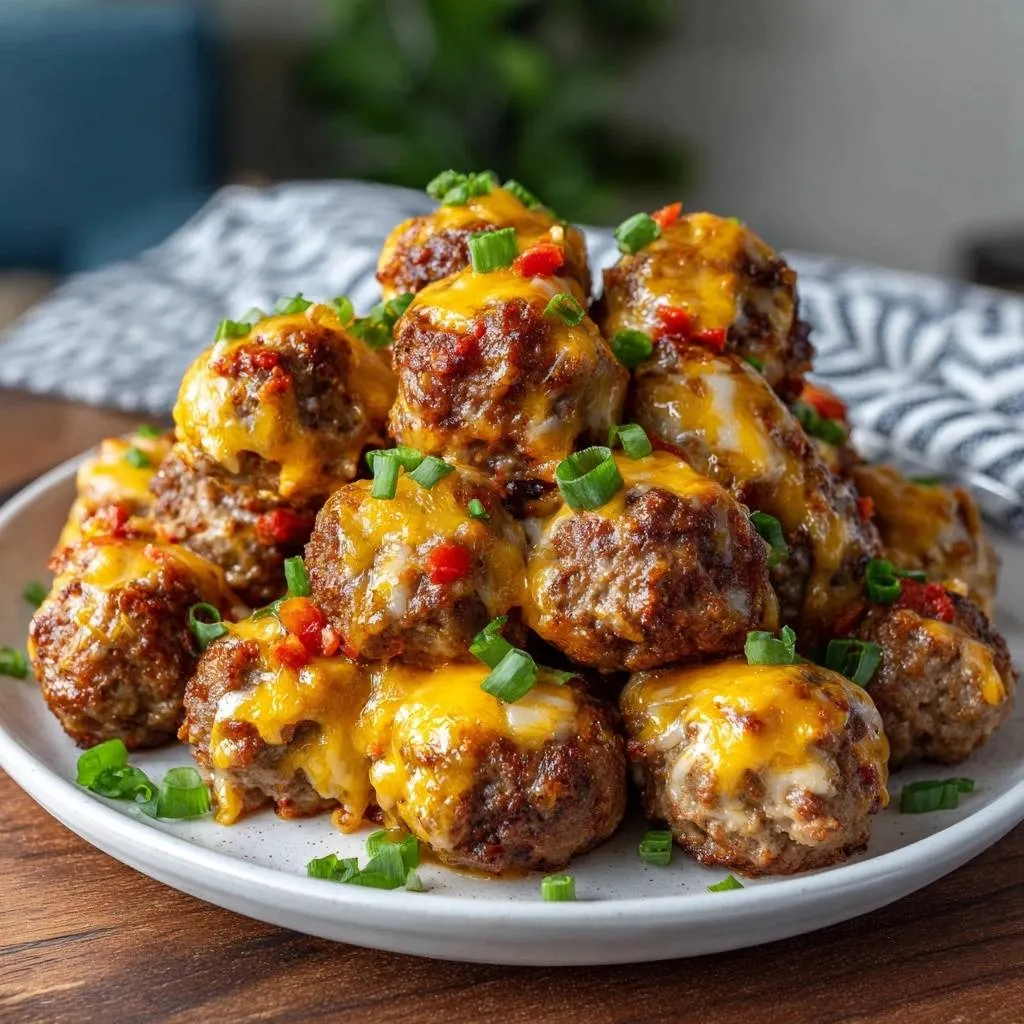
- Remove the skillet from the oven. Immediately top each meatball with a generous pinch of the combined cheddar and Monterey Jack cheeses.
- Sprinkle the finely minced red peppers over the cheese. Return to the oven for 1-2 minutes until the cheese is fully melted and draped over the sides as shown in the image.
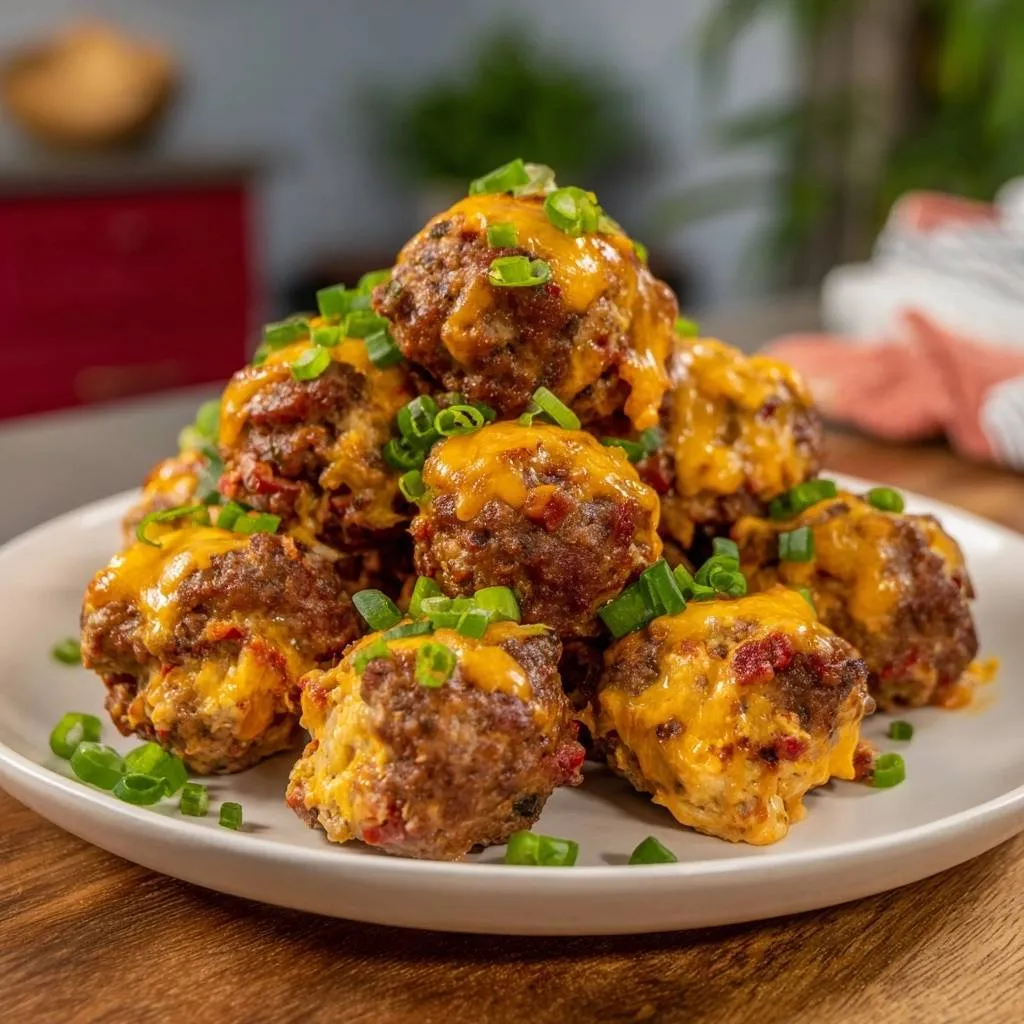
- Garnish heavily with fresh green onions and serve immediately while the cheese is molten and the centers are juicy.
Notes
- Do not overwork the meat mixture to avoid a dense texture. Ensure the skillet is oven-safe before transferring to the oven.