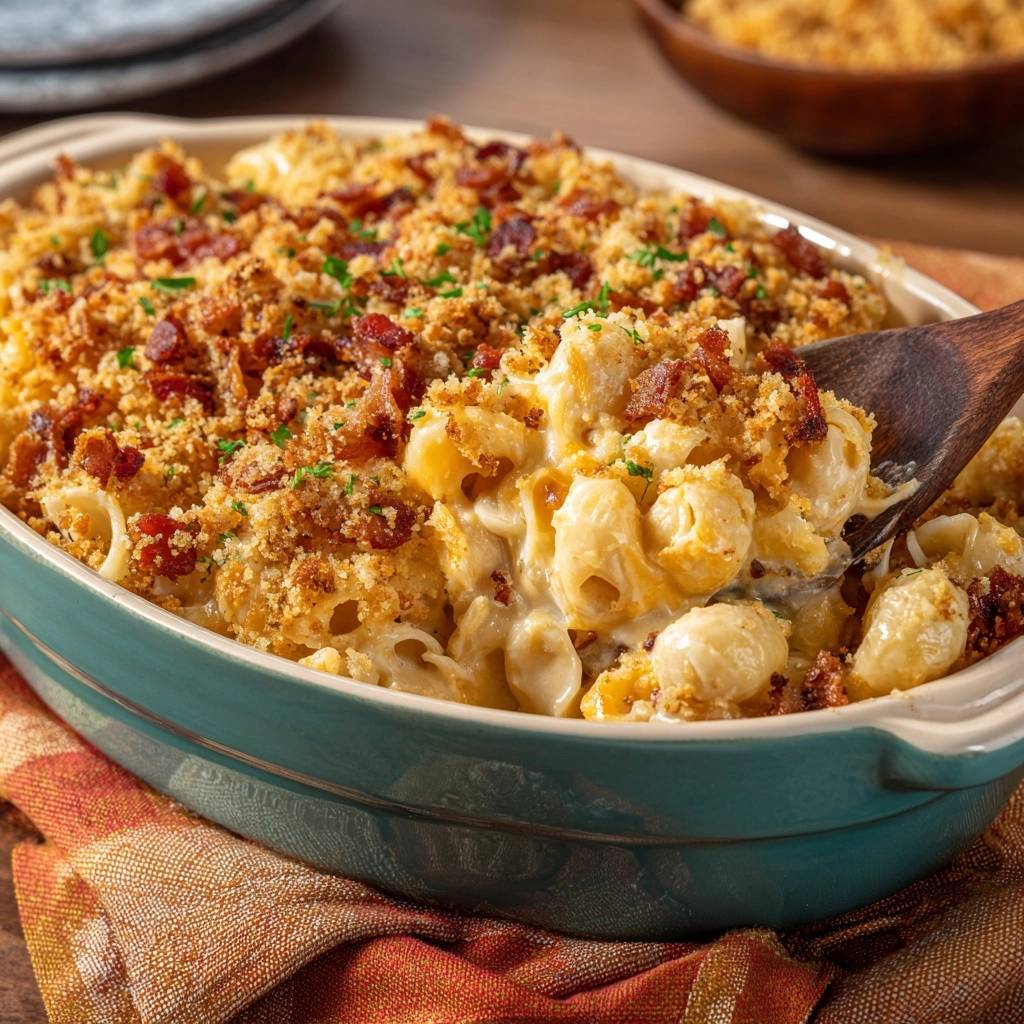
Imagine diving into a bowl of pasta where every single bite offers a dramatic contrast between a shatteringly crisp topping and a velvety, molten cheese sauce. Most baked pasta dishes suffer from a tragic flaw: the breadcrumbs absorb steam from the sauce, turning into a mushy, unappealing layer within minutes of leaving the oven.
This recipe changes the game by introducing a specific double-toasting method that protects the crunch. By the time you pull this dish out of the oven, you’ll have a golden crust that stands up to the rich, smoky sauce underneath. It’s a high-reward meal that feels like a weekend project but only takes about 15 minutes of active prep and 25 minutes in the oven.
For an even silkier finish, check out this ultra creamy stovetop mac and cheese.
The secret to this professional-grade texture is creating a moisture-resistant barrier on the breadcrumbs before they ever touch the pasta. I’ve found that using rendered fat as a coating agent is the only way to ensure that “crunch” lasts from the first serving to the very last spoonful. Let’s get into how you can master this technique at home.
The Science of the Double-Toasted Topping
To understand why most toppings fail, you have to look at the physics of steam. As the cheese sauce bubbles in the oven, it releases moisture upward. Standard breadcrumbs act like tiny sponges, soaking up that moisture and becoming soggy. However, when you coat Panko breadcrumbs in rendered bacon fat, you’re essentially waterproofing them.
The fat creates a hydrophobic layer around each individual crumb. Because oil and water don’t mix, the steam from the sauce cannot penetrate the breadcrumb. Instead of softening, the crumbs continue to fry in the oven heat, resulting in a rigid, crunchy texture that provides a necessary break from the richness of the cheese.
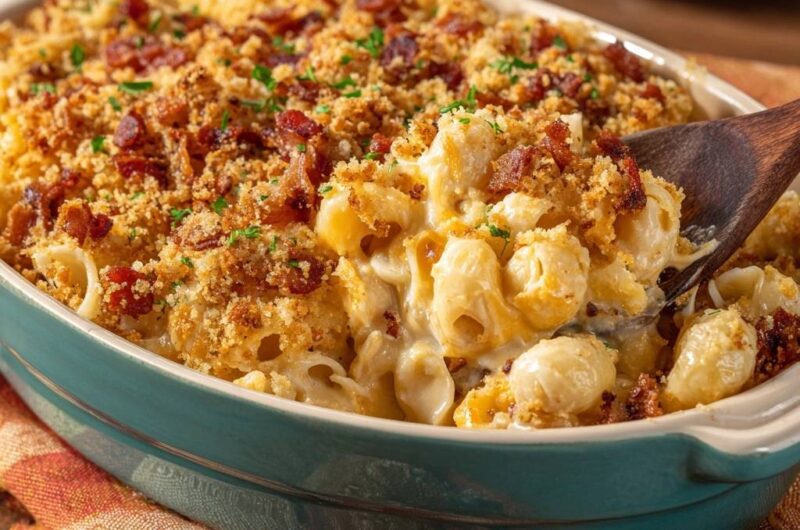
This double-toasting method—first in the skillet and then in the oven—also develops a much deeper flavor profile. You aren’t just getting the taste of toasted bread; you’re getting the smoky, salty essence of the bacon infused into every particle of the crust. It transforms the topping from an afterthought into the star of the show.
Essential Components for Creamy Bacon Mac and Cheese
Quality ingredients are the foundation of a great Mornay sauce. While it’s tempting to grab a bag of pre-shredded cheese, that’s the fastest way to a grainy, broken sauce. Those bags contain cellulose—an anti-caking agent—that prevents the cheese from melting into a smooth emulsion. Always grate your sharp cheddar and parmesan from a fresh block for that glossy, professional finish.
The choice of dairy also matters immensely. We use a combination of whole milk and heavy cream to provide stability. The higher fat content in the cream helps prevent the sauce from “breaking” or separating into oil and solids when exposed to the high heat of the oven. It creates a luxurious mouthfeel that coats the pasta without feeling heavy or greasy.
Selecting the Right Pasta Shape
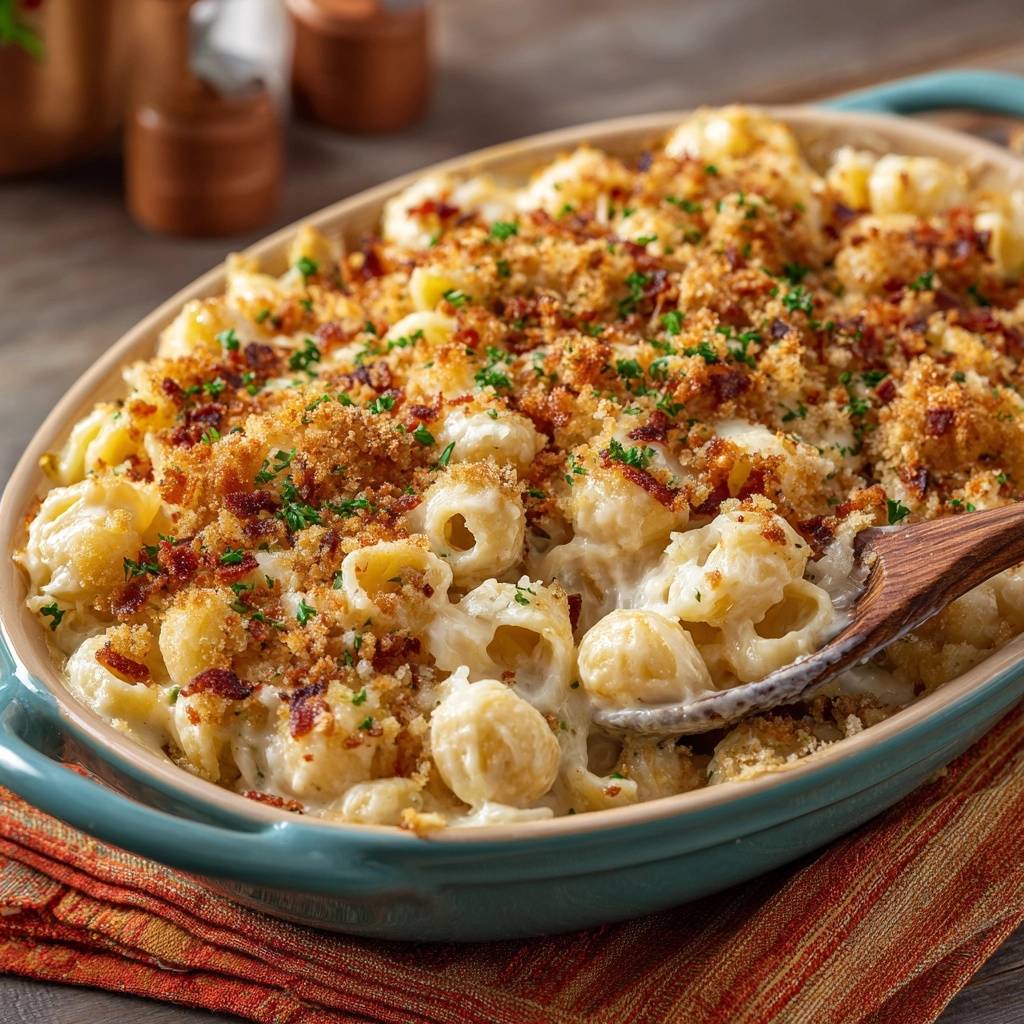
While elbow macaroni is the traditional choice, medium shells are actually superior for this specific recipe. The “cup” of the shell acts like a tiny vessel, trapping the bacon bits and the thick cheese sauce inside. This ensures that you get a balanced distribution of flavors in every single forkful.
If you can’t find shells, cavatappi is another excellent alternative. Its corkscrew shape provides plenty of surface area for the sauce to cling to. Avoid long, thin pastas like spaghetti or flat noodles like fettuccine, as they don’t have the structural integrity to support a heavy, bacon-laden cheese sauce.
The Cheese Profile: Sharpness and Meltability
A great mac and cheese needs a balance of sharp flavor and smooth melting capability. Sharp cheddar provides that classic, tangy punch that cuts through the cream. We pair it with parmesan, which adds a salty, nutty complexity and helps provide structure to the sauce so it doesn’t just run off the noodles.
If you want to experiment, you can swap half of the cheddar for Gruyère or Fontina. Gruyère adds a sophisticated, earthy note that pairs beautifully with smoky bacon. Fontina is one of the best melting cheeses in the world and will give you those long, dramatic cheese pulls that everyone loves.
Preparing the Smoky Bacon Foundation
The key to perfect bacon is starting with a cold skillet. When you place chopped bacon into a cold pan and then turn on the heat, the fat renders out slowly and evenly. This results in bacon that is perfectly crisp rather than chewy or burnt. You want those bits to be firm so they don’t disappear into the sauce.
Once the bacon is crisp, use a slotted spoon to remove it, but do not discard that fat! That “liquid gold” is the secret ingredient for our topping. It carries all the smoky flavor of the meat and provides the perfect medium for toasting our Panko breadcrumbs in the next step.
Step-by-Step: The Anti-Soggy Breadcrumb Technique
With the skillet still hot and the bacon fat shimmering, toss in your Panko breadcrumbs. You need to stir these constantly for about 3 to 4 minutes. Panko can go from golden to burnt in a matter of seconds, so keep them moving until they reach a light tan color and smell toasted.
Once they are toasted, remove the pan from the heat and stir in half of your cooked bacon bits. This integrates the meat into the topping, ensuring that the smoky flavor is present in every layer of the dish. Set this mixture aside while you build your sauce; it will stay crisp and ready for the final assembly.
Building a Silky Bechamel and Mornay Sauce
The base of our sauce is a roux, which is a simple mixture of equal parts butter and flour. Cook the roux for about two minutes until it smells slightly nutty. This step is crucial because it cooks out the “raw” flour taste, ensuring your sauce tastes like cream and cheese rather than paste.
When adding your milk and heavy cream, do it slowly. Start with just a splash and whisk vigorously until a thick paste forms, then gradually add the rest. This “tempering” process prevents lumps from forming. Adding dry mustard and smoked paprika at this stage enhances the cheddar’s natural sharpness and echoes the smokiness of the bacon.
Achieving the Perfect Sauce Consistency
You are looking for the “nappe” stage, which is a fancy way of saying the sauce should coat the back of a metal spoon. If you run your finger through the sauce on the spoon, the line should stay clean and not fill back in. This indicates the flour has properly hydrated and thickened the liquid.
Keep in mind that the sauce should feel slightly thinner than you think it needs to be. Once you add the four cups of shredded cheese, the proteins will thicken the mixture significantly. If the sauce is too thick before the cheese goes in, the final result might turn out dry after it spends time in the oven.
The Par-Boiling Rule for Baked Pasta
Never cook your pasta all the way to al dente on the stove if you plan to bake it. I recommend boiling the shells for exactly 3 minutes less than the package directions. The pasta should still have a very firm, almost slightly crunchy bite in the center when you drain it.
This is because the pasta will continue to cook in the oven. It will absorb the flavored milk and cream from the sauce as it bakes. If you start with fully cooked noodles, they will become bloated and mushy. By undercooking them initially, you ensure the final texture is tender but still has a pleasant bite.
Assembling and Baking for Maximum Texture
When you fold the pasta into the cheese sauce, make sure you’re thorough. You want the sauce to fill the “cup” of every shell. Pour the mixture into your greased 9×13 dish and spread it out evenly. Now, take that bacon-breadcrumb mixture and sprinkle it generously over the top.
Bake at 375°F for 15 to 20 minutes. This temperature is high enough to get the sauce bubbling and the edges slightly browned without breaking the cheese emulsion. Because we pre-toasted the crumbs in fat, they won’t absorb the steam, leaving you with a topping that stays rigid and crunchy even as the cheese melts underneath.
Troubleshooting Common Mac and Cheese Issues
If you notice your sauce looks oily or “broken,” don’t panic. This usually happens if the heat was too high. You can often fix it by whisking in a tablespoon of warm milk very gently. The extra liquid helps re-emulsify the fats and proteins, bringing the sauce back to a smooth state.
If your topping is browning too quickly but the sauce isn’t bubbling yet, simply tent the dish with a piece of aluminum foil. This stops the direct heat from darkening the crumbs further while allowing the interior to finish heating through. If the dish seems dry, it’s likely the pasta was cooked too long or the sauce was too thick; next time, add an extra half-cup of milk.
Flavor Variations and Ingredient Swaps
You can easily customize this base recipe to suit your cravings. For a spicy kick, sauté some diced jalapeños in the bacon fat before adding the breadcrumbs. The heat from the peppers balances the richness of the heavy cream beautifully. You can also add a teaspoon of hot sauce directly into the cheese sauce.
If you prefer a garlic-heavy version, stir in some roasted garlic paste or fresh chives at the very end. For those who don’t eat beef or turkey alternatives, you can use beef bacon or even smoked turkey bacon. Just ensure you add a tablespoon of butter to the pan if the alternative meat doesn’t render enough fat to toast the breadcrumbs.
Optimal Side Dishes for Rich Pasta
Because this mac and cheese is incredibly rich and savory, you want to pair it with something acidic or slightly bitter to cleanse the palate. A simple arugula salad with a bright lemon vinaigrette is a perfect companion. The peppery greens and citrus juice cut right through the heavy fats of the cheese and bacon.
Roasted balsamic Brussels sprouts or steamed broccoli with a splash of apple cider vinegar also work wonders. These vegetables provide a nice crunch and a hit of acidity that makes the next bite of creamy pasta taste even better. Avoid heavy, starchy sides like potatoes, as the meal already has plenty of carbohydrates.
Make-Ahead Strategies and Storage Tips
If you want to prep this ahead of time, I recommend making the sauce and boiling the pasta, then storing them separately. When you’re ready to eat, combine them and add the topping fresh. If you assemble the whole dish and let it sit in the fridge, the pasta will drink up all the sauce, leaving you with a dry bake.
Store leftovers in an airtight container in the refrigerator for up to 3 days. To reheat, the oven is your best friend. Place a portion in a small oven-safe dish, add a tiny splash of milk to the corner, and heat at 350°F until bubbly. This helps preserve the crunch of the topping much better than a microwave ever could.
Expert Tips for Professional Results
Always use room temperature milk and cream when building your sauce. Cold dairy can cause the roux to seize up and form lumps, making it much harder to get that silky-smooth consistency. Just set the milk out on the counter for 20 minutes before you start cooking.
Don’t forget to salt your pasta water “like the sea.” This is your only chance to season the actual noodle. Finally, use a heavy-bottomed pot like a Dutch oven for making the sauce. These pots distribute heat more evenly, which prevents the cheese from scorching on the bottom of the pan as you stir.
How do I store and reheat leftovers?
Store your leftovers in an airtight container in the fridge for up to 3 days. For the best results, reheat in the oven at 350°F. Add a splash of milk to the dish and cover it with foil for the first 10 minutes to keep it moist, then remove the foil for the last 5 minutes to crisp up the topping again. Avoid freezing this dish, as the heavy cream and cheese sauce can become grainy and separate once thawed.
Why did my cheese sauce turn out grainy?
Grainy sauce is usually caused by two things: using pre-shredded cheese or overheating the sauce. Pre-shredded cheese is coated in potato starch or cellulose which prevents a smooth melt. Additionally, if you boil the sauce after adding the cheese, the proteins can clump together. Always remove the sauce from the heat before folding in your shredded cheese to ensure a glossy, smooth texture.
Can I use a different type of bacon?
Yes, you can use turkey bacon or beef bacon if you prefer. However, these alternatives are often much leaner than traditional thick-cut bacon. If there isn’t enough fat left in the pan after browning the meat, you will need to add 1-2 tablespoons of unsalted butter to the skillet to properly toast the Panko breadcrumbs and create that moisture-resistant barrier.
What can I use if I don’t have Panko breadcrumbs?
While Panko is preferred for its light, airy crunch, you can use crushed crackers or even toasted sourdough crumbs. If using regular breadcrumbs, be extra vigilant during the skillet-toasting phase, as they are smaller and will brown much faster than Panko. The goal is still the same: coat every crumb in fat to prevent them from getting soggy in the oven.
Can I make this recipe gluten-free?
You can certainly adapt this for a gluten-free diet. Use your favorite gluten-free shell pasta and a 1-to-1 gluten-free flour blend for the roux. For the topping, look for gluten-free Panko-style breadcrumbs. Since gluten-free pasta tends to release more starch, make sure to rinse it briefly after undercooking it to prevent the final dish from becoming too gummy.
Mac and Cheese
Course: Main CourseCuisine: AmericanDifficulty: medium6
servings15
minutes25
minutes640
kcal40
MinutesThis recipe solves the soggy topping problem by browning Panko breadcrumbs in rendered bacon fat before baking. This creates a moisture-resistant barrier for a shatteringly crisp finish paired with a rich, four-cheese and heavy cream sauce.
Ingredients
1 pound medium pasta shells
1/2 pound thick-cut bacon, chopped
4 cups sharp cheddar cheese, freshly shredded
1/2 cup parmesan cheese, grated
3 cups whole milk
1 cup heavy cream (for maximum creaminess shown in image)
4 tablespoons unsalted butter
1/4 cup all-purpose flour
1 teaspoon garlic powder
1/2 teaspoon smoked paprika
1/2 teaspoon dry mustard powder
Salt and black pepper to taste
1.5 cups Panko breadcrumbs
Fresh parsley, finely chopped for garnish
Directions
- Preheat your oven to 375°F (190°C). Grease a 9×13 inch baking dish.
- In a large skillet, cook the chopped bacon over medium heat until crisp. Use a slotted spoon to remove the bacon to a paper towel-lined plate, but keep the rendered bacon fat in the skillet.
- The Anti-Soggy Hack: Add the Panko breadcrumbs directly into the skillet with the hot bacon fat. Toast over medium heat for 3-4 minutes, stirring constantly, until golden brown. Remove from heat and toss with half of the cooked bacon bits. Set aside.
- Boil the pasta shells in heavily salted water for 3 minutes less than the package directions for al dente. They should still have a firm bite. Drain and set aside.
- In a large heavy-bottomed pot, melt 4 tablespoons of butter. Whisk in the flour and cook for 1-2 minutes until it smells slightly nutty.
- Slowly whisk in the milk and heavy cream to ensure no lumps form. Add the garlic powder, smoked paprika, and dry mustard. Simmer over medium-low heat, stirring frequently, until the sauce is thick enough to coat the back of a metal spoon.
- Remove the sauce from the heat. Gradually fold in the shredded cheddar and parmesan until the sauce is glossy and smooth. Taste and adjust salt and pepper.
- Fold the undercooked pasta and the remaining bacon bits into the cheese sauce. Ensure every shell is filled with sauce.
- Pour the mixture into the prepared baking dish. Evenly distribute the pre-toasted bacon-breadcrumb mixture over the top.
- Bake for 15-20 minutes until the sauce is bubbling around the edges. Because the breadcrumbs were toasted in fat, they will remain rigid and crunchy rather than absorbing the steam from the sauce.
- Garnish with fresh parsley and serve immediately to enjoy the contrast between the crunchy topping and the velvety sauce.
Notes
- The Anti-Soggy Hack: Toasting breadcrumbs in bacon fat prevents them from absorbing steam during the baking process, maintaining a crunchy texture.