We have all been there. You sit down for a long-awaited holiday meal or a cozy Sunday dinner, reaching for that big bowl of mashed potatoes, only to be met with a sticky, gluey mess. Instead of a light and airy side dish, you get something that feels more like wallpaper paste. It is a heartbreaking kitchen fail that happens to the best of us, but it doesn’t have to be your reality.
The difference between cafeteria-style sludge and the velvet-smooth mash served at high-end steakhouses isn’t just the amount of butter used. It comes down to a two-pronged approach involving meticulous starch management and a deep-reduction technique for the gravy. When you master these two elements, you create a side dish that carries the emotional weight of a warm hug on a plate.
The secret to that perfect cloud-like texture is actually quite scientific. By controlling how we handle the potato’s natural starches and ensuring our gravy has a glossy, mahogany finish, we can turn humble tubers into a luxury experience. I’m going to show you exactly how to achieve that melt-in-your-mouth consistency every single time.
The Science of Starch and Texture
To understand why potatoes turn gummy, we have to look at their cellular structure. Potatoes are packed with starch granules called amylose and amylopectin. When you boil a potato, these granules swell and soften, but they are still contained within the potato’s cells. The trouble starts when those cells are ruptured too aggressively.
Mechanical agitation, such as using a high-speed electric mixer or over-working the mash with a spoon, acts like a blender on those delicate cells. Once the cells break, they leak starch into the surrounding moisture. This creates a literal glue. Think of it like making bread dough; the more you work it, the more the “structure” develops, which is exactly what you want for a chewy baguette but exactly what you want to avoid for fluffy potatoes.
Therefore, our goal is to remove as much excess surface starch as possible before cooking and to handle the potatoes with extreme care once they are soft. By rinsing the cubed potatoes and using a gentle “folding” motion rather than a “beating” motion, we keep those starch granules intact. This ensures the final result is creamy and light rather than stretchy and sticky.
Why Yukon Golds Outperform Russets
While many people reach for Russets because they are high in starch, they can often turn out grainy or mealy if not handled perfectly. Red potatoes, on the other hand, are waxy and hold their shape too well, making them difficult to mash into a smooth puree. Yukon Golds are the “Goldilocks” of the potato world.
Yukon Golds possess a medium starch content and a naturally creamy, buttery yellow hue. This unique balance allows them to break down into a velvet-smooth consistency without the grittiness of a Russet. Furthermore, their skin is thin enough that even if a tiny bit remains, it doesn’t ruin the texture, though we will be peeling them for this specific recipe to ensure total silkiness.
Essential Components for Velvet Potatoes and Gravy
For this recipe, we are using three pounds of Yukon Gold potatoes and four cloves of garlic. The garlic is a key player here, but we aren’t just tossing it in at the end. We also need high-quality dairy. I always recommend using unsalted butter because it allows you to control the sodium levels of the dish precisely. Salt is already present in the boiling water and the beef broth, so using salted butter can quickly push the dish into “too salty” territory.
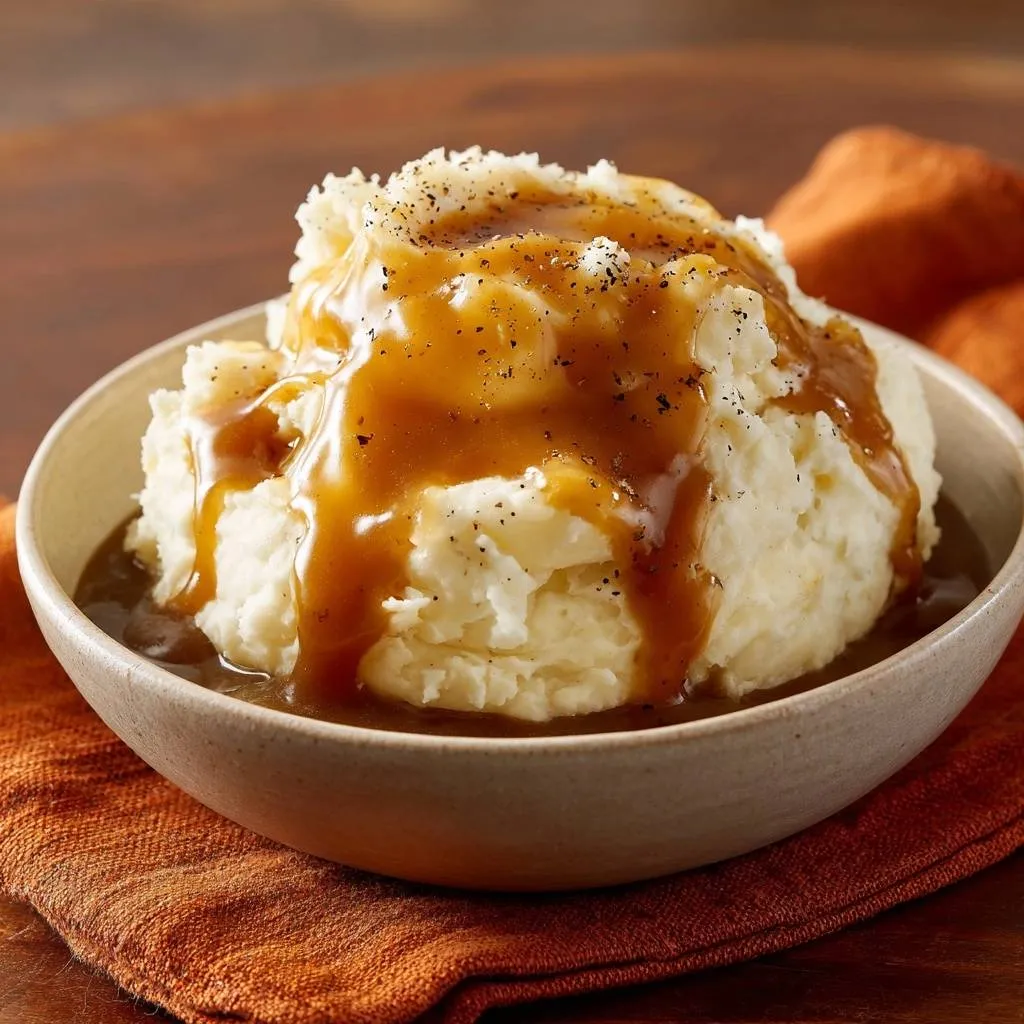
The gravy relies on a rich beef broth to achieve a deep, mahogany color. Many people use artificial browning agents, but you don’t need them if you cook your roux correctly. The combination of butter, flour, and a slow-whisked broth creates a savory, glossy sauce that clings to the peaks and valleys of your mashed potatoes. A splash of Worcestershire sauce adds that final hit of umami that makes the gravy taste like it has been simmering for hours.
The Role of Temperature in Emulsification
One of the biggest mistakes home cooks make is adding cold milk or butter directly from the fridge into hot potatoes. This temperature shock causes the potato starch to seize up, which almost always leads to stubborn lumps. It also cools the dish down far too quickly, leaving you with a lukewarm side dish.
In addition, fat and liquid emulsify much better when they are warm. By melting the butter and warming the heavy cream or milk before they touch the potatoes, you create a smooth, stable emulsion. The potatoes absorb the warm fats much more readily, resulting in a more cohesive and luxurious mouthfeel.
Aromatics: Smashed Garlic vs. Minced
You might be tempted to toss in some raw minced garlic at the end, but I urge you to reconsider. Raw garlic has a sharp, pungent bite that can easily overwhelm the delicate flavor of the potatoes. Instead, we use smashed garlic cloves and boil them right along with the potatoes.
This boiling process mellows the garlic, turning it sweet and soft. As the potatoes cook, they absorb the subtle garlic essence from the water. When you mash the softened cloves into the potatoes, they disappear into the mix, providing a deep, infused sweetness that lingers on the palate without the harsh aftertaste of raw garlic.
Step-by-Step: Preparing the Potatoes
The preparation phase is where the battle for texture is won or lost. We start by peeling and cubing the potatoes into uniform pieces, roughly one inch in size. Uniformity is vital because it ensures every piece of potato finishes cooking at the exact same time, preventing a mix of mushy and hard bits.
Once cubed, we move into the three distinct phases of preparation: The Cold Rinse, The Infused Boil, and The Steam-Dry. Each of these steps serves a specific purpose in managing moisture and starch. If you follow these closely, you will never have watery or sticky potatoes again.
The Cold Water Rinse Technique
After cubing your potatoes, place them in a large bowl and run cold water over them. You will notice the water becomes very cloudy almost immediately. This cloudiness is the excess surface starch that was released when you sliced the potatoes. If left on the potato, this starch will turn into a sticky film during the boiling process.
Continue rinsing and swirling the potatoes until the water runs completely clear. This might take two or three changes of water, but it is the first line of defense against a “sticky” result. Once the water is clear, you know you have removed the problematic surface starch, leaving only the starch trapped safely inside the potato cells.
The Critical Steam-Drying Phase
After the potatoes are fork-tender, drain them thoroughly in a colander. However, do not start mashing them yet! Return the drained potatoes to the hot pot and place it back over low heat for about one to two minutes. Shake the pan constantly to prevent sticking.
You will see steam rising rapidly from the pot; this is the residual moisture evaporating. This “steam-drying” step is crucial because it ensures the potatoes are as dry as possible. A dry potato is like a sponge; it is much more capable of absorbing the butter and cream, which leads to a richer flavor and a fluffier texture.
Step-by-Step: Achieving the Perfect Mash
Now that the potatoes are dry and hot, it is time to break them down. This is a manual process, and for the love of all things delicious, please stay away from the electric mixer! High-speed blades are the ultimate enemy of fluffiness because they shear the potato cells and release all that starch we worked so hard to manage.
Instead, use a potato ricer or a heavy-duty hand masher. Work quickly while the potatoes are still steaming hot. The hotter the potato, the easier it is to break down the structure without over-working it. If the potatoes cool down too much, they become stubborn and require more force, which leads to—you guessed it—gumminess.
For a similarly satisfying meal, try shredded beef over creamy mashed potatoes.
Ricer vs. Masher: Choosing Your Texture
If you want a cloud-like, uniform texture that mimics a five-star restaurant, a potato ricer is your best friend. It pushes the potato through tiny holes, creating thin “noodles” of potato that require almost no mixing to become smooth. It is the most foolproof way to avoid lumps.
However, if you prefer a more “rustic” mash with a bit of texture, a traditional hand masher works perfectly. Just be sure to use a firm, vertical pressing motion rather than a stirring or beating motion. Both methods are great; it just depends on whether you want total silkiness or a bit of home-style character.
The Fat-First Folding Method
Once the potatoes are broken down, add the melted butter first. Use a spatula to gently fold the butter into the potatoes. This is a professional secret: the fat in the butter coats the potato granules, creating a protective barrier. This barrier prevents the liquid in the milk or cream from over-hydrating the starch.
After the butter is incorporated, gradually pour in your warm milk or cream. Continue folding gently until the liquid is absorbed and the potatoes look glossy. Stop the moment everything is combined. Over-mixing at this stage is the most common reason for a gluey finish, so keep it light and quick.
Step-by-Step: Crafting the Savory Gravy
A great gravy starts with a proper roux. Melt two tablespoons of butter in a small saucepan and whisk in the flour. You need to cook this mixture for at least two to three minutes over medium heat. This removes the “raw” flour taste and allows the roux to develop a light golden color.
If you pour the liquid in too early, the gravy will taste like paste. Therefore, wait until you smell a slightly nutty aroma before moving to the next step. This short cook time ensures the flour is toasted enough to provide flavor but not so much that it loses its thickening power.
Building Depth with Worcestershire and Beef Broth
To avoid lumps, add the beef broth very slowly, about a quarter cup at a time, whisking vigorously between each addition. At first, it will look like a thick paste, but it will eventually turn into a smooth, pourable sauce. The Worcestershire sauce is the “secret ingredient” here, providing a hit of umami that deepens the beefy flavor.
Continue to simmer the gravy until it thickens enough to coat the back of a spoon. It should look glossy and rich. If it gets too thick, simply whisk in another splash of broth. The final result should be a smooth, pourable sauce that pools beautifully around the base of your potato peaks.
Troubleshooting Common Texture Issues
If your potatoes end up too thin, don’t panic. You can place them back over very low heat and stir gently for a few minutes to cook off the excess moisture. Conversely, if they are too thick, add warm cream one tablespoon at a time until you reach the desired consistency.
If you find that the potatoes have already become slightly gummy, the best “rescue” is to spread them into a baking dish, top them with a little extra butter or cheese, and bake them for a few minutes. The dry heat of the oven can help set the starch and improve the mouthfeel, turning a “fail” into a delicious potato gratin-style side.
Pairing Suggestions for a Complete Meal
These garlic mashed potatoes are the ultimate foundation for hearty main courses. They are spectacular when served alongside a slow-roasted beef pot roast or braised short ribs, where the meat juices can mingle with the gravy. The creamy texture also provides a wonderful contrast to the crispy skin of a roasted chicken.
For a vegetarian option, try serving these potatoes under a rich mushroom stew. The earthy flavors of the mushrooms and the savory gravy create a deeply satisfying meal. No matter what you pair them with, these potatoes usually end up being the star of the show, so make sure you have plenty of extra gravy on hand!
Expert Tips for Advanced Flavor
If you want to take things a step further, try infusing your warming milk with fresh herbs. Steeping a sprig of thyme or rosemary in the milk for five minutes before straining it into the potatoes adds a sophisticated floral note. It is a small touch that makes a massive difference in the final flavor profile.
Another pro tip is to use roasted garlic instead of boiled garlic. If you have the time, roast a whole head of garlic in the oven until the cloves are caramelized and jam-like. Squeeze those cloves directly into the mash for a much deeper, smokier garlic flavor that is absolutely addictive.
Make Ahead and Reheating Instructions
You can absolutely make these potatoes ahead of time. To keep them warm for a party, place them in a slow cooker on the “warm” setting. To prevent them from drying out, add a thin layer of melted butter over the top and cover the pot tightly. This creates a seal that keeps the moisture inside.
When reheating leftovers, do not use the microwave if you can avoid it, as it can make the potatoes rubbery. Instead, place them in a saucepan over low heat and add a splash of warm milk. Whisk gently as they heat up to restore the creamy emulsion. Your potatoes will taste almost as fresh as the day you made them.
Expert Troubleshooting
How do I fix lumpy potatoes after they are mashed?
If you have already mashed the potatoes and they are full of lumps, the best fix is to pass the entire mixture through a fine-mesh sieve or a ricer. It takes a bit of elbow grease, but it will force the lumps to break down. Once passed through, fold in a tiny bit more warm cream to bring the texture back together.
Can I use a food processor to save time?
Absolutely not! A food processor is the fastest way to ruin mashed potatoes. The high-speed blades spin so fast that they break every single starch cell in the potato instantly. You will end up with a bowl of literal glue that is impossible to fix. Stick to manual tools for the best results.
Why is my gravy too pale?
A pale gravy usually means the roux (the butter and flour mixture) wasn’t cooked long enough, or the broth used was too light. To get a darker color, cook your roux until it is the color of peanut butter before adding the liquid. You can also use a very high-quality, dark beef stock to ensure a rich, mahogany finish.
Can I substitute the heavy cream?
Yes, you can use whole milk or half-and-half if you prefer a lighter dish. However, keep in mind that the lower fat content will result in a slightly less “velvety” mouthfeel. If you use milk, you might want to add an extra tablespoon of butter to compensate for the loss of richness. Avoid skim milk, as it can make the potatoes look grey and watery.
How long can the gravy sit before a skin forms?
Gravy starts to form a “skin” as soon as the surface begins to cool and dry out, usually within 5 to 10 minutes. To prevent this, you can press a piece of parchment paper or plastic wrap directly onto the surface of the gravy while it sits. Alternatively, keep it in a small thermos or give it a quick whisk every few minutes to keep it smooth.
Creamy Garlic Mashed Potatoes
Course: Side DishCuisine: AmericanDifficulty: easy6
servings15
minutes25
minutes345
kcal40
MinutesA foolproof recipe for light and fluffy Yukon Gold mashed potatoes that uses a specific rinsing and steam-drying technique to prevent a gluey texture, served with a smooth beef-based gravy.
Ingredients
3 pounds Yukon Gold potatoes, peeled and cubed
4 cloves garlic, smashed
1/2 cup unsalted butter, melted
1 cup whole milk or heavy cream, warmed
2 teaspoons sea salt
1 1/2 teaspoons freshly cracked black pepper (divided)
2 cups beef broth (for a deep brown color)
3 tablespoons all-purpose flour
2 tablespoons butter (for gravy)
1/2 teaspoon Worcestershire sauce
Directions
- To prevent a gummy texture, place your cubed potatoes in a large bowl and rinse them under cold water until the water runs completely clear. This removes the excess surface starch that causes stickiness.
- Place potatoes and smashed garlic in a large pot of cold salted water. Bring to a boil, then reduce heat and simmer for 15 to 20 minutes until fork-tender.
- Drain the potatoes thoroughly in a colander. Return them to the hot pot over low heat for 1 to 2 minutes, shaking the pan constantly. This “steam-drying” step is crucial as it evaporates excess moisture that makes potatoes watery.
- Use a potato ricer or masher to break down the potatoes while still hot. Slowly fold in the melted butter first to coat the starch molecules, then gradually add the warm milk or cream. Do not over-mix or use a high-speed electric mixer, as this will develop the starch and create a gluey consistency. Fold in 1 teaspoon of the cracked black pepper and salt to taste.
- For the gravy, melt 2 tablespoons of butter in a small saucepan over medium heat. Whisk in the flour and cook for 2-3 minutes until it turns a light golden brown. Slowly whisk in the beef broth and Worcestershire sauce. Simmer, whisking constantly, until thickened and glossy.
- Scoop the potatoes into a bowl, creating peaks and valleys with a spoon. Pour the hot gravy generously over the top, allowing it to pool at the base. Finish with an extra sprinkle of cracked black pepper for visual contrast and serve immediately.
Notes
- To ensure the best texture, always add the melted butter before the milk to coat the starch, and never use an electric mixer.