Most skillet chicken recipes promise a golden finish but deliver rubbery, boiled skin the moment the sauce hits the pan. It’s a common frustration that turns a potentially gourmet meal into a soggy disappointment. This recipe changes that dynamic by focusing on a specific searing technique that creates a structural, herb-flecked crust capable of resisting moisture.
The sensory contrast here is what makes the dish truly special. You get that immediate, shatter-crisp crunch from the skin followed by the succulent, tender meat of the thigh, all tied together by a velvety lemon cream. By using bone-in, skin-on thighs, you ensure the meat stays incredibly juicy while the fat renders out to provide the base for your sauce.
The secret to this success lies in the “no-touch” rule during the initial sear. Most home cooks flip their chicken too early, which prevents the skin from fully dehydrating and crisping. If you let it sit undisturbed in a hot cast-iron skillet for nearly ten minutes, the fat renders completely, leaving behind a golden brown texture that stays crunchy even when nestled in a rich sauce.
The Physics of Achieving Shatter-Crisp Chicken Skin
Achieving that perfect crunch isn’t about luck; it’s about managing moisture, which is the ultimate enemy of the Maillard reaction. When you pat the chicken thighs extremely dry with paper towels, you remove the surface water that would otherwise turn into steam. Steam boils the skin rather than frying it, leading to that flabby texture everyone wants to avoid.
Using a cast-iron skillet is non-negotiable for this process because of its superior heat retention. Once the cold chicken hits the pan, a thin stainless steel skillet might drop in temperature, but cast iron stays hot, immediately beginning the rendering process. This high, steady heat transforms the collagen in the skin into a crisp, crackling layer.
The herb crust also plays a functional role beyond just adding flavor. By heavily seasoning the skin side with dried oregano and thyme, you create a literal barrier of herbs. This “insulation” helps protect the skin from the rising steam of the lemon cream sauce later in the cooking process, ensuring the top stays dry while the bottom soaks up the savory liquid.
Essential Components for Creamy Lemon Herb Chicken Thighs
Quality ingredients are the backbone of this dish, and choosing the right cut of meat is the first step. Bone-in chicken thighs are superior to boneless because the bone acts as a thermal conductor, distributing heat evenly through the center of the meat. This prevents the outside from overcooking before the inside is safe to eat, resulting in a much juicier bite.
The choice of herbs is equally intentional. We use dried oregano and thyme for the initial sear because dried herbs are more heat-resistant and won’t burn as easily during the long rendering process. Fresh parsley, however, is reserved for the very end. Its bright, grassy notes would be lost in the high heat of the skillet, so we add it as a finishing touch to provide a pop of color and freshness.
For the sauce, the balance of fat and acid is critical. We combine the rendered chicken fat with olive oil to create a rich base, then cut through that heaviness with fresh lemon juice. Always use fresh lemons rather than the bottled variety; the natural oils in the zest and the sharp acidity of fresh juice provide a clean finish that bottled versions simply can’t replicate. This acidity balances the heavy cream, preventing the dish from feeling too “heavy” on the palate.
Selecting and Preparing the Poultry
Before the chicken ever touches the pan, you should perform a quick “dry-brine” by seasoning it with salt and letting it sit for a few minutes. Salt draws out deep-seated moisture to the surface, where you can pat it away. When you’re prepping, trim any large, hanging flaps of fat, but be careful not to remove the skin that covers the meat, as it acts as a protective shield during the high-heat sear.
The Dairy Base: Heavy Cream vs. Substitutes
To achieve that signature “yellow velvet” texture, heavy cream is a must. Lower-fat options like whole milk or half-and-half lack the stability to withstand the acidity of the lemon juice and the heat of the simmer. If you try to use a lower-fat substitute, the sauce will likely curdle, resulting in a grainy texture rather than a smooth, luxurious coating.
Step-by-Step: Searing for Maximum Texture
The searing phase is where the magic happens, and it requires patience. Start with a hot pan; the oil should be shimmering and just on the verge of smoking. When you lay the chicken in, skin-side down, you should hear a loud, aggressive sizzle. This immediate contact with high heat begins the rendering process that turns fat into liquid and skin into gold.
Once the chicken is in the pan, embrace the “No-Touch” Rule. For 8 to 10 minutes, do not move, peek at, or flip the thighs. If you try to lift them and they stick, they aren’t ready. The meat will naturally release from the pan once the skin has formed a solid, crispy crust. Pressing down slightly with a spatula during this time ensures the entire surface area of the skin makes contact with the hot iron.
After flipping and finishing the cook, move the chicken to a wire rack rather than a flat plate. If you put hot, seared chicken on a plate, the heat trapped underneath creates steam, which immediately softens the skin you just worked so hard to crisp. A wire rack allows air to circulate around the entire thigh, keeping that crust perfectly intact while you prepare the sauce.
Deglazing and Reducing the Lemon Velvet Sauce
Transitioning from frying to sauce-making requires a quick adjustment of your heat. Lower the flame to medium before adding your minced garlic. Garlic burns in seconds in a scorching pan, so you want it to gently sizzle in the remaining chicken fat until it smells fragrant and turns a light golden color. This only takes about 60 seconds.
Next comes deglazing, which is the most important step for flavor depth. When you pour in the chicken broth and lemon juice, use a wooden spoon to scrape up the “fond”—those dark, caramelized bits stuck to the bottom of the pan. These bits are concentrated umami and will dissolve into the liquid, giving your sauce a complex, savory backbone that salt alone cannot provide.
Finally, stir in the heavy cream and let it simmer. You are looking for the “nappe” consistency, a French culinary term meaning the sauce is thick enough to coat the back of a spoon. As the water evaporates, the fats and proteins in the cream concentrate, turning the liquid into a rich, golden velvet that will cling to the chicken without making it soggy.
The Assembly: Protecting the Crust
The final assembly is where many cooks lose the battle for crispy skin. Instead of tossing the chicken back into the pan and stirring it around, you must carefully nestle the thighs into the sauce. The goal is to have the sauce reach only halfway up the sides of the chicken, leaving the herb-crusted tops completely exposed to the air.
By keeping the skin above the “tide line” of the sauce, you maintain the crunch while the bottom of the meat absorbs the lemon and garlic flavors. Arrange your lemon slices in the gaps between the chicken pieces. This brief one-minute simmer marries the flavors together without compromising the structural integrity of the crust you’ve built.
Troubleshooting Common Skillet Chicken Hurdles
If your sauce happens to curdle, don’t panic. This usually happens if the heat is too high or the lemon juice is added too quickly to cold cream. You can often fix this by vigorously whisking in a tablespoon of warm chicken broth to re-emulsify the fats. To prevent it next time, ensure your cream is at room temperature before adding it to the pan.
If the meat feels tough, you likely overcooked it. While 165°F is the safety standard, chicken thighs are forgiving and can actually handle up to 175°F because of their fat content. However, if you go beyond that, the fibers will tighten. Always use a meat thermometer rather than relying on a timer, as every stove and skillet retains heat differently.
If the sauce feels too thin, simply remove the chicken and turn the heat up for another two minutes. Reducing the liquid further will thicken it naturally without the need for flour or cornstarch. Conversely, if the dish lacks punch, it’s usually a seasoning issue. Make sure you season the meat side of the thigh just as well as the skin side to ensure flavor in every bite.
Optimal Pairings for Creamy Lemon Herb Chicken Thighs
To make the most of that incredible lemon velvet sauce, you need a side dish that acts as a sponge. Orzo pasta is a fantastic choice, as the small grains catch the sauce in every nook. Garlic mashed potatoes or a thick slice of toasted sourdough bread are also perfect for mopping up every last drop of the creamy reduction.
To balance the richness of the heavy cream, look for greens with a bit of a “bite.” A simple arugula salad with a light vinaigrette provides a peppery contrast that cleanses the palate between bites. Alternatively, blanched asparagus or roasted broccolini offer a fresh, earthy element that complements the lemon and thyme beautifully.
Storage and Reheating Without Losing the Crunch
If you have leftovers, avoid the microwave at all costs. Microwaves heat from the inside out and trap steam, which will turn your crispy chicken skin into a rubbery mess. Instead, store the chicken and sauce in an airtight container in the fridge for up to three days. The sauce may thicken or solidify when cold, which is perfectly normal due to the high fat content.
To reheat, place the chicken in an oven or air fryer at 350°F for about 8 to 10 minutes. This dry heat will re-crisp the skin while warming the meat through. You can warm the sauce separately in a small saucepan over low heat, adding a splash of water or broth if it needs to be thinned out, then pour it around the chicken just before serving.
Expert Culinary FAQ
Can I use chicken breasts instead of thighs?
You can, but you must be very careful with the timing. Breasts are leaner and dry out much faster than thighs. You will need to reduce the searing time and use a meat thermometer to pull them the exact second they hit 165°F. They also lack the fat needed to flavor the sauce as deeply as thighs do.
For a bolder take on citrus and chicken, consider these blackened chicken thighs.
How do I prevent the lemon juice from making the cream curdle?
The key is the temperature and the fat content. Using heavy cream is vital because its high fat-to-protein ratio makes it more stable. Additionally, avoid boiling the sauce vigorously once the cream and lemon are combined; a gentle simmer is all you need to thicken the sauce safely.
Can I use dried parsley instead of fresh?
It isn’t recommended for this specific dish. Dried parsley often tastes like hay and lacks the bright, citrusy punch of fresh leaves. Since the sauce is so rich, that hit of fresh greenery at the end is essential for balancing the flavors and providing a professional visual finish.
What is the best skillet to use if I don’t own cast iron?
A heavy-bottomed stainless steel skillet is your next best option. It provides good heat distribution and allows for excellent fond formation. Avoid non-stick pans for this recipe, as they don’t allow the skin to “grip” and sear properly, and you won’t get those flavorful browned bits needed for the sauce.
Can I freeze this dish for later?
It is not recommended to freeze this specific dish. Cream-based sauces often break and become grainy when thawed and reheated. Additionally, the chicken skin will lose all of its crispness in the freezer. This meal is best enjoyed fresh or kept in the refrigerator for a few days.
Why is my sauce too salty?
This usually happens if you use a high-sodium chicken broth along with the salt used for seasoning the chicken. If your sauce tastes too salty, add a small squeeze of extra lemon juice or a splash of unsalted broth. The acidity of the lemon can help mask the perception of saltiness.

Creamy Lemon Herb Chicken Thighs
Course: Main CourseCuisine: AmericanDifficulty: easy4
servings10
minutes25
minutes420
kcal35
MinutesThis recipe solves the problem of soggy skin in skillet chicken by using a specific searing technique and a late-stage sauce reduction. The result is a shatter-crisp herb crust on juicy chicken thighs nestled in a rich lemon cream sauce.
Ingredients
4 bone-in, skin-on chicken thighs
2 tablespoons olive oil
1 tablespoon dried oregano and thyme blend
1 teaspoon cracked black pepper
1/2 teaspoon sea salt
3 cloves garlic, minced
1 cup heavy cream
1/2 cup chicken broth
2 fresh lemons (one juiced, one sliced)
Fresh parsley for garnish
Directions
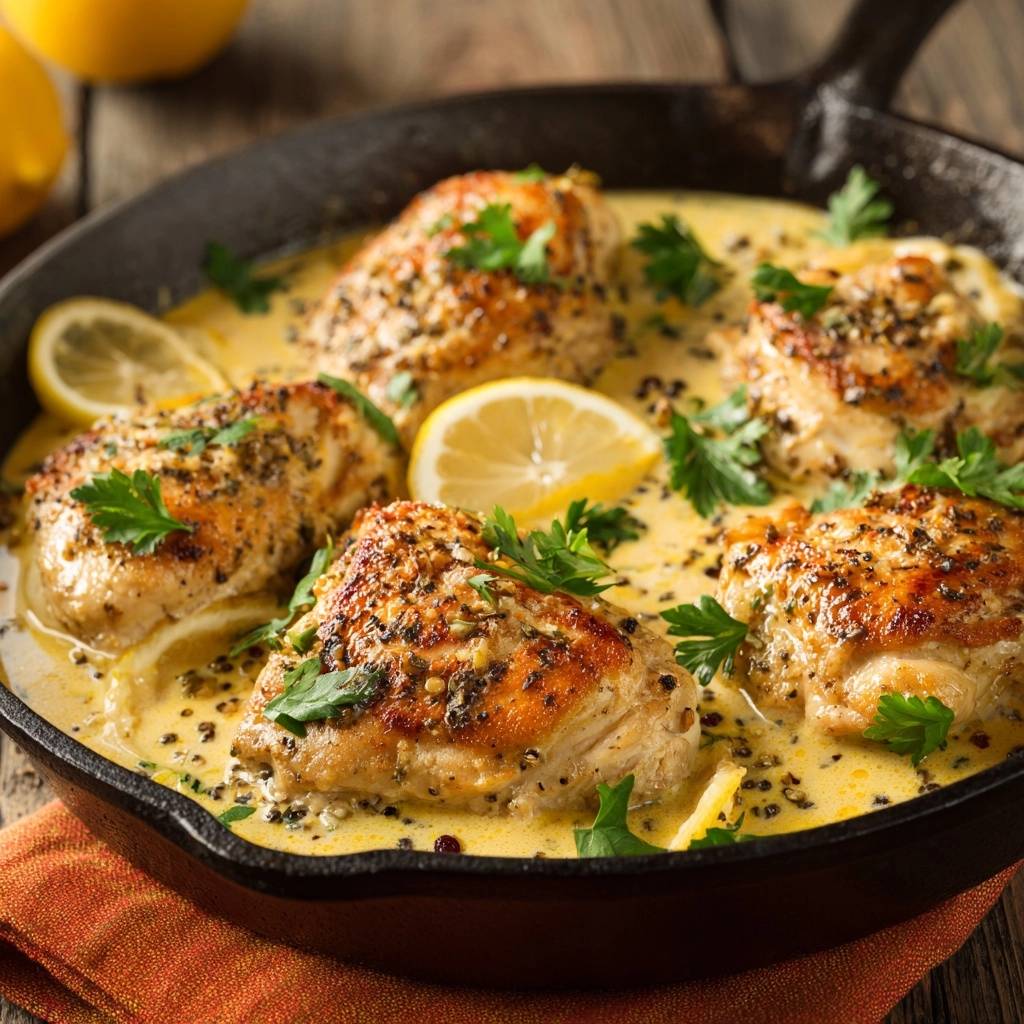
- Pat the chicken thighs extremely dry with paper towels. This is the first step to avoiding soggy skin. Season the meat side with salt and pepper, but season the skin side heavily with the dried herb blend, salt, and cracked pepper to create the herb-crusted visual seen in the image.
- Place a large cast iron skillet over medium-high heat with the olive oil. Once the oil is shimmering but not smoking, place the chicken skin-side down.
- To solve the soggy skin problem, do not move the chicken for at least 8 to 10 minutes. Press down slightly with a spatula to ensure full contact. This renders the fat and creates a structural, herb-flecked crust that resists moisture later.
- Flip the chicken once the skin is deep golden brown and crispy. Cook for another 5 to 7 minutes until the internal temperature reaches 165°F (74°C). Remove the chicken from the pan and set it aside on a wire rack (not a plate) to keep the skin crisp.
- Lower the heat to medium. Add the minced garlic to the remaining pan drippings and cook for 1 minute until fragrant. Pour in the chicken broth and lemon juice, scraping the bottom of the pan with a wooden spoon to release the flavorful browned bits (deglazing).
- Stir in the heavy cream and bring to a gentle simmer. Let the sauce reduce for 4 to 5 minutes until it thickens into a rich, yellow velvet consistency that coats the back of a spoon.
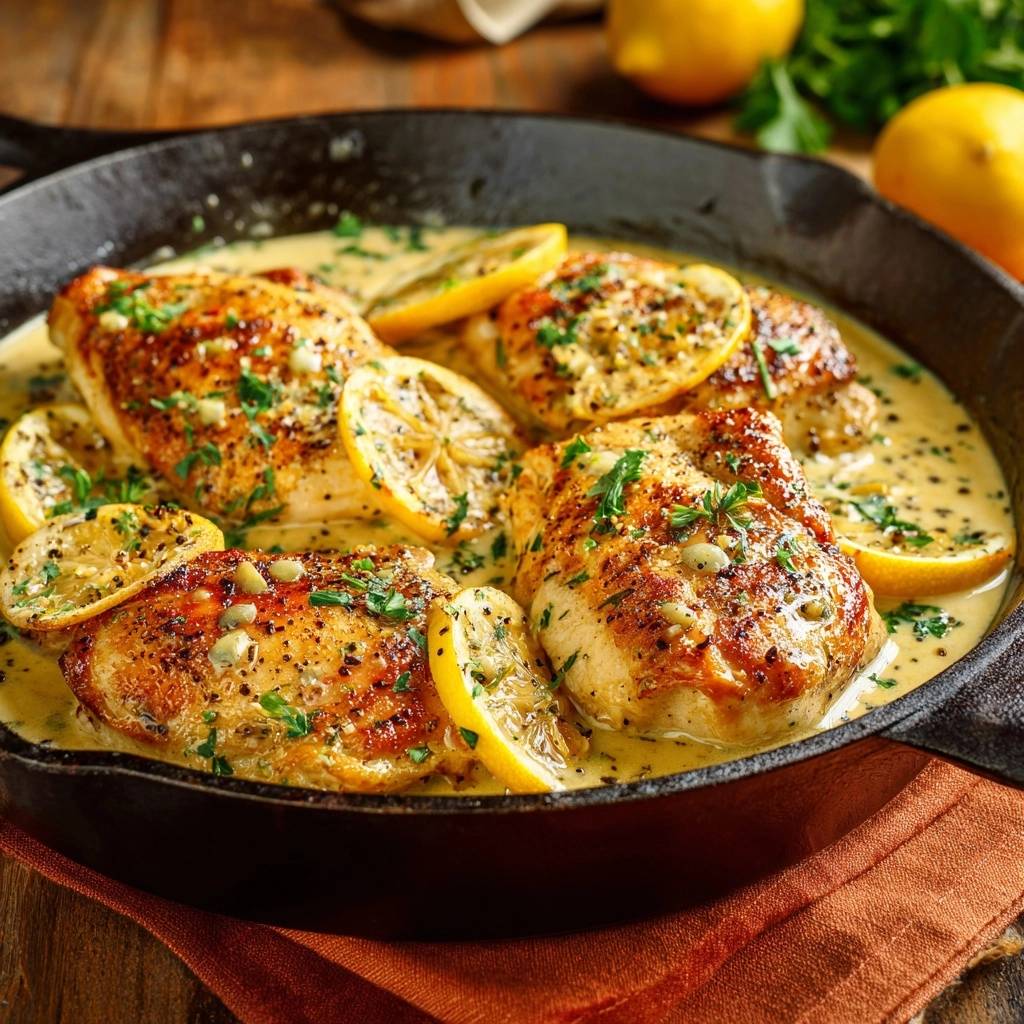
- Carefully nestle the chicken back into the pan, but here is the trick: do not submerge the skin. The sauce should only reach halfway up the sides of the chicken. Arrange the fresh lemon slices in the sauce between the thighs.
- Simmer for 1 minute just to marry the flavors. Garnish generously with fresh parsley leaves as shown in the image and serve immediately while the skin remains perfectly crunchy.
Notes
- To maintain maximum crunch, rest the cooked chicken on a wire rack instead of a plate while preparing the sauce, and ensure the sauce never covers the top of the skin when re-adding the meat to the pan.