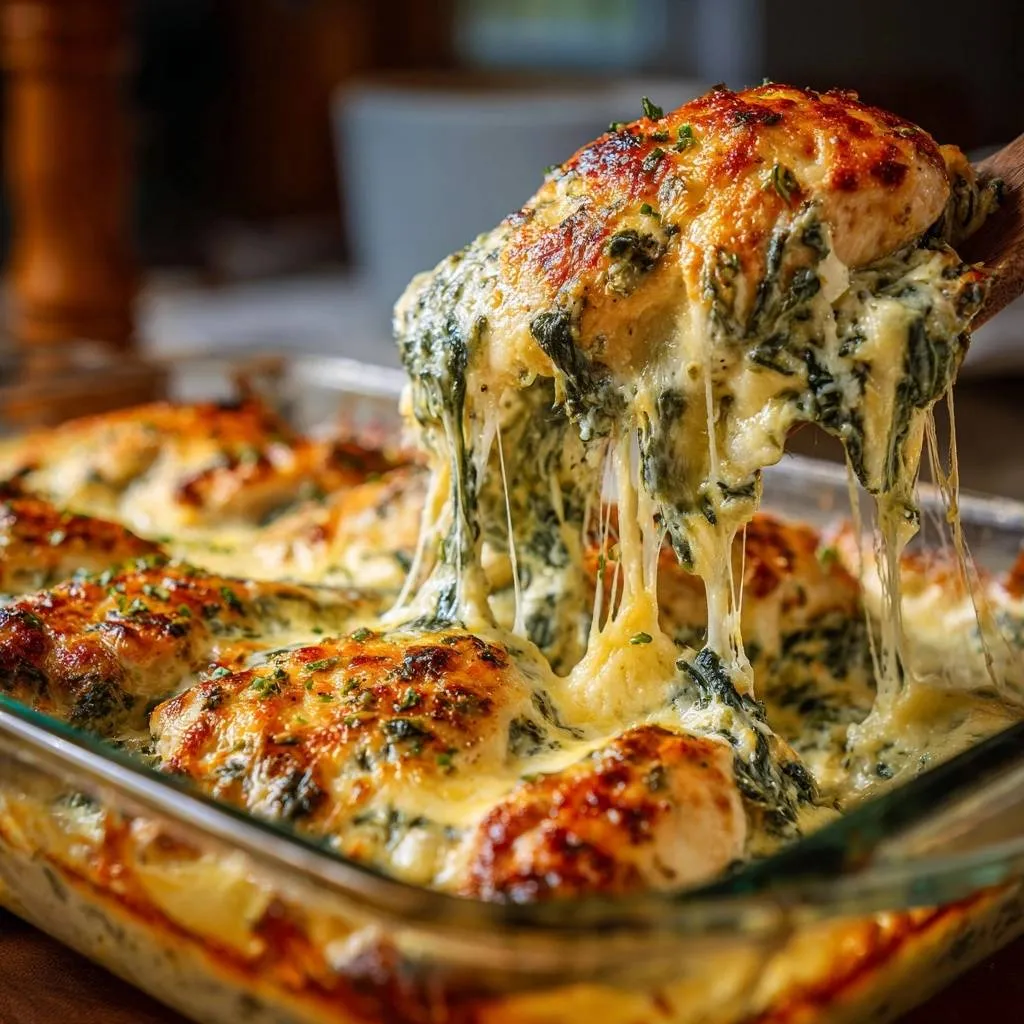
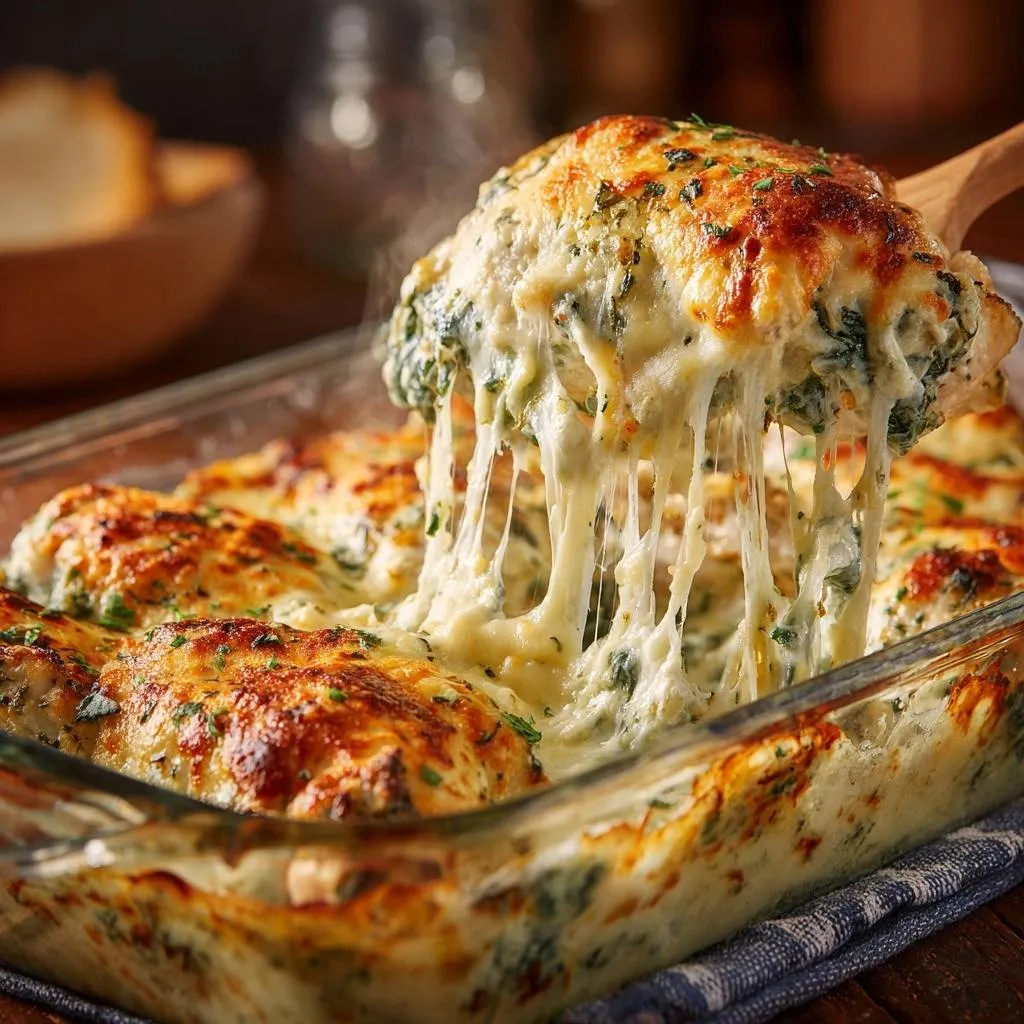
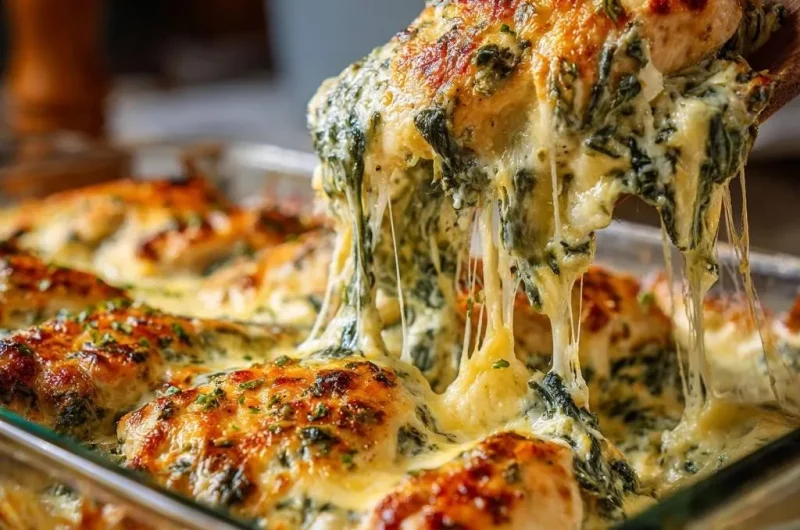
Imagine the most indulgent, velvety spinach artichoke dip you’ve ever tasted, but transformed into a hearty, protein-packed dinner. This Creamy Spinach Artichoke Baked Chicken takes those classic, savory flavors and turns them into a main course that feels like a celebration. However, many home cooks struggle with the dreaded “soupy plate” syndrome, where the chicken sits in a pool of thin, bland liquid.
The secret to a restaurant-quality result lies in moisture management and heat control. By focusing on specific technical steps, you can ensure the sauce stays thick and clings to every bite of the meat. We’re going to dive deep into the mechanics of searing and vegetable prep to make sure your dinner is nothing short of spectacular.
I’ve found that the absolute key to success is the “bone-dry” spinach technique. If you skip the manual wringing of your greens, that hidden water will release in the oven and break your beautiful cream sauce. Let’s look at how to lock in flavor and keep that texture perfectly thick.
The Science of Preventing Watery Chicken Casseroles
When you bake chicken, the proteins in the meat contract as they heat up, which naturally squeezes out moisture. If you place raw chicken directly into a baking dish with a cream sauce, that released liquid has nowhere to go but into your sauce. This dilution is why many casseroles end up thin and unappealing.
Furthermore, vegetables like spinach and artichokes are naturally high in water content. Through the process of osmosis, salt in your seasoning draws even more water out of these ingredients during the cooking process. To combat this, we use a two-pronged approach: mechanical dehydration and searing.
Searing the chicken over high heat creates a Maillard reaction, forming a flavorful crust that helps manage the surface moisture. Meanwhile, manually removing water from the vegetables ensures that the only liquid in your baking dish is the rich, fatty emulsion of the cheese and sour cream.
Why Frozen Spinach Requires Mechanical Extraction
Frozen spinach is a pantry hero, but it’s also a hidden water bomb. When spinach is frozen, the water inside the plant cells expands and ruptures the cell walls. Once thawed, all that internal moisture is ready to leak out into your recipe.
Unlike fresh spinach, which wilts slowly, thawed frozen spinach is already structurally compromised. You must use a clean kitchen towel or cheesecloth to wring it out with significant force. You’ll be shocked at how much green liquid comes out, but removing it is the only way to keep your sauce velvety.
The Role of Emulsifiers in a Stable Cream Sauce
Cream cheese and sour cream aren’t just there for flavor; they act as the structural base for your topping. These dairy products contain fats and proteins that help emulsify the juices from the chicken as it finishes cooking in the oven.
I always recommend using full-fat versions for this specific dish. Low-fat or “light” dairy products often contain more water and stabilizers that are prone to “breaking” or curdling at high temperatures. Full-fat dairy stays stable at 400°F, resulting in a smooth, glossy finish that looks as good as it tastes.
Essential Components for Creamy Spinach Artichoke Baked Chicken
Every ingredient in this dish serves a specific purpose beyond just filling the pan. The smoked paprika, for instance, provides a subtle earthiness and a hint of color that cuts through the heavy richness of the mozzarella. It adds a layer of complexity that makes the dish taste like it came from a professional kitchen.
The combination of mozzarella and parmesan is also intentional. While mozzarella provides that iconic, gooey cheese pull we all crave, parmesan brings the “bite.” Its salty, nutty profile seasons the sauce from within, ensuring the flavor isn’t lost under all that creaminess.
Don’t overlook the garlic and onion powders, either. Because we are baking this relatively quickly, these powders distribute flavor more evenly through the cheese mixture than fresh aromatics might. They provide a consistent savory backbone to every single forkful.
Selecting and Prepping the Poultry
For the best results, look for chicken breasts that are relatively uniform in size. If you have one breast that is much thicker than the others, it will take longer to cook, which might lead to the cheese topping burning before the meat is safe to eat.
I suggest lightly pounding the thickest part of the breast with a meat mallet or the bottom of a heavy skillet. This ensures even cooking across the entire dish. Also, always pat the meat dry with paper towels before seasoning to help the spices stick and the sear to form quickly.
The Artichoke Factor: Marinated vs. Canned
While canned artichokes work in a pinch, marinated artichoke hearts are the superior choice here. They are usually packed in oil, vinegar, and herbs, which adds a necessary acidic brightness to the dish. This acidity is crucial for balancing the heavy fats in the cream cheese and mozzarella.
If you do use canned artichokes, make sure to drain them thoroughly and perhaps add a tiny squeeze of lemon juice to the mix. You want that tangy contrast to keep the dish from feeling too “one-note” or overly heavy on the palate.
Step-by-Step: Achieving the Perfect Golden Sear
The sear is where the flavor begins. When you drop that seasoned chicken into a hot, oiled skillet, you should hear a loud, aggressive sizzle. This is the sound of the Maillard reaction, where amino acids and sugars transform into hundreds of different flavor compounds.
We only want to sear the chicken for about 3 minutes per side. You aren’t trying to cook it all the way through at this stage. Instead, you’re looking for a beautiful golden-brown crust. This crust acts as a barrier and adds a savory depth that baking alone simply cannot replicate.
Using an oven-safe skillet, like cast iron, is a great way to minimize cleanup. However, if you don’t have one, just transfer the seared breasts to a standard baking dish. The goal is to keep that heat high and the process moving quickly so the meat stays juicy.
Constructing the Spinach Artichoke Topping
Mixing the topping is where the magic happens. Once your spinach is bone-dry and your artichokes are chopped, fold them into the softened cream cheese and sour cream. It should be a thick, spreadable paste that holds its shape easily.
When you spread this mixture over the seared chicken, be generous. You want to create a thick “blanket” that completely covers the top of the meat. This layer acts as insulation, keeping the chicken tender while the flavors meld together in the heat of the oven.
The final sprinkle of mozzarella on top is what creates that irresistible crust. By layering the cheese this way, you get a creamy interior and a crispy, bubbly exterior. It’s the best of both worlds in every bite.
The Baking Phase: Temperature and Timing
We bake this dish at 400°F because it’s the “sweet spot” for poultry. This high temperature allows the cheese to melt and bubble rapidly while the chicken finishes cooking before it has a chance to dry out. It’s a fast, efficient way to get dinner on the table.
Keep an eye on the clock, as 15 to 20 minutes is usually all it takes after the initial sear. You’re looking for the chicken to reach an internal temperature of 165°F. At this point, the juices should run clear, and the topping should be molten and fragrant.
For more cheesy chicken goodness, check out this cheesy chicken stromboli.
The Broiler Method for a Bubbly Crust
If your cheese isn’t quite as brown as you’d like after 20 minutes, the broiler is your best friend. Switch it on for the last 2 minutes of cooking, but do not walk away! The sugars in the dairy can go from perfectly golden to burnt in a matter of seconds.
Watch for those beautiful “leopard spots” of deep brown across the mozzarella. This adds a smoky, toasted flavor to the cheese that elevates the entire experience. Once you see those bubbles popping and browning, pull it out immediately.
Resting the Meat for Sauce Stability
Patience is a virtue, especially when it comes to creamy casseroles. Let the dish rest for at least 5 minutes before you even think about cutting into it. This allows the muscle fibers in the chicken to relax and reabsorb their natural juices.
More importantly, the cheese sauce needs this time to “set.” As the temperature drops slightly, the emulsion stabilizes. If you cut into it immediately, the sauce might run across the plate. After a short rest, it will stay thick and perfectly coat every slice of chicken.
Flavor Variations and Ingredient Swaps
This recipe is a fantastic canvas for your own culinary creativity. If you want to add a punch of umami, try mixing in some finely chopped sun-dried tomatoes. Their concentrated sweetness and chew provide a lovely contrast to the creamy greens.
For a more sophisticated, nutty profile, you could swap the mozzarella for Gruyère or Fontina cheese. These cheeses melt beautifully and offer a more complex flavor than standard mozzarella. If you like a bit of heat, a teaspoon of red pepper flakes stirred into the cream cheese mixture adds a wonderful warmth.
You can also experiment with the greens. While spinach is the classic choice, finely chopped kale or even Swiss chard can work. Just remember that tougher greens might need a quick sauté before being added to the cheese mixture to ensure they are tender.
Optimal Side Dish Pairings
Because this dish is so rich and creamy, I love pairing it with something bright and acidic. A simple arugula salad tossed with a sharp lemon vinaigrette is the perfect palate cleanser. The peppery greens cut right through the heavy cheese sauce.
If you’re looking for something more substantial, roasted garlic cauliflower mash is a fantastic low-carb option that soaks up any extra sauce. Alternatively, some simple roasted asparagus or steamed green beans with a touch of sea salt provide a nice crunch and a pop of color to the plate.
Avoid overly heavy sides like buttered pasta or thick gravies. You want the chicken to be the star of the show, so keep the accompaniments light and fresh to balance out the indulgence of the spinach artichoke topping.
Troubleshooting Common Preparation Hurdles
If you find that your sauce is still a bit thinner than you’d like, don’t panic. You can carefully drain a little of the excess liquid from the corner of the pan and whisk in a tiny bit of cornstarch before drizzling it back over the top. However, if you followed the wringing and searing steps, this shouldn’t be necessary.
If your chicken ends up a bit dry, it’s likely because it was overcooked. Next time, use a meat thermometer to pull the chicken out exactly at 165°F. Remember that carryover cooking will continue to raise the temperature by a few degrees while the meat rests.
Sometimes the cheese can look oily rather than creamy. This usually happens if the oven was too hot or if you used pre-shredded cheese with too many additives. Stick to high-quality blocks of cheese and grate them yourself for the smoothest melt possible.
Managing Leftovers and Reheating Techniques
Leftovers store beautifully in an airtight container in the refrigerator for up to three days. However, reheating requires a bit of care. The microwave is often the enemy of cream sauces because it heats unevenly, which can cause the fats to separate and become greasy.
For the best results, reheat the chicken in a covered skillet over low heat with a splash of milk or water. This creates a gentle steam that thins the sauce just enough to make it creamy again without breaking the emulsion. You can also use a low-heat oven (around 300°F) until warmed through.
Expert Tips for Professional Results
To truly master this dish, always grate your cheese from a block. Pre-shredded cheeses are coated in potato starch or cellulose to prevent clumping in the bag, but these coatings also prevent the cheese from melting into a smooth, cohesive sauce.
Use a digital meat thermometer to take the guesswork out of the process. Chicken is safe at 165°F, and pulling it at exactly the right moment ensures maximum juiciness. It’s the single best investment you can make for your kitchen.
Finally, don’t skip the fresh parsley at the end. While dried herbs have their place, the fresh aromatic lift of chopped parsley adds a brightness that wakes up all the heavy, savory flavors. It makes the dish look beautiful and taste incredibly fresh.
How do I store leftovers and does this freeze well?
Store any leftovers in an airtight container in the refrigerator for up to 3 days. I do not recommend freezing this dish once it has been baked. The cream cheese and sour cream base can change texture significantly when frozen and thawed, often becoming grainy or separating into an oily mess.
Why was my sauce still watery even after wringing the spinach?
If the sauce is watery, it usually means the chicken wasn’t seared long enough or the artichokes weren’t drained properly. The sear creates a barrier that helps manage the release of juices. Also, ensure you are using full-fat dairy, as “light” versions have a much higher water content that releases during baking.
Can I use fresh spinach instead of frozen?
Yes, you can use fresh spinach, but you must sauté it first until it is completely wilted. Once sautéed, you still need to squeeze out the excess moisture just like you would with frozen spinach. If you put raw fresh spinach into the cheese mix, it will release all its water during the bake and ruin the sauce consistency.
What can I use if I don’t have sour cream?
Full-fat Greek yogurt is an excellent substitute for sour cream. It provides a similar tang and creamy texture. Just make sure it is plain and unsweetened. You could also use heavy cream in a pinch, though the sauce will be slightly less thick and tangy.
How do I prevent the cheese from burning under the broiler?
The key is to stay right by the oven. Set a timer for 60 seconds and check it. The high fat content in mozzarella and parmesan means they can go from golden to black very quickly. If your oven has a “low” broiler setting, use that for more control.
Can I use chicken thighs instead of breasts?
Absolutely! Boneless, skinless chicken thighs are very forgiving and stay incredibly juicy. Since they are usually smaller and thinner than large breasts, you may need to reduce the baking time by 5 minutes. Just ensure they reach an internal temperature of 165°F.
Spinach Artichoke Baked Chicken
Course: Main CourseCuisine: AmericanDifficulty: easy4
servings15
minutes25
minutes650
kcal40
MinutesThis recipe solves the problem of watery baked chicken dishes. By wringing the spinach bone-dry and searing the chicken breasts before baking, you create a rich, stable sauce that clings to the meat. Topped with a blend of cream cheese, artichokes, and melted mozzarella.
Ingredients
4 large boneless skinless chicken breasts
10 ounces frozen chopped spinach, thawed and squeezed bone-dry
1 cup marinated artichoke hearts, drained and finely chopped
8 ounces cream cheese, softened
1/2 cup sour cream
1/2 cup grated parmesan cheese
2 cups shredded mozzarella cheese
1 tablespoon garlic powder
1 teaspoon onion powder
1/2 teaspoon smoked paprika
2 tablespoons olive oil
Salt and black pepper to taste
2 tablespoons fresh parsley, finely chopped (for garnish and mixing)
Directions
- Preheat your oven to 400 degrees F (200 degrees C).
- The secret to avoiding a watery sauce is the spinach. Place the thawed spinach in a clean kitchen towel and wring it out with all your strength until no more liquid drips out. Set the dry spinach aside.
- In a medium bowl, combine the softened cream cheese, sour cream, parmesan, 1 cup of the mozzarella, the dry spinach, chopped artichokes, and half of the fresh parsley. Mix until smooth and thick.
- Season the chicken breasts on both sides with salt, pepper, garlic powder, onion powder, and paprika.
- Heat olive oil in a large oven-safe skillet over medium-high heat. Sear the chicken for 3 minutes per side until a golden-brown crust forms. This seals the exterior and prevents the chicken juices from thinning out your sauce during the baking process.
- Transfer the seared chicken to a baking dish. Spread a very thick, generous layer of the spinach artichoke mixture over the top of each breast, ensuring the meat is fully covered.
- Top with the remaining 1 cup of mozzarella cheese.
- Bake for 15 to 20 minutes. For the specific deep-golden, bubbly crust shown in the image, turn the broiler on for the last 2-3 minutes of cooking, watching closely to prevent burning.
- Remove from the oven when the chicken reaches an internal temperature of 165 degrees F. Let the dish rest for 5 minutes before serving. This allows the cheese and cream base to set perfectly. Garnish with the remaining fresh parsley and serve.
Notes
- The secret to the thick sauce is wringing the spinach in a kitchen towel until completely dry. Searing the chicken first prevents juices from thinning the sauce. Let the dish rest for 5 minutes after baking to allow the cheese base to set.