We’ve all been there. You pull a beautiful, bubbling tray of pasta out of the oven, only to find a puddle of green-tinted water lurking at the bottom of the dish. It’s heartbreaking. Most recipes fail because they don’t account for the massive water content in fresh greens. When that spinach hits the hot oven, it releases its moisture, effectively watering down your expensive cheddar and turning a velvety sauce into a thin soup.
The culinary physics are simple: spinach is about 90% water. If you don’t manage that moisture before it hits the pan, your sauce never stands a chance. This recipe solves that problem with a specific “Moisture-Lock” method. We aren’t just tossing leaves into a pot; we’re prepping them to stay integrated with the cheese so every bite remains rich and stable.
For similar results preventing mushy textures, check out this creamy tomato tortellini soup.
The secret to this professional-grade texture is the combination of a stabilized roux and a quick-wilt technique. By using the boiling pasta water to flash-cook the spinach, we bypass the soggy-bottom syndrome entirely. I’ve found that this extra sixty seconds of effort makes the difference between a side dish and a centerpiece. You’ll get a sauce that clings to the noodles with a thick, glossy finish that stays perfect even as it cools.
The Architecture of a Perfect Cheese Sauce
A truly great mac and cheese relies on a Mornay sauce, which is just a fancy way of saying a white sauce with cheese added. We start with a roux of butter and flour. This creates the structural foundation that keeps the milk from separating. When you whisk in your milk, do it slowly. This “tempering” process ensures the flour particles hydrate evenly, preventing those annoying floury lumps that ruin the mouthfeel.
However, the real insurance policy in this recipe is the cream cheese. While cheddar provides the flavor, it can be temperamental under high heat. Cheddar has a tendency to “break,” which is when the fat separates from the solids, leaving you with an oily mess. The cream cheese acts as a stabilizer. Its emulsifiers keep the sharp cheddar and parmesan in a state of permanent silkiness, ensuring the sauce stays creamy even after twenty minutes in a hot oven.
Why Cavatappi Outperforms Standard Elbow Macaroni
While elbow macaroni is the traditional choice, cavatappi is the superior vehicle for a heavy, spinach-laden sauce. These corkscrew-shaped noodles have a much larger surface area and deep ridges that act like little traps for the cheese. When you have chopped spinach in the mix, you need a noodle that can hold onto the greens rather than letting them slide to the bottom of the bowl.
Texture is everything here, so you must boil the pasta for exactly two minutes less than the box says. This is non-negotiable. The pasta will continue to absorb moisture and cook while it’s submerged in the cheese sauce in the oven. If you start with fully soft noodles, you’ll end up with a mushy casserole. You want that “al dente” bite to provide a structural contrast to the creamy sauce.
Essential Components for Creamy Spinach Mac and Cheese
Quality ingredients are the difference between a bland meal and a restaurant-quality experience. I always recommend sharp white cheddar over mild versions. Sharp cheddar has been aged longer, meaning it has a lower moisture content and a much more punchy, complex flavor that doesn’t get lost when mixed with milk and flour. If you use mild cheddar, the spinach will likely overpower the cheese entirely.
Then there’s the nutmeg. It might seem like a strange addition to a savory pasta, but it’s the secret weapon of French béchamel. Nutmeg doesn’t make the dish taste like dessert; instead, it highlights the nuttiness of the parmesan and cuts through the richness of the whole milk. Speaking of milk, stick with whole milk. The fat content is necessary to create a sauce that is thick enough to coat the spinach leaves without sliding off.
Finally, let’s talk about the cheese prep. If you can, grate your cheddar from a block. Pre-shredded cheeses are coated in potato starch or cellulose to keep them from clumping in the bag. That coating prevents the cheese from melting smoothly into your sauce. For the smoothest results, a box grater and five minutes of elbow grease are your best friends.
Selecting and Prepping Your Greens
Fresh baby spinach is the only way to go for this dish. It has a delicate texture and a mild sweetness that blends perfectly with the cheddar. While you could use larger, mature spinach, it tends to be more fibrous and requires removing the tough stems. Baby spinach can be chopped whole, stems and all, saving you time and providing a more uniform texture.
You might be tempted to use kale or Swiss chard, but be warned: those greens are much heartier. They require a longer sauté before they become tender enough for a creamy pasta. If you stick with baby spinach, the quick-wilt method we use will give you the perfect “melt-in-your-mouth” consistency without any bitterness.
The Moisture-Lock Technique: Eliminating Soggy Pasta
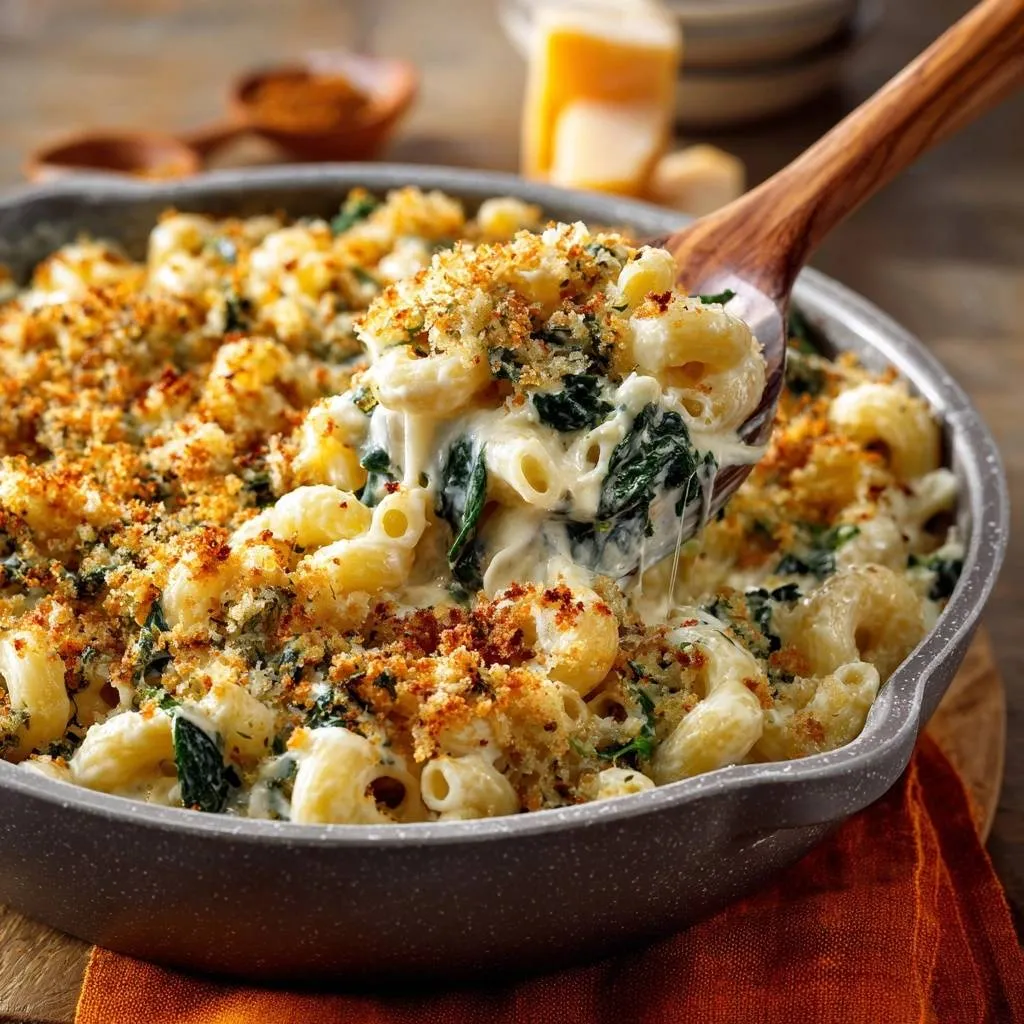
This is the most important part of the entire process. To achieve the “Moisture-Lock,” you place your chopped raw spinach in a large colander. When your pasta is done, you pour the entire pot of boiling water and noodles directly over the greens. This heat instantly wilts the spinach, but because it’s a quick flash of heat, the spinach retains its vibrant green color and fresh flavor.
But we don’t stop there. Once the water has drained, you must take a clean kitchen towel or several heavy-duty paper towels and physically squeeze the spinach and pasta mixture. You’ll be surprised at how much green liquid comes out. By removing this excess water now, you ensure that the only liquid in your baking dish is the rich, creamy cheese sauce you worked so hard to build. This step is the difference between a watery failure and a professional success.
Step-by-Step: Constructing the Ultimate Casserole
The construction phase begins with building your sauce in a heavy-bottomed pan or a cast-iron skillet. Once your roux is cooked and the milk is whisked in, you’re looking for “nappe consistency.” This is a chef’s term meaning the sauce is thick enough to coat the back of a spoon so that when you run your finger through it, the line stays clean. This thickness is vital because it ensures the sauce won’t just run off the noodles.
Once the sauce is thick and the cheeses are melted in, it’s time for the assembly. Gently fold your bone-dry spinach and pasta into the skillet. Use a large spatula and a folding motion rather than aggressive stirring. You want to coat every single nook and cranny of the cavatappi without breaking the delicate corkscrew shapes. The sauce should look almost too thick at this stage; don’t worry, it will loosen slightly in the oven.
After the pasta is coated, smooth the top with your spatula. If you’re using a cast-iron skillet, you can go straight from the stovetop to the oven, which saves on dishes and keeps the heat consistent. If not, transfer the mixture to a buttered baking dish. The goal is to get the dish into the oven while the sauce is still warm to jumpstart the bubbling process.
For another take on baked comfort, explore Southern baked mac and cheese.
Achieving the Shatter-Crisp Panko Topping
A creamy interior needs a crunchy exterior for balance. We use Panko breadcrumbs because they are flakier and larger than standard breadcrumbs, which leads to a much better crunch. Mixing them with olive oil and parmesan is the key to the Maillard reaction—that beautiful chemical process that creates a deep, golden-brown crust and savory flavor.
I also add a touch of smoked paprika to the topping. It provides a gorgeous copper color and a hint of woodsy depth that complements the sharp cheddar. When you sprinkle the topping, make sure to go all the way to the edges. Those edge bits where the cheese bubbles up and meets the crispy crumbs are often the best parts of the entire meal.
Troubleshooting Common Mac and Cheese Obstacles
If you find your sauce is getting too thick before you’ve even added the cheese, don’t panic. Simply whisk in a splash more milk or a tablespoon of the reserved pasta water. The starch in the pasta water helps keep the sauce cohesive. On the flip side, if your cheese seems to be clumping instead of melting, your heat is likely too high. Remove the pan from the burner entirely and let the residual heat do the work.
Another common issue is a “grainy” texture. This usually happens if the sauce gets too hot after the cheese is added. Cheese is an emulsion of fat and protein; if it gets too hot, the proteins tighten up and squeeze out the fat, creating a gritty feel. Always turn your heat to the lowest setting (or off) before folding in your shredded cheddar to keep things velvety smooth.
Make-Ahead Strategies and Storage Solutions
You can definitely prep this dish 24 hours in advance, which makes it perfect for dinner parties. However, there is a trick to it. If you assemble it and let it sit, the pasta will act like a sponge and soak up all the sauce, leaving you with a dry bake. To prevent this, make the sauce slightly thinner than usual if you plan to refrigerate it overnight. Store the breadcrumb topping separately and only add it right before you slide the dish into the oven.
For leftovers, the microwave is fine, but the oven is better. To reheat in the microwave, add a tiny splash of milk to the bowl and cover it to create steam. This helps re-emulsify the sauce. If you have time, reheating a portion in a 350°F oven for 10-15 minutes will help restore that signature crunch to the Panko topping.
Freezing and Thawing for Future Meals
Freezing dairy-based sauces can be tricky because the fat often separates during the thawing process. If you want to freeze this, I recommend doing so before the final bake. Wrap the dish tightly in plastic wrap and then foil to prevent freezer burn. When you’re ready to eat, let it thaw completely in the refrigerator for 24 hours before baking.
If the sauce looks a little grainy after thawing, don’t worry. The heat of the oven and a good stir halfway through the baking process (before you add the topping) can often bring the emulsion back together. Freezing in individual portions is also a great way to have a high-quality meal ready for busy weeknights.
Optimal Pairings for a Rich Pasta Main
Since this mac and cheese is incredibly rich and savory, you want side dishes that offer a bright, acidic contrast. A simple arugula salad with a sharp lemon vinaigrette is my personal favorite. The peppery bite of the greens and the hit of acid from the lemon cut right through the heavy cheddar and cream cheese.
Roasted root vegetables, like carrots or parsnips with a bit of honey and balsamic vinegar, also work beautifully. The sweetness of the roasted veggies balances the saltiness of the parmesan. If you’re feeling extra indulgent, a piece of crusty artisanal sourdough is perfect for swiping up any extra cheese sauce left on your plate.
Expert Tips for Customizing Your Flavor Profile
Once you master the base technique, you can start playing with the flavors. For a nuttier, more sophisticated profile, try swapping half of the cheddar for Gruyère or Fontina. These Swiss-style cheeses melt beautifully and add a layer of complexity that feels very “French bistro.” Just remember to keep the cream cheese in the mix to maintain that stability.
More Creamy Spinach Goodness
If you’re enjoying this creamy spinach mac and cheese, you might also like these other spinach-focused treats.
- For more savory pastry bites, try these spinach and feta puff pastry pinwheels that share a similar flavor profile.
- If you’re after another cheesy, baked spinach delight, check out these cheesy spinach puffs for a flaky experience.
If you like a bit of tang, add a teaspoon of dry mustard powder to your roux. It’s a classic addition that brightens the entire dish without adding heat. For those who love garlic, roasting a whole head of garlic and squeezing the soft cloves into the milk as it simmers will create a deep, caramelized sweetness that pairs perfectly with the spinach. No matter what changes you make, always stick to the moisture-lock technique for the greens!
Frequently Asked Questions
Can I use frozen spinach instead of fresh?
Yes, you can use frozen spinach, but you must be extremely diligent about draining it. Thaw the spinach completely and then squeeze it in a kitchen towel until it is bone-dry. Frozen spinach is much more concentrated than fresh, so use about 6-8 ounces of frozen to replace the 10 ounces of fresh. Be aware that the texture will be softer and less “leafy” than fresh spinach.
Why did my cheese sauce turn out grainy?
Graininess usually happens for two reasons: using pre-shredded bagged cheese or overheating the sauce. Bagged cheese is coated in cellulose which doesn’t melt. If you used block cheese and it’s still grainy, the heat was likely too high when you added the cheese, causing the proteins to clump. Next time, remove the sauce from the heat entirely before stirring in your cheddar.
Can I make this recipe gluten-free?
Absolutely. Use a high-quality gluten-free flour blend for the roux and your favorite gluten-free short pasta. I recommend a brown rice-based pasta as it tends to hold its shape better during baking than corn-based versions. For the topping, use gluten-free Panko or crushed gluten-free crackers to maintain that essential crunch.
What is the best substitute for nutmeg?
If you don’t have nutmeg, mace is the closest relative and works perfectly. If you have neither, a tiny pinch of allspice or even a half-teaspoon of dry mustard can provide a similar depth of flavor. If you prefer to leave it out entirely, the dish will still be delicious, though it will lose that classic “French” finish.
How do I get a darker crust without burning the cheese?
If your mac and cheese is bubbling but the top isn’t as brown as you’d like, move your oven rack to the top third of the oven for the last 5 minutes of baking. You can also turn on the broiler for 60-90 seconds, but watch it like a hawk! Panko goes from golden to burnt in a matter of seconds under the broiler.
How long will leftovers stay fresh in the fridge?
When stored in an airtight container, this mac and cheese will stay delicious for 3 to 4 days. Because of the spinach, you might notice a small amount of green liquid at the bottom after a few days; this is normal. Just give it a good stir when reheating to incorporate everything back into the sauce.
Spinach Mac and Cheese
Course: Main CourseCuisine: AmericanDifficulty: medium6
servings15
minutes25
minutes510
kcal40
MinutesThis elevated comfort food dish combines cavatappi pasta with a rich blend of sharp white cheddar, parmesan, and cream cheese. By using a specific wilting and drying method for the spinach, this recipe guarantees a stable, creamy texture that won’t get soggy in the oven.
Ingredients
1 pound cavatappi or large elbow macaroni
10 ounces fresh baby spinach, roughly chopped
3 cups shredded sharp white cheddar cheese
1 cup grated parmesan cheese, divided
4 ounces cream cheese, softened (for extra silkiness and stability)
3 cups whole milk
4 tablespoons unsalted butter
1/4 cup all-purpose flour
1 1/2 cups Panko breadcrumbs
2 tablespoons olive oil
1 teaspoon garlic powder
1/2 teaspoon smoked paprika
1/4 teaspoon ground nutmeg
Salt and black pepper to taste
Directions
- Preheat your oven to 400°F (200°C). Boil the pasta in heavily salted water for 2 minutes less than the package directions for al dente. The pasta should have a firm bite to prevent it from becoming mushy during the bake.
- The Moisture-Lock Step: Place the chopped raw spinach in a large colander in the sink. When the pasta is finished, pour the boiling pasta water and noodles directly over the spinach. This wilts the spinach instantly without overcooking it. Drain thoroughly, then transfer the spinach and pasta to a clean kitchen towel or heavy paper towels and pat/squeeze firmly to remove every drop of excess water. This is the secret to preventing a watery sauce.
- In a large oven-safe cast iron skillet or heavy-bottomed pan, melt the butter over medium heat. Whisk in the flour and cook for 1-2 minutes until fragrant but not browned.
- Slowly whisk in the milk, a little at a time, stirring constantly to prevent lumps. Simmer until the mixture thickens enough to coat the back of a spoon.
- Reduce heat to low. Whisk in the cream cheese until melted, then stir in the white cheddar and 1/2 cup of the parmesan. Season with garlic powder, nutmeg, salt, and pepper.
- Fold the bone-dry spinach and cooked pasta into the cheese sauce until every noodle is heavily coated.
- In a small bowl, toss the Panko breadcrumbs with olive oil, smoked paprika, and the remaining 1/2 cup of parmesan cheese.
- Sprinkle the breadcrumb mixture evenly over the skillet.
- Bake for 15 to 20 minutes until the sauce is bubbling at the edges and the breadcrumb topping is deeply golden brown and crispy.
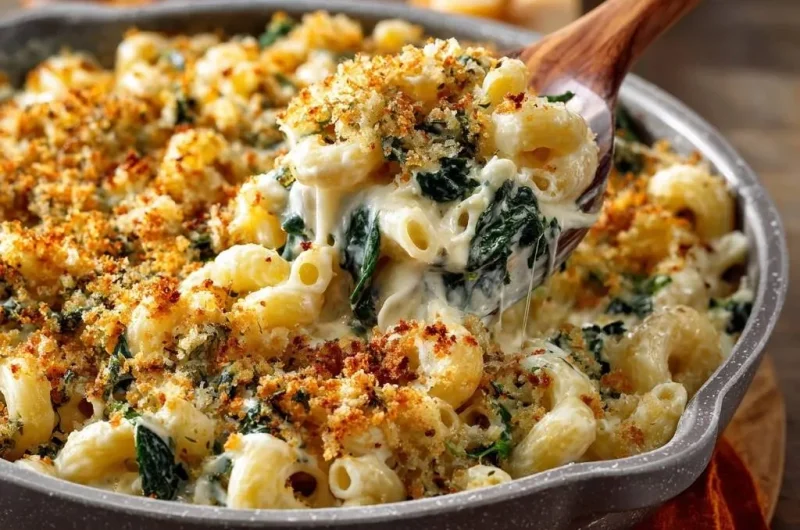
- Let the dish rest for 5 minutes before serving. This allows the starches to settle and the sauce to achieve the perfect “cling” seen in the image.
Notes
- The secret to the ‘Anti-Soggy Bottom’ is the moisture-lock step: ensure you squeeze the wilted spinach and pasta thoroughly to prevent water from thinning the sauce during baking.