Most home cooks have experienced the disappointment of a broken, watery cream sauce. You start with high hopes, but by the time the chicken is done, the sauce has separated into a thin puddle of oil and liquid that slides right off the meat. It’s frustrating because you’ve used expensive ingredients like heavy cream and parmesan, yet the texture just isn’t there.
The secret to a restaurant-quality finish lies in a specific reduction and emulsification technique. By concentrating the base before the dairy ever touches the pan, you create a stable, velvety coating. This recipe ensures your sauce stays thick and glossy, clinging to every inch of the chicken while maintaining a skin so crispy it practically shatters when you bite into it.
For a similar success with a never-watery sauce, check out this creamy spinach pepper chicken.
I’ve found that the real trick is all about the chicken broth reduction. If you add cream to a large volume of thin broth, you’ll never get that rich “nappe” consistency. You have to let that broth boil down until it’s intense and syrupy. This creates a sturdy foundation that allows the fats from the cream and cheese to bind perfectly without splitting.
The Secret to a Non-Watery Cream Sauce
Science plays a huge role in why some sauces fail while others succeed. When you pour heavy cream into a pan full of watery chicken broth, the fat molecules are too diluted to create a thick texture. Therefore, the most important step in this entire process is reducing your chicken broth by at least 50% before you even think about reaching for the cream.
As the water evaporates from the broth, the proteins and flavors become highly concentrated. This reduction acts as a natural thickener. When you finally whisk in the heavy cream and parmesan, they don’t just sit on top of the liquid; they emulsify into it. This creates a stable, glossy emulsion that won’t separate into a greasy mess on your plate.
Furthermore, the parmesan cheese acts as a secondary emulsifier. As the cheese melts into the reduced broth and cream, the proteins in the cheese help hold the fat and water together. The result is a sauce that is thick enough to coat the back of a spoon and rich enough to stand up to the bold flavors of the sun-dried tomatoes.
Essential Components for the Perfect Pan Sauce
Quality ingredients are the backbone of this dish, and it starts with the cut of meat. You really need bone-in, skin-on chicken thighs here. The bone keeps the meat juicy during the simmering process, while the skin provides that essential crunch and renders out flavorful fat that builds the base of your sauce.
Don’t throw away the jar of sun-dried tomatoes once you’ve drained them. That oil is liquid gold. It’s infused with the concentrated essence of the tomatoes and herbs, providing a massive flavor boost when used to sear the chicken. Using a tablespoon of this oil alongside your olive oil adds a layer of complexity you just can’t get from plain oil alone.
When it comes to the cheese, please skip the green shaker bottle or the pre-shredded bags. Pre-shredded cheese is coated in potato starch or cellulose to prevent clumping in the bag, which unfortunately prevents it from melting smoothly into a sauce. Freshly grated parmesan is a must because it melts into the cream instantly, creating that sought-after silky texture.
Why Smoked Paprika Defines the Color
While standard paprika adds a mild sweetness, smoked paprika is the key to that deep, sunset-orange hue you see in professional food photography. It provides a rich, earthy undertone that complements the sweetness of the sun-dried tomatoes. Without it, the sauce can look a bit pale and washed out once the white cream is added.
In addition to the color, the “smoked” element adds a subtle charred flavor that mimics the taste of a wood-fired oven. It bridges the gap between the savory chicken and the bright acidity of the tomatoes. Just a half-teaspoon is enough to transform the visual appeal of the dish from “home-cooked” to “gourmet.”
Fresh Basil vs. Dried Herbs
Timing is everything when it comes to herbs. I like to add the dried oregano early in the process, right when the garlic and tomatoes are sautéing. This allows the heat to “bloom” the dried herb, releasing its oils into the fat so the flavor permeates the entire sauce. Dried herbs need that extra time and heat to wake up.
Fresh basil, however, is delicate and loses its vibrant color and peppery aroma if cooked too long. That’s why we stir half of it in at the very end and save the rest for garnish. The residual heat of the sauce is enough to soften the leaves while keeping their bright green color, providing a beautiful visual contrast to the orange sauce.
Step-by-Step: Searing for Maximum Skin Crispness
To get that perfect crunch, you must start with dry chicken. Use paper towels to pat the skin until there isn’t a drop of moisture left. Moisture is the enemy of crispiness; if the skin is wet, it will steam in the pan rather than fry. Once dry, season it generously with salt and your smoked paprika blend.
Heat your skillet over medium-high heat until the oil is shimmering but not smoking. Place the thighs skin-side down and then—this is the hard part—don’t touch them. You need about 7 to 9 minutes of uninterrupted contact with the heat to render the fat and develop a deep, golden-brown crust. If you try to flip them and they stick, they aren’t ready yet.
Once the skin releases easily from the pan and looks like a crisp cracker, flip them over for a quick sear on the bottom. They won’t be fully cooked through at this point, which is exactly what we want. Remove them to a plate so you can build the sauce in the same pan, capturing all those flavorful drippings left behind.
Building the Base: Deglazing and Reducing
After removing the chicken, you’ll see brown bits stuck to the bottom of the pan. This is called “fond,” and it’s the concentrated essence of roasted chicken and spices. Don’t you dare wash that pan! Sauté your garlic and sun-dried tomatoes in the leftover fat for a minute until the kitchen smells incredible.
Now, pour in the chicken broth. Use a wooden spoon to scrape up every bit of that fond as the liquid bubbles. This process, called deglazing, incorporates all that toasted flavor directly into your sauce base. This is where the magic happens as the broth begins to boil and reduce, turning into a dark, flavorful concentrate.
Wait until the liquid has visibly thickened and reduced by half before moving to the next step. If you skip this, your sauce will be thin and runny. You’re looking for the liquid to become slightly syrupy, which ensures that when the cream is added, the final result will be thick enough to stay exactly where you want it.
The Emulsification Phase: Achieving a Velvety Texture
Turn the heat down to medium-low before adding the heavy cream. High heat is the primary reason cream sauces “split” or curdle. Slowly pour in the cream while whisking constantly. You’ll see the dark reduction swirl into the white cream, creating a beautiful marbled effect before settling into a consistent orange glow.
Next, sprinkle in your freshly grated parmesan. Keep whisking! The goal is to melt the cheese into the liquid so it becomes one cohesive unit. You’ll know it’s ready when the sauce reaches “nappe” consistency. This is a fancy chef term that just means if you dip a spoon in and run your finger across the back, the line stays clean.
If the sauce seems too thick at this stage, you can add a tiny splash of broth to loosen it. However, usually, the moisture released by the chicken as it finishes cooking will thin it out just enough. The texture should be smooth, rich, and completely free of any graininess or oil slicks.
Finishing the Chicken Without Losing the Crunch
Now it’s time to bring the chicken back to the pan. The key here is to “nestle” the thighs into the sauce rather than submerging them. You want the bottom half of the chicken to sit in the cream so it stays tender, but the crispy skin must remain high and dry above the liquid line.
If you cover the skin with sauce, all that hard work you put into searing will be wasted as the skin turns soggy. Let the chicken simmer gently in the sauce for about 5 to 8 minutes. This allows the internal temperature to reach 165°F while the flavors of the sun-dried tomatoes and basil soak into the meat.
Using a meat thermometer is the best way to ensure the chicken is safe to eat without overcooking it. Once it hits the target temp, pull the pan off the heat immediately. The residual heat will keep everything warm while you get your side dishes ready, but it won’t dry out the meat.
Avoiding Common Mistakes with Creamy Sauces
One of the biggest mistakes people make is trying to save calories by using milk or half-and-half. In a reduction sauce like this, the lower fat content in milk almost guarantees the sauce will break or turn watery. Stick with heavy cream; the high fat content is what provides the stability needed for a simmered sauce.
If you find your sauce has become too thick or looks a bit oily, don’t panic. You can usually fix a broken sauce by whisking in a tablespoon of warm water or broth very vigorously. This helps re-emulsify the fats. Also, avoid boiling the sauce once the cheese is in; a gentle simmer is all you need to keep the proteins from tightening up and becoming grainy.
Lastly, make sure you don’t overcrowd the pan. If the chicken thighs are squeezed too tightly together, they will release too much moisture at once, which can steam the skin and thin out the sauce. Use a large enough skillet so there is a little bit of “breathing room” around each piece of chicken.
Optimal Pairings for Sun-Dried Tomato Chicken
Since this sauce is so rich and flavorful, you want side dishes that can act as a sponge. Orzo pasta is a fantastic choice because the tiny grains catch the sauce in every bite. Similarly, a wide noodle like pappardelle or even a simple bed of mashed potatoes works beautifully to soak up the extra cream.
To balance the heaviness of the cream and chicken fat, I always recommend something with a bit of acidity or crunch. A simple arugula salad with a lemon vinaigrette provides a sharp contrast that cleanses the palate. Roasted asparagus or sautéed spinach with a squeeze of fresh lemon also cuts through the richness perfectly.
If you’re a fan of bread, a thick slice of toasted sourdough is mandatory. There is nothing quite like using a piece of crusty bread to swipe up the last bits of sun-dried tomato sauce from the bottom of your plate. It’s the best part of the meal, honestly!
Storage and Reheating for Best Results
Leftovers can be stored in an airtight container in the refrigerator for up to three days. However, be aware that the sauce will thicken significantly as it cools, often turning into a solid gel-like consistency. This is normal and is just the fats and proteins firming up.
When reheating, avoid the microwave if possible. The intense, uneven heat of a microwave usually causes the cream sauce to “break,” leaving you with a puddle of yellow oil. Instead, place the chicken and sauce in a small skillet over low heat. Add a splash of chicken broth or water to help “loosen” the sauce back to its original texture.
Gently warm it through, spooning the sauce over the meat as it heats. While the skin won’t be quite as crispy as it was on day one, the flavor of the sauce actually improves after a day in the fridge as the garlic and sun-dried tomatoes continue to meld. I do not recommend freezing this dish, as the cream texture often becomes grainy once thawed.
Expert Troubleshooting
Can I use chicken breasts instead of thighs?
You can, but you’ll need to be much more careful. Breasts cook faster and dry out easily, and they don’t have the same amount of fat to render into the sauce. If you use breasts, I recommend searing them quickly and checking the internal temperature frequently to ensure they don’t go past 165°F. You may also need to add an extra tablespoon of oil since you won’t have as much rendered chicken fat.
Why is my sauce grainy?
Graininess usually happens for two reasons: the heat was too high when the cheese was added, or you used pre-shredded cheese. If the sauce gets too hot, the proteins in the cheese clump together instead of melting smoothly. To prevent this, always lower the heat to a simmer before adding your freshly grated parmesan and whisk constantly until it’s fully incorporated.
How do I scale this for a dinner party?
If you are doubling the recipe, use two separate pans or cook the chicken in batches. Overcrowding a single pan will prevent the skin from getting crispy and will cause the chicken to release too much liquid, which ruins the reduction process. You can make the sauce in one large pot once the chicken is seared, but ensure you have enough surface area for the reduction to happen efficiently.
Can I use sun-dried tomatoes not packed in oil?
Yes, but you’ll need to rehydrate them first. Soak the dry tomatoes in warm water for about 15 minutes until they are pliable, then pat them dry before sautéing. Keep in mind that you’ll miss out on that flavorful tomato-infused oil from the jar, so you might want to add a pinch more smoked paprika or a dash of tomato paste to compensate for the depth of flavor.
What if my sauce is too salty?
Sun-dried tomatoes and parmesan are both naturally salty, so it’s easy to overdo it. Always taste your sauce before adding extra salt at the end. If it’s already too salty, you can add a small squeeze of lemon juice or a teaspoon of honey. The acidity or sweetness will help balance the saltiness without thinning out the sauce too much.
Chicken Thighs
Course: Main CourseCuisine: AmericanDifficulty: easy4
servings10
minutes30
minutes510
kcal40
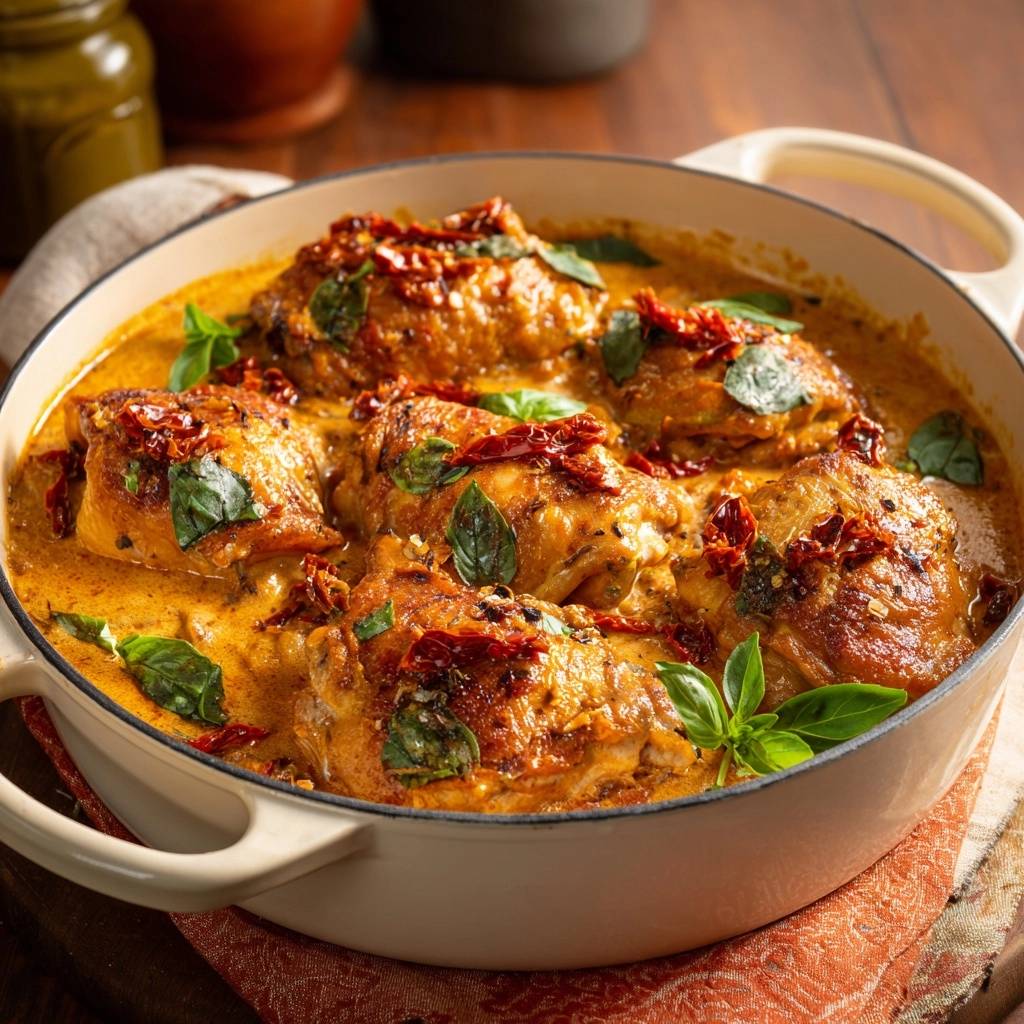
MinutesThis recipe features crispy skin-on chicken thighs nestled in a rich, emulsified sauce made with heavy cream, parmesan, and sun-dried tomatoes. By reducing the broth and using tomato-infused oil, the sauce achieves a perfect consistency that clings to the meat.
Ingredients
6 bone-in, skin-on chicken thighs
1 tablespoon olive oil (plus 1 tablespoon oil reserved from the sun-dried tomato jar)
1/2 cup sun-dried tomatoes in oil, drained and julienned
4 cloves garlic, minced
1/2 cup chicken broth
1 1/4 cups heavy cream
1/2 cup freshly grated parmesan cheese
1 teaspoon dried oregano
1/2 teaspoon smoked paprika (for the deep orange hue seen in the image)
1/2 teaspoon red pepper flakes
1 cup fresh basil leaves (some for the sauce, some for garnish)
Salt and black pepper to taste
Directions
- Pat the chicken thighs completely dry with paper towels. This is essential for a crispy skin. Season both sides generously with salt, pepper, and the smoked paprika.
- Heat the olive oil and 1 tablespoon of the sun-dried tomato oil in a large, deep skillet or braiser over medium-high heat.
- Place chicken skin-side down. Sear for 7-9 minutes without moving them until the skin is deep golden brown and crispy. Flip and cook for another 3 minutes. Remove chicken from the pan and set aside on a plate (it will finish cooking in the sauce).
- Drain all but two tablespoons of the rendered fat from the pan. Add the minced garlic and julienned sun-dried tomatoes. Sauté for 1-2 minutes until the garlic is fragrant and the tomatoes softened.
- Pour in the chicken broth. Use a wooden spoon to scrape up all the browned bits (fond) from the bottom of the pan. Let the broth boil and reduce by at least half. This concentration is the secret to a stable, non-watery sauce.
- Reduce heat to medium-low. Slowly pour in the heavy cream while whisking. Bring to a gentle simmer.
- Stir in the parmesan cheese, oregano, and red pepper flakes. Whisk constantly until the cheese is fully melted and the sauce thickens into a rich, orange-tinted glaze.
- Nestled the chicken thighs back into the sauce, ensuring the crispy skin stays above the liquid line to remain crunchy. Add half of the fresh basil leaves into the sauce around the chicken.
- Simmer for 5-8 minutes until the chicken reaches an internal temperature of 165°F (74°C).
- Garnish with the remaining fresh basil leaves and serve immediately. The sauce will be thick, glossy, and perfectly emulsified.
Notes
- To ensure the sauce is never watery, let the chicken broth reduce by at least half before adding the cream. Keep the crispy chicken skin above the sauce line when simmering to maintain texture.