Imagine biting into a jalapeno popper and hearing a distinct, audible crackle before hitting a center of molten, sharp cheddar. That shattering crunch is the hallmark of a perfect appetizer, yet it’s so rarely achieved at home. Most homemade versions suffer from a tragic flaw: the breading slides right off the pepper like a loose coat, leaving you with a greasy, naked chili and a pile of crumbs on your plate.
For that same satisfying crunch, consider making your own homemade crispy potato chips.
The frustration of a soggy coating usually stems from the natural moisture inside the pepper. As the jalapeno heats up, it releases steam that pushes against the breading, effectively boiling the crust from the inside out. This recipe solves that structural failure by using a reinforced double-dredge technique that creates an impenetrable, golden fortress around the pepper.
The secret to this professional-grade texture isn’t a fancy deep fryer or a secret ingredient. It’s the “cold-set” method. By freezing the breaded peppers for exactly twenty minutes before they hit the oil, you stabilize the cheese and lock the flour-and-egg matrix to the pepper’s skin, ensuring the crust stays attached from the first bite to the last.
The Physics of the Perfect Jalapeno Crunch
To understand why most poppers fail, you have to look at the science of moisture migration. Jalapenos have a slick, waxy skin that naturally repels liquids. When you dip a raw pepper into a standard batter, the bond is incredibly weak. As the pepper cooks, the water inside turns to steam, creating a high-pressure barrier that forces the breading away from the surface.
Therefore, we use a double-dredge system to create a reinforced protein-and-starch matrix. The first layer of flour absorbs the initial surface moisture, while the second layer of Panko creates a thick, structural wall. This wall is strong enough to withstand the internal steam pressure without buckling or softening.
In addition, this thick barrier acts as an insulator for the cheddar cheese. It allows the exterior to reach a deep, mahogany brown while the cheese inside reaches a perfect, gooey consistency without liquifying and leaking into your oil. This balance of thermal dynamics is what separates a “good” popper from a “perfect” one.
Essential Components for Crispy Cheddar Jalapeno Poppers
Quality ingredients are the foundation of this dish, starting with the cheese. While pre-shredded cheese is convenient, it’s coated in potato starch to prevent clumping, which can interfere with a smooth melt. Using sharp cheddar batons—thick, hand-cut rectangular strips—provides a dense, flavorful core that holds its shape better during the breading process.
The choice of breading is equally vital. We use Panko breadcrumbs because their large, jagged surface area creates more “crunch points” than traditional fine breadcrumbs. Panko is also airier, meaning it absorbs less oil, resulting in a lighter, cleaner mouthfeel that doesn’t feel heavy or sodden.
Finally, don’t overlook the liquid components. We mix the eggs with whole milk rather than water. The extra fat in the milk helps the egg wash brown more evenly and provides a richer flavor profile that complements the heat of the peppers and the sharpness of the cheddar.
Selecting and Preparing the Peppers
When shopping, look for medium to large jalapenos that feel firm and heavy for their size. If you see small brown lines on the skin—often called “stretch marks”—be prepared for a spicier kick. These marks indicate the pepper has endured more stress during growth, which often boosts the capsaicin levels.
Keep the stems intact when you slice them in half. Not only do they look beautiful on a serving platter, but they also act as a natural handle for dipping. Just remember to wear gloves or wash your hands thoroughly with soap and oil after seeding them to avoid a painful capsaicin burn later.
The Spice Profile: Beyond Salt and Pepper
A common mistake is only seasoning the pepper itself. To get a truly professional flavor, you must season the breading layers. We incorporate garlic powder, onion powder, and smoked paprika directly into the flour and Panko mixtures. This ensures every millimeter of the popper is packed with savory depth.
As the poppers fry, these spices “bloom” in the hot oil. This process releases their essential oils and intensifies their aroma. The smoked paprika, in particular, adds a subtle wood-fired note that pairs beautifully with the natural grassiness of the fresh jalapeno.
Step-by-Step: Executing the Double-Dredge Technique
Setting up an efficient breading station is the best way to ensure success. You’ll need three shallow bowls arranged in a row: flour, egg wash, and seasoned Panko. Use the “dry hand/wet hand” method—keep one hand for the dry ingredients and the other for the egg wash—to prevent your fingers from becoming breaded clubs.
Start by pressing the cheese-stuffed pepper firmly into the flour. You want to see a fine, even dust covering every nook and cranny. If the flour doesn’t stick, the egg wash won’t either, and your crust will eventually peel away in the fryer.
After the flour, submerge the pepper in the egg wash and then move it to the Panko. Press the crumbs into the pepper with your dry hand. Don’t just toss them; you need to physically anchor the Panko into the egg layer to create that initial bond.
Phase 1: The Primary Flour and Egg Coat
The first flour dusting is essentially a primer. It dries out the slick surface of the pepper and gives the egg wash something to grab onto. Without this step, the egg wash would simply bead up and slide off the waxy skin like rain off a windshield.
Once the pepper is floured, the egg wash acts as the primary glue. Ensure the egg mixture gets into the gaps between the cheese baton and the pepper walls. This creates a seal that helps prevent the cheese from escaping once it starts to melt.
Phase 2: The Reinforced Panko Barrier
This is where the “No-Soggy Secret” really happens. After the first layer of Panko, you’ll dip the pepper back into the egg wash and then back into the Panko a second time. This second pass creates a “double-wall” of crunch that is virtually indestructible.
This reinforced layer is your insurance policy against “cheese blowouts.” Even if the cheese becomes incredibly hot and pressurized, this thick Panko shell will hold it in place. You’ll end up with a popper that is significantly crunchier than anything you’d find in a restaurant.
The Cold-Set Secret: Why Freezing is Mandatory
Do not skip the twenty-minute freeze. This step is non-negotiable for a perfect result. When you chill the breaded peppers, you are essentially “setting” the glue. The cold temperature firms up the egg and flour, turning the breading into a solid shell before it ever touches the oil.
Furthermore, freezing the cheddar batons ensures they stay solid for the first minute of frying. This gives the exterior crust enough time to polymerize and harden. By the time the cheese finally melts, the crust is already strong enough to contain it, preventing a messy leak in your skillet.
Frying Mechanics: Temperature Control and Oil Choice
For frying, choose an oil with a high smoke point like vegetable, canola, or peanut oil. Avoid olive oil, as it will burn at the temperatures required for a crispy crust. You want to maintain a steady temperature of 350°F (175°C) throughout the process.
If the oil is too cold, the breading will act like a sponge and soak up grease, leading to a heavy, oily popper. If it’s too hot, the outside will burn before the pepper is tender and the cheese is melted. Use a clip-on thermometer to monitor the heat closely.
Fry in small batches to avoid crowding the pan. Adding too many cold peppers at once will cause the oil temperature to plummet, which ruins the “shattering” texture we worked so hard to build. Give each popper enough room to swim freely in the oil.
Troubleshooting Common Breading and Frying Issues
If you find your breading is falling off, it’s usually because the peppers weren’t dried properly before the flouring stage or the flour layer was too thin. Ensure the pepper is completely coated in white dust before it hits the egg wash. This is the foundation of the entire structure.
If your cheese is leaking out, you likely missed a spot during the second Panko dredge. The second layer must be thorough, especially around the edges where the cheese meets the pepper. Think of it like caulking a window; any gap will allow the “heat” to get in and the “cheese” to get out.
Lastly, if the exterior is dark brown but the pepper is still crunchy and raw, your oil is too hot. Lower the flame and let the oil cool for a few minutes. A perfect popper should take about 2 to 3 minutes to reach a deep golden hue, which is just enough time to soften the chili.
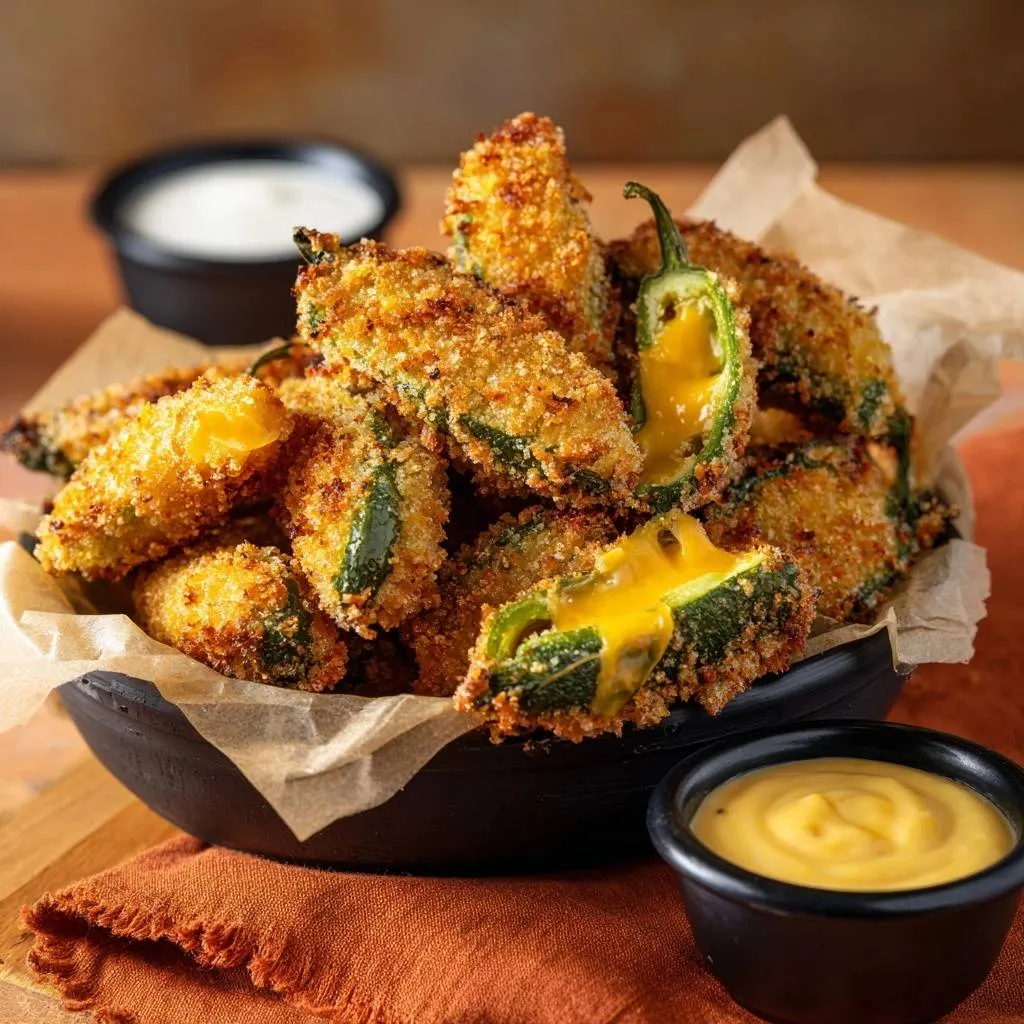
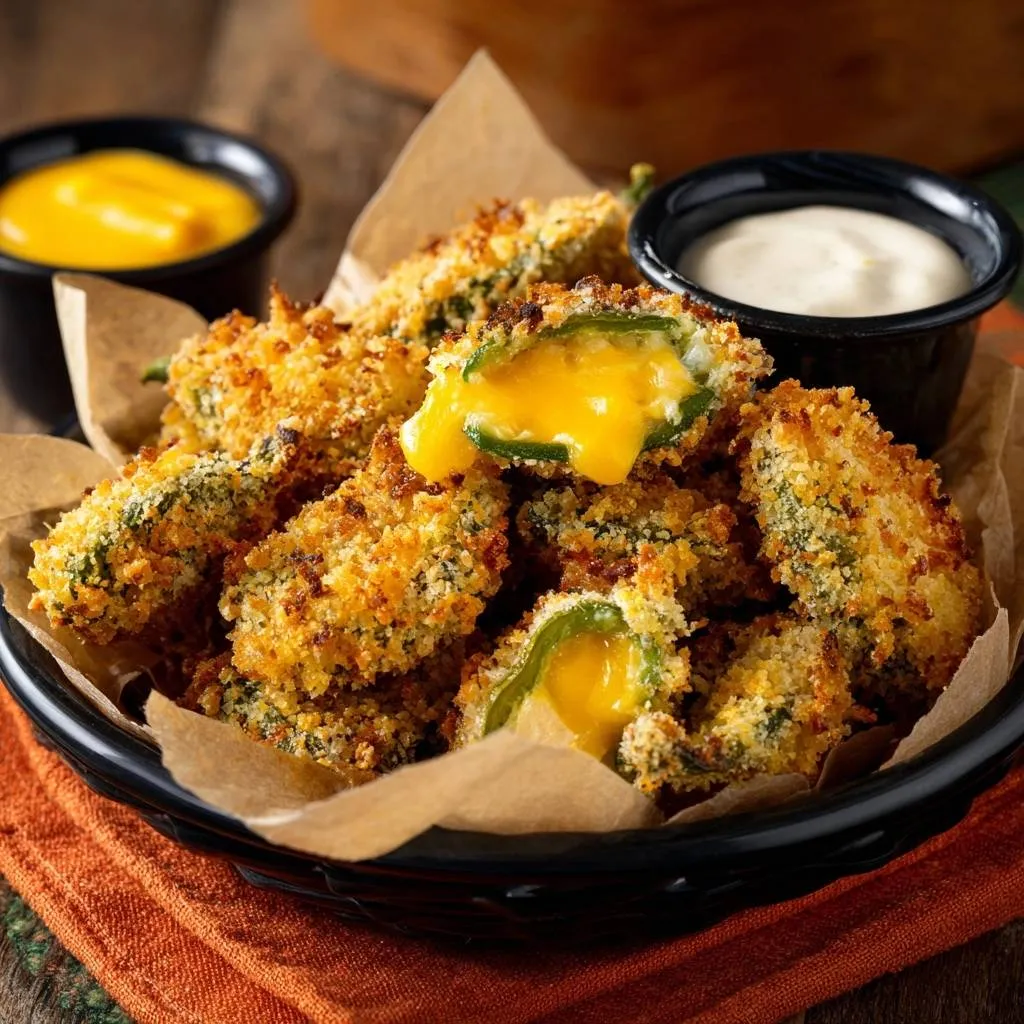
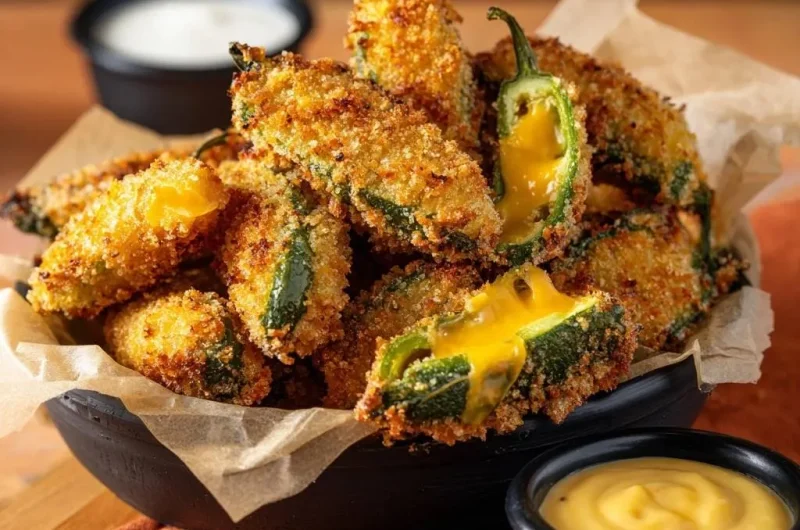
Optimal Serving and Dipping Pairings
The flavor profile of a jalapeno popper is a balance of heat, fat, and salt. To round this out, you need a dipping sauce that offers either cooling relief or a sweet-and-tangy contrast. A classic, herb-heavy ranch dressing is the gold standard for cooling down the capsaicin heat.
However, honey mustard is a fantastic alternative. The acidity of the mustard cuts through the richness of the fried breading and cheddar, while the honey provides a sweet finish that tames the spice of the jalapeno. Serving a “flight” of both sauces allows your guests to customize their experience.
Make-Ahead Strategies and Storage Logistics
These poppers are an entertainer’s dream because they actually benefit from being made in advance. You can bread them and keep them in the freezer for up to 24 hours before frying. This makes party day much less stressful since the messy work is already done.
For long-term storage, you can freeze the breaded, uncooked poppers for up to three months in an airtight container. When you’re ready to eat, you can fry them directly from frozen. Just add an extra minute to the frying time to ensure the center is fully melted.
Maintaining Texture: The Wire Rack Cooling Method
Once the poppers come out of the oil, never place them on paper towels. While it seems like a good way to drain grease, the paper towel actually traps steam underneath the popper. This steam quickly softens the bottom crust, turning your “shattering crunch” into a soggy mess.
Instead, use a wire cooling rack set over a baking sheet. This allows air to circulate 360 degrees around the popper. The excess oil will still drip away, but the crust will stay crisp and firm on all sides. It’s a small change that makes a massive difference in the final texture.
Expert Tips for High-Volume Entertaining
If you’re cooking for a crowd, you don’t want the first batch to get cold while you finish the rest. Set your oven to 200°F and place the wire rack with the finished poppers inside. This low heat will keep them warm and maintain the crust’s integrity without overcooking the peppers.
In addition, try to size-match your peppers for each batch. Frying all the small peppers together and all the large ones together ensures that everything in the pan finishes at the same time. This prevents the frustration of having half a batch burnt while the other half is still undercooked.
How do I store leftover jalapeno poppers?
Store any leftover fried poppers in an airtight container in the refrigerator for up to three days. To regain their signature crunch, do not use a microwave, as it will make the breading rubbery. Instead, reheat them in a 375°F oven or an air fryer for 5-7 minutes until the exterior sizzles and the cheese is hot again.
Why did my breading fall off during frying?
Breading usually falls off because of a weak bond at the flour stage. If the jalapeno skin is too wet or if the flour coating is patchy, the egg wash won’t have a surface to grip. Additionally, moving the peppers too much in the oil before the crust has “set” can knock the breading loose. Let them fry undisturbed for at least 60 seconds before turning.
Can I use a different type of cheese?
Yes, you can substitute the sharp cheddar with Monterey Jack for a milder flavor or Pepper Jack for extra heat. However, avoid soft cheeses like brie or very oily cheeses like low-quality mozzarella, as they tend to liquify too quickly and cause blowouts. Always use cold, firm cheese batons for the best structural results.
Are these poppers very spicy?
The heat level depends entirely on the individual peppers and how well you clean them. Most of the heat lives in the seeds and the white internal membranes (the pith). If you scrape the peppers completely clean, they will be relatively mild. For a truly spicy popper, leave a small amount of the white membrane intact before stuffing with cheese.
Can I bake these instead of frying them?
While you can bake them at 400°F for 15-20 minutes, they will not achieve the same “shattering” crunch as the fried version. If you choose to bake, spray the breaded poppers generously with cooking oil spray before putting them in the oven to help the Panko brown. Frying is highly recommended for the authentic “No-Soggy” experience.
What is the best oil for frying poppers?
Peanut oil is the top choice for many chefs because of its high smoke point and neutral flavor. If you have nut allergies, vegetable oil or canola oil are excellent alternatives. Avoid butter or unrefined coconut oil, as they will smoke and burn at the 350°F temperature required to crisp the Panko properly.
Jalapeno Poppers
Course: AppetizerCuisine: AmericanDifficulty: medium4
servings20
minutes15
minutes450
kcal35
MinutesA foolproof recipe for cheddar-stuffed jalapeno poppers featuring a reinforced Panko crust. By using a double-breading technique and a short freeze before frying, these poppers achieve a shattering crunch without the grease or soggy coating found in traditional recipes.
Ingredients
12 large fresh jalapenos, halved lengthwise and seeded (keep stems on for presentation)
8 ounces sharp cheddar cheese, sliced into thick batons
1 cup all-purpose flour
2 large eggs, beaten
2 tablespoons whole milk
1.5 cups Panko breadcrumbs
1 teaspoon garlic powder
1 teaspoon smoked paprika
1/2 teaspoon onion powder
Salt and black pepper to taste
Vegetable oil for frying
Ranch and honey mustard for dipping
Directions
- Prepare the peppers by slicing them in half lengthwise. Use a small spoon to scrape out the seeds and white membranes, leaving the stem intact if possible. Stuff each cavity tightly with a baton of cheddar cheese, ensuring the cheese is flush with the edges of the pepper.
- Set up a breading station with three shallow bowls:
- Bowl 1: Flour mixed with salt, pepper, and onion powder.
- Bowl 2: Eggs whisked with the milk.
- Bowl 3: Panko mixed with garlic powder and smoked paprika.
- To solve the soggy coating problem, use the double-dredge technique. Press the stuffed pepper (cheese-side down first) firmly into the flour to coat all surfaces. Dip into the egg wash, then press firmly into the Panko. For the ultimate crunch and to prevent cheese leaks, dip the breaded pepper back into the egg wash and then into the Panko a second time. This creates a thick, reinforced barrier.
- Place the breaded peppers on a baking sheet and freeze them for 20 minutes before cooking. This “cold-set” step is the secret to preventing the cheese from melting too quickly and ensuring the breading adheres perfectly during the heat of frying.
- Heat 2 inches of oil in a heavy skillet or Dutch oven to 350°F (175°C). Fry the peppers in small batches for 2 to 3 minutes, turning once, until the exterior is a deep golden brown and the pepper is tender.
- Drain the poppers on a wire rack set over a baking sheet rather than paper towels. This allows air to circulate around the entire pepper, preventing the bottom from steaming and getting soft. Serve immediately with ranch and honey mustard dipping sauces.
Notes
- The secret to success is the 20-minute ‘cold-set’ in the freezer and draining the finished poppers on a wire rack instead of paper towels to maintain maximum crunch.