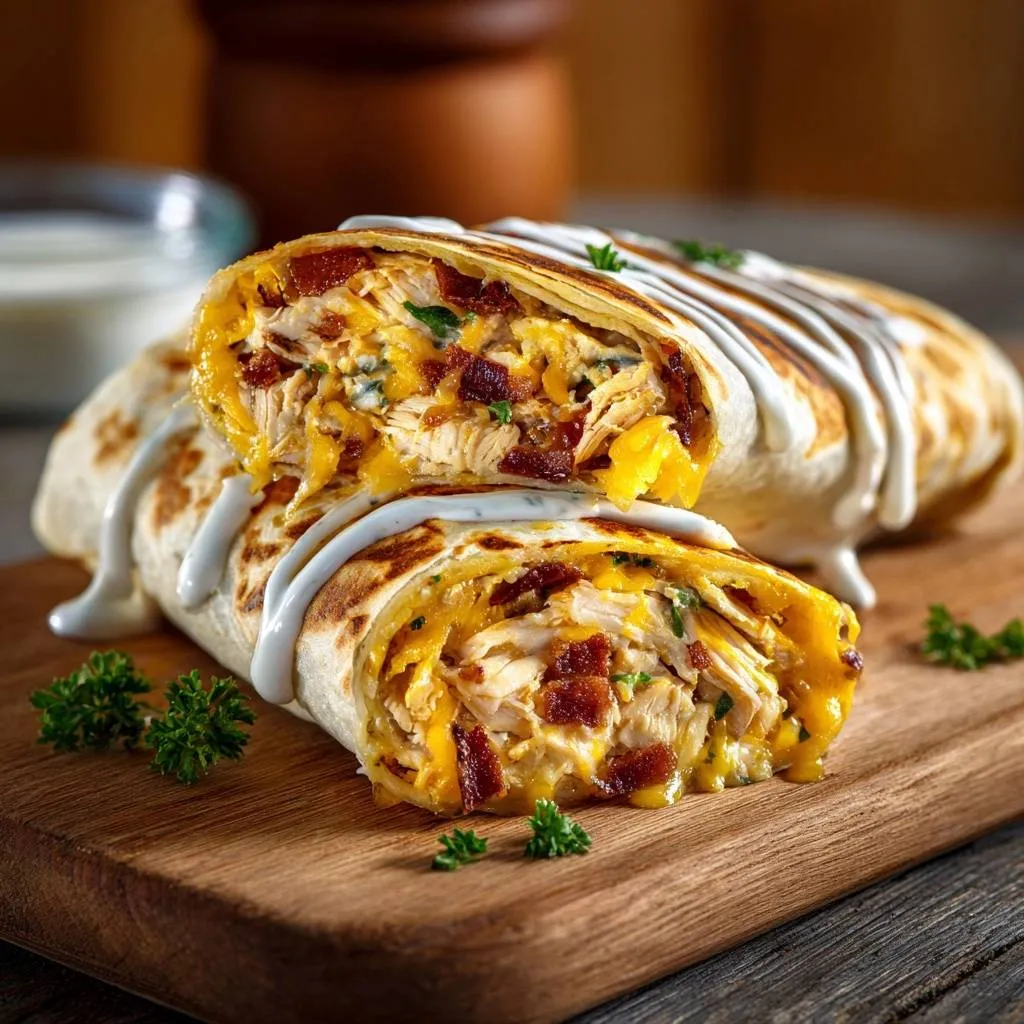
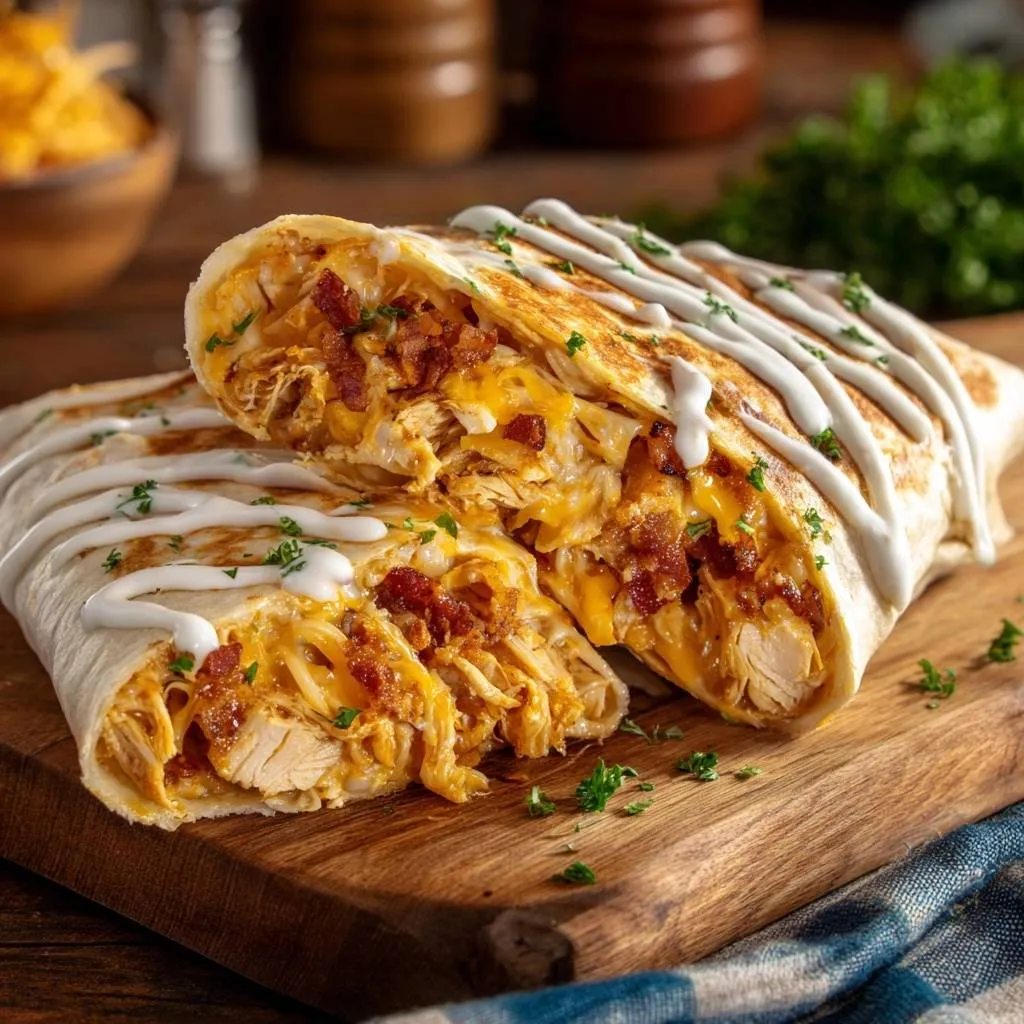
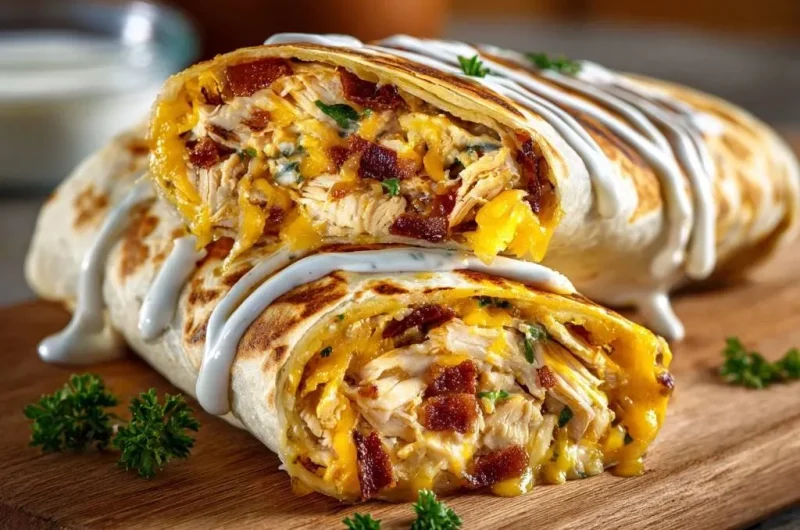
Imagine biting into a wrap that actually fights back with a loud, satisfying crunch. You know that disappointing, limp tortilla you usually get at the drive-thru? This isn’t that. We’re talking about a shatteringly crisp exterior that gives way to a molten, creamy center of savory chicken and smoky bacon.
The frustration of a soggy wrap usually comes down to poor structural engineering. Most people pile wet ingredients directly onto a cold tortilla, which leads to a gummy mess within minutes. By using a specific dry-searing technique and a moisture-barrier layering system, you can create a wrap that holds its shape and stays rigid until the very last bite.
The secret to this professional-grade crunch is all about the “cheese weld.” Instead of mixing everything together, you must place a layer of shredded cheese directly against the tortilla. This creates a waterproof seal that prevents the ranch dressing from soaking into the flour, ensuring the outside stays toasted while the inside remains juicy. Oh man, once you hear that first crackle, you’ll never go back to basic rolling again!
The Structural Anatomy of a Non-Soggy Wrap
Building a perfect wrap is more about physics than just tossing ingredients together. When you put ranch-coated chicken directly on a tortilla, the moisture migrates into the starch, making it soft and prone to tearing. Therefore, you must think of your ingredients as layers of protection.
By placing a generous bed of shredded cheese first, you create a hydrophobic barrier. As the wrap hits the heat, that cheese melts into a solid, fatty layer that repels the water in the sauce. This keeps the tortilla dry and allows it to toast properly against the pan. In addition, the cheese acts as a structural stabilizer, holding the chicken and bacon in place so they don’t slide out when you take a bite.
Selecting the Right Flour Tortilla
Size is the most important factor when you’re shopping for tortillas. You want to look for “Burrito Size” or 10-12 inch flour tortillas. If the tortilla is too small, you won’t have enough surface area to create the double-fold seal required to keep the filling contained during the searing process.
Standard flour tortillas work best because they have the elasticity needed for a tight roll. However, avoid “raw” tortillas that require cooking unless you plan to pre-cook them slightly. A standard, room-temperature flour tortilla provides the perfect balance of flexibility and browning potential for that golden-brown finish.
The Role of Sharp Cheddar as an Edible Adhesive
Sharp cheddar is the MVP of this recipe because of its relatively low melting point and high oil content. While a mild cheese might just sit there, sharp cheddar liquefies quickly, seeping into the nooks and crannies of the chicken. This creates an edible adhesive that binds the entire interior together.
For a similar cheesy experience, try this crispy chicken cheddar melt.
Furthermore, the fat in the cheddar helps fry the inside of the tortilla slightly as it melts. This double-sided heat application ensures that the wrap isn’t just crispy on the very outside, but has a firm, “set” texture all the way through. If you use pre-shredded cheese, just keep in mind that the anti-caking agents might make it slightly less “gooey” than cheese you grate yourself.
Essential Components for Maximum Flavor
Since this recipe relies on a few simple ingredients, the quality of each component really shines through. You want a contrast between the warm, tender chicken and the sharp, salty bite of the bacon. When these flavors meld with the cool tang of ranch, it creates a classic profile that everyone loves.
Preparing the Shredded Chicken Base
Using warm, freshly shredded chicken breast is a total game-changer for the melting process. If you use cold, cubed chicken straight from the fridge, the tortilla will likely burn before the center of the wrap is even lukewarm. Warm chicken starts softening the cheese the moment it touches the tortilla.
I recommend poaching or roasting your chicken and shredding it with two forks while it’s still steaming. This creates more surface area for the ranch dressing to cling to. Instead of big chunks of meat, you get a cohesive filling where every single strand of chicken is seasoned and moist.
Achieving the Perfect Bacon Texture
The bacon needs to be cooked until it has a definitive “snap.” Since the chicken and ranch are soft, the bacon provides the necessary textural variety. If the bacon is chewy or undercooked, it will pull out of the wrap in one long string when you take a bite, which is always a mess.
For the best results, cook your bacon until it’s fully rendered and deep mahogany in color. Let it drain on paper towels so it stays crunchy. Whether you use beef bacon or a high-quality turkey bacon, make sure it’s crumbled into small bits so you get a little bit of salty crunch in every single mouthful.
Step-by-Step: Constructing the Perfect Seal
Now comes the technical part where we turn a pile of ingredients into a rigid, handheld meal. You need to be deliberate with your movements here. A loose wrap is a soggy wrap, so keep your tucks tight and your folds clean.
The Layering Sequence for Moisture Control
Start by laying your tortilla flat and placing a circle of cheese in the center, leaving about two inches of space from the edges. Next, pile your ranch-tossed chicken and bacon bits directly on top of that cheese. Finally, add a second layer of cheese over the meat.
This “Cheese-Chicken-Bacon-Cheese” sandwich method is vital. The bottom layer protects the tortilla from the sauce, while the top layer acts as the “glue” for the top fold. When the wrap is flipped in the pan, that top layer of cheese melts and fuses the folds together, creating a permanent seal.
The Professional Folding Technique
To master the envelope fold, pull the left and right sides of the tortilla toward the center until they almost touch. While holding those sides down, use your thumbs to bring the bottom edge up and over the filling. Tuck the bottom edge tightly under the chicken mixture, pulling back slightly to create tension.
Continue rolling upward while keeping the side flaps tucked in. You should end up with a tight, rectangular cylinder. If the wrap feels loose, don’t be afraid to unroll it and try again. A tight roll ensures that the heat penetrates evenly and the filling doesn’t shift during the searing stage.
The Dry-Searing Method for a Rigid Exterior
The goal here is to transform the soft flour tortilla into a toasted shell. We aren’t deep-frying this; we are using a dry-searing method that relies on high contact heat. This creates a “toasted” flavor rather than a “greasy” one.
Why Oil Beats Butter for Tortilla Toasting
While butter tastes great, it’s a poor choice for searing tortillas. Butter contains milk solids that begin to burn at 350°F, which will leave your wrap covered in bitter, black specks before the cheese inside has even melted. It’s much better to use a light coating of avocado oil or a simple cooking spray.
High-smoke point oils allow you to use medium-high heat safely. This heat is necessary to achieve that deep golden-brown color and the rigid texture we’re after. Just a thin film of oil in the pan is enough to facilitate heat transfer without making the wrap feel heavy or oily.
The Seam-Down Searing Priority
Always place the wrap in the pan seam-side down first. This is the most critical step in the entire process. The heat from the pan immediately begins to melt the “glue” cheese we placed on top, welding the seam shut.
Press down firmly with a spatula for about 60 seconds. You are essentially cauterizing the opening. Once that seam is fused, the wrap becomes a structural cylinder that won’t unravel, even if you’re eating it on the go. After the seam is browned, rotate the wrap to toast the other three sides until the whole exterior is firm to the touch.
Troubleshooting Common Wrap Failures
Even with the best intentions, things can go wrong in the kitchen. Most wrap failures are caused by temperature issues or tortilla brittleness. Fortunately, these are easy to fix once you know what to look for.
Preventing Tortilla Cracking and Tearing
If your tortillas are coming straight from the fridge, they will likely crack as soon as you try to fold them. Cold gluten is brittle. To fix this, stack your tortillas between two damp paper towels and microwave them for 10 to 15 seconds.
This quick steam bath makes the tortillas incredibly pliable and stretchy. You’ll be able to pull the edges tight without worrying about the sides blowing out. Always work with one tortilla at a time, keeping the others covered so they stay warm and moist until you’re ready to roll.
Managing Internal Temperature Without Burning the Outside
If you find that your tortilla is getting dark too quickly but the cheese inside is still cold, your heat is too high. Every stove is different, so you may need to adjust. If the wrap is extra thick, you can use a “low and slow” finish.
Once the wrap is browned on all sides, turn the heat down to low and cover the pan with a lid for one minute. The trapped steam will finish melting the cheese without further browning the exterior. However, don’t leave the lid on too long, or you’ll lose that precious crunch!
Flavor Variations and Ingredient Swaps
Once you master the base technique, you can start playing with the flavors. The key is to ensure that any additions don’t introduce too much moisture, which would defeat the purpose of our anti-soggy method.
Spicy Buffalo and Jalapeño Adjustments
If you want to add a kick, you can swap the ranch for a thick buffalo sauce. However, be careful with thin, watery hot sauces. It’s better to mix a little hot sauce into the ranch to keep the consistency thick.
For jalapeños, always use pickled slices that have been patted dry with a paper towel. If you toss them in straight from the jar, the brine will soak into the chicken and ruin the texture. A few dry slices of jalapeño tucked between the chicken and the top layer of cheese add a perfect vinegary heat.
Garden Additions: Keeping Greens Fresh
A common mistake is putting lettuce or tomatoes inside the wrap before searing. Heat turns lettuce into a slimy, gray mess and makes tomatoes release all their water. To keep things fresh, keep the greens out of the pan.
I recommend serving a side of shredded romaine or a crisp cabbage slaw. If you absolutely must have greens inside, slice the hot wrap open and stuff some fresh, cold lettuce into the ends right before serving. This maintains the contrast between the hot, crispy wrap and the cool, refreshing vegetables.
What to Serve with Crispy Chicken Wraps
These wraps are quite rich due to the cheese, bacon, and ranch. Therefore, you want to pair them with something that offers a bright, acidic contrast to cleanse the palate between bites.
Acidic Sides to Balance the Palate
A simple vinegar-based coleslaw is the perfect companion. The tang of the vinegar cuts right through the heaviness of the cheddar. Alternatively, a few spears of chilled pickled cucumbers or a bright citrus salad with lime dressing can elevate the whole meal.
If you want something heartier, try some baked potato wedges seasoned with smoked paprika. The starchiness of the potatoes pairs naturally with the ranch flavors. Just make sure your side dish isn’t too “saucy,” or you’ll lose the textural focus of the meal.
Frequently Asked Questions
Can I make these wraps ahead of time for meal prep?
You can definitely prep the filling ahead of time! Store the ranch-tossed chicken and cooked bacon in the fridge for up to three days. However, do not assemble or sear the wraps until you are ready to eat. The tortilla will eventually absorb moisture from the chicken if it sits in the fridge, losing that signature crunch. For the best experience, roll and sear them fresh in about 10 minutes.
What is the best way to reheat a leftover wrap?
Never use a microwave to reheat these wraps, as it will turn the tortilla into a rubbery, soggy mess. Instead, use an air fryer at 350°F for about 3-5 minutes until the exterior is crisp again. If you don’t have an air fryer, a dry skillet over medium heat works wonders. Just flip it every minute or so until the cheese inside is melted and the outside is rigid.
Can I use a Panini press instead of a skillet?
Yes, a Panini press is a fantastic tool for this recipe because it applies even heat to both sides simultaneously. However, be careful not to press down too hard. If you use excessive force, you might squeeze the melted cheese and ranch out of the sides of the wrap. Use light pressure and cook until the tortilla is golden and the ridges are well-defined.
How do I keep the wrap from falling apart while eating?
The most important tip is to let the wrap rest for at least two minutes after taking it out of the pan. When the wrap is screaming hot, the cheese is in a liquid state and won’t hold the filling together. As it rests, the cheese solidifies just enough to act as a mortar, locking the chicken and bacon in place. Slicing it on a diagonal with a sharp serrated knife also helps maintain the structure.
Crispy Chicken Wraps
Course: Main CourseCuisine: AmericanDifficulty: easy2
servings15
minutes10
minutes850
kcal25
MinutesA delicious and structurally sound wrap featuring warm shredded chicken, crispy bacon, and sharp cheddar cheese, seared to golden perfection to ensure a crunchy exterior.
Ingredients
2 large flour tortillas
2 cups shredded cooked chicken breast (warm)
1/2 cup crispy bacon bits
1 1/2 cups shredded sharp cheddar cheese
1/4 cup ranch dressing (plus extra for drizzling)
2 tablespoons fresh chopped parsley
Cooking spray or a light brush of oil
Directions
- In a medium bowl, toss the warm shredded chicken with the ranch dressing and parsley. The chicken should be lightly coated, not swimming in sauce, to maintain the structural integrity of the wrap.
- To prevent sogginess, start by placing a generous layer of shredded cheese (about 1/2 cup) directly onto the center of the tortilla. This cheese will melt into a “waterproof” seal between the chicken and the wrap.
- Top the cheese with the chicken mixture and the crispy bacon bits. Add another layer of cheese on top of the chicken; this acts as the “glue” to keep the wrap tight.
- Fold the sides of the tortilla inward, then roll tightly from the bottom up, ensuring the ends are tucked in securely.
- Heat a non-stick skillet or griddle over medium-high heat. Lightly coat the pan with cooking spray or a very thin layer of oil (avoid butter, as the milk solids can burn before the tortilla gets fully crisp).
- Place the wrap seam-side down first. This is the critical step: searing the seam shut prevents juices from leaking out.
- Press down firmly with a spatula or a heavy press for 2-3 minutes until the tortilla shows deep golden-brown sear marks (as seen in the image). Rotate the wrap and sear the other three sides until the entire exterior is rigid and toasted.
- Remove from heat and let it sit for 2 minutes before slicing. This allows the internal cheese to set so the filling doesn’t spill out. Slice on a diagonal, drizzle with extra ranch dressing, and garnish with extra parsley. serve immediately.
Notes
- Avoid using butter for searing as it burns too quickly; use cooking spray or oil instead. Always sear seam-side down first to lock in the fillings.