You’ve been there before. You pull a tray of wings out of the oven, and they look glorious, only to watch them turn into a sad, rubbery mess the moment you toss them in sauce. This “Soggy Wing Syndrome” is the ultimate kitchen heartbreak. Most home cooks assume the only way to get a real crunch is a deep fryer, but the truth is that traditional frying often fails once a wet glaze is introduced anyway.
The secret to a wing that stays crunchy under a blanket of sticky sauce isn’t more oil; it’s science. We’re aiming for a shatter-crisp shell that acts as a barrier against moisture. By changing the way we treat the skin before it ever hits the heat, we can create a blistered, glass-like texture that stands up to the thickest glazes you can throw at it.
I’ve found that the real trick lies in the pH level of the chicken skin. If you don’t break down those proteins and draw out the moisture, you’re just steaming the meat inside a fatty jacket. One simple pantry staple changes everything, and it’s probably sitting in your cupboard right now.
The Chemistry of the Perfect Wing Crunch
Achieving that elusive “crunch” is all about chemistry. When you apply aluminum-free baking powder to the skin, it raises the pH level of the poultry. This alkaline environment breaks down the peptide bonds in the skin, allowing it to crisp up much faster and more intensely than it would on its own.
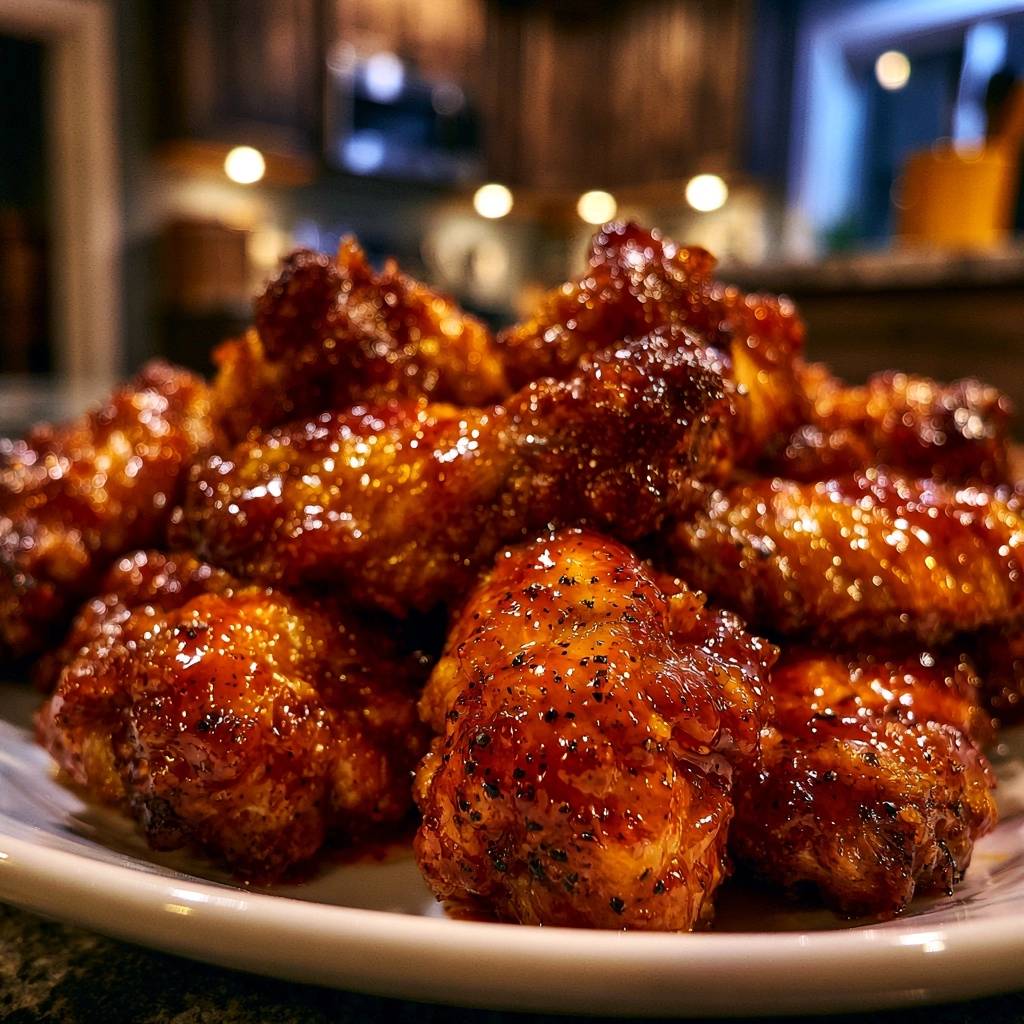
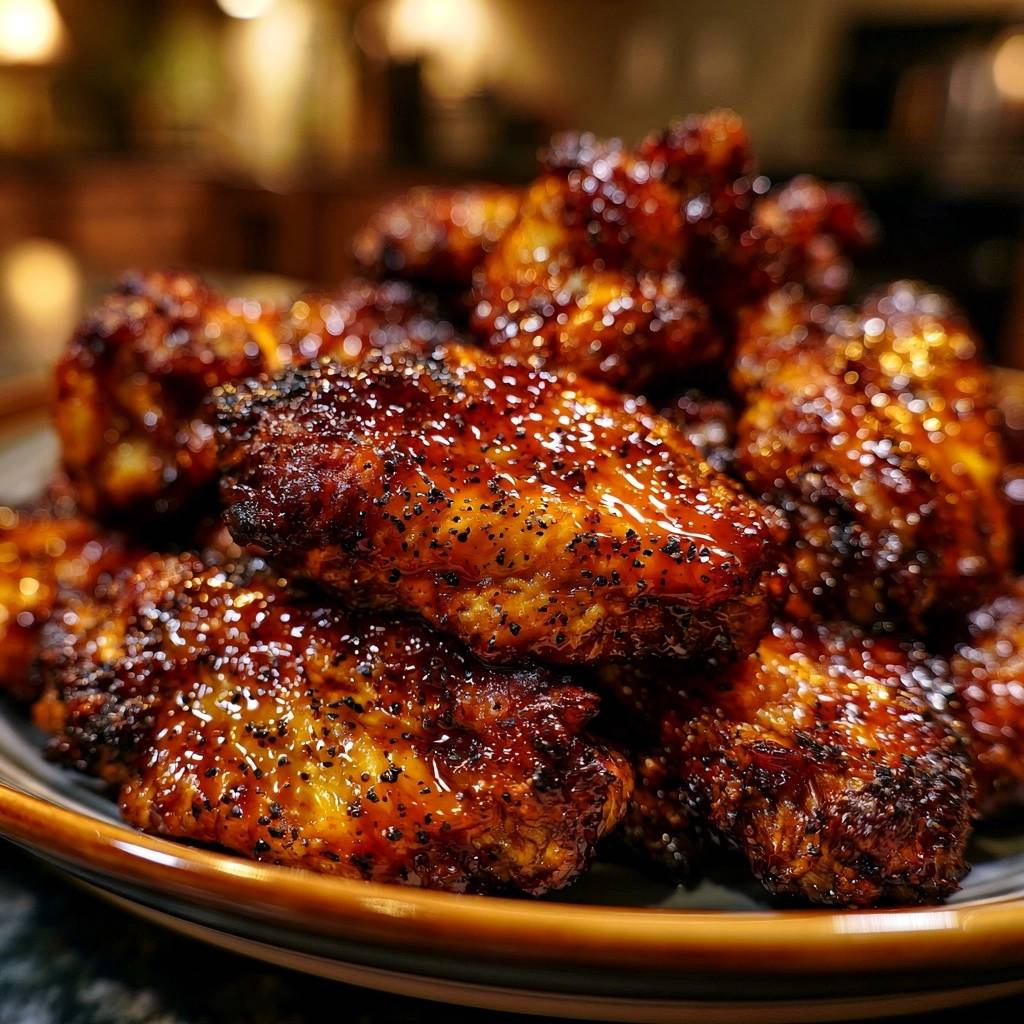
As the wings heat up, the baking powder reacts to create tiny carbon dioxide bubbles. These bubbles create more surface area, resulting in a blistered, craggy texture that mimics the look of a deep-fried wing. Combined with a high heat of 425°F, the subcutaneous fat renders out completely, leaving behind a thin, rigid shell that won’t yield to the glaze.
Why Aluminum-Free Baking Powder is Mandatory
You must check your label to ensure your baking powder is aluminum-free. Standard baking powder often contains sodium aluminum sulfate, which can leave a bitter, metallic aftertaste when used in high concentrations on meat. Since we’re using a full tablespoon to coat these wings, that metallic tang would ruin the delicate balance of the honey and soy glaze.
Baking powder is also distinct from baking soda. Don’t swap them! Baking soda is much stronger and will leave the wings tasting like soap. The powder provides the perfect chemical lift without compromising the savory flavor of the chicken.
The Role of Coarsely Cracked Black Pepper
The pepper in this recipe does more than just provide a spicy bite. By using coarsely cracked peppercorns rather than a fine powder, you’re adding physical “grit” to the surface of the wing. This creates a speckled aesthetic that looks professional and rustic at the same time.
More importantly, these larger pepper bits provide structural grip. They act like tiny anchors for the glaze, giving the thick syrup something to cling to. This prevents the sauce from simply sliding off the wing and pooling at the bottom of the bowl.
Essential Components for Crispy Glazed Chicken Wings
Success starts with the bird itself. When you’re at the grocery store, look for wings that appear dry in the package. Many brands use “water-chilling” during processing, which means the chicken has absorbed extra liquid. If you can find air-chilled wings, grab them; they have a much lower moisture content and will crisp up significantly faster.
If you buy whole wings, you’ll need to butcher them into flats and drumettes. Simply find the joints, wiggle them to locate the gap, and slice through the cartilage. Discard the tips or save them for a future stock. Removing that extra moisture starts the moment you get home, so don’t skip the heavy pat-down with paper towels.
Selecting and Prepping the Poultry
If you’re stuck with water-chilled chicken, you’ll need to be extra diligent. I recommend double-drying them. Pat them down once, let them sit for ten minutes, and then pat them down again with fresh towels. Any surface moisture will turn into steam in the oven, which is the enemy of the crunch.
Make sure the wings are at least somewhat close to room temperature before they go into the oven. If they’re ice-cold, the outside might brown before the fat underneath has a chance to fully render. A more even temperature ensures the skin and the fat work together to create that “shatter” effect.
The Glaze: Balancing Viscosity and Acidity
A great glaze is a balancing act. Honey provides the necessary tackiness and sugar for caramelization, while soy sauce brings a deep umami saltiness. Sriracha adds a fermented heat that lingers without being overwhelming. However, the real hero here is the rice vinegar.
The vinegar provides a sharp brightness that cuts right through the heavy fat of the chicken. Without that acidity, the wings can feel “heavy” or cloying after just a few bites. The vinegar also helps thin the honey just enough so it flows into every nook and cranny of the blistered skin.
Phase One: The Dry Brine and Dehydration
This is the most critical step in the entire process. Once your wings are dry, toss them thoroughly with the baking powder, salt, and pepper. You want every inch of the skin covered in a fine, dusty film. This is the “dry brine” that begins pulling moisture out of the skin immediately.
You must use a wire rack set over a baking sheet. If you place the wings directly on a flat pan, the bottom of the wing will sit in its own rendered fat and juices. This creates a “steamed” effect that leads to a soggy bottom. The rack allows hot air to circulate 360 degrees around the meat.
The Benefits of the Cold-Air Refrigeration Rest
If you have the time, put the tray of coated wings into the fridge uncovered for 1 to 8 hours. The cold, circulating air of the refrigerator acts as a secondary dehydrator. This process forms what chefs call a “pellicle,” a slightly tacky, dry skin that is primed for crisping.
Even an hour makes a massive difference. You’ll notice the skin looks tighter and more translucent after its time in the fridge. This dry exterior is the only way to achieve a glass-like crunch that stays firm even after the sauce is applied.
Phase Two: Precision Roasting for Maximum Rendering
Preheat your oven to 425°F. This high temperature is non-negotiable. We need the heat to be intense enough to render the fat quickly while the baking powder does its work. If the oven is too cool, the skin will just get tough and leathery instead of crispy.
At the 20-minute mark, you’ll need to flip the wings. Even with a wire rack, the top side usually gets more direct heat. Flipping ensures that both sides get that beautiful golden-brown hue and that the fat renders evenly from all angles.
Air Circulation and Oven Positioning
Position your oven rack in the middle of the oven. If it’s too high, the honey in the skin might burn; too low, and the bottoms won’t get enough heat. Make sure you don’t overcrowd the pan. If the wings are touching, they’ll create a micro-climate of steam between them.
Give them space to breathe. If you’re making a double batch, use two separate pans on different racks. You want to see the fat visibly bubbling on the surface of the skin. That bubbling is the sound of moisture leaving and flavor arriving.
Phase Three: Reducing the High-Gloss Glaze
While the wings are roasting, get your glaze going in a small saucepan. Simmer the ingredients over medium heat. You aren’t just warming it up; you’re reducing it. This is vital because we need to cook off the water content in the soy sauce and vinegar.
You’re looking for a “Nappe” consistency, which is a fancy way of saying it should coat the back of a spoon. If you run your finger through the sauce on the spoon, the line should stay clean. Be careful not to over-reduce it, though. If it gets too thick, the honey will start to taste burnt and bitter.
The Critical Three-Minute Rest Period
When the wings come out of the oven, your instinct will be to toss them in the sauce immediately. Don’t do it! If you glaze a wing straight out of the oven, the internal steam is still trying to escape. That steam will get trapped under the glaze and soften the skin instantly.
Let them rest on the wire rack for about three minutes. This allows the internal temperature to stabilize and the “shell” to harden. Think of it like letting a cookie cool so it gets crunchy. Once that shell is set, it becomes much more resistant to the moisture in the glaze.
Troubleshooting Common Wing Texture Issues
If your wings come out too salty, you likely used a fine-grain table salt instead of kosher salt. Table salt is much “saltier” by volume, so always stick to kosher for dry brines. If the wings are sticking to the rack, you can lightly spray the rack with oil before placing the chicken down, though the rendered fat usually does this job for you.
If the glaze is sliding off and pooling at the bottom of the bowl, it wasn’t reduced enough. It needs to be a thick syrup, not a thin juice. On the flip side, if the wings are tough, they might have been overcooked or the chicken was too lean. Stick to the 45-minute window for the best results.
Optimal Pairings for Crispy Glazed Chicken Wings
Since these wings are rich, sweet, and salty, you want sides that offer a sharp contrast. A cold, crunchy slaw with a lime dressing works wonders. Pickled radishes, often served with Korean fried chicken, provide a wonderful textural “snap” and acidity that cleanses the palate between wings.
I also love serving these with charred bok choy or a simple cucumber salad. Avoid heavy, starchy sides like mashed potatoes or thick mac and cheese. You want the wings to be the star, and light, crunchy vegetables help keep the meal feeling balanced rather than weighed down.
Frequently Asked Questions
Can I use an Air Fryer for this?
Yes, you absolutely can! Set your air fryer to 375°F and cook for 20 to 25 minutes, shaking the basket halfway through. The high-velocity air in an air fryer actually works perfectly with the baking powder trick, often producing an even crispier result than a standard oven. Just make sure not to overlap the wings in the basket.
Why is my glaze turning the wings mushy?
This usually happens for two reasons: the glaze wasn’t reduced enough or you didn’t let the wings rest before tossing. If the glaze has too much water content, the skin will absorb it like a sponge. Ensure the glaze is a thick, syrupy consistency and that the wings have rested for 3 minutes to let the skin “set” before saucing.
Can I substitute the honey for other sweeteners?
Maple syrup or brown sugar are great alternatives. Keep in mind that maple syrup is thinner than honey, so it will require a longer reduction time to reach that syrupy state. Brown sugar will create a deeper, molasses-like flavor but can burn more easily, so keep a close eye on the saucepan as it simmers.
Is the baking powder safe to consume in this quantity?
It is perfectly safe. The small amount used per pound of meat undergoes a chemical transformation during the high-heat baking process. By the time the wings are done, the baking powder has reacted and “disappeared,” leaving behind only the physical texture changes in the skin. Using aluminum-free powder ensures there is no lingering taste.
How do I reheat leftovers without losing the crunch?
Never use the microwave for glazed wings; it will turn them into rubber. Instead, put them back in a 400°F oven or an air fryer for about 5 minutes. This high heat re-crystallizes the sugars in the glaze and draws out any moisture that settled into the skin while in the fridge, bringing back a surprising amount of the original crunch.
Crispy Glazed Chicken Wings
Course: AppetizerCuisine: AmericanDifficulty: easy4
servings15
minutes45
minutes60
Minutes480
kcalAmerican
Ingredients
2 pounds chicken wings (flats and drumettes)
1 tablespoon baking powder (must be aluminum-free)
1 teaspoon kosher salt
2 teaspoons coarsely cracked black pepper (essential for the visual “speckled” finish)
1/2 cup honey
1/4 cup soy sauce
2 tablespoons sriracha or hot sauce
1 tablespoon minced garlic
1 teaspoon grated ginger
1 tablespoon rice vinegar (to balance the glaze)
Directions
- The Secret to the Crunch: Pat the wings completely dry with paper towels. In a large bowl, toss the wings with the baking powder, salt, and the cracked black pepper. The baking powder raises the pH level of the skin, breaking down the proteins to create a blistered, extra-crispy surface, while the heavy pepper provides the distinct visual texture seen in the final dish.
- The Air-Dry Phase: For maximum crunch, place the coated wings on a wire rack set over a baking sheet and refrigerate uncovered for at least 1 hour (or up to 8 hours). This dehydrates the skin further. If short on time, proceed immediately to baking.
- The Roast: Preheat oven to 425°F (220°C). Ensure the wings are arranged on the wire rack with space between them to allow hot air to circulate entirely around the wing, preventing a soggy bottom.
- Bake: Bake for 40 to 45 minutes, flipping halfway through, until the skin is deep golden brown, visibly bubbling, and the fat has rendered out completely.
- The Glaze Reduction: While the wings bake, combine honey, soy sauce, sriracha, garlic, ginger, and rice vinegar in a small saucepan. Simmer over medium heat for 8 to 10 minutes. You are looking for a “thick syrup” consistency that coats the back of a spoon; this prevents the moisture from penetrating the crispy skin.
- The Finish: Remove the wings from the oven and let them rest on the rack for 3 minutes. This allows internal steam to dissipate so the skin sets into a hard shell.
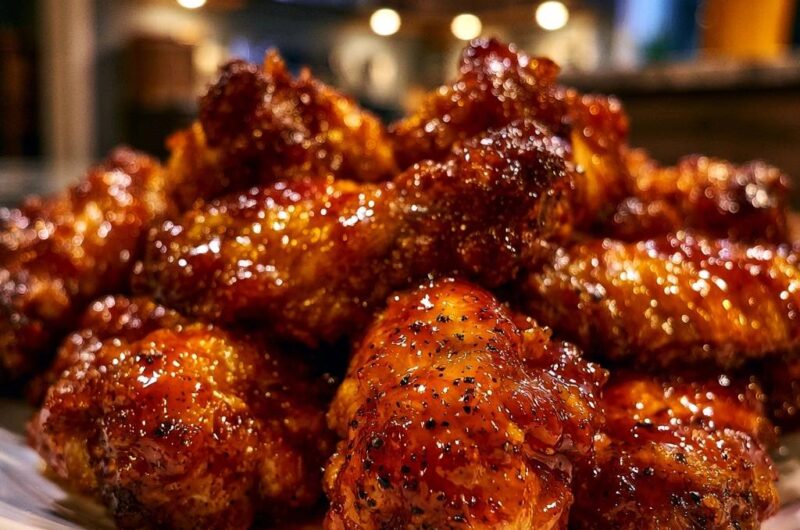
- Toss and Serve: Place the wings in a large bowl and drizzle the warm, thickened glaze over them. Toss quickly to coat. The result is a high-gloss, deeply caramelized wing with visible pepper specks and a crunch that lasts. Serve immediately.
Notes
- Ensure the baking powder is aluminum-free to avoid a metallic aftertaste. For the best results, do not skip the air-dry phase in the refrigerator, as this is crucial for maximum skin dehydration.