We’ve all been there. You order honey garlic chicken from your favorite takeout spot, dreaming of that perfect crunch, only to have it arrive as a soggy, lukewarm mess. It’s frustrating when the sauce turns a beautiful coating into a gummy layer of disappointment. This recipe changes that dynamic entirely by focusing on a “shatter-crisp” crust that stays crunchy even after it’s tossed in a sticky glaze.
The secret lies in a specific double-dredge method that creates a craggy, bubbly exterior. By using a high-heat shallow fry and a specialized binder, you can achieve professional-grade results in your own kitchen. This guide will walk you through the process of making these addictive bites in just 35 minutes, delivering a high-protein meal at 510 calories per serving that actually keeps its promise of a loud, satisfying crunch.
I’ve found that the most important step is the temperature of your oil. If the oil isn’t shimmering and ready, the starch will soak up the fat instead of crisping up instantly. Therefore, always test a small piece of bread or a pinch of starch in the pan first. If it sizzles immediately, you’re ready to create the best chicken you’ve ever tasted at home.
The Science of the Shatter-Crisp Coating
Achieving a crust that shatters when you bite into it requires a bit of kitchen chemistry. Most home cooks reach for all-purpose flour, but that’s actually a mistake for this specific dish. Flour contains gluten, which can become chewy or bread-like when it hits a liquid sauce. Instead, we use cornstarch because of its high amylose content. This starch creates a brittle, thin, and incredibly crisp layer that doesn’t develop the same toughness as wheat-based coatings.
For those interested in achieving truly crisp results, explore the science behind an anti-soggy crust.
Furthermore, the egg whites play a vital role in this structural integrity. Unlike whole eggs, which contain fats in the yolk that can soften a crust, egg whites are almost pure protein. When they hit the hot oil, they tighten up and act as a powerful “glue.” This protein-rich barrier prevents the natural juices of the chicken from leaking out and steaming the starch from the inside out. This is why the coating stays attached to the meat rather than peeling off in the pan.
When you combine the protein of the egg whites with the fine particles of cornstarch, you create a microscopic network of bubbles. These bubbles expand rapidly in the heat, resulting in those craggy ridges you see in high-end restaurant versions. This specific combination is the only way to ensure the chicken stands up to a heavy honey glaze without losing its structural soul.
Essential Components for Honey Garlic Chicken
Quality ingredients are the foundation of any great meal, and this dish is no exception. Firstly, you want to use chicken breast cut into uniform 1-inch bites. This size is crucial because it ensures the meat cooks through at the exact moment the coating reaches peak golden-brown perfection. If the pieces are too large, you’ll end up with a burnt exterior and raw centers.
The binder is your next priority. You must whisk the egg whites until they are frothy and light before adding the chicken. This aeration helps the “glue” spread evenly into every nook and cranny of the meat. Additionally, don’t skimp on the aromatics. Freshly minced garlic and grated ginger provide a sharp, spicy bite that cuts through the sweetness of the honey. Powdered versions simply cannot replicate the aromatic oils found in the fresh roots.
Finally, let’s talk about the acid. Rice vinegar might seem like a small addition, but it’s the most important part of the sauce. Honey is incredibly glucose-heavy, and without the vinegar, the glaze would feel cloying and one-dimensional. The acid balances the sugars, making the sauce bright and craveable rather than just sugary. It also helps thin the honey just enough so it can reduce into a proper syrup.
Choosing the Right Frying Oil
For a successful shallow fry, you need an oil with a high smoke point. Vegetable oil or canola oil are the best choices here because they can easily handle the 350°F target temperature without breaking down or smoking. Avoid using extra virgin olive oil or butter for the frying stage. Olive oil has a lower smoke point and a strong flavor that will clash with the honey, while butter will burn and turn bitter long before the chicken is crispy.
Step-by-Step: Preparing the Chicken for Frying
The preparation phase follows a strict “Dry-Wet-Dry” philosophy. Firstly, you must pat the chicken pieces completely dry with paper towels. Any surface moisture left on the meat will create steam under the coating, which is the primary cause of breading falling off. Once the chicken is dry, toss it with your salt, pepper, and garlic powder so the seasoning is directly on the meat.
For a similar flavorful approach to chicken, explore skillet roasted lemon garlic chicken.
Next, give the chicken its egg white bath. Ensure every piece is glistening and coated. Then comes the most important part: the cornstarch dredge. Don’t just lightly toss the chicken in the starch. Instead, you should actually press the starch into the meat with your hands. This “pressing” action encourages the starch to clump slightly with the egg white, creating those irregular, craggy ridges that catch the sauce later.
As you work, you’ll notice the chicken looks a bit dusty and shaggy. This is exactly what you want. Those little shags of starch will transform into the ultimate crunch once they hit the oil. Set the coated pieces on a clean plate for a minute while your oil heats up, which allows the starch to fully hydrate and stick to the binder.
The Shallow Fry: Achieving Golden Perfection
Heating the oil correctly is a technical necessity. If you don’t have a thermometer, use the wooden spoon trick. Dip the handle of a wooden spoon into the oil; if steady bubbles form around the wood and float up, your oil is ready. Carefully place the chicken in the pan, but do not crowd it. If you put too many pieces in at once, the oil temperature will plummet, and the chicken will become greasy rather than crispy.
Fry the chicken in batches, giving each piece enough space to “breathe.” You’ll see the coating transition from a pale, dusty white to a vibrant golden-brown. Use tongs to flip them after about 3 or 4 minutes. You are looking for a deep, audible crunch when you tap the pieces together. Once they are done, move them to a wire rack set over a baking sheet.
Never drain fried chicken on paper towels. While it seems like a good way to remove grease, the paper towels trap steam underneath the chicken. That steam will immediately soften your hard-earned crust. A wire rack allows air to circulate around the entire piece, keeping it “shatter-crisp” while you finish the rest of the batches and prepare the glaze.
Reducing the Honey Garlic Glaze to a Syrup
The sauce is where many people go wrong by leaving it too watery. You aren’t looking for a thin liquid; you are aiming for a true syrup. Combine your honey, soy sauce, garlic, ginger, and vinegar in a saucepan and bring it to a vigorous simmer. As the water evaporates, the sugars in the honey and soy sauce will undergo a Maillard reaction, deepening the flavor and darkening the color.
Use the “back of the spoon” test to check the consistency. Dip a metal spoon into the glaze and run your finger through the middle. If the line stays clean and the sauce doesn’t run back into the gap, it’s ready. This thick consistency is what allows the sauce to coat the chicken without soaking into the crust. However, be careful not to over-reduce it, or the honey will burn and turn the glaze bitter.
The 10-Second Toss: Preserving the Crunch
Timing is everything in the final stage. Once your sauce is syrupy and your chicken is hot, place the chicken into a large stainless steel bowl. Pour the hot glaze over the top and toss it rapidly. You should spend no more than 10 seconds on this step. The goal is a quick, aggressive coat that covers every ridge without giving the liquid time to penetrate the starch barrier.
Using a bowl rather than tossing the chicken in the frying pan is a pro move. The residual heat of a heavy pan can continue to cook the chicken or scorch the honey. A cool stainless steel bowl gives you maximum control. As soon as the pieces are glistening and amber-colored, get them out of the bowl and onto a plate immediately.
Troubleshooting Common Texture Issues
If your coating falls off during frying, it’s almost always due to moisture. Either the chicken wasn’t patted dry enough, or the oil wasn’t hot enough when you started. Low oil temperature allows the binder to dissolve before it can set. Always ensure that sizzle is present the moment the meat touches the pan.
If your sauce is too thin and makes the chicken soggy, you simply didn’t simmer it long enough. It needs to be thick enough to hold its shape. On the other hand, if the chicken feels tough, you likely overcooked the small 1-inch cubes. They only need a few minutes per side. Finally, if the coating feels gummy, ensure you only used egg whites; the fat in yolks prevents that clean, brittle snap.
Flavor Variations and Ingredient Swaps
You can easily customize this dish to suit your palate. If you love heat, double the red pepper flakes or stir in a teaspoon of sriracha at the very end of the sauce reduction. For those who need a gluten-free option, this recipe is already halfway there. Just ensure your cornstarch is certified gluten-free and swap the soy sauce for Tamari.
If you want a brighter, more summery flavor, try a citrus twist. Adding a teaspoon of fresh orange zest or a squeeze of lime juice to the glaze adds a beautiful top note that complements the honey. You can also swap the parsley for cilantro if you prefer a more herbal, earthy finish to the dish.
What to Serve with Crispy Chicken Bites
While fluffy white rice is the classic choice for soaking up extra glaze, other sides can elevate the meal. Steamed bok choy or charred broccoli provide a necessary bitterness that balances the sweet honey. The crunch of the vegetables also mirrors the texture of the chicken, making for a very satisfying mouthfeel.
Complementary Dishes
To round out your meal of crispy honey garlic chicken bites, consider these dishes that offer great flavor pairings.
- For a root vegetable that complements the sweet and savory notes of the chicken, try these spicy glazed baby potatoes.
- If you’re looking for a lighter option that still features chicken, this garlic herb grilled chicken salad offers a fresh and herbaceous contrast.
For a bit of acidity, try serving this with quick-pickled cucumbers or radishes. The sharp vinegar bite cleanses the palate between pieces of rich, fried chicken. If you’re looking for a lighter base, cauliflower rice or quinoa work surprisingly well, as they provide a nutty backdrop that doesn’t compete with the bold garlic flavors.
Expert Tips for Meal Prep and Storage
Fried foods are always best eaten immediately, but you can manage leftovers if you’re smart about it. Whatever you do, avoid the microwave. The microwave will turn your crispy chicken into a rubbery, soft mess in seconds. Instead, use an air fryer or a toaster oven. Reheating at 375°F for about 4 minutes will revive the crunch and melt the glaze back into a delicious coating.
If you want to prep this ahead of time for a party, you can “par-fry” the chicken. Fry the pieces for just 2 minutes per side until they are pale gold and set. Let them cool on a wire rack. When you’re ready to serve, drop them back into hot oil for 60 seconds for a second fry. This “double fry” method is actually how many restaurants achieve their signature crunch.
Frequently Asked Questions
Can I bake these instead of frying?
You can bake them at 425°F on a wire rack, but the texture will be different. Frying creates an immediate steam-seal that keeps the meat juicy while hardening the starch. Baking tends to dry out the chicken before the starch can get truly “shatter-crisp.” If you must bake, spray the pieces heavily with oil first.
Can I use chicken thighs instead of breast?
Yes, chicken thighs work beautifully and are much harder to overcook. Because they have a higher fat content, they stay juicy even if they stay in the oil a minute too long. Just be sure to trim any excess fat so the coating can adhere properly to the meat.
How do I keep the chicken warm while cooking in batches?
The best way is to keep your wire rack and baking sheet in an oven set to 200°F. As you finish each batch, slide them into the warm oven. This keeps the chicken hot and allows air to circulate, ensuring the first batch is just as crispy as the last one when you’re ready to sauce.
What is the best way to mince garlic for maximum flavor?
For this sauce, using a microplane or a very fine grater is better than chopping with a knife. Grating the garlic turns it into a paste, which releases more sulfur compounds and allows the flavor to meld seamlessly into the honey without leaving large, chunky bits in the glaze.
Can I substitute honey with maple syrup?
You can, but the flavor profile will shift significantly. Maple syrup has a much thinner consistency and a distinct woody flavor. If you use it, you will need to reduce the sauce for a longer period to reach that syrupy stage, and the final dish will be much more “breakfast-forward” in its aroma.
Garnishing for Visual Impact
Presentation is the final step in mastering this dish. The deep amber color of the honey glaze looks stunning against a bright green garnish. Finely chopped parsley adds a fresh, peppery finish that lightens the heavy sauce. For an extra layer of texture and a professional look, sprinkle a teaspoon of toasted sesame seeds over the top right before serving. The white seeds pop against the dark glaze and add a subtle nuttiness that rounds out the entire experience.
Honey Garlic Chicken Bites
Course: Main CourseCuisine: AmericanDifficulty: easy4
servings15
minutes20
minutes510
kcal35
MinutesThese chicken bites feature a craggy, bubbly crust achieved through an egg white binder and cornstarch coating. Tossed in a thick honey and garlic glaze, they provide a perfect balance of sweet and savory without losing their signature crunch.
Ingredients
1.5 lbs chicken breast, cut into 1-inch pieces
2 egg whites, whisked until frothy
3/4 cup cornstarch (plus more if needed)
1/2 teaspoon salt
1/2 teaspoon garlic powder
1/4 teaspoon black pepper
1/2 cup neutral oil (vegetable or canola) for shallow frying
1/2 cup honey
3 tablespoons soy sauce
4 cloves garlic, minced
1 teaspoon fresh ginger, grated
1 tablespoon rice vinegar
1/2 teaspoon red pepper flakes (optional)
2 cups cooked white rice
1/4 cup fresh parsley, finely chopped
Directions
- Pat the chicken pieces completely dry with paper towels. In a bowl, toss the chicken with salt, pepper, and garlic powder.
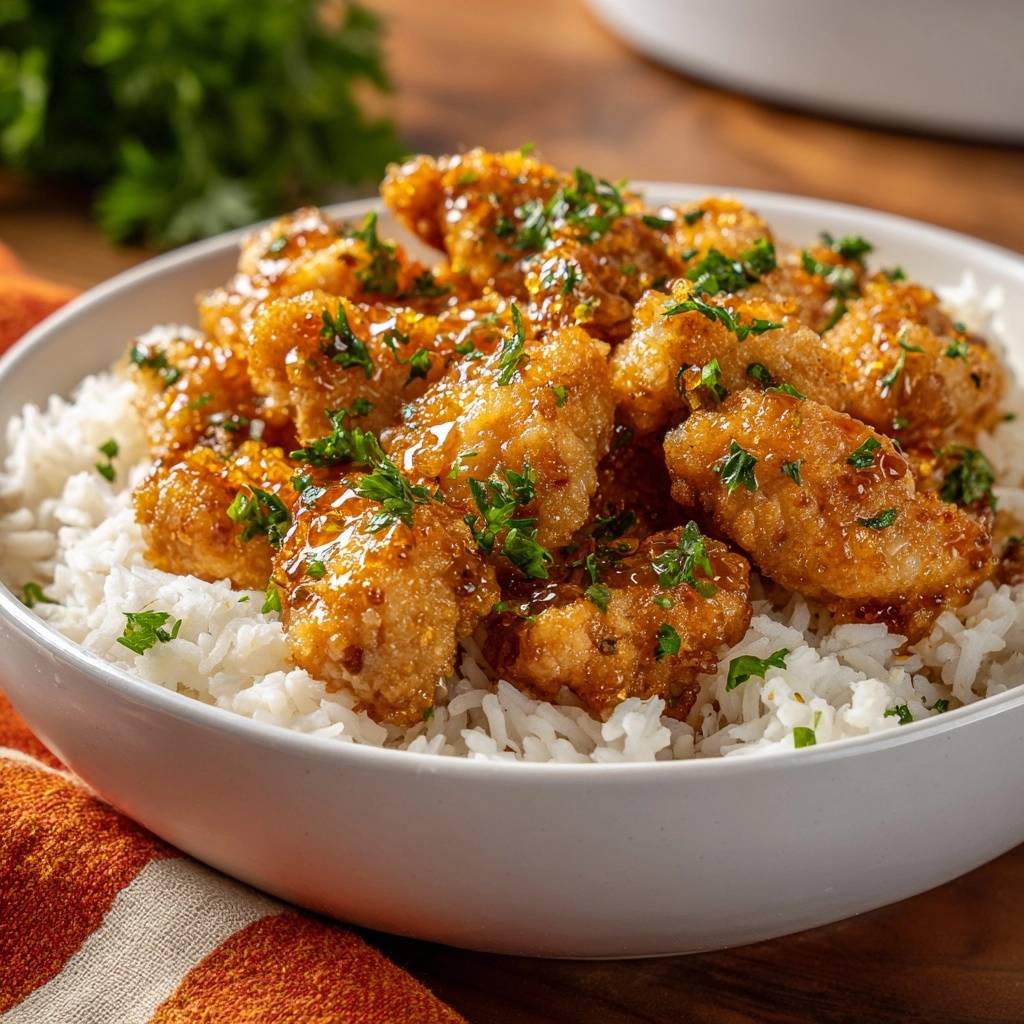
- Pour the whisked egg whites over the chicken and toss to coat. This acts as the “glue” for the heavy crust shown in the image.
- Place the cornstarch in a shallow dish. Dredge each piece of chicken in the cornstarch, pressing firmly so the starch clumps slightly to create those craggy, crispy ridges.
- Heat 1/2 cup of oil in a large skillet over medium-high heat until it shimmers (approx. 350°F).
- Fry the chicken in batches to avoid crowding. Fry for 3-4 minutes per side until the coating is golden-brown and deeply crunchy. Transfer the chicken to a wire rack set over a baking sheet; do not use paper towels, as trapped steam will soften the crust.
- While the chicken rests, combine honey, soy sauce, garlic, ginger, and rice vinegar in a small saucepan. Bring to a vigorous simmer over medium heat.
- Reduce the sauce for 4-6 minutes until it reaches a thick, syrupy consistency that coats the back of a spoon.
- Place the hot chicken in a large stainless steel bowl. Pour the thickened glaze over the chicken and toss quickly for no more than 10 seconds to ensure even coverage while maintaining the “crunch.”
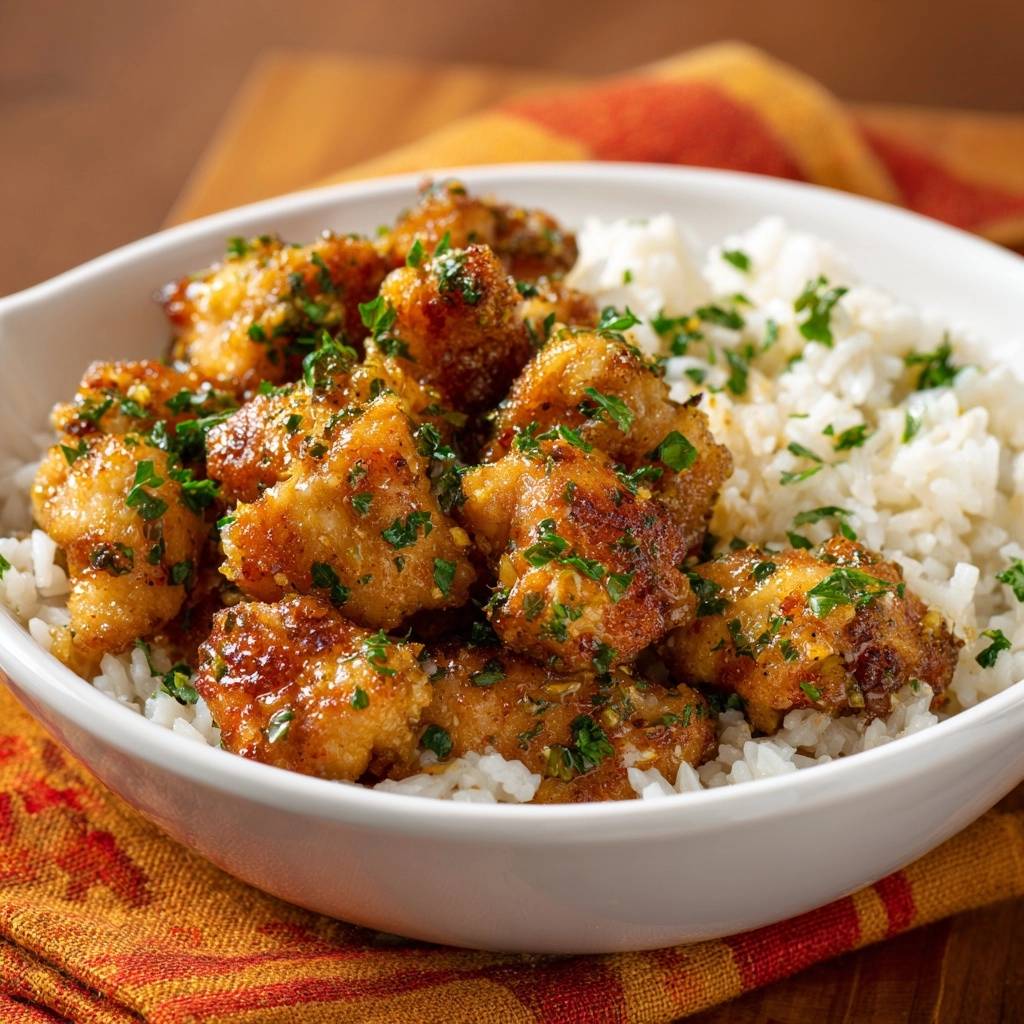
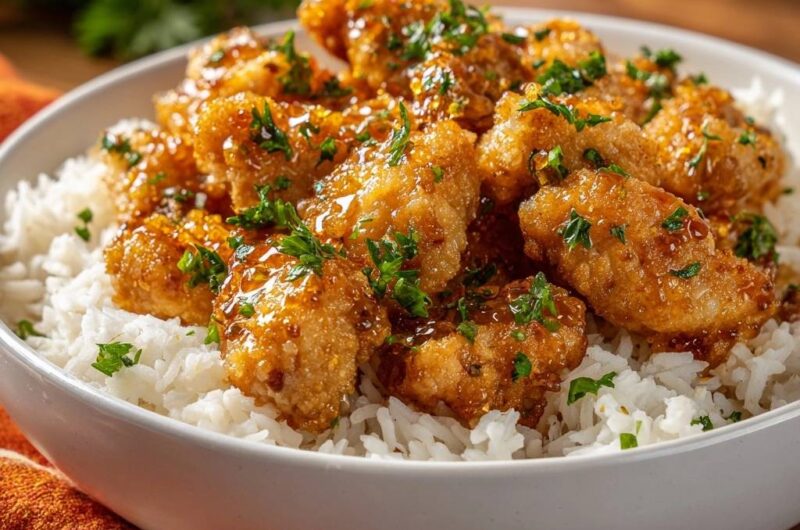
- Serve immediately over a bed of fluffy white rice. Garnish generously with fresh chopped parsley to match the visual presentation.
Notes
- To maintain maximum crunch, rest the fried chicken on a wire rack instead of paper towels to prevent steam from softening the crust. Toss with the sauce for no more than 10 seconds just before serving.