Most home cooks have experienced the disappointment of a watery, mushy potato casserole. You expect a rich, velvety side dish, but you end up with a pool of thin liquid and potatoes that have lost all their structural integrity. This “soggy bottom” epidemic happens because traditional horizontal layering traps moisture between the slices, effectively steaming the potatoes in their own juices until they turn to mush.
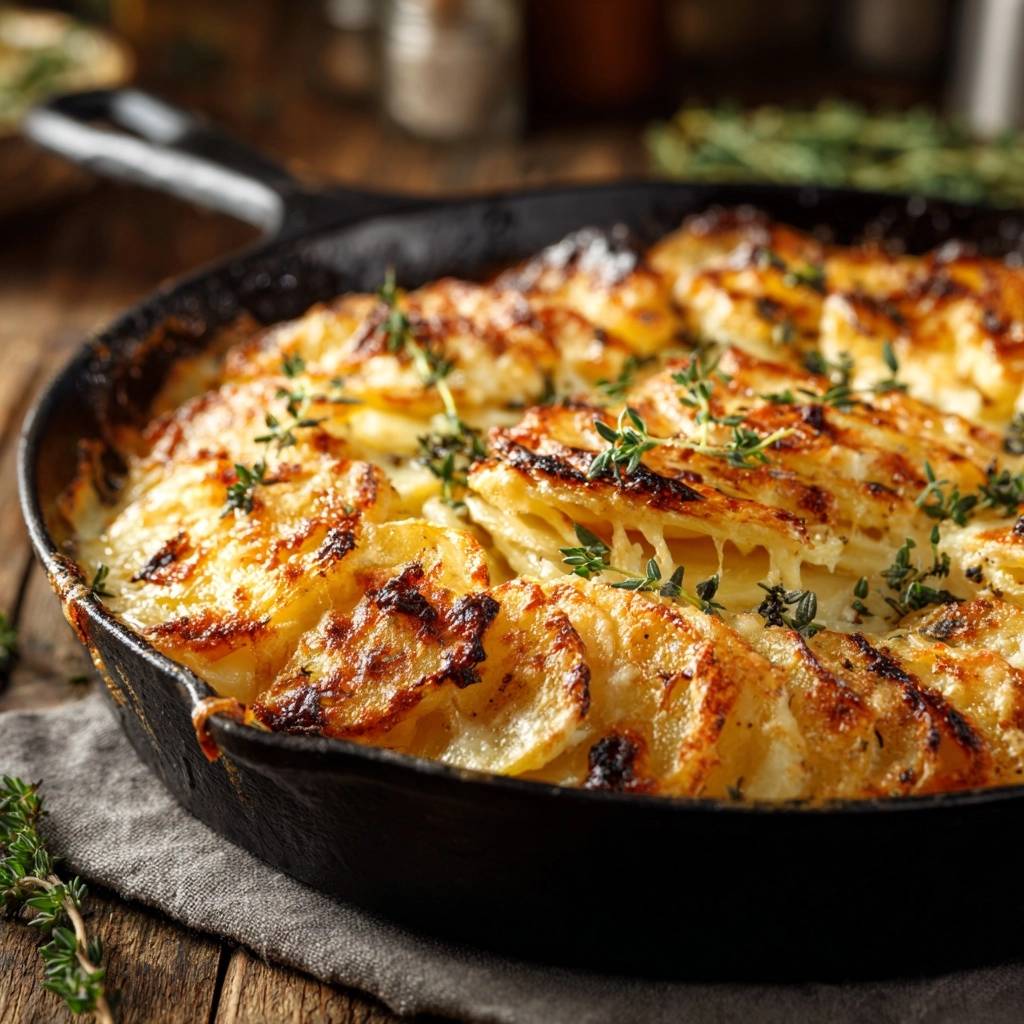
The secret to a truly transformative side dish lies in the skillet method. By using a cast iron pan and a vertical shingling technique, we create a sensory masterpiece of textures. You get shatteringly crisp, golden-brown ridges on top that contrast beautifully with the tender, cream-soaked interior. It is the ultimate upgrade to a classic comfort food that finally delivers on the promise of a perfect crunch.
For a different take on a rich potato bake, learn how to achieve creamy scalloped potatoes without curdling.
The real magic happens when you ditch the deep ceramic baker for a shallow, heavy skillet. This allows steam to escape freely while the heavy iron sears the edges of the potatoes. To ensure success, always use a mandoline to get those slices exactly 1/8 inch thick. This precision ensures every piece cooks at the same rate, leaving no crunchy raw bits or overcooked paste behind.
For a richer flavor, consider trying creamy rosemary scalloped potatoes next.
The Science of the Anti-Soggy Potato
Physics plays a massive role in why this recipe works where others fail. When you lay potato slices flat in a deep dish, you create a seal that prevents evaporation. The water released by the potatoes has nowhere to go, so it thins out your cream sauce and boils the starch. This results in that dreaded “soup” at the bottom of your pan.
Vertical shingling, often called the Hasselback effect, changes the game by allowing steam to travel upward and out of the skillet. As the water evaporates, the starches and fats from the heavy cream concentrate. This creates a thick, luxurious glaze that clings to the potatoes rather than pooling around them. It essentially turns the top of every potato slice into a tiny, crispy chip.
We also rely on the specific starch profile of Yukon Gold potatoes. These potatoes contain a high amount of amylopectin, which helps them hold their shape even after an hour in the oven. Unlike Russets, which tend to fall apart and become grainy, Yukon Golds maintain a creamy, waxy texture that feels incredibly indulgent on the tongue.
Essential Components for Crispy Skillet Scalloped Potatoes
Quality ingredients are the foundation of this dish because there are so few of them. Yukon Gold potatoes are non-negotiable here. Their natural buttery flavor and medium starch content provide the perfect balance of structural integrity and creamy mouthfeel. If you try to use a starchy Russet, the dish may become unpleasantly mealy.
The dairy you choose is equally important for a stable sauce. You must use heavy cream and whole milk to achieve the right fat-to-liquid ratio. Low-fat substitutes or skim milk lack the emulsifiers needed to withstand high heat. If the fat content is too low, the sauce will “break” or curdle, leaving you with oily yellow droplets and gritty white clumps.
Don’t forget the butter for the skillet. Greasing the cast iron generously with unsalted butter does more than just prevent sticking. It mingles with the potato starches at the base of the pan to create a fried, savory crust that is often the best part of the entire meal.
Aromatic Infusions: Garlic, Thyme, and Nutmeg
We don’t just pour cold cream over the potatoes; we build a flavor foundation first. By simmering the cream with smashed garlic cloves, we extract the sweet, mellow essence of the garlic without the harsh bite of minced bits. Smashing the cloves releases the oils while keeping the garlic intact so it can be easily discarded before baking.
Fresh thyme leaves add an earthy, floral note that cuts through the richness of the dairy. While dried herbs can work in a pinch, fresh thyme stays vibrant under the high heat of the oven. A tiny pinch of ground nutmeg is the “secret” ingredient that makes people ask for the recipe. It adds a subtle warmth that enhances the natural sweetness of the cream.
Selecting the Right Cheese for Melting and Browning
The cheese provides the final layer of flavor and that iconic golden crust. Gruyère is the gold standard for scalloped potatoes because of its nutty profile and incredible melting capabilities. It has a high “oil-off” point, meaning it melts smoothly without becoming a greasy mess. It browns beautifully, contributing to the Maillard reaction that creates those savory, charred spots.
If you prefer something sharper, a high-quality sharp white cheddar is an excellent alternative. Look for an aged cheddar, as the lower moisture content leads to a crispier finish. Avoid pre-shredded cheeses in bags; they are coated in potato starch or cellulose to prevent clumping, which interferes with the melting process and can make your sauce feel chalky.
Why Cast Iron is the Superior Vessel
A cast iron skillet is a powerhouse of heat retention and emissivity. Unlike glass or ceramic, which take a long time to heat up and often cook unevenly, cast iron radiates intense heat. This thermal mass sears the bottom and sides of the potato stacks simultaneously. It creates a 360-degree crunch that a standard casserole dish simply cannot replicate.
The dark surface of the iron also encourages better browning. As the skillet sits in the 400-degree oven, it acts like a secondary heat source, frying the edges of the potatoes that touch the metal. This ensures that the very first bite is just as crispy as the very last one.
Preparing the Infused Cream Base
To start, combine your cream, milk, garlic, and herbs in a small saucepan. You want to bring this mixture to a gentle simmer, not a rolling boil. Boiling the cream too vigorously can destabilize the emulsion, which might cause it to separate later in the oven. Watch for small bubbles forming around the edges of the pan.
Once it reaches that simmer, pull it off the heat immediately. Let it sit for at least 10 minutes. This rest period is vital for flavor extraction. It gives the garlic and thyme enough time to steep, ensuring every drop of liquid is packed with aromatic goodness. Remember to fish out the garlic cloves before pouring the liquid over your potatoes.
The Vertical Shingling Technique Explained
This is the most important step for achieving that “anti-soggy” result. Instead of laying the potato slices flat, you will stand them up on their edges. Grab a small stack of about 10 to 15 slices and place them vertically in the buttered skillet. Continue this around the perimeter, working your way toward the center in a circular rose pattern.
The tightness of the pack matters. You want the potatoes to be snug enough that they don’t flop over, but not so tight that the cream can’t flow between them. If you pack them too loosely, they will fall flat and you’ll lose the vertical advantage. If they are too tight, the centers might stay raw while the edges burn.
When you pour the cream over the potatoes, aim for the liquid to reach about two-thirds of the way up the sides. This leaves the top edges exposed to the dry heat of the oven. Those exposed tips will dehydrate and brown, creating the signature crispy ridges that make this dish so visually stunning and delicious.
The Two-Stage Baking Process
We use a “steam then sear” philosophy to ensure the potatoes are fully cooked but perfectly crisp. For the first 30 minutes, the skillet is covered tightly with foil. This traps just enough moisture to tenderize the dense potato centers. Without this step, the outside would burn before the inside was soft enough to eat.
The second stage is where the magic happens. After removing the foil and adding the cheese, the potatoes are exposed to the direct heat of the oven. This allows the remaining moisture to evaporate rapidly. The cream thickens into a velvety sauce, and the cheese begins to bubble and brown into a savory crust.
Achieving the Perfect Golden Ridge
If you want that “shatteringly crisp” texture, the broiler is your best friend. During the last 2 or 3 minutes of baking, keep a very close eye on the skillet. The high heat of the broiler will quickly turn the cheese and potato edges into a deep golden brown with “leopard spotting” charred bits.
Be careful when moving the skillet, as cast iron is incredibly heavy and retains heat for a long time. Use heavy-duty oven mitts and place the skillet on a sturdy surface. The intense heat of the broiler can turn “perfectly browned” to “burnt” in a matter of seconds, so do not walk away from the oven during this final stage.
Troubleshooting Common Potato Pitfalls
If your sauce seems too thin when you pull it out of the oven, don’t panic. The most common cause is simply not letting the dish rest. The starches need time to cool slightly and bind with the liquid. If the sauce is still watery after resting, it usually means the potatoes weren’t packed tightly enough or the cream didn’t have a high enough fat content.
Are the potatoes still firm in the center? This usually happens if the slices were thicker than 1/8 inch. To fix this, you can cover the skillet back up with foil and bake for an additional 10 to 15 minutes. Next time, use a mandoline to ensure uniform, thin slices that cook through quickly.
If your cheese looks oily or separated, you likely used pre-shredded cheese or your oven was running too hot. The additives in bagged cheese prevent a smooth melt. Always grate your cheese fresh from the block for the best results. If the sauce looks curdled, it’s often a sign that the cream was boiled too hard during the infusion stage.
Optimal Resting: The Secret to a Set Sauce
The 15-minute rest period is a mandatory part of the cooking process, not a suggestion. When the dish is bubbling hot, the starches are still fluid. As the temperature drops slightly, those starches begin to re-absorb the liquid and the fats. This turns a potentially soupy skillet into a cohesive, sliceable side dish.
During this time, the flavors also have a chance to settle and deepen. If you cut into it immediately, the sauce will run to the bottom of the pan, leaving the top potatoes dry. Patience here ensures that every serving has the perfect amount of creamy sauce clinging to every crispy potato slice.
Pairing Suggestions for Rich Potato Dishes
Because these potatoes are incredibly rich and decadent, they pair best with main courses that offer a bit of acidity or brightness. A lemon-herb roasted chicken is a classic choice, as the citrus cuts through the heavy cream. The herbal notes in the chicken also complement the fresh thyme in the potatoes.
What to Try Next
Round out your meal with these chicken dishes.
- For a fresh contrast to your potatoes, consider the Garlic Herb Grilled Chicken Salad, featuring bright herbs and tender chicken.
- If you’re in the mood for something creamy and satisfying, the Creamy Zesty Chicken and Corn Salad offers vibrant flavors that pair well.
For a lighter contrast, serve the skillet alongside a sharp arugula salad with a vinaigrette. The peppery bite of the greens balances the nutty Gruyère. If you are looking for a hearty winter meal, braised beef short ribs provide a deep, savory flavor that stands up well to the bold textures of the crispy potato ridges.
Make-Ahead Strategies and Reheating Instructions
You can partially prepare this dish by slicing the potatoes and infusing the cream ahead of time. However, do not store raw sliced potatoes in the cream overnight, as they will oxidize and turn a greyish color. If you need to prep ahead, par-bake the dish covered for the first 30 minutes, let it cool, and refrigerate. Finish the second baking stage right before serving.
Freezing is not recommended for this dish. Cream-based sauces often undergo texture degradation when frozen and thawed, resulting in a grainy or “broken” sauce. The potatoes can also become unpleasantly soft and watery once they lose their structural integrity in the freezer.
To reheat leftovers, avoid the microwave at all costs. It will make the potatoes rubbery and the cheese greasy. Instead, place the potatoes back in a skillet or oven-safe dish, cover with foil, and heat at 350 degrees F until warmed through. Remove the foil for the last 5 minutes to help the edges regain some of their original crispiness.
Expert Tips for Skillet Success
Never rinse your potatoes after slicing them. You want to preserve every bit of surface starch, as this is what thickens the cream into a luxurious sauce. If you rinse them, you’ll likely end up with a much thinner, more watery result. Just slice them and get them straight into the skillet.
Using a mandoline is the only way to get the 1/8 inch precision required for this recipe. If the slices are uneven, some will be mushy while others are still hard. If you don’t have a mandoline, take your time with a very sharp chef’s knife and aim for translucent, uniform rounds.
Always perform the “knife test” before taking the skillet out for the final time. Insert a paring knife into the center of the potatoes; it should slide in and out with absolutely no resistance. Finally, remember to adjust your salt levels based on your cheese. If you are using a very salty aged cheddar, you might want to slightly reduce the kosher salt in the cream mixture.
Frequently Asked Questions
How do I store leftovers?
Store any leftovers in an airtight container in the refrigerator for up to 3 days. Because of the high dairy content, they should be chilled as soon as they reach room temperature. When reheating, use the oven method mentioned above to maintain the best texture. Do not freeze this dish, as the cream sauce will separate and the potatoes will become grainy.
Why are my potatoes still hard after an hour?
This usually happens if the potato slices were too thick or if the oven temperature was inconsistent. If you find they are still firm, cover the skillet with foil to prevent the top from burning and continue baking in 10-minute increments. Using a mandoline to ensure 1/8 inch thickness is the best way to prevent this issue in the future.
Can I use a different type of potato?
While Yukon Golds are the best choice for their balance of starch and waxiness, you can use red potatoes in a pinch. However, avoid Russet potatoes if possible. Russets are very starchy and tend to break down completely, which can lead to a mushy texture rather than the distinct, crispy slices this recipe aims for.
What if I don’t have a cast iron skillet?
You can use a heavy stainless steel skillet or a ceramic baking dish, but you may not get the same level of crispiness on the bottom and sides. Cast iron is unique in its ability to radiate high heat. If using ceramic, you might need to increase the final baking time by 5-10 minutes to achieve a similar golden-brown crust on the top.
Can I use dried herbs instead of fresh?
Yes, you can substitute dried thyme if fresh isn’t available. Use about 1 teaspoon of dried thyme in place of the tablespoon of fresh leaves. Keep in mind that dried herbs are more concentrated, so a little goes a long way. Add them to the cream during the simmering stage so they have time to rehydrate and release their oils.
Why did my cream sauce curdle?
Curdling usually happens for two reasons: using low-fat dairy or boiling the cream too hard. Always use heavy cream and whole milk to ensure there is enough fat to stabilize the sauce. Additionally, ensure you only bring the cream to a gentle simmer during the infusion stage. High heat can break the emulsion before the dish even enters the oven.
Scalloped Potatoes
Course: Side DishCuisine: AmericanDifficulty: medium6
servings20
minutes1
hour340
kcal80
MinutesThis recipe reimagines traditional scalloped potatoes by using a cast iron skillet and vertical arrangement. By allowing steam to escape and the heavy iron to sear the edges, these potatoes achieve a perfect balance of tender interiors and shatteringly crisp golden tops.
Ingredients
3 pounds Yukon Gold potatoes, sliced 1/8 inch thick
1.5 cups heavy cream
1/2 cup whole milk
3 cloves garlic, smashed
1 tablespoon fresh thyme leaves, plus extra sprigs for garnish
1.5 cups shredded Gruyere or sharp white cheddar cheese
2 tablespoons unsalted butter
1.5 teaspoons kosher salt
1/2 teaspoon black pepper
1/4 teaspoon ground nutmeg (optional)
Directions
- Preheat your oven to 400 degrees F.
- In a small saucepan, combine the heavy cream, milk, smashed garlic, thyme, salt, pepper, and nutmeg. Heat over medium heat until it just begins to simmer. Remove from heat and let steep for 10 minutes to infuse the flavors, then discard the garlic cloves.
- While the cream steeps, generously butter a 10 or 12-inch cast iron skillet. The heavy iron is the secret to the crispy bottom and sides shown in the image.
- Arrange the raw potato slices in the skillet by grabbing small stacks and standing them up vertically. Pack them in a tight circular shingle pattern. This vertical orientation is crucial; it allows moisture to evaporate upward rather than trapping it between flat layers, which prevents the “soggy bottom” effect.
- Pour the infused cream mixture carefully over the potatoes. It should come about halfway to two-thirds of the way up the sides of the potatoes, leaving the very tops exposed to the air so they can crisp.
- Cover the skillet tightly with aluminum foil. Place the skillet on a baking sheet (to catch any bubble-over) and bake for 30 minutes.
- Remove the foil. Sprinkle the shredded cheese evenly over the potatoes, ensuring some falls into the crevices.
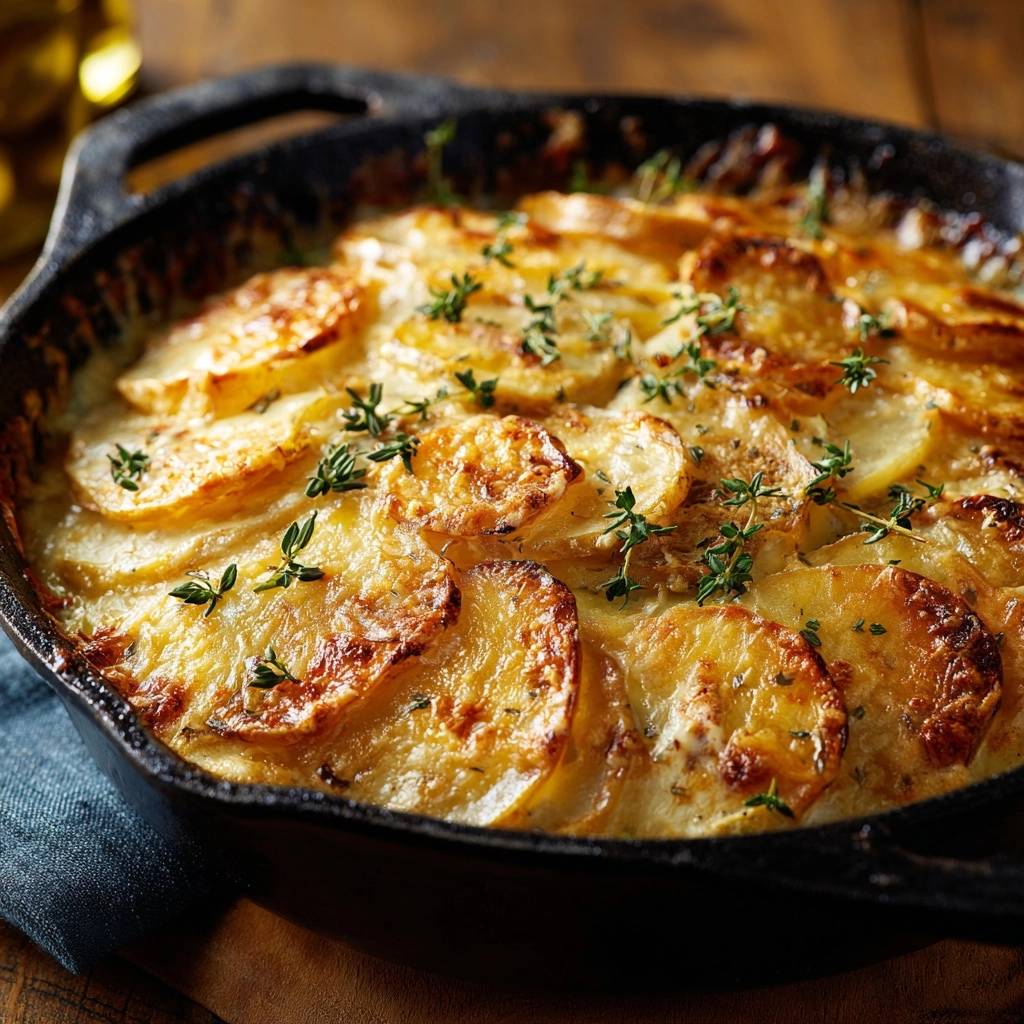
- Return the skillet to the oven, uncovered, and bake for another 25 to 30 minutes. The exposed potato edges will brown and crisp into golden ridges, and the cheese will become bubbly and charred in spots.
- For an extra-crispy finish as seen in the image, you can broil the skillet for the final 2-3 minutes, watching closely to prevent burning.
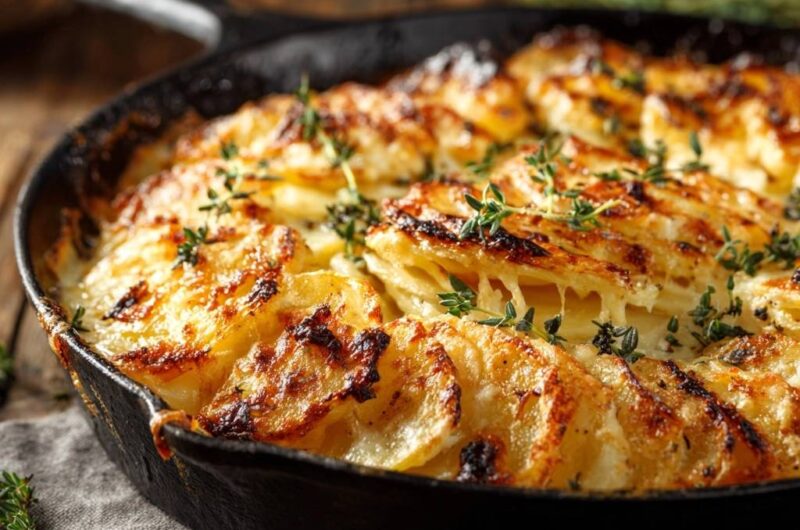
- Let the dish rest for 10 to 15 minutes before serving. This is a mandatory step to allow the starch to set and the sauce to thicken. Garnish with fresh thyme sprigs and serve directly from the skillet.
Notes
- The vertical shingling technique is essential for moisture evaporation. Resting the dish for 10 to 15 minutes after baking is mandatory to allow the sauce to thicken and the starch to set.