Most home cooks have experienced the heartbreak of a soggy zucchini fritter. You start with fresh vegetables and high hopes, but you end up with a mushy, pale patty that falls apart the moment your fork touches it. The contrast between a limp vegetable pancake and a truly shatter-crisp fritter is all about mastering moisture management.
The secret to achieving that coveted restaurant-style crunch lies in a simple but non-negotiable salt-and-squeeze technique. By removing the hidden water inside the zucchini, you transform a watery vegetable into a concentrated, savory base that fries up beautifully. This method ensures every bite offers a golden, craggy exterior that stands up to a sweet honey drizzle.
I’ve found that the real trick to structural integrity is using a dual-binder system. While many recipes rely solely on flour, adding Panko breadcrumbs creates a skeletal framework that keeps the fritter light and airy. This combination prevents the interior from becoming gummy while the outside develops a deep, mahogany crust in the skillet.
The Science of Moisture in Crispy Zucchini Fritters
Zucchini is roughly 95% water, which is the primary enemy of anything fried. When you grate zucchini, you break open the cell walls, releasing moisture that will inevitably turn into steam once it hits hot oil. If you don’t remove this liquid beforehand, your fritters will essentially boil from the inside out rather than frying.
Osmosis is your best friend in this process. By sprinkling salt over the grated zucchini, you create a high-concentration environment outside the vegetable cells. This forces the water to move out of the zucchini to balance the salinity, effectively “sweating” the vegetable before it ever touches the pan.
Skipping the dehydration step leads to a “steaming” effect where the flour turns into a wet paste. However, when you take the time to draw that water out, the flour and Panko can actually bond with the vegetable fibers. This results in a crisp, stable fritter that maintains its shape and provides a satisfying snap when you bite into it.
Essential Components for Structural Integrity
Every ingredient in this recipe serves a specific structural purpose. The all-purpose flour acts as the primary glue, while the Panko breadcrumbs provide “craggy” surface area for the oil to crisp up. This dual-binder approach is superior to using flour alone, which can often feel heavy or doughy.
The egg is the protein-rich binder that sets quickly upon contact with heat, locking the other ingredients in place. In addition, the grated parmesan cheese isn’t just for flavor. As the cheese melts and then fries against the skillet, it creates a lacy, caramelized edge that adds a secondary layer of crunch.
Selecting the Right Zucchini
Size matters when you are shopping for produce. Medium zucchinis are ideal because they have smaller seeds and a lower water-to-flesh ratio than those giant, “baseball bat” garden zucchinis. Smaller squash also have a more tender skin, which we keep on for that beautiful green flecked appearance and extra fiber.
Panko vs. Standard Breadcrumbs
Standard breadcrumbs are often too fine and can make the batter feel like a dense meatloaf. Panko breadcrumbs are larger, jagged flakes that don’t absorb as much oil. These airy shards create little pockets of texture that stay crispy even after you drizzle the fritters with a sweet glaze.
Step-by-Step: Achieving the Perfect Crunch
Success with fritters is all about the transition from a wet vegetable to a dry, fryable batter. You want to see a visible transformation in the texture of the zucchini before you even think about turning on the stove.
For more crunchy zucchini options, consider these crispy zucchini fries.
Phase 1: The Salt and Dehydration Process
After grating your zucchini, toss it with the salt and let it sit in a colander for at least 10 minutes. You will notice a pool of green liquid forming at the bottom of the bowl. This is exactly what you want to see, as it means the salt is doing its job.
Once the time is up, transfer the zucchini to a clean kitchen towel. Twist the towel with all your strength to wring out every last drop of moisture. You should end up with a dry, compacted ball of zucchini that looks significantly smaller than when you started.
Phase 2: Mixing for Aeration and Binding
When you mix your ingredients, use a light hand. Over-mixing can develop the gluten in the flour, which leads to a tough, bready texture. Stir just until the egg and flour have coated the zucchini and breadcrumbs into a thick, tacky batter.
The consistency should be sturdy enough that you can scoop it with a spoon and it holds its shape. If it feels runny, you likely didn’t squeeze enough water out of the zucchini. In that case, add an extra tablespoon of Panko to help stabilize the mixture.
Phase 3: The Shallow Fry Technique
A cast-iron skillet is the best tool for this job because it holds heat consistently, even when you add cold batter to the pan. Heat about 1/4 inch of vegetable oil until it shimmers. You can test the heat by dropping a tiny bit of batter into the oil; it should sizzle and bubble immediately.
Drop rounded tablespoons of the mixture into the oil and flatten them gently with a spatula. Cook them for about 3 to 4 minutes per side. You are looking for a deep golden-brown color and edges that feel firm and crispy when poked with your turner.
Avoiding Common Fritter Mistakes
The most common mistake is crowding the pan. If you put too many fritters in at once, the temperature of the oil will plummet. Instead of searing the exterior, the fritters will sit in lukewarm oil and soak it up like a sponge, resulting in a greasy mess.
Another pitfall is flipping the fritters too early. You must wait until the bottom has formed a solid, browned crust. If you try to flip them while they are still pale, they will likely break apart. Patience in the first three minutes is the key to a successful flip.
Flavor Variations and Savory Swaps
While the garlic and green onion base is classic, you can easily customize these fritters. Adding a handful of sweet corn kernels provides a nice pop of texture and natural sugar. You could also crumble in some feta cheese for a tangy, salty kick that complements the zucchini perfectly.
Herbal Enhancements
Fresh herbs can brighten the flavor of the fried batter significantly. Try adding two tablespoons of chopped fresh dill or mint to the mixture. These herbs provide a cooling contrast to the richness of the oil and the warmth of the garlic.
Spice Cabinet Additions
If you want to add some depth without changing the moisture levels, look to your spice rack. A teaspoon of smoked paprika adds a lovely woodsy note, while a pinch of red pepper flakes provides a gentle heat that cuts through the sweet honey glaze.
Optimal Pairings for Crispy Zucchini Fritters
The combination of savory zucchini and a sweet honey or maple drizzle is a game-changer. To balance the richness, serve these with a bright lemon-arugula salad. The acidity of the lemon juice acts as a palate cleanser between bites of the crispy fritters.
A cooling yogurt-based dip is another fantastic pairing. You can whisk together some Greek yogurt, lemon zest, and a pinch of salt for a simple sauce. This creamy element provides a beautiful textural contrast to the “shatter-crisp” exterior of the zucchini patties.
Make-Ahead Strategy and Reheating Instructions
Fritters are always best served immediately, but you can make them ahead of time if necessary. Never use a microwave to reheat them, as this will turn the Panko soggy and the zucchini rubbery. The microwave is truly the enemy of the fried fritter.
To regain that original crunch, place the cold fritters on a wire rack set over a baking sheet. Heat them in a 375°F oven for about 8 to 10 minutes. The wire rack allows hot air to circulate under the fritter, crisping up the bottom while the top heats through.
Expert Troubleshooting and FAQ
How do I store leftover zucchini fritters?
Store your leftovers in an airtight container in the refrigerator for up to 3 days. To keep them as fresh as possible, place a piece of paper towel between layers to absorb any residual moisture. While you can freeze them for up to a month, the texture will be slightly softer upon thawing, so reheating in a hot oven is mandatory.
Why did my fritters turn brown too fast on the outside but stay raw inside?
This usually happens when your oil is too hot. If the oil is smoking or the fritters turn dark brown in less than two minutes, turn the heat down. You want a steady, medium-high sizzle that allows the heat to penetrate the center of the fritter at the same rate the exterior browns.
Can I use gluten-free flour for this recipe?
Yes, you can substitute the all-purpose flour with a 1:1 gluten-free flour blend. However, make sure your Panko breadcrumbs are also a gluten-free variety. The moisture-squeezing step is even more important with gluten-free flours, as they can sometimes become “slimy” if the batter is too wet.
My batter is still watery even after squeezing, what should I do?
If you see liquid pooling at the bottom of your mixing bowl, your zucchini wasn’t squeezed dry enough. Don’t panic! Simply stir in an extra tablespoon or two of Panko breadcrumbs. The breadcrumbs will act as a sponge and soak up that extra moisture, helping the fritters hold together in the pan.
Can I air-fry these instead of shallow frying?
You can air-fry them, but the texture will be different. To do so, spray the basket and the fritters generously with oil spray. Cook at 400°F for about 10-12 minutes, flipping halfway through. Note that they won’t have the same “craggy” golden crust that you get from the direct contact with a hot, oiled skillet.
Maintaining the Crunch After Frying
The “Wire Rack Secret” is the most important part of the post-cooking process. If you place hot fritters directly onto a flat plate or even a paper towel, the heat coming off the bottom creates steam. That steam gets trapped and immediately softens the crust you worked so hard to build. By using a wire cooling rack, air can circulate 360 degrees around the fritter, keeping it crispy on all sides while you finish the rest of the batches.
Zucchini Fritters
Course: AppetizerCuisine: AmericanDifficulty: easy4
servings15
minutes10
minutes210
kcal25
MinutesA restaurant-style zucchini fritter recipe that focuses on moisture management to ensure a golden, shatter-crisp exterior. These fritters are finished with a sweet honey or maple syrup glaze for a perfect balance of savory and sweet.
Ingredients
2 medium zucchinis, grated
1 teaspoon salt
1/2 cup all-purpose flour
1/2 cup Panko breadcrumbs (for extra visual texture and crunch)
1/4 cup grated parmesan cheese
1 large egg, beaten
2 cloves garlic, minced
2 green onions, thinly sliced
1/4 teaspoon black pepper
1/2 cup vegetable oil for shallow frying
Honey or maple syrup for drizzling
Directions
- Place the grated zucchini in a colander and sprinkle with 1 teaspoon of salt. Let it sit for 10 minutes. This is the most critical step to prevent sogginess.
- Using a clean kitchen towel or cheesecloth, wrap the zucchini and squeeze with all your strength. You must extract as much liquid as possible until the zucchini feels dry and compacted.
- In a large bowl, combine the squeezed zucchini, flour, Panko breadcrumbs, parmesan, egg, garlic, green onions, and pepper. Stir until a thick, bindable batter forms.
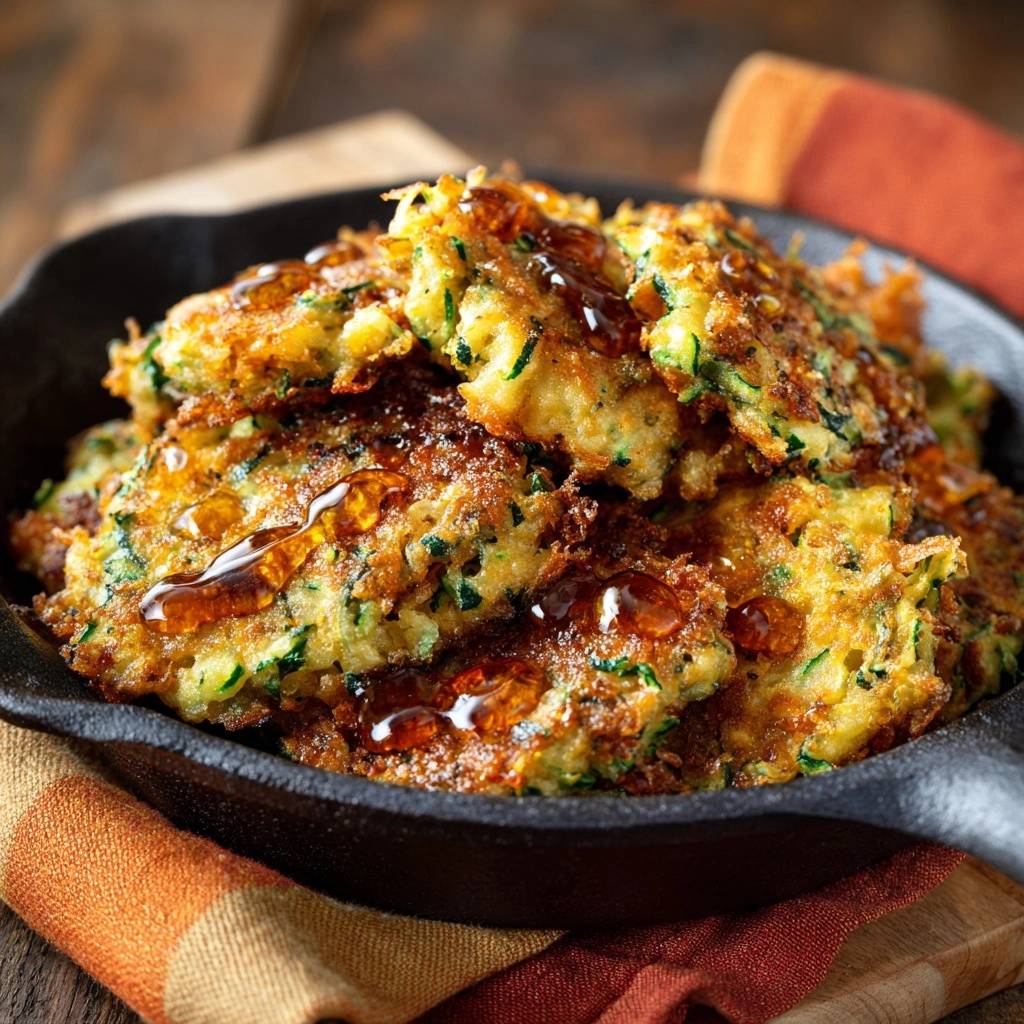
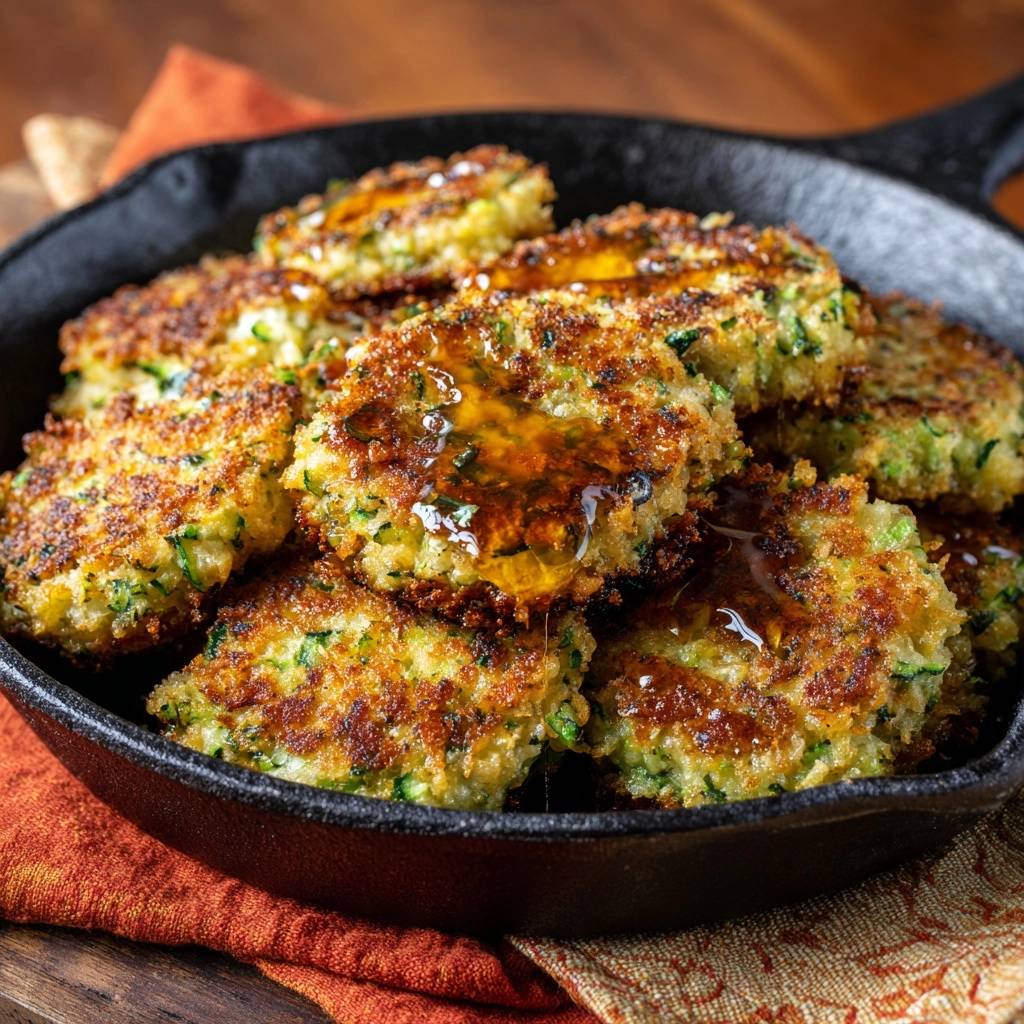
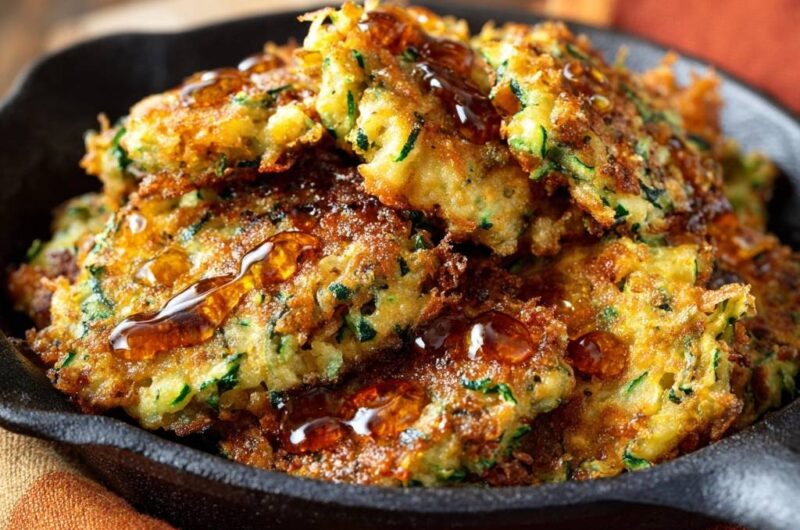
- Heat the vegetable oil in a large cast-iron skillet over medium-high heat. The oil should be about 1/4 inch deep to achieve the craggy, golden crust seen in the image. Wait until the oil is shimmering and a small pinch of batter sizzles instantly.
- Drop rounded tablespoons of the mixture into the hot skillet and flatten slightly with a spatula.
- Cook for 3 to 4 minutes per side. Do not crowd the pan, as this lowers the oil temperature and leads to oil absorption. Flip only once the edges are deeply browned and the crust is firm.
- Transfer the fritters to a wire rack for 1 minute to drain. This maintains airflow and prevents the bottoms from steaming.
- Pile the fritters into a warm skillet or serving dish and immediately drizzle with honey or maple syrup while hot, allowing the glaze to pool slightly on the crispy ridges.
Notes
- The most critical step is squeezing the liquid out of the zucchini using a kitchen towel. Use a wire rack for draining to maintain airflow and prevent the bottoms from becoming soggy.