Imagine pulling a tray of cookies from the oven, the aroma of toasted nuts and rich cocoa filling your kitchen, only to lift one up and find a greasy, limp mess. We’ve all felt that disappointment when a beautiful cookie lacks the structural integrity to hold its own weight. A truly great cookie should offer a definitive snap at the edges while transitioning into a dense, fudgy center that feels like a decadent truffle.
The “Anti-Soggy Bottom” method isn’t just a catchy name; it’s a technical approach to home baking that solves the most common chocolate cookie failures. By focusing on the physics of heat and the chemistry of fats, you can create a cookie that stands tall and stays crisp. This recipe moves away from the thin, oily puddles of standard bakes and delivers a robust, bakery-style masterpiece every single time.
The secret to this success lies in the 10-minute flash-freeze. By chilling the dough balls right before they hit the high heat of the oven, you ensure the outer shell sets instantly. This creates a structural “skeleton” for the cookie, preventing the butter from leaking out and soaking the bottom of the dough before it has a chance to bake.
For more ideas on keeping baked goods perfectly formed, check out this red velvet cheesecake stuffed cookies.
The Chemistry of the Perfect Double Chocolate Hazelnut Cookie
Creating a deep chocolate flavor requires more than just adding cocoa; it involves managing the interaction between high-fat cocoa powder and butter. Cocoa powder is naturally acidic, and when it meets baking soda, it creates a chemical reaction that produces carbon dioxide. This lift is what prevents your cookies from becoming dense, leaden pucks of dough.
The ratio of granulated sugar to light brown sugar is also a calculated move for structural success. Granulated sugar is hygroscopic but also aids in crisping as it recrystallizes during cooling. Meanwhile, the molasses in the light brown sugar provides that essential chew. Together, they create a balance where the cookie is sturdy enough to hold heavy hazelnuts but soft enough to melt in your mouth.
Why Temperature Control Prevents Greasy Cookie Bases
Butter has a very specific melting point, and managing it is the difference between a thick cookie and a flat one. When you use butter that is “softened but cool” (roughly 65°F), it maintains enough plasticity to hold air pockets during the creaming process. If the butter is too warm or oily, those air pockets collapse, and the dough will simply slide across the pan in the oven.
By keeping the fat slightly cool, you ensure that the flour has time to hydrate and bond before the fat turns to liquid. This creates a stable emulsion. When that chilled fat finally hits the heat, it expands slightly to create a tender crumb rather than just melting into a pool of grease on your baking sheet.
The Role of Toasted Hazelnuts in Moisture Management
Toasting your hazelnuts is a non-negotiable step for both flavor and texture. Raw nuts contain a surprising amount of internal moisture. If you fold raw nuts into your dough, that moisture turns to steam during the baking process, essentially steaming the inside of your cookie and leading to a soft, bread-like texture.
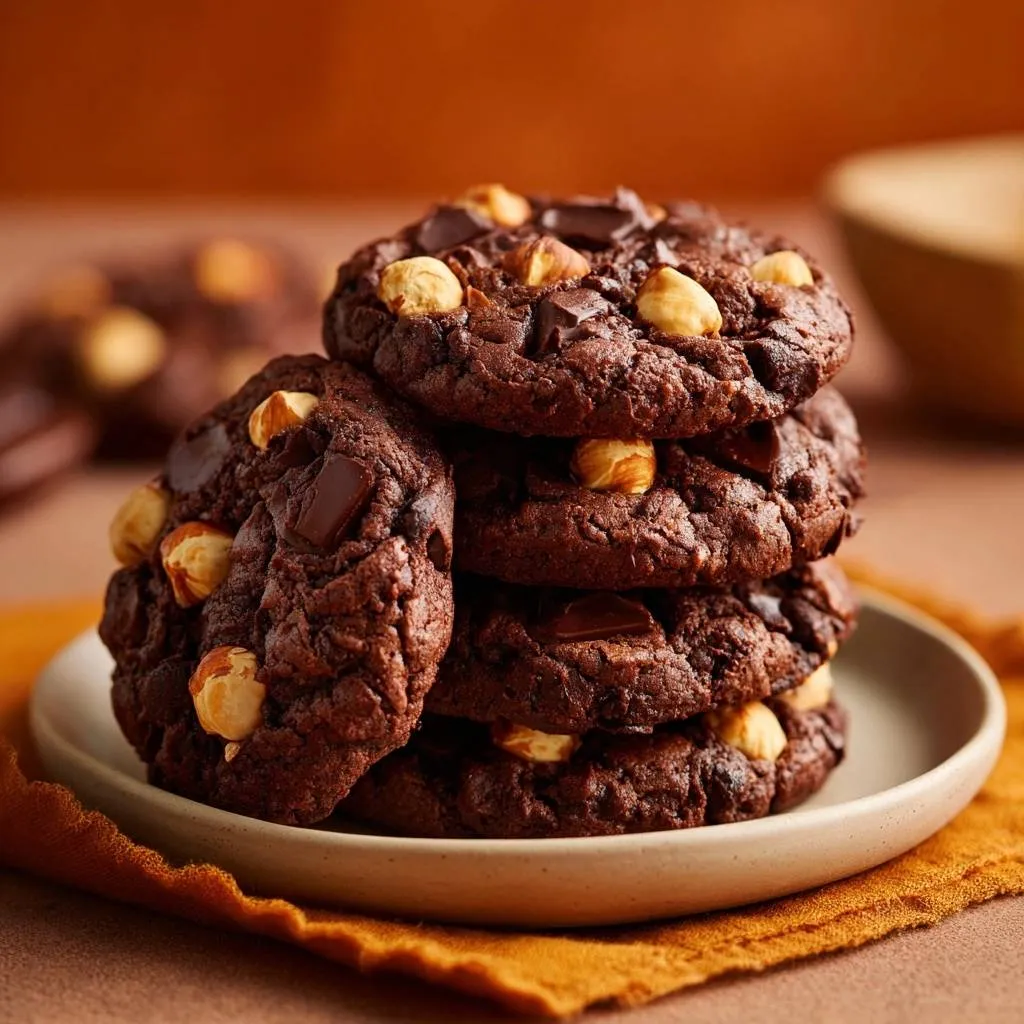
When you toast the nuts beforehand, you drive out that moisture and develop the essential oils that provide that classic nutty aroma. This ensures the nuts stay crunchy inside the fudgy dough. Furthermore, removing the skins after toasting prevents a bitter, papery aftertaste from ruining the sweetness of the dark chocolate.
Essential Components for Double Chocolate Hazelnut Cookies
Every ingredient in this bake serves a specific structural purpose. For instance, using “large” eggs is vital because they provide the exact protein-to-fat ratio needed to bind the cocoa and flour. If you use eggs that are too small, the dough will be crumbly; too large, and the excess moisture will contribute to the very sogginess we are trying to avoid.
I always recommend using light brown sugar rather than dark brown sugar for this specific recipe. Dark brown sugar contains more molasses, which is a liquid at room temperature. Too much molasses can cause the cookies to spread excessively, making it harder to achieve that thick, professional height we want for these chocolate treats.
Selecting High-Quality Cocoa and Dark Chocolate Chunks
For this recipe, a high-quality natural cocoa powder works best because its acidity reacts beautifully with the baking soda. While Dutch-processed cocoa offers a darker color, it is neutral in acidity and might result in a flatter cookie unless the leavening agents are adjusted. Stick to a premium natural cocoa for the best rise and a bright, complex chocolate profile.
If you enjoy the deep cocoa notes here, you’ll also appreciate the rich flavor in frosted dark chocolate toffee cookies.
When it comes to the chocolate, chunks are vastly superior to standard chips. Most chocolate chips contain stabilizers like soy lecithin that help them keep their shape under heat. Chunks, however, melt into luxurious, irregular pools of chocolate. This creates “chocolate veins” throughout the cookie, ensuring you get a hit of melted dark chocolate in every single bite.
The Importance of Heavy-Duty Baking Sheets
Your choice of pan is just as important as your choice of chocolate. Thin, dark-colored baking sheets absorb heat too quickly and often warp in the oven, creating hot spots. These hot spots cause the butter to melt unevenly, leading to those dreaded greasy, burnt bottoms while the tops remain raw.
Invest in professional-grade, light-colored aluminum half-sheet pans. These pans distribute heat evenly across the entire surface. Because they are thick, they act as a buffer, allowing the bottom of the cookie to brown gently and set firmly without scorching or becoming oil-soaked.
Step-by-Step: Engineering the Ultimate Chocolate Hazelnut Texture
Building the perfect cookie is a process of layering textures. You aren’t just mixing ingredients; you are building a structure that can support heavy inclusions like whole hazelnuts and large chocolate chunks. If you rush the process, the cookies will lose their “heft” and become thin.
Start by ensuring your workspace isn’t too hot. If your kitchen is steaming from other cooking, your dough will soften too quickly. Keep everything cool and move with intention. The goal is to keep the fats in the dough as stable as possible until the very moment they enter the oven.
Phase 1: Aerating the Fats and Sugars
The creaming phase is where you build the foundation of the cookie. You want to beat the butter and sugars until the mixture looks pale and noticeably fluffy. This usually takes about 3 to 4 minutes with a hand mixer. You are looking for a texture that resembles thick frosting.
Be careful not to over-cream once you add the eggs. Adding the eggs one at a time ensures they emulsify properly with the fat. If you dump them in all at once, the batter might “break” or look curdled, which leads to an uneven bake. You want a smooth, cohesive ribbon of batter before you even touch the dry ingredients.
Phase 2: Sifting to Eliminate Cocoa Clumps
Cocoa powder is notoriously hydrophobic, meaning it hates water and loves to clump together. If you don’t sift your cocoa with the flour, you will end up with small “cocoa bombs” in your dough. These clumps trap moisture and create weak spots in the cookie’s structure, which can lead to a soft, falling-apart center.
Sifting also aerates the flour, making it easier to fold into the wet ingredients without overworking the gluten. When you fold the dry ingredients in, stop the moment you see the last streak of white flour disappear. Over-mixing at this stage develops too much gluten, turning your decadent cookie into something tough and bread-like.
Phase 3: The 10-Minute Flash-Freeze Technique
This is the most critical step for the “Anti-Soggy” method. Once you have scooped your dough into large, 2-ounce balls, place them in the freezer for exactly 10 minutes. You aren’t trying to freeze them solid; you are just chilling the outer layer of fat and firming up the sugar structure.
This flash-freeze creates a temperature differential. When the cold dough hits the 375°F oven, the outside of the cookie undergoes a “heat shock.” The edges and bottom set almost instantly, creating a crisp crust that acts as a bowl for the center. This prevents the cookie from spreading too thin and keeps the bottom dry and crunchy.
The High-Heat Baking Strategy for Crisp Bottoms
Most cookie recipes call for 350°F, but we are cranking it up to 375°F. This higher temperature is essential for the “Anti-Soggy” method. The intense heat causes the exterior of the cookie to caramelize and harden quickly. This rapid setting of the dough prevents the butter from seeping out and creating a greasy film on the parchment paper.
While the outside crisps, the inside stays protected by the mass of the dough ball, remaining soft and fudgy. It is a game of thermodynamics that results in the perfect textural contrast. You’ll notice the cookies puff up beautifully and develop those characteristic “cracks” on top that look like they came straight from a high-end patisserie.
Visual Cues: When to Pull Cookies from the Oven
Knowing when to pull the cookies out is an art form. At 9 to 11 minutes, the edges should look dark and feel firm to a light touch, but the centers will still look slightly “underdone” and soft. Do not be tempted to leave them in longer! If the centers look fully cooked in the oven, the cookies will be dry once they cool.
The cookies will continue to cook on the hot baking sheet for about 5 minutes after you pull them out. This is called “carry-over cooking.” During this time, the heat from the pan finishes setting the center of the cookie while the bottom continues to crisp up against the parchment. This is the final step in ensuring a stable, non-soggy base.
Troubleshooting Common Chocolate Cookie Failures
If your cookies still spread more than you’d like, the most common culprit is a warm baking sheet. Never place fresh dough onto a pan that is still warm from a previous batch. This melts the butter instantly, bypassing the flash-freeze benefit and leading to a thin, greasy cookie. Always let your pans cool completely or run them under cold water and dry them before the next round.
Another common issue is “cakey” cookies. This usually happens if you over-measure your flour. Instead of scooping the flour directly with the measuring cup (which packs it down), spoon the flour into the cup and level it off with a knife. This ensures the dough stays rich and fudgy rather than dry and bready.
Fixing Excessive Spread and Thin Edges
If you find the edges are becoming too thin and lacy, check your oven temperature with an external thermometer. Many ovens run 10-20 degrees cool. If your oven is actually at 350°F when it says 375°F, the cookies won’t set fast enough, and the fat will migrate to the edges, causing them to spread and thin out.
Additionally, make sure you aren’t over-beating your eggs. While you want the butter and sugar fluffy, over-beating eggs incorporates too much air, which can cause the cookies to rise like a soufflé and then collapse. A collapsed cookie is almost always a greasy cookie because the structure has failed.
Achieving the Professional Bakery Aesthetic
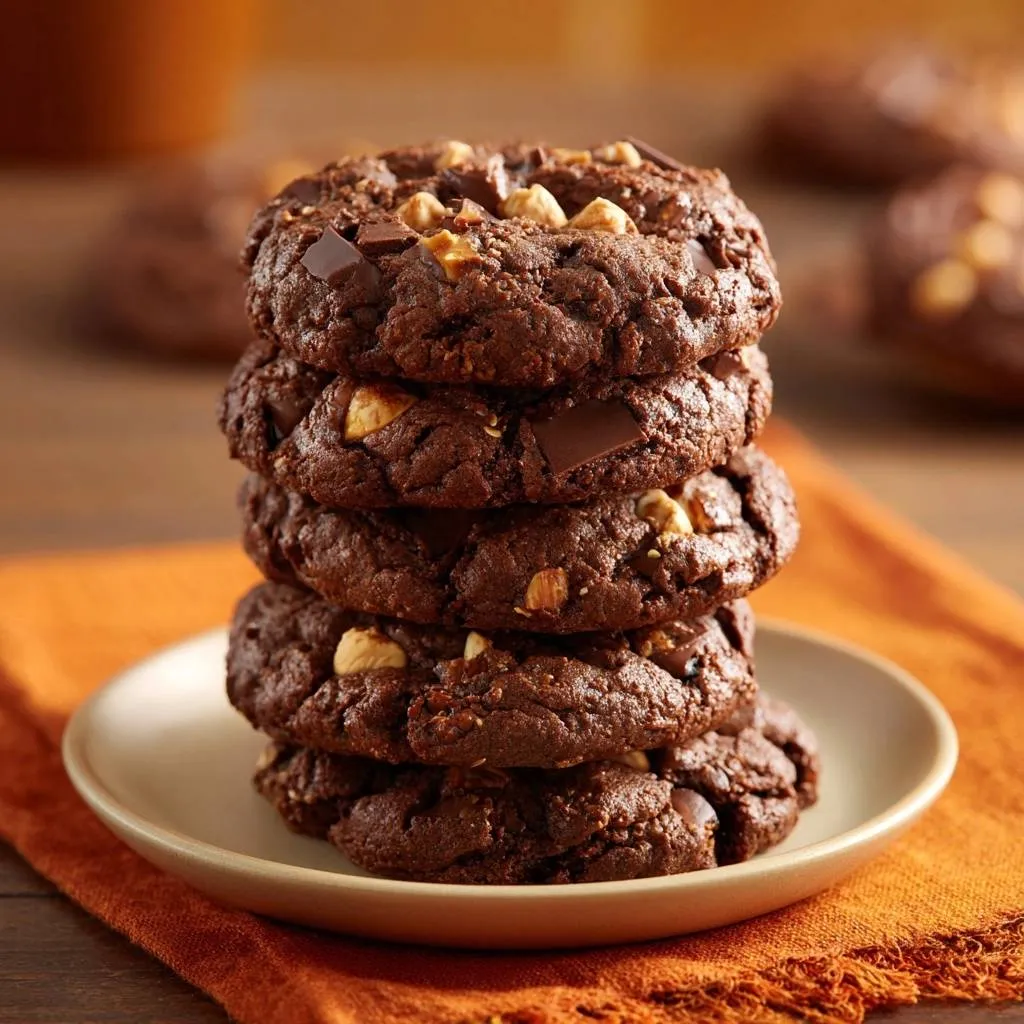
To get that “Instagram-ready” look, use the “Scoop and Press” method. After you’ve scooped your dough balls, don’t just leave them plain. Take those reserved hazelnuts and chocolate chunks and manually press them into the top of the dough. This ensures the “star ingredients” are visible and not buried inside the dark dough.
As the cookies bake and spread slightly, these toppings will stay on the surface, creating a beautiful, bumpy landscape of melted chocolate and toasted nuts. It gives the cookies an artisanal, handcrafted feel that looks much more impressive than a standard smooth-topped cookie.
Storage and Preservation: Maintaining the Crunch
To keep these cookies from losing their “Anti-Soggy” status, you must store them correctly. Once they are completely cool, place them in an airtight glass container. Glass is superior to plastic because it doesn’t retain odors and provides a better seal against humidity, which is the enemy of a crisp cookie bottom.
If you live in a very humid climate, you can place a small piece of parchment paper between the layers of cookies. This prevents them from sticking together and helps maintain the integrity of the crust. They will stay fresh and crunchy at room temperature for up to 4 days, though they rarely last that long!
Freezing Dough for On-Demand Baking
One of the best things about this dough is how well it freezes. You can scoop the dough balls, flash-freeze them on a tray until solid, and then toss them into a freezer bag. They will stay perfect for up to 3 months. This allows you to bake just one or two cookies whenever the craving strikes.
More Sweet Treats to Try
Since you’re enjoying these double chocolate hazelnut cookies, consider these other baked goods.
- For more chocolatey goodness, you might enjoy these S’mores Pancakes, offering a similar campfire sweetness.
- If you appreciate a good crisp edge, these Cinnamon French Toast Stacks offer a satisfying texture contrast.
When baking from frozen, do not thaw the dough. Place the frozen balls directly onto the baking sheet and bake at 375°F. You will likely need to add 2 to 3 minutes to the total baking time. The result is an even fudgier center because the middle stays cold for longer while the outside crisps up.
Expert Tips for Double Chocolate Hazelnut Cookies
Can I use hazelnut flour instead of all-purpose flour?
No, substituting hazelnut flour for all-purpose flour will ruin the structure of the cookie. Hazelnut flour lacks the gluten and protein needed to hold the heavy chocolate and nuts. It also has a very high fat content, which would cause the cookies to melt into a greasy puddle. If you want more hazelnut flavor, stick to the toasted whole nuts or add a drop of hazelnut extract.
Why did my chocolate chunks burn on the top?
Chocolate burns when it has a high sugar or milk content. If you use milk chocolate chunks, they are much more likely to scorch at 375°F. Using dark chocolate (at least 60% cacao) is safer because it has a higher melting point and less sugar. If you must use milk chocolate, try tucking the chunks slightly into the dough so they aren’t fully exposed to the direct heat.
How do I get perfectly round cookies?
The “glass jar” trick is the best way to get professional circles. Immediately after taking the cookies out of the oven, while they are still hot and soft, place a circular glass or a large round cookie cutter over a cookie. Gently swirl the glass in a circular motion. This “scootches” the edges inward, smoothing out any irregularities and creating a perfect, thick circle.
Can I substitute the butter with oil?
For this specific “Anti-Soggy” method, you cannot use oil. Oil is a liquid at room temperature and will not hold the air pockets needed during the creaming phase. Furthermore, oil-based cookies spread much more and lack the “snap” that cold butter provides. The solid-to-liquid transformation of butter in the oven is what creates the specific texture of this cookie.
How do I prevent the hazelnuts from falling off?
The key is to press the nuts into the dough balls before they go into the freezer for their 10-minute chill. By pressing them into the room-temperature dough, you “seat” them into the structure. The flash-freeze then locks them in place. If you try to press them in after the dough is chilled or while they are baking, they won’t adhere properly to the surface.
Why are my cookies flat even after freezing the dough?
If your cookies are still flat, your butter was likely too soft when you started the creaming process. If the butter is oily or “melty” before you even mix it, the structure is already compromised. Another possibility is that your baking soda is expired. Baking soda loses its potency over time; to test it, drop a pinch into some vinegar. If it doesn’t fizz violently, it’s time for a new box.

Double Chocolate Hazelnut Cookies
Course: DessertCuisine: AmericanDifficulty: medium18
cookies15
minutes10
minutes350
kcal25
MinutesA bakery-style chocolate cookie featuring dark chocolate chunks and toasted hazelnuts. This recipe utilizes specific temperature controls and sifting techniques to ensure a crisp exterior and a fudgy, stable center without any greasiness.
Ingredients
1 cup unsalted butter, softened but still cool to the touch
3/4 cup granulated sugar
3/4 cup packed light brown sugar
2 large eggs, room temperature
1 teaspoon vanilla extract
2 cups all-purpose flour
2/3 cup unsweetened cocoa powder
1 teaspoon baking soda
1/2 teaspoon salt
1 1/2 cups dark chocolate chunks (reserve 1/2 cup for topping)
1 1/2 cups whole hazelnuts, toasted and skins removed (reserve 1/2 cup for topping)
Directions
- Preheat your oven to 375 degrees F. Line two heavy-duty baking sheets with parchment paper. Using a heavy baking sheet is the first step in preventing uneven heat distribution that causes soggy bottoms.
- In a large bowl, cream together the butter and both sugars until light and fluffy. Add the eggs one at a time, followed by the vanilla, beating well after each addition.
- Sift together the flour, cocoa powder, baking soda, and salt. Sifting is vital here to prevent cocoa clumps which can trap moisture and lead to soft, weak spots in the cookie structure.
- Gradually fold the dry ingredients into the wet ingredients until just combined. Fold in 1 cup of the chocolate chunks and 1 cup of the hazelnuts.
- To solve the soggy bottom issue, you must chill the dough balls. Scoop large, rounded tablespoons of dough (about 2 ounces each) and place them on a plate. Freeze the dough balls for exactly 10 minutes before baking. This ensures the outer edges set and crisp up before the butter has a chance to melt and soak the bottom of the cookie.
- Place the chilled dough balls 3 inches apart on the prepared baking sheets. To match the visual aesthetic of professional bakery cookies, press the reserved 1/2 cup of whole hazelnuts and 1/2 cup of chocolate chunks into the tops of the dough balls before they go into the oven.
- Bake for 9 to 11 minutes. The high 375-degree temperature is the final secret; it creates an immediate crust on the bottom of the cookie, locking in the shape and preventing sogginess. The cookies will look slightly soft in the center but will have set edges.
- Let the cookies cool on the baking sheet for 5 minutes before transferring to a wire rack. This carry-over cooking time allows the center to firm up while the bottom stays crisp and dry.
Notes
- The secret to preventing soggy bottoms is freezing the dough balls for 10 minutes and baking at a high temperature of 375°F to set the crust immediately. Sifting the cocoa powder is essential to prevent moisture-trapping clumps.