Nothing ruins a gourmet cookie faster than a soft, greasy base that falls apart under the weight of a heavy frosting. Most bakers struggle with toffee because those delicious bits often melt into a sticky puddle on the pan, creating a soggy mess. You want a cookie that offers a sharp, satisfying snap at the bottom while maintaining a fudgy, decadent center.
For a similar fudgy texture, try these fudgy chocolate ganache cookies next.
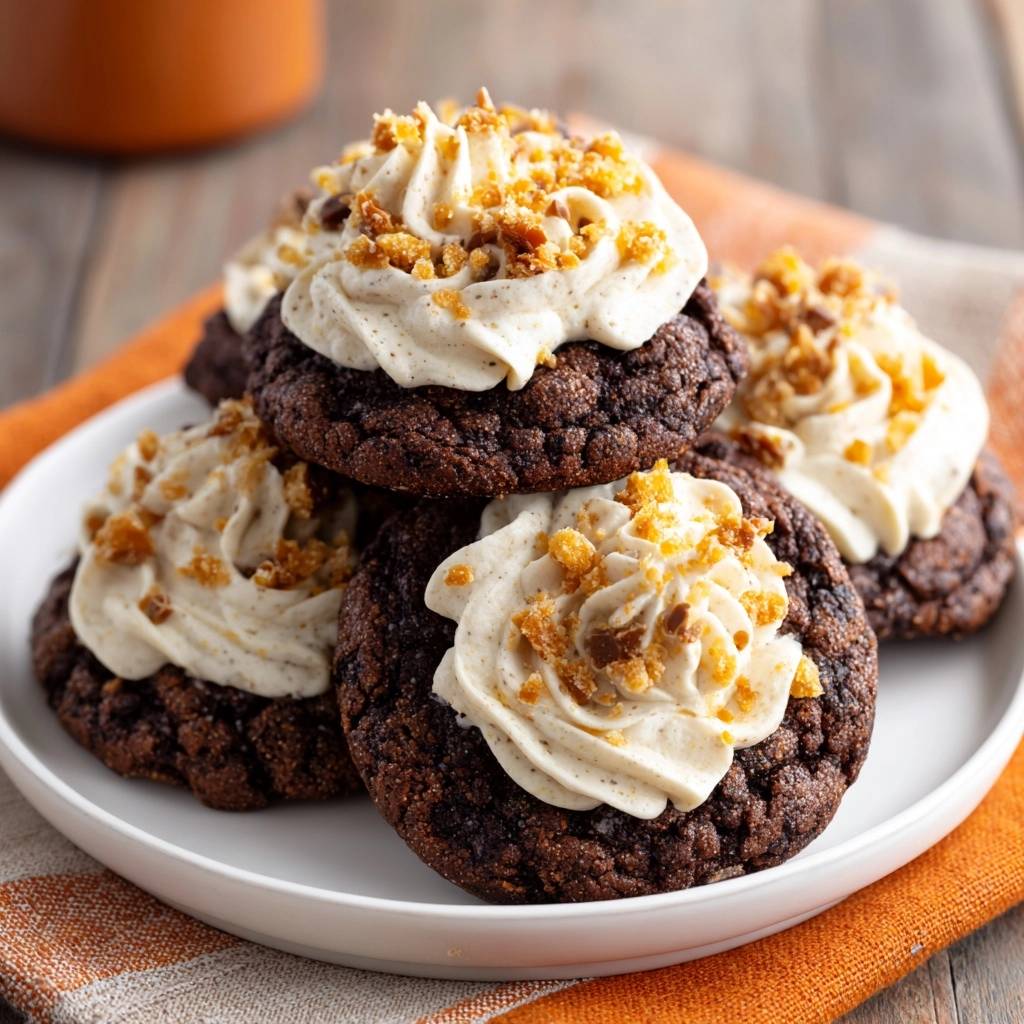
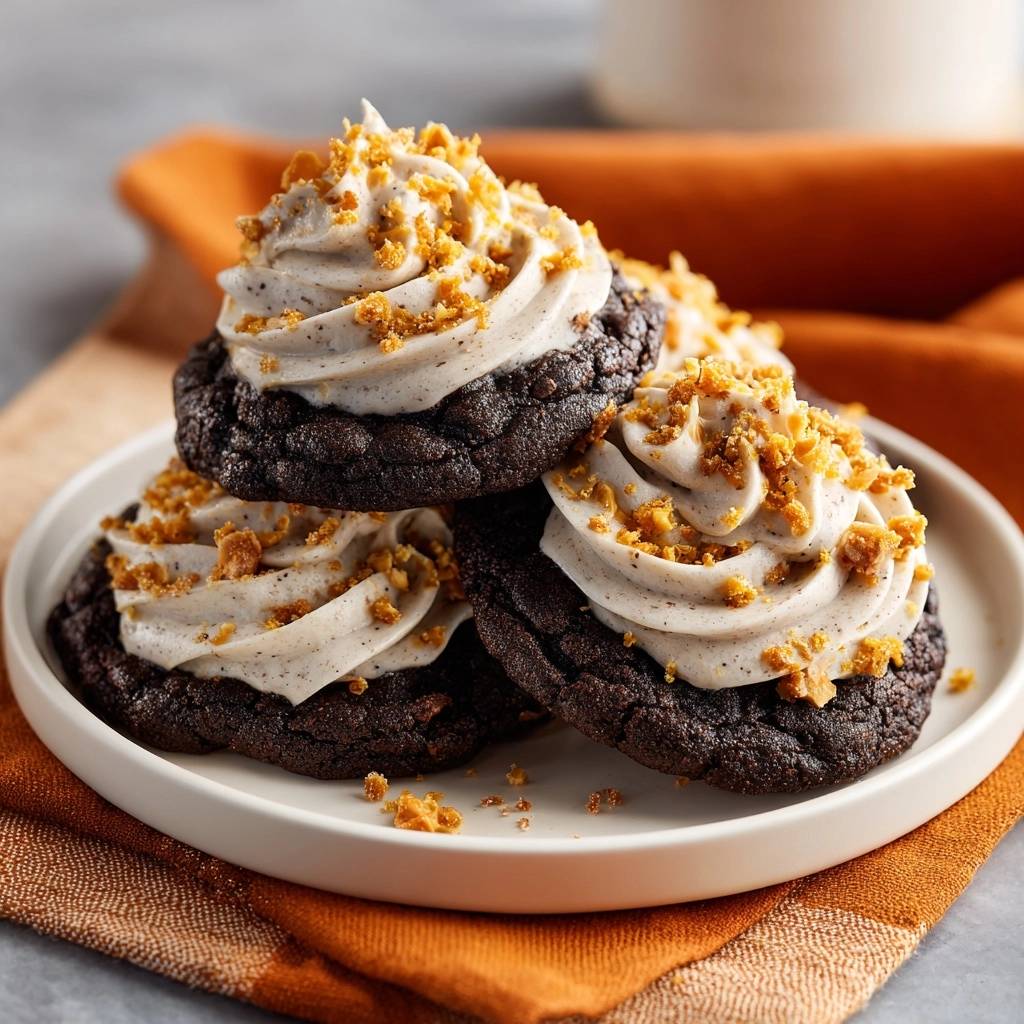
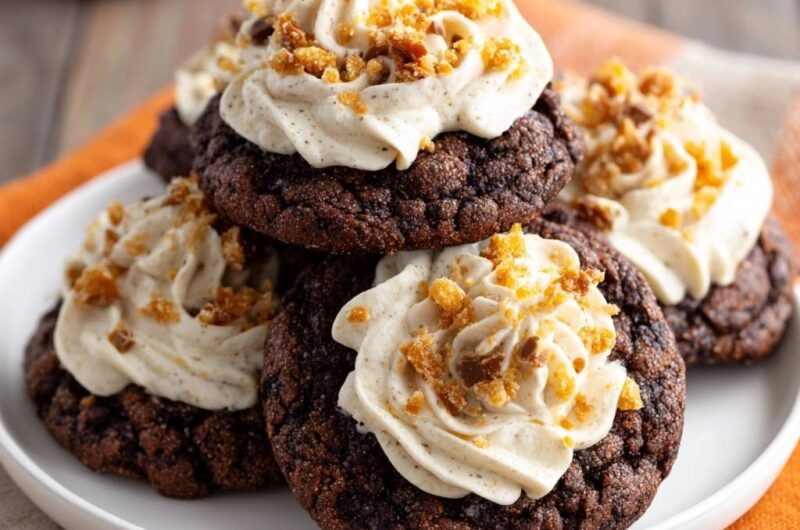
The secret to these Frosted Dark Chocolate Toffee Cookies lies in the contrast between the intense, bitter notes of dark cocoa and the buttery sweetness of the toffee. However, achieving that balance requires more than just mixing ingredients; it requires structural integrity. By using a specific flash-chill method, we ensure the cookie stays tall and sturdy enough to support a mountain of silky cinnamon buttercream.
I’ve found that the real trick to avoiding the “soggy bottom” is all about temperature control and surface friction. If you’ve ever had a cookie spread into a thin pancake, it’s usually because the fats melted before the flour structure could set. My technique involves a 10-minute freezer blast that locks the shape in place, giving you a professional, bakery-style result every single time.
The Structural Science of Toffee-Laced Dough
When you work with toffee, you’re essentially working with concentrated sugar and butter that wants to return to a liquid state in the heat of the oven. In a high-fat dough, this can lead to “bleeding,” where the toffee leaks out and fries the bottom of your cookie. To combat this, we use dark cocoa powder, which is naturally acidic.
This acidity is crucial because it reacts with the baking soda to create an immediate lift. This chemical reaction creates tiny air pockets that trap the melting toffee, keeping it suspended within the dough rather than letting it sink to the pan. Therefore, a stiff dough is absolutely non-negotiable for this recipe.
If your dough feels too soft or greasy at room temperature, the cookies will inevitably spread too thin. By sifting the dry ingredients and gradually incorporating them, you build a gluten network strong enough to hold the heavy toffee bits. This structural “skeleton” is what allows the cookie to remain thick and chewy even after it’s loaded with frosting.
Essential Components for Dark Chocolate Toffee Cookies
Quality ingredients make the difference between a standard treat and a gourmet experience. For the base, I highly recommend using a high-quality dark cocoa powder. Dutch-processed cocoa works beautifully here because it has a smoother, deeper flavor that pairs perfectly with the salty-sweet crunch of the toffee bits.
When measuring your brown sugar, make sure it’s firmly packed into the cup. This moisture is what gives the cookie its signature chewiness and prevents it from becoming crumbly. In addition, using room temperature eggs is a small but vital step; they emulsify much better with the creamed butter, creating a smoother, more uniform dough.
For the frosting, vanilla bean paste is a total game-changer compared to standard extract. While the flavor is similar, the paste adds those gorgeous little black flecks that signal to everyone that you used the good stuff. It makes the cinnamon buttercream look as sophisticated as it tastes.
Selecting the Right Toffee Bits
You’ll generally find two types of toffee in the baking aisle: chocolate-coated bits and plain almond brickle. For this specific recipe, I prefer the plain bits for the dough and the chocolate-coated ones for the topping. The plain bits melt more predictably inside the cookie, while the coated ones add a nice visual variety on top of the frosting.
The Role of Heavy-Duty Parchment Paper
Never grease your pan for these cookies! Greasing a pan adds extra fat to the bottom of the dough, which encourages the toffee to liquefy and spread into a greasy mess. Silicone mats can also be too slick for this high-sugar dough. Professional-grade parchment paper provides just enough friction to hold the dough in place while absorbing a tiny bit of excess oil, ensuring a crisp finish.
Phase One: Creating the High-Stability Base
Start by creaming your butter and sugars until the mixture looks pale and fluffy. This isn’t just about mixing; you’re actually beating air into the fat, which helps the cookies rise. You’ll know you’re there when the grit of the sugar has mostly dissolved into the butter and the color lightens significantly.
Once you add your dry ingredients, keep a close eye on the texture. You are looking for a stiff dough that pulls away from the sides of the bowl cleanly. If it feels sticky or tacky to the touch, you might need to add one more tablespoon of flour, but be careful not to over-mix, or you’ll end up with a tough, bread-like cookie.
The Flash-Chill Technique for Crispy Bottoms
This is the most important step in the entire process. After you’ve rolled your dough balls in the granulated sugar, they need a 10-minute “time out” in the freezer. This temperature shock does two things: it firms up the butter and it sets the outer sugar crust.
When that cold dough hits the 350-degree oven, the outside of the cookie sets almost instantly. This creates a structural shell that prevents the toffee from leaking out. It’s the ultimate fix for the soggy bottom problem, ensuring your cookies come out thick, round, and perfectly textured.
Step-by-Step: Baking and Carry-Over Cooling
Bake the cookies for 9 to 11 minutes, but don’t wait for them to look “done” in the center. You want the edges to be firm and the surface to show those beautiful cracks, but the middle should still look a bit soft. Over-baking will make the toffee taste burnt and bitter.
The real magic happens during the cooling phase. Leave the cookies on the hot baking sheet for at least 10 minutes after taking them out of the oven. This residual heat allows the toffee to harden into a structural “floor.” If you move them to a wire rack too soon, the centers might collapse or the bottoms might stay soft.
Engineering the Perfect Cinnamon Buttercream Swirl
To get that iconic bakery swirl, your frosting needs to be very stiff. Start with softened butter, but add your powdered sugar gradually. If the frosting feels too soft to hold a peak, add more sugar rather than more cream. The goal is a pipeable consistency that won’t sag under its own weight.
The addition of cinnamon is the secret weapon here. Dark chocolate and toffee are both very rich and heavy flavors. The warm spice of the cinnamon cuts through that richness, providing a bright note that keeps the cookie from feeling too sugary. Use a star tip for the best visual impact, and pipe in a circular motion starting from the outside in.
Troubleshooting Common Dark Chocolate Baking Issues
If your cookies spread too much, you likely skipped the freezer step or your butter was too melted before you started. Always start with “cool” softened butter—it should indent when pressed but still hold its shape. If your kitchen is particularly warm, keep the dough in the fridge between batches.
If your frosting is sliding off the top, your cookies weren’t 100% cold. Even a tiny bit of warmth in the center of the cookie will liquefy the butter in the frosting. Patience is key here! Wait at least an hour before you even think about reaching for that piping bag.
Preventing the Toffee Puddle
Temperature control is your best friend when dealing with toffee. If you notice the toffee “bleeding” out of the sides during baking, try chilling the dough balls for an extra 5 minutes. Also, ensure you aren’t using “cheap” toffee bits that have a high oil content, as these are more prone to melting prematurely.
Achieving the Crystalline Sugar Exterior
Rolling the dough in granulated sugar before baking isn’t just for looks. That sugar layer acts as a moisture barrier, helping the exterior crisp up while the inside stays fudgy. It also creates that beautiful “cracked” look as the cookie expands in the oven, giving it a professional, textured finish.
Storage Solutions and Make-Ahead Strategies
These cookies are fantastic for making ahead of time. You can scoop and roll the dough balls in sugar, then freeze them in a freezer bag for up to three months. When you’re ready to bake, just pop them straight from the freezer onto the tray and add two minutes to the baking time.
Once frosted, store the cookies in a single layer in an airtight container. If you stack them, you’ll ruin those beautiful buttercream swirls! Interestingly, these cookies actually improve after about 12 hours. The toffee slightly softens into the crumb of the cookie, making the texture even more cohesive and delicious.
Expert Baking FAQ
Can I use cacao powder instead of dark cocoa powder?
I don’t recommend it for this specific recipe. Cacao powder is less processed and much more acidic than Dutch-processed cocoa. This can throw off the balance with the baking soda, causing the cookies to rise too much and then collapse. Stick with a dark cocoa powder for the best color and structural results.
Why is my buttercream frosting grainy?
Grainy frosting usually happens when the powdered sugar isn’t sifted. Even if it looks fine in the bag, powdered sugar often has tiny clumps that won’t dissolve in the butter. Always sift your sugar through a fine-mesh strainer before beating it to ensure a silky-smooth finish that won’t clog your piping tip.
Can I substitute margarine for the butter?
No, you should definitely avoid margarine here. Margarine has a much higher water content than real butter. That extra water will cause the toffee to dissolve and the cookies to spread uncontrollably. For the “anti-soggy bottom” results we want, high-quality unsalted butter is the only way to go.
How do I get the perfect “cracked” top on my cookies?
The cracks come from the contrast between the cold dough and the hot oven, combined with the sugar coating. The granulated sugar dries out the surface of the dough quickly, so when the center rises and expands, the surface has to “break,” creating those beautiful fissures. Don’t flatten the balls before baking; let the oven do the work!
How long will these cookies stay fresh?
In an airtight container at room temperature, these cookies will stay delicious for about 3 to 4 days. If you need them to last longer, you can refrigerate them for up to a week, but let them come to room temperature before serving so the buttercream softens back up to its ideal creamy consistency.
Dark Chocolate Toffee Cookies
Course: DessertCuisine: AmericanDifficulty: medium18
cookies20
minutes10
minutes245
kcal30
MinutesA gourmet dark chocolate cookie featuring a crystalline sugar crust and a sturdy base that supports a mountain of cinnamon buttercream frosting and crunchy toffee bits.
Ingredients
1/2 cup unsalted butter, softened
3/4 cup granulated sugar
1/2 cup brown sugar, packed
1 large egg
1 teaspoon vanilla extract
1 1/4 cups all-purpose flour
1/2 cup dark cocoa powder
1/2 teaspoon baking soda
1/4 teaspoon salt
1 cup toffee bits, divided
1/2 cup granulated sugar (for rolling)
1/2 cup butter, softened (for frosting)
2 cups powdered sugar
1 tablespoon heavy cream
1/2 teaspoon cinnamon
1/2 teaspoon vanilla bean paste (optional, for visual flecks)
Directions
- To prevent the soggy bottom, preheat your oven to 350 degrees F and line your heavy-duty baking sheets with professional-grade parchment paper. Never grease the pan directly, as this encourages the toffee to liquefy and spread.
- In a large bowl, cream together the 1/2 cup softened butter, 3/4 cup granulated sugar, and brown sugar until light and fluffy. Beat in the egg and vanilla.
- Sift together the flour, cocoa powder, baking soda, and salt. Gradually add the dry ingredients to the wet mixture until a stiff dough forms. Fold in 1/2 cup of the toffee bits.
- Scoop the dough into 2-tablespoon sized balls. Roll each ball in the extra 1/2 cup of granulated sugar until fully coated; this creates the textured, crystalline exterior seen in the image.
- Here is the fix: Place the sugar-coated dough balls on a tray and chill in the freezer for exactly 10 minutes before baking. This prevents the fats and sugars from melting too quickly, which is the primary cause of a greasy, weak cookie base.
- Place chilled dough balls 2 inches apart on the parchment-lined sheets. Bake for 9 to 11 minutes. The edges should be set and the surface should show slight cracks, but the centers should remain slightly soft.
- Allow cookies to cool completely on the baking sheet. This carry-over cooking time on the warm parchment is essential for the toffee to harden into a crisp, structural base.
- For the frosting, beat the remaining 1/2 cup butter, powdered sugar, cream, cinnamon, and vanilla bean paste until very stiff and holds a peak.
- Using a star tip and a piping bag, pipe a high, decorative swirl of frosting onto each cooled cookie. Immediately top with the remaining 1/2 cup of toffee bits, ensuring they nestle into the ridges of the frosting for that perfect crunch.
Notes
- To prevent a soggy bottom, use professional-grade parchment paper and chill the dough balls in the freezer for 10 minutes before baking to flash-set the sugars.