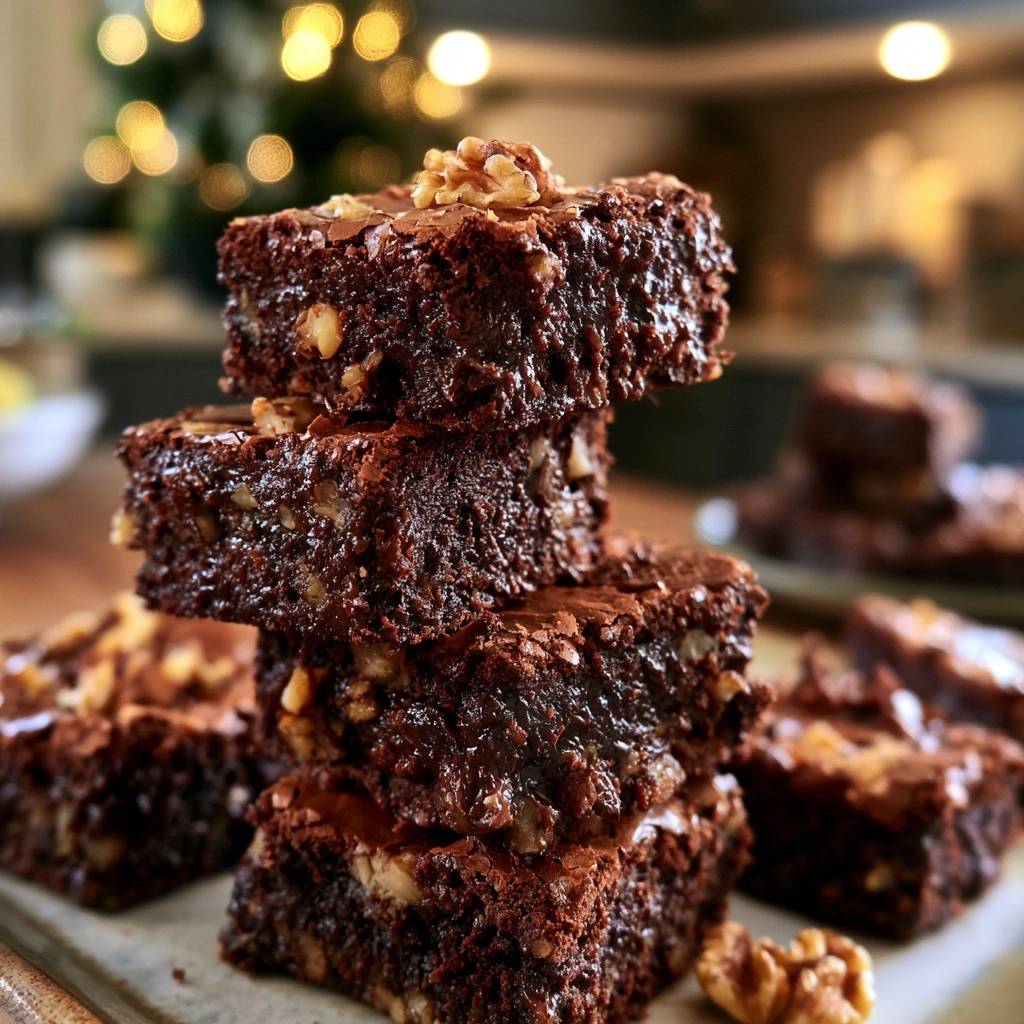
Forget everything you know about those airy, bread-like squares often masquerading as brownies. If you have ever pulled a tray out of the oven only to find a dry, cakey texture that crumbles at the touch, you know the heartbreak of a “brownie fail.” A true brownie should be an experience of pure decadence, featuring a center so dense and fudgy it mimics a chocolate truffle. These Fudgy Walnut Dark Chocolate Brownies are designed specifically for those who crave a rich, moist interior and a paper-thin, crackly crust that shatters when you bite into it.
The secret to achieving this specific texture lies in the deliberate rejection of aeration. While most baking encourages you to whip, whisk, and beat air into the batter, we are doing the exact opposite here. By controlling the fat-to-flour ratio and keeping the mixing process gentle, we ensure the crumb remains heavy and moist rather than light and fluffy. This isn’t just a dessert; it’s a masterclass in balancing the earthy crunch of toasted walnuts with the intense, sophisticated bitterness of high-quality dark chocolate.
To guarantee success, you must pay close attention to the state of your butter and chocolate. The foundation of this recipe is a warm, emulsified base of melted fats that coats the sugar crystals without dissolving them entirely. This specific interaction is what creates that iconic shiny top. If you use cold ingredients or over-mix the flour, you’ll lose that fudgy magic. Trust the process, keep your spatula moving slowly, and prepare for the most intense chocolate experience of your life.
The Chemistry of Fudgy Walnut Dark Chocolate Brownies
Baking is a science, and the difference between a cakey brownie and a fudgy one comes down to the molecular structure of the batter. Cakey brownies rely on chemical leaveners like baking powder or the mechanical leavening of beaten eggs to create height. In this recipe, we omit leavening agents entirely. By stirring the eggs in gently rather than whisking them, we prevent air bubbles from forming. Without those bubbles to expand in the heat, the brownie stays compressed, resulting in that sought-after “fudge” factor.
Furthermore, the way we handle the cocoa powder changes the flavor profile significantly. Cocoa powder is fat-soluble, meaning its flavor compounds are released most effectively when they come into contact with warm fats. By sifting the Dutch-process cocoa into a base of melted butter and bittersweet chocolate, you are essentially “blooming” the cocoa. This process deepens the chocolate notes and ensures a silky mouthfeel that you simply cannot get from a boxed mix or a creaming-method recipe.
The ratio of flour to fat also plays a critical role. This recipe uses a relatively small amount of all-purpose flour compared to the two sticks of butter and four ounces of melted chocolate. This high fat content inhibits gluten development. Since gluten provides the “chew” and structure found in bread, keeping it to a minimum ensures the brownies remain tender and melt-on-the-tongue soft. Every ingredient is calculated to prioritize density over volume.
Why Temperature Control Prevents Dry Edges
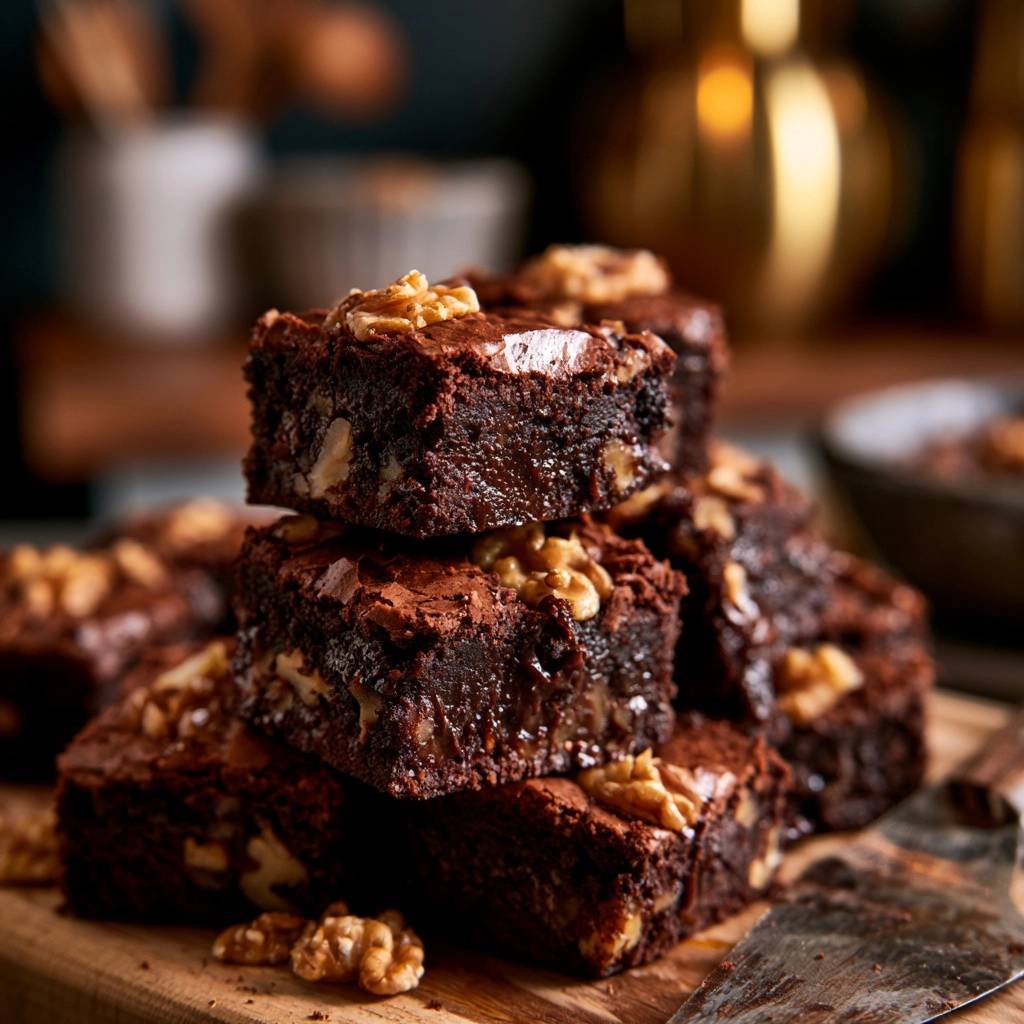
Most people bake at 350°F out of habit, but for ultra-fudgy brownies, that heat is actually your enemy. High temperatures cause the edges of the pan to cook much faster than the center. By the time the middle is set, the perimeter has turned into a hard, dry crust. Dropping the oven to 325°F allows for a more even heat distribution. This gentle bake ensures the entire pan reaches the perfect temperature simultaneously, leaving you with edges that are just as soft and fudgy as the very center square.
Essential Components for Dark Chocolate Brownies
When a recipe has so few ingredients, the quality of each one becomes paramount. For the chopped chocolate, I highly recommend a bittersweet bar with at least 60% cacao. This provides a sophisticated depth of flavor that isn’t masked by overwhelming sweetness. Avoid using only chocolate chips for the melted base, as they often contain stabilizers that prevent them from melting into the perfectly smooth consistency needed for a dense crumb.
The choice of cocoa powder is equally important. You must use Dutch-process cocoa here. Unlike natural cocoa powder, which is acidic and reacts with baking soda, Dutch-process cocoa has been treated with an alkalizing agent. This results in a darker color, a smoother flavor, and a more soluble powder. It provides that “Oreo-dark” aesthetic and a mellow richness that pairs beautifully with the buttery walnuts. If you use natural cocoa, the brownies may taste slightly sharp or acidic.
Selecting and Toasting the Walnuts
English walnuts are the gold standard for this recipe because they have a high oil content and a mild, buttery flavor. However, raw walnuts can sometimes taste a bit “dusty” or flat. To truly elevate this dish, give your chopped walnuts a quick dry-toast in a skillet over medium heat for 3 to 5 minutes before adding them to the batter. You’ll know they’re ready when they smell fragrant and look slightly golden. This releases the essential oils, ensuring the nuts stay crunchy even after being submerged in the moist batter.
The Importance of Room Temperature Eggs
It is tempting to grab eggs straight from the fridge, but cold eggs are the enemy of a smooth brownie batter. When you add cold eggs to a warm mixture of melted butter and chocolate, the fat can seize and clump. This creates a grainy, broken emulsion that ruins the final texture. Room temperature eggs incorporate seamlessly, helping to create a glossy, unified batter that bakes up with a perfectly smooth finish.
Step-by-Step: Achieving the Dense Fudgy Texture
Creating the perfect brownie is all about the “feel” of the batter as you move through the steps. You aren’t just mixing ingredients; you are building a specific structure. Start by preparing your 8×8 inch pan with parchment paper. Having that “sling” ready is vital because these brownies are so soft when warm that they will fall apart if you try to scoop them out of the pan. Preparation is the first step toward a professional result.
Melting the Chocolate-Butter Base
You can use a double boiler or a microwave, but the goal is the same: low and slow heat. If you use a microwave, heat the butter and chopped bittersweet chocolate in 30-second bursts, stirring well between each one. Chocolate can burn easily, and scorched chocolate tastes bitter in a bad way. Once the mixture is smooth and glossy, let it sit for a minute or two. It should be warm to the touch but not boiling hot before you move on to the sugar.
The “No-Whisk” Mixing Method
Put away the electric mixer and the wire whisk. For a truly fudgy brownie, a silicone spatula or a sturdy wooden spoon is your best friend. Stir the sugar into the melted chocolate mixture until combined. When you add the eggs, do it one at a time. Stir gently until the yellow disappears, then stop. You want to incorporate the eggs without whipping in air. If you see the batter becoming pale and foamy, you’ve gone too far and are heading toward cake territory.
Sifting and Folding for Structural Integrity
Cocoa powder is notorious for forming small, stubborn clumps that won’t break down during stirring. Sifting the cocoa, flour, and salt directly over the wet ingredients is a non-negotiable step. Once the dry ingredients are in, use a folding motion. Scrape the bottom of the bowl and fold the batter over the top. Stop the moment you see only a few tiny streaks of flour remaining. Over-mixing at this stage develops gluten, which will make your brownies tough and chewy instead of tender and fudgy.
Techniques for the Iconic Crackly Top
That beautiful, shiny, paper-thin crust is the hallmark of a great brownie. This “skin” is actually a very thin layer of meringue that forms during baking. It happens when the sugar dissolves into the egg whites and migrates to the surface as the brownie sets. To ensure you get this effect, make sure your eggs are at room temperature and that you stir the sugar into the warm butter-chocolate mixture thoroughly. This helps the sugar dissolve just enough to create that gorgeous, shattered-glass aesthetic on top.
Troubleshooting Common Brownie Baking Errors
Even experienced bakers can run into trouble with brownies because the window between “perfectly fudgy” and “overbaked” is very small. If your brownies come out greasy, it usually means the butter separated from the batter. This often happens if the chocolate-butter mixture was too hot when the eggs were added, “cooking” the eggs and breaking the emulsion. Always ensure the base is just warm, not hot, to keep the fats and proteins bound together properly.
Identifying the “Perfect Jiggle”
The most common mistake is leaving brownies in the oven too long. If a toothpick comes out clean, you have overbaked them. For a fudgy center, you want to pull the pan out when the edges are firm and slightly pulling away from the sides, but the center still has a very slight jiggle when you shake the pan. A toothpick inserted into the middle should come out with moist, thick crumbs attached. Remember, the brownies will continue to cook and firm up as they cool in the pan.
Correcting a Greasy Batter
If you notice a layer of oil sitting on top of your batter before it goes into the oven, don’t panic. This usually means the mixture has become too warm. You can often fix this by adding a teaspoon of room-temperature water and stirring very gently to help the emulsion come back together. To prevent this entirely, always add your eggs one by one and ensure they are not cold, which is the primary cause of fat separation in chocolate batters.
Optimal Cooling and Slicing Strategies
Patience is the hardest part of this recipe, but it is also the most important. You must let these brownies cool completely in the pan for at least two hours. During this time, “carry-over cooking” occurs. The residual heat finishes setting the center while the fats begin to solidify. If you cut into them while they are hot, they will be a gooey mess and won’t hold their shape. For the absolute best texture, you can even refrigerate them overnight before slicing.
To get those perfectly clean, sharp edges you see in professional bakeries, use a large chef’s knife. Dip the knife in hot water, wipe it completely dry, and make one long, clean slice. Wipe the blade clean and re-dip it in hot water after every single cut. This prevents the fudgy center from sticking to the blade and tearing the brownie. Alternatively, a plastic knife works surprisingly well for cutting brownies without sticking, though it won’t give you as sharp an edge as a hot metal knife.
Storage and Make-Ahead Instructions
These brownies actually taste better on the second day as the flavors have more time to meld. You can store them in an airtight container at room temperature for up to four days. If you prefer an even denser, almost fudge-like consistency, store them in the refrigerator. The cold firms up the butter and chocolate, creating a very satisfying, heavy bite. Just make sure the container is sealed tight so they don’t pick up any fridge odors.
If you want to save them for later, these brownies freeze beautifully. Wrap individual squares tightly in plastic wrap, then place them in a heavy-duty freezer bag or wrap them in a layer of aluminum foil. They will stay fresh for up to three months. When you’re ready for a treat, let a square thaw at room temperature for about an hour, or pop it in the microwave for 15 seconds if you want that “just-out-of-the-oven” warmth and gooeyness.
Expert Tips for Fudgy Walnut Dark Chocolate Brownies
To take your brownies from great to world-class, focus on the small details that enhance the primary flavors. Chocolate and walnuts are a classic pairing, but they need a little help to truly shine. Using high-quality extracts and the right amount of seasoning can transform the entire profile of the dessert. Here are a few pro-level tips to keep in mind as you bake.
Enhancing Flavor with Salt and Vanilla
Salt is not just for savory dishes; it is a powerful flavor enhancer for chocolate. The half-teaspoon of salt in this recipe balances the sugar and cuts through the richness of the 60% cacao. If you want an extra pop, sprinkle a tiny bit of flaky sea salt over the top of the brownies immediately after they come out of the oven. Additionally, use a high-quality pure vanilla extract. Vanilla acts like a spotlight for chocolate, making the cocoa notes taste deeper and more complex.
The Parchment Paper “Sling” Technique
Never skip the parchment paper. Grease the pan first, then lay a strip of parchment across the bottom so that the ends hang over two of the sides. This creates a “sling” that allows you to lift the entire block of brownies out of the pan once they are cool. This is the only way to ensure you don’t destroy the first square when trying to get it out. It also makes slicing much easier since you can do it on a flat cutting board rather than inside the high walls of a baking pan.
Customizing the Nut-to-Chocolate Ratio
While this recipe calls for 1.5 cups of walnuts, you can certainly adjust this to your preference. The key is the division: putting one cup inside the batter provides a consistent crunch throughout, while the half-cup on top toasts further in the oven and creates a beautiful visual. If you want an even more indulgent experience, you can swap the semi-sweet chocolate chunks for white chocolate chips or even peanut butter chips to create a different flavor contrast against the dark chocolate base.
How should I store these brownies to keep them fudgy?
To maintain that perfect fudgy texture, store the brownies in an airtight container at room temperature for up to 4 days. If you live in a very warm climate, or if you simply prefer a firmer, more truffle-like bite, you can keep them in the refrigerator for up to a week. For long-term storage, wrap individual squares in plastic wrap and freeze them in a zip-top bag for up to 3 months. Avoid leaving them uncovered, as the high fat content can easily absorb other flavors from your kitchen or fridge.
Why did my brownies turn out cakey instead of fudgy?
Cakiness is almost always caused by one of two things: over-mixing or too much flour. When you beat eggs vigorously, you incorporate air, which acts as a leavening agent and makes the brownies rise like a cake. Similarly, if you measure your flour by scooping the measuring cup directly into the bag, you likely packed too much flour into the cup. Always use the “spoon and level” method or a kitchen scale. Finally, ensure you aren’t using baking powder or baking soda, as these are strictly forbidden in a true fudgy brownie recipe.
Can I substitute the walnuts with a different nut or omit them?
Yes, you can easily substitute the walnuts for pecans, macadamia nuts, or hazelnuts. If you have a nut allergy or simply prefer a smooth brownie, you can omit the walnuts entirely without changing any other part of the recipe. If you do omit the nuts, you might want to add an extra half-cup of chocolate chunks to maintain the volume of the batter and ensure you still get those pockets of melted chocolate throughout.
What is the best way to tell if the brownies are done?
The “toothpick test” works differently for fudgy brownies than it does for cakes. You do not want the toothpick to come out clean. Instead, look for “moist crumbs.” If the toothpick comes out with wet, liquid batter, they need more time. If it comes out with thick, sticky crumbs that look like fudge, they are perfect. Also, look at the edges; they should be slightly firm and starting to pull away from the sides of the pan, while the center should still have a very slight, dull jiggle.
Can I use natural cocoa powder instead of Dutch-process?
While you can technically use natural cocoa powder, it will change the flavor and texture of the brownies. Natural cocoa is more acidic and has a lighter, sharper chocolate flavor. Dutch-process cocoa is neutralized and provides a much deeper, darker color and a smoother, more mellow taste that defines this specific recipe. If you use natural cocoa, your brownies may be slightly lighter in color and have a more pronounced “tang” to them.
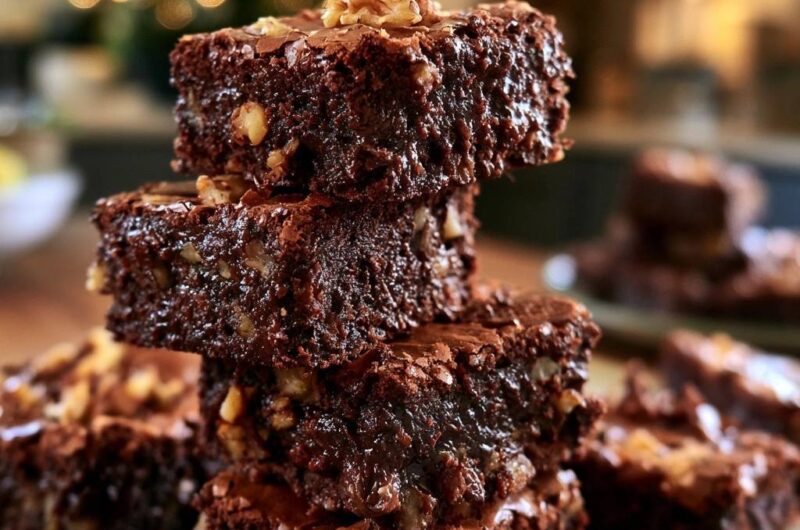
Fudgy Walnut Dark Chocolate Brownies
Course: DessertCuisine: AmericanDifficulty: easy16
brownies15
minutes35
minutes50
Minutes280
kcalAmerican
Ingredients
1 cup (2 sticks) unsalted butter
4 oz high-quality bittersweet chocolate (60% cacao), chopped
2 cups granulated sugar
2 teaspoons vanilla extract
4 large eggs, room temperature
3/4 cup unsweetened Dutch-process cocoa powder
3/4 cup all-purpose flour
1/2 teaspoon salt
1 1/2 cups chopped walnuts, divided (1 cup for batter, 1/2 cup for topping)
1/2 cup semi-sweet chocolate chunks
Directions
- Preheat your oven to 325°F (165°C). A lower temperature ensures the center stays fudgy while the edges don’t dry out. Grease an 8×8 inch baking pan and line it with parchment paper, leaving an overhang on the sides for easy removal.
- In a microwave-safe bowl or over a double boiler, melt the butter and the 4 oz of chopped bittersweet chocolate together. Stir until smooth. This extra chocolate fat is the secret to the ultra-dense, moist crumb seen in the image.
- In a large bowl, combine the melted chocolate-butter mixture and sugar. Stir by hand with a spatula. Do not use an electric mixer; incorporating too much air creates bubbles that make brownies rise like bread.
- Add the eggs one at a time, stirring gently until just combined. Stir in the vanilla extract.
- Sift the cocoa powder, flour, and salt directly into the wet ingredients. Sifting is essential to remove cocoa lumps without over-mixing. Fold the dry ingredients in until just a few streaks of flour remain.
- Gently fold in 1 cup of chopped walnuts and the chocolate chunks. Stop as soon as the ingredients are distributed to avoid developing gluten, which leads to a tough texture.
- Spread the thick batter evenly into the prepared pan. Generously top the surface with the remaining 1/2 cup of walnuts, pressing them slightly into the batter so they stay nestled in the crackly crust.
- Bake for 30 to 35 minutes. To solve the “dry edge” problem, pull the brownies out when the edges are set but the center still has a slight jiggle. A toothpick inserted into the center should come out with thick, fudgy crumbs, not clean.
- Allow the brownies to cool completely in the pan for at least 2 hours. This carry-over cooking time is what locks in the fudgy, almost truffle-like center. Slice into squares once fully set.
Notes
- To ensure the best texture, do not use an electric mixer and pull the brownies out of the oven while the center still has a slight jiggle. Cooling for 2 hours is essential for the final set.