Most home cooks avoid making scallops because they’ve been burned by the “rubber ball” effect. You know the one: you pull a tray out of the oven only to find the scallops swimming in a gray, watery pool with a soggy, sad topping. It’s frustrating to spend money on premium seafood only to have it turn out chewy and bland.
The secret to a restaurant-quality result isn’t a fancy oven or a professional degree. It’s all about moisture management and timing. A perfect scallop should offer a distinct contrast between a buttery, tender interior that melts in your mouth and a shatter-crisp topping that provides a satisfying crunch in every bite.
I’ve found that the biggest mistake is rushing the prep. If you take the time to properly dry the protein and pre-toast your breadcrumbs, you’ll achieve that “Anti-Soggy Bottom” finish every single time. The secret is using a high-heat environment to set the proteins quickly while the pre-browned Panko provides the texture the oven alone can’t deliver in twelve minutes.
The Science of Moisture Control in Seafood
To understand why scallops often fail, you have to understand their biology. Many grocery stores sell “wet” scallops, which have been soaked in a solution called sodium tripolyphosphate (STPP). This chemical causes the scallop to absorb excess water, increasing its weight but ruining its ability to sear or bake properly.
When that excess moisture hits the heat of the oven, it releases all at once. Instead of roasting, your scallops end up steaming in their own juices. This prevents the Maillard reaction—the chemical process that creates those deep, savory flavors—and leaves the breadcrumbs damp and mushy.
Surface moisture is the ultimate enemy of a crispy crust. Even if you buy “dry” scallops, they still carry natural juices on the exterior. If you salt them too early, the salt draws out even more liquid through osmosis. By using a dedicated drying phase with paper towels, you strip away that barrier, allowing the garlic butter to actually adhere to the flesh rather than sliding off into the pan.
Essential Components for Garlic Butter Baked Scallops
Quality ingredients are the foundation of this dish. For the best results, look for U10 or U12 sea scallops. These numbers indicate that there are 10 to 12 scallops per pound. Larger scallops are essential for baking because they have enough mass to stay juicy in the center while the topping finishes.
Panko breadcrumbs are non-negotiable here. Unlike traditional fine breadcrumbs, Panko has a larger, flaky surface area. This jagged structure creates more “nooks and crannies” for the garlic butter to hide in, resulting in a much lighter and crispier texture that doesn’t turn into a paste.
Aromatics and fats play a supporting role but are equally vital. Freshly minced garlic provides a pungent, sweet depth that pre-jarred versions lack. I always use lemon zest in addition to the juice because the zest contains essential oils that provide a bright, floral citrus note without adding the acidity that can sometimes “cook” the seafood prematurely.
Using unsalted butter is a pro move for seasoning control. It allows you to add the exact amount of kosher salt needed to enhance the scallops without the risk of the dish becoming overly salty. This ensures the delicate, sweet flavor of the sea scallop remains the star of the show.
Selecting High-Quality Sea Scallops
When you’re at the seafood counter, trust your nose first. Fresh scallops should smell like the ocean—salty and slightly sweet. If you detect even a hint of ammonia or a “fishy” odor, walk away. The color should be ivory, creamy, or even slightly pinkish; avoid scallops that look stark, bleached white, as this often indicates a chemical soak.
Before cooking, check for the “side muscle.” This is a small, rectangular tag of tough tissue on the side of the scallop used to attach it to the shell. It becomes incredibly rubbery when cooked. Simply pinch it with your thumb and forefinger and pull it away; it should pop right off, leaving you with a perfectly uniform piece of seafood.
The Role of Dry White Wine in the Pan
Adding a splash of liquid to the bottom of the baking dish serves a very specific purpose. As the oven heats up, the wine creates a small amount of flavored steam. This steam rises and gently cooks the bottom and sides of the scallops, keeping them incredibly tender while the dry heat of the oven roasts the top.
If you prefer not to use wine, you can easily substitute a high-quality seafood stock mixed with a teaspoon of white wine vinegar. This provides the necessary moisture and acidity to balance the richness of the butter. The goal is to create a shallow “bath” that transforms into a built-in sauce by the time the timer dings.
Phase One: The Critical Drying Technique
This is the most important step in the entire process. Take your scallops out of the fridge and sandwich them between several layers of heavy-duty paper towels. Press down firmly with your palms to wick away every drop of surface moisture. Let them sit like this at room temperature for about 15 minutes.
Allowing the scallops to lose their refrigerator chill prevents the muscle fibers from seizing up when they hit the heat. Cold scallops tend to “weep” more liquid as they cook. By bringing them closer to room temperature and ensuring the surface is bone-dry, you guarantee the garlic butter will coat them perfectly rather than pooling at the bottom.
Phase Two: Pre-Toasting the Panko Topping
Scallops only need about 10 to 12 minutes in a hot oven. Unfortunately, that isn’t nearly enough time for raw breadcrumbs to turn that beautiful, deep golden brown we all crave. If you wait for the oven to do the browning, you’ll end up with overcooked, rubbery scallops and pale, flavorless crumbs.
To fix this, melt a bit of butter in a skillet and toast the Panko over medium heat before it ever touches the seafood. Stir them constantly; they go from golden to burnt in a heartbeat. Once they look like toasted coconut, pull them off the heat and stir in your lemon zest and parsley. This ensures every bite has a “shatter-crisp” texture and a vibrant, fresh aroma.
Phase Three: Emulsifying the Garlic Butter Sauce
When you melt the remaining butter for the sauce, whisk it vigorously with the garlic, lemon juice, and spices. You want to create a temporary emulsion so the flavors are evenly distributed. The paprika isn’t just for flavor; it adds a gorgeous sunset hue to the sauce that makes the finished dish look professional.
Make sure your garlic is minced as finely as possible. Since the baking time is short, large chunks of garlic might stay raw and pungent. Finely minced garlic will mellow out in the oven, infusing the butter with a sweet, roasted flavor that complements the natural sugars in the scallops.
Phase Four: Assembly and High-Heat Baking
Preheat your oven to 425°F. This high temperature is vital for cooking the scallops quickly so they stay moist. Arrange the dried scallops in your baking dish, making sure they aren’t crowded together. If they touch, they will steam each other, which leads back to that soggy texture we’re trying to avoid.
Drizzle the garlic butter over each one, then spoon a generous mound of the toasted Panko on top. Press the crumbs down firmly with the back of a spoon so they adhere to the buttered surface. This creates a protective “cap” that seals in the juices while the wine bubbles away underneath, creating a rich reduction in the pan.
Troubleshooting Rubbery or Soggy Scallops
If you find your scallops sitting in a pool of water, it’s almost always because the drying phase was skipped or “wet” scallops were used. Next time, double down on the paper towels and ensure you’re buying “dry-packed” seafood. Also, check that your oven is fully preheated before the dish goes in.
If the texture is chewy, you’ve likely overstayed the welcome in the oven. Scallops are lean and cook very fast. Start checking them at the 10-minute mark. They should be opaque and firm to a light touch, but still have a slight “give” in the center. If they feel like a bouncy ball, they are overdone.
A pale topping usually means the pre-toasting step was cut short. Remember, the oven is only there to heat the crumbs and help them stick, not to provide the color. Don’t be afraid to get those breadcrumbs a nice, deep tan in the skillet before you assemble the dish.
Optimal Side Dishes for Rich Seafood
Because this dish is rich with butter and garlic, you want sides that offer a bit of contrast. A lemon-zest risotto is a classic choice, as the creaminess matches the scallops while the citrus cuts through the fat. Alternatively, a thick slice of crusty sourdough is essential for mopping up every last drop of the garlic-wine sauce.
For those who enjoy this garlic and butter base, discover a similar flavor profile in this garlic parmesan stuffed chicken.
For vegetables, think green and crisp. Charred broccolini with a squeeze of lemon or a shaved fennel salad provides a refreshing, acidic counterpoint. The crunch of a fresh salad helps reset your palate between those rich, buttery bites of seafood.
To complement the richness, consider trying these bright lemon herb chicken meatballs.
Expert Tips for Preparation and Storage
You can easily prep parts of this dish in advance if you’re hosting a dinner party. Toast the Panko crumbs up to a day ahead and store them in an airtight container at room temperature. You can also mix the garlic butter sauce earlier in the day; just gently re-melt it when you’re ready to assemble.
Complementary Flavors
To round out your meal, consider these recipes that share flavors or textures with your garlic butter scallops.
- For a refreshing contrast, pair your scallops with a Garlic Herb Grilled Chicken Salad, bringing in bright, herbaceous notes.
- If you enjoy a bit of crunch and creaminess, the Creamy Kale Caesar Salad with Sourdough Croutons offers a satisfying textural element.
Seafood is always best enjoyed immediately, as the texture of scallops changes significantly once cooled. However, if you have leftovers, avoid the microwave at all costs. Reheat them in a 300°F oven for about 5-7 minutes until just warmed through. This helps maintain some of the crispness in the topping without turning the scallop into rubber.
If you’re scaling this recipe for a larger crowd, use two baking dishes rather than cramming everything into one. Overcrowding the pan drops the oven temperature and traps steam, which will ruin the crust. Give each scallop its own space to breathe so the hot air can circulate properly.
Alternative Herb Profiles
While parsley is the traditional choice for its clean, grassy flavor, don’t be afraid to experiment. Fresh chives add a very subtle onion note that pairs beautifully with garlic. If you want a more sophisticated, French-inspired flavor, try using a small amount of fresh tarragon for a hint of anise.
Managing Oven Hot Spots
Most home ovens have hot spots, usually in the back corners. To ensure every scallop in the 1.5-pound batch cooks evenly, place your baking dish on the middle rack. Halfway through the 12-minute baking time, carefully rotate the pan 180 degrees. This simple move ensures a uniform golden crust across the entire dish.
Frequently Asked Questions
How do I store leftover scallops and can I freeze them?
Store any leftovers in an airtight container in the refrigerator for up to two days. I do not recommend freezing cooked scallops, as the delicate texture breaks down and becomes grainy and mushy upon thawing. For the best experience, try to cook only what you plan to eat in one sitting.
Why did my scallops turn out tough and rubbery?
This is almost always caused by overcooking. Scallops are very lean and lose their moisture rapidly once they pass the 125°F to 130°F internal temperature mark. Another culprit is using “wet” scallops treated with chemicals, which naturally have a firmer, more processed texture than fresh, dry-packed sea scallops.
Can I use frozen scallops for this recipe?
Yes, you can use frozen scallops, but they must be thawed completely in the refrigerator overnight. Once thawed, they will hold significantly more moisture than fresh ones, so you must be extra diligent with the paper towel drying process. Pat them dry, let them sit, and pat them dry again before proceeding.
What is a good substitute for white wine in the sauce?
If you don’t want to use wine, a high-quality clam juice or seafood stock is the best replacement. To mimic the acidity of the wine, add a half-teaspoon of white wine vinegar or an extra squeeze of lemon juice to the stock. This ensures the sauce remains balanced and doesn’t taste too heavy.
Can I use regular breadcrumbs instead of Panko?
You can, but the texture will be much denser and less crunchy. Regular breadcrumbs tend to absorb the butter and turn into a soft stuffing-like consistency. If you must use them, I recommend using a smaller amount so the topping doesn’t become heavy and doughy.
How do I know for sure when the scallops are done?
Look for the scallops to turn from translucent to opaque (solid white). They should feel firm to the touch but still have a little springiness, similar to the feel of your palm just below your thumb. The juices in the pan should be bubbling vigorously, and the breadcrumbs should be a deep, toasted brown.
Garlic Butter Baked Scallops
Course: Main CourseCuisine: AmericanDifficulty: easy4
servings15
minutes12
minutes310
kcal27
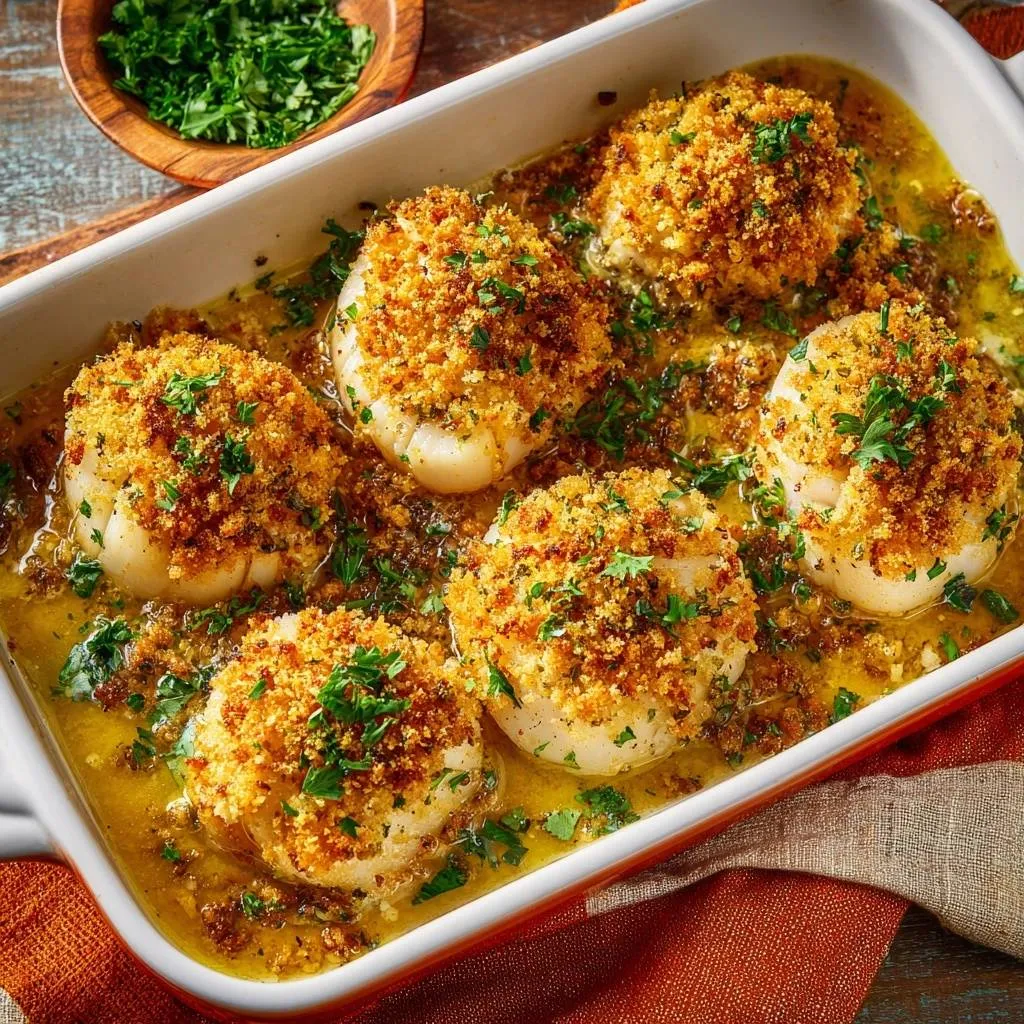
MinutesA foolproof method for restaurant-quality sea scallops featuring a rich, emulsified garlic butter sauce and shatter-crisp Panko topping that never gets soggy.
Ingredients
1.5 pounds large sea scallops (U10 or U12 size), tough side muscle removed
3/4 cup Panko breadcrumbs
6 tablespoons unsalted butter, divided
4 cloves garlic, minced
1 tablespoon fresh lemon juice
1/2 teaspoon lemon zest
1/2 teaspoon paprika
1/2 teaspoon kosher salt
1/4 teaspoon black pepper
1/4 cup dry white wine (Pinot Grigio or Sauvignon Blanc)
3 tablespoons fresh parsley, finely chopped
Directions
- The Moisture Secret: Place the scallops on a plate lined with three layers of paper towels. Place more paper towels on top and press down firmly. Let them sit for 15 minutes at room temperature. This prevents the scallops from “weeping” in the oven, which is the primary cause of soggy breadcrumbs.
- Preheat: Preheat your oven to 425°F (220°C).
- Toast the Topping: In a small skillet over medium heat, melt 2 tablespoons of the butter. Add the Panko breadcrumbs and stir constantly for 3-4 minutes until they are a deep golden brown. Remove from heat and stir in the lemon zest and half of the parsley. (Pre-toasting is essential because the scallops cook too fast for the crumbs to brown properly in the oven).
- Prepare the Garlic Butter Sauce: In a small bowl, melt the remaining 4 tablespoons of butter. Whisk in the minced garlic, lemon juice, salt, pepper, and paprika.
- Assemble: Pour the white wine into the bottom of a shallow baking dish (this creates the steam needed to keep the scallops tender without making the tops soggy). Arrange the dried scallops in a single layer in the dish.
- Coat: Drizzle the garlic butter mixture generously over each scallop, allowing the excess to pool in the wine at the bottom of the dish.
- Top: Spoon the toasted breadcrumbs onto the top of each scallop, pressing down firmly so they form a thick, mounded crust as seen in the image.
- Bake: Bake for 10 to 12 minutes. The scallops are done when they are firm to the touch and opaque, and the sauce in the pan is bubbling.
- Finish: Remove from the oven. Garnish immediately with the remaining fresh parsley. Serve the scallops with the garlic-butter-wine reduction from the bottom of the dish spooned over the sides.
Notes
- Pre-toasting the Panko breadcrumbs is essential because the scallops cook too quickly for the crumbs to brown properly in the oven. Ensure the side muscle is removed from each scallop before starting.