We’ve all been there. You crave that perfect roasted potato, but you end up with a pile of mushy spuds that are hard in the middle and soggy on the outside. It’s a kitchen heartbreak that happens when moisture gets trapped against the pan.
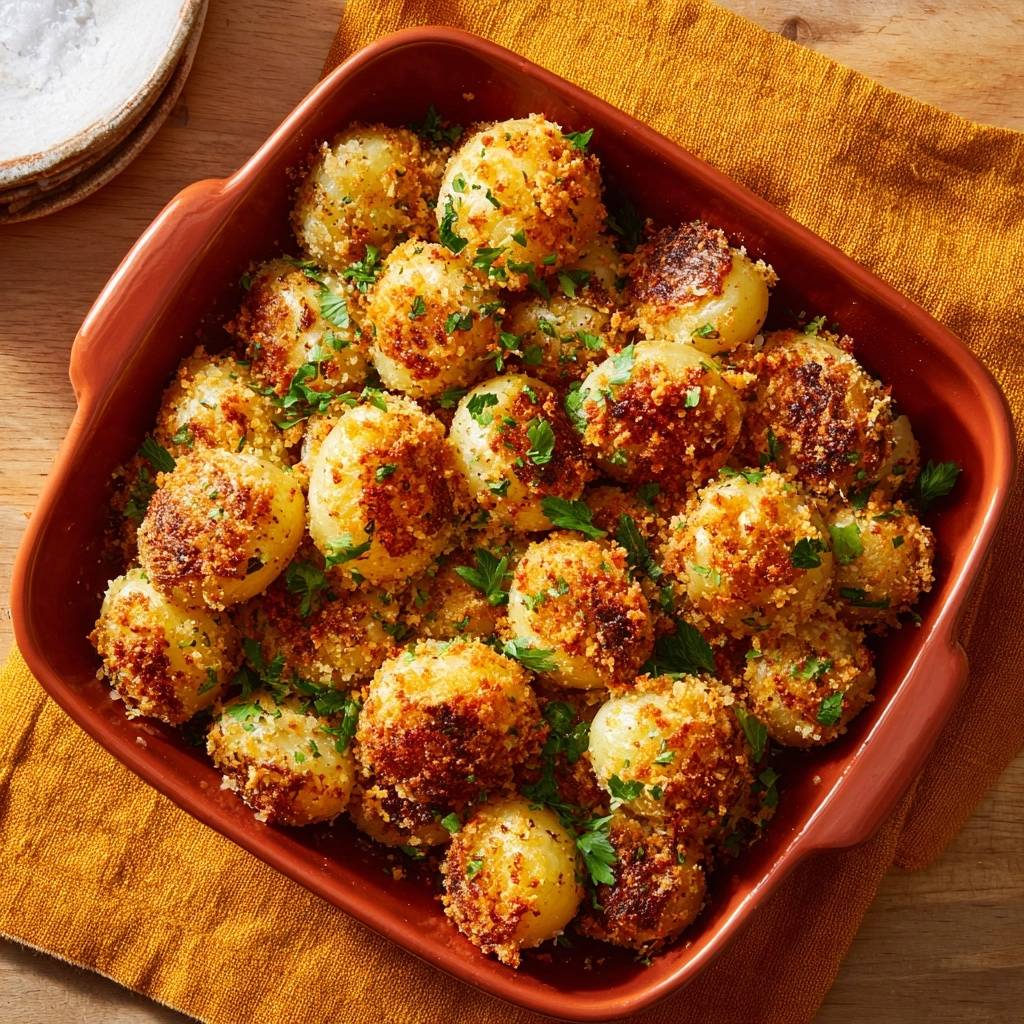
The secret to these Garlic Butter Roasted Baby Potatoes is a specific “Anti-Soggy Bottom” philosophy. We aren’t just tossing vegetables in oil; we’re building a structural, glass-like shell around a fluffy, cloud-like interior. It’s a restaurant-quality side dish that takes only 15 minutes of prep and 35 minutes in the oven.
I’ve found that the real magic happens when you manipulate the starch before the heat even hits. By par-boiling and then roughing up the edges, you create a starchy “paste” that acts as a magnet for the butter and breadcrumbs. This ensures every single bite has a shatteringly crisp exterior that stays crunchy long after it leaves the oven.
The Physics of the Perfect Potato Crunch
Achieving a world-class crunch is actually a matter of science and surface area. When you roast a smooth, whole potato, there isn’t much for the fat to grab onto. However, when we “rough up” the surface, we create thousands of tiny ridges and valleys.
These ridges turn into a starchy slurry that dehydrates rapidly in the high heat of the oven. As the water evaporates, that slurry hardens into a jagged, golden crust. Therefore, the more you beat up the potatoes in the pot, the more surface area you create for that satisfying crunch.
Contrast this with the standard “smooth skin” roasting method. Without roughing them up, the skins often act as a barrier that traps steam inside. This leads to steaming rather than roasting, which is exactly why so many home-cooked potatoes turn out limp and disappointing.
Essential Components for Garlic Butter Roasted Baby Potatoes
For this recipe, you’ll want two pounds of baby yellow potatoes. I always reach for yellow or Yukon Gold varieties because they have the perfect starch-to-sugar ratio. They hold their shape during the boil but turn incredibly creamy once roasted.
While Russets are great for baking, they can be too mealy for this specific roasting technique. In addition to the potatoes, the half-cup of Panko breadcrumbs is non-negotiable. Panko is lighter and airier than traditional breadcrumbs, which allows it to crisp up without becoming heavy or greasy.
Freshly minced garlic is another heavy hitter here. While garlic powder has its place, fresh cloves provide a pungent, aromatic punch that develops beautifully in the melted butter. Just make sure you mince them finely so they distribute evenly across every potato surface.
Fat Ratios: Butter vs. Olive Oil
We use a specific ratio of four tablespoons of unsalted butter to two tablespoons of extra virgin olive oil. Butter provides that unmistakable rich flavor and aids in the Maillard reaction, which is the chemical process that browns the food. However, butter has a low smoke point and can burn easily at 425°F.
By adding olive oil, we stabilize the fat mixture. The oil helps prevent the butter solids from scorching too quickly in the hot oven. This combination gives you the best of both worlds: the deep, nutty flavor of butter and the high-heat reliability of olive oil.
The Role of Parmesan as a Structural Binder
The quarter-cup of grated Parmesan cheese isn’t just there for the salty kick. It actually acts as a structural “glue” that helps the Panko breadcrumbs stick to the potato. As the cheese melts and then hardens, it creates a lacy, crispy texture known as a frico.
This cheesy lattice reinforces the crust, making it even more durable. When the Parmesan hits the hot baking sheet, it browns into a savory gold that adds a layer of complexity you just can’t get from salt alone. It’s the ultimate secret for a deep, golden-brown finish.
Pre-Roasting Prep: The Par-Boil Technique
Always start your potatoes in a pot of cold, salted water. If you drop them into already boiling water, the outside will overcook and fall apart before the inside is even warm. Starting cold ensures the potato heats through evenly from the core to the skin.
You are looking for “fork-tender” results after about 8 to 10 minutes of boiling. This means a fork should slide into the exterior easily, but you should still feel a bit of resistance in the very center. They need to be firm enough to handle a vigorous shake without turning into mashed potatoes.
Once they reach this stage, drain them immediately. Don’t let them sit in the water, or they will continue to soften. A quick, thorough drain is essential to keep the starch on the surface from becoming too watery or gummy.
The “Roughing Up” Method for Maximum Texture
This is the most important step in the entire process. After draining, put the potatoes back into the dry pot, pop the lid on, and shake them vigorously for about 30 seconds. You want them to knock against the sides of the pot and each other.
When you take the lid off, the potatoes should look “fuzzy.” This white, starchy coating is exactly what you want. It looks a bit messy, but that thick starch paste is the foundation for the Garlic Butter Roasted Baby Potatoes’ legendary crust.
If they still look smooth, give them another ten seconds of shaking. You aren’t trying to break them into pieces, but you want the edges to look frayed and worn. This texture is what will eventually trap the garlic butter and breadcrumbs for that massive crunch.
Step-by-Step: Achieving the Restaurant-Style Roast
Preheat your oven to 425°F and place your ceramic baking dish or rimmed baking sheet inside while it warms up. This is a pro move. When the potatoes hit a hot pan, the fat begins to sizzle and sear the bottom immediately, preventing sticking and jump-starting the crust.
Carefully pull the hot pan out and add the potatoes in a single layer. You should hear a distinct, aggressive sizzle the moment they touch the surface. If you don’t hear that sound, your pan wasn’t hot enough, so work quickly to get it back into the heat.
Roast them for 20 to 25 minutes total. It is vital that you do not stir them for the first 15 minutes. This “quiet time” allows the bottom crust to set and harden. If you move them too early, you’ll tear off that beautiful golden layer we worked so hard to build.
Infusing the Garlic and Spice Blend
While the potatoes are roughing up, whisk together your melted butter, oil, minced garlic, onion powder, smoked paprika, salt, and pepper. The smoked paprika adds a subtle earthiness and a gorgeous red-gold tint to the finished dish.
Pour this mixture over the fuzzy potatoes and toss them until every nook and cranny is filled with fat and spices. Because the surface is roughed up, the garlic bits will get trapped in the ridges rather than sliding off to the bottom of the pan.
After the fat coating, sprinkle the Panko and Parmesan mixture over the top. Toss one last time. The starchy paste acts like a magnet, pulling the crumbs and cheese into a thick, even coating that covers every square inch of the potato.
The Single Layer Rule and Heat Circulation
Overcrowding is the enemy of crispiness. If the potatoes are touching or piled on top of each other, the moisture they release will turn into steam. This steam will soften the crust you’re trying to build, resulting in a soggy mess.
Use a large enough pan so that every potato has its own “personal space.” This allows the hot air to circulate around the entire surface, dehydrating the crust from all angles. If you’re doubling the recipe, use two separate baking sheets rather than cramming them onto one.
Flip them gently just once toward the end of the cooking time. This ensures the top gets as much direct heat as the bottom. You’ll know they are done when the breadcrumbs are a deep, toasted brown and the kitchen smells like a garlic lover’s dream.
Troubleshooting Common Roasting Hurdles
If your potatoes are sticking to the pan, it usually means one of two things: you didn’t use enough fat, or you tried to move them too early. If they feel stuck, give them another five minutes in the oven; often, they will “release” themselves once the crust is fully formed.
Sometimes the garlic can start to brown too quickly if your oven has hot spots. If you notice the garlic bits turning dark brown or black, move the rack down one level or lightly tent the pan with foil. This protects the aromatics while the potato centers finish softening.
If you still end up with a soggy bottom, it’s likely due to trapped steam. Make sure you aren’t using a pan with very high sides, which can trap moisture. A flat baking sheet or a shallow ceramic dish is always the best choice for maximum airflow.
Flavor Variations and Herb Substitutions
While fresh parsley is the classic finish, you can easily swap it for other fresh herbs. Fresh rosemary or thyme are incredible if added during the last 10 minutes of roasting. They infuse the butter with a woody, earthy aroma that pairs perfectly with the garlic.
For those who like a bit of heat, add a teaspoon of red pepper flakes to the butter mixture. It provides a slow burn that cuts through the richness of the Parmesan. Alternatively, a pinch of cumin can add a warm, smoky depth that feels very cozy.
For an extra kick, consider the vibrant flavor of crispy garlic herb baby potatoes.
Just remember to keep your herbs fresh whenever possible. Dried herbs can sometimes become bitter or gritty in the high heat of the oven. If you must use dried, use about one-third of the amount called for in the fresh measurements.
Optimal Pairings for Garlic Butter Roasted Baby Potatoes
These potatoes are incredibly versatile and act as the perfect side for any protein. They are particularly good with a simple roasted chicken, where the crispy skins of both the bird and the potatoes complement each other. The garlic notes also pair beautifully with grilled lamb chops.
If you’re looking for a vegetarian option, serve these alongside a hearty vegetable pot pie or a large garden salad. The richness of the garlic butter provides a satisfying weight to lighter meals. They also make a fantastic base for a breakfast hash the next morning.
Because these potatoes are so flavorful, you don’t need a heavy sauce on your main dish. A simple squeeze of lemon over the potatoes right before serving can brighten the whole plate and cut through the buttery richness perfectly.
Storage and Reheating for Retained Crispness
If you have leftovers, store them in an airtight container in the refrigerator for up to three days. However, be warned: the microwave is the absolute enemy of this dish. It will turn that glorious crust into a rubbery, soft skin in seconds.
To bring back the crunch, use an air fryer or your oven. Reheat them at 400°F for about 5 to 8 minutes. This high heat reactivates the fats and crisps the Panko back up to its original glory. It’s almost as good as the first time they came out of the oven.
I do not recommend freezing these potatoes. The freezing and thawing process breaks down the cellular structure of the potato, making them grainy and watery. These are definitely best enjoyed fresh or within a few days of roasting.
Expert Tips for Potato Success
Can I use red potatoes instead of yellow?
You can use red potatoes, but the texture will be slightly different. Red potatoes are waxier and have less starch, so they won’t produce as much of that “fuzzy” paste when you shake them. They will still be delicious, but the crust might be a bit thinner and less jagged than if you used yellow potatoes.
Why did my garlic turn bitter?
Garlic turns bitter when it burns. This usually happens if the garlic pieces are too large or if they are exposed to direct, intense heat for too long. Ensure you mince the garlic very finely so it blends into the butter paste. If your oven runs hot, you can also add the garlic halfway through the roasting time to prevent over-browning.
Can I use dried herbs instead of fresh?
Yes, you can use dried herbs, but you need to adjust the quantity. The general rule is one teaspoon of dried herbs for every tablespoon of fresh. For this recipe, use about two teaspoons of dried parsley if you don’t have fresh. Add dried herbs to the butter mixture before roasting so they have time to rehydrate and release their oils.
Is peeling mandatory?
Peeling is highly recommended for this specific “shatter-crisp” method. While potato skins are nutritious, they prevent the starch from escaping and forming that fuzzy paste. By peeling the baby potatoes, you expose the starchy flesh, which is the key ingredient for building that thick, crunchy breadcrumb crust.
How do I scale this for a large crowd?
When scaling up, the most important factor is pan space. Do not try to fit four pounds of potatoes on one tray. Use multiple baking sheets and rotate them between the top and bottom racks halfway through cooking. This ensures even heat distribution and prevents the potatoes from steaming each other out.
What if I don’t have Panko breadcrumbs?
If you don’t have Panko, you can pulse a few slices of dry white bread in a food processor until you have coarse crumbs. Avoid using the very fine, sandy breadcrumbs sold in canisters, as they can become dense and pasty. You want a larger crumb to provide that signature “shatter” when you take a bite.
Garlic Butter Roasted Baby Potatoes
Course: Side DishCuisine: AmericanDifficulty: easy6
servings15
minutes35
minutes210
kcal50
MinutesThese Garlic Butter Roasted Baby Potatoes use a specific par-boiling and surface-roughing method to create a starchy coating that, when combined with Panko and Parmesan, results in an ultra-crunchy, anti-soggy exterior.
Ingredients
2 pounds baby yellow potatoes, peeled
1/2 cup Panko breadcrumbs
1/4 cup grated Parmesan cheese (the secret to the deep golden crust)
4 tablespoons unsalted butter, melted
2 tablespoons extra virgin olive oil
3 cloves garlic, minced
1 teaspoon sea salt
1/2 teaspoon cracked black pepper
1/2 teaspoon onion powder
1/2 teaspoon smoked paprika
2 tablespoons fresh parsley, chopped
Directions
- Preheat your oven to 425°F (220°C). Place a large ceramic baking dish or rimmed baking sheet inside the oven while it heats. A preheated pan ensures the potatoes begin crisping the moment they touch the surface.
- Place the peeled baby potatoes in a large pot of cold salted water. Bring to a boil and cook for 8 to 10 minutes. They should be “fork-tender” on the outside but still firm and holding their shape in the center.
- Drain the potatoes thoroughly in a colander. Return the potatoes to the dry pot and shake them vigorously for 30 seconds with the lid on. This “roughs up” the exterior, creating a fuzzy, starchy coating that is the key to the ultimate crunch.
- In a small bowl, whisk together the melted butter, olive oil, minced garlic, onion powder, smoked paprika, salt, and pepper. Pour this mixture over the roughed-up potatoes and toss until every potato is evenly coated in the fat and spices.
- In a separate bowl, mix the Panko breadcrumbs and grated Parmesan cheese. Sprinkle this over the potatoes and toss again. The cheese and crumbs will adhere to the starchy “paste” created in step 3.
- Carefully remove the hot baking dish from the oven. Add the potatoes in a single layer. You should hear a distinct sizzle.
- Roast for 20 to 25 minutes. Do not stir for the first 15 minutes to allow the bottom crust to set. Flip gently once toward the end of cooking to ensure even browning.
- Remove from the oven when the crumbs are deep golden brown and the potatoes are soft inside. Garnish generously with fresh parsley and an extra pinch of sea salt before serving hot.
Notes
- The secret to the crunch is roughing up the potatoes after boiling to create a starchy paste that locks in moisture and grips the breadcrumbs.