Most people dread the standard grilled chicken skewer because it usually ends up as a dry, rubbery cube of disappointment. You’ve likely experienced it before: the outside is charred and tough while the inside lacks any real moisture or flavor. It’s a common frustration that stems from high heat stripping away the natural juices of lean poultry.
For another way to enjoy chicken with a creamy sauce, check out this crispy breaded chicken.
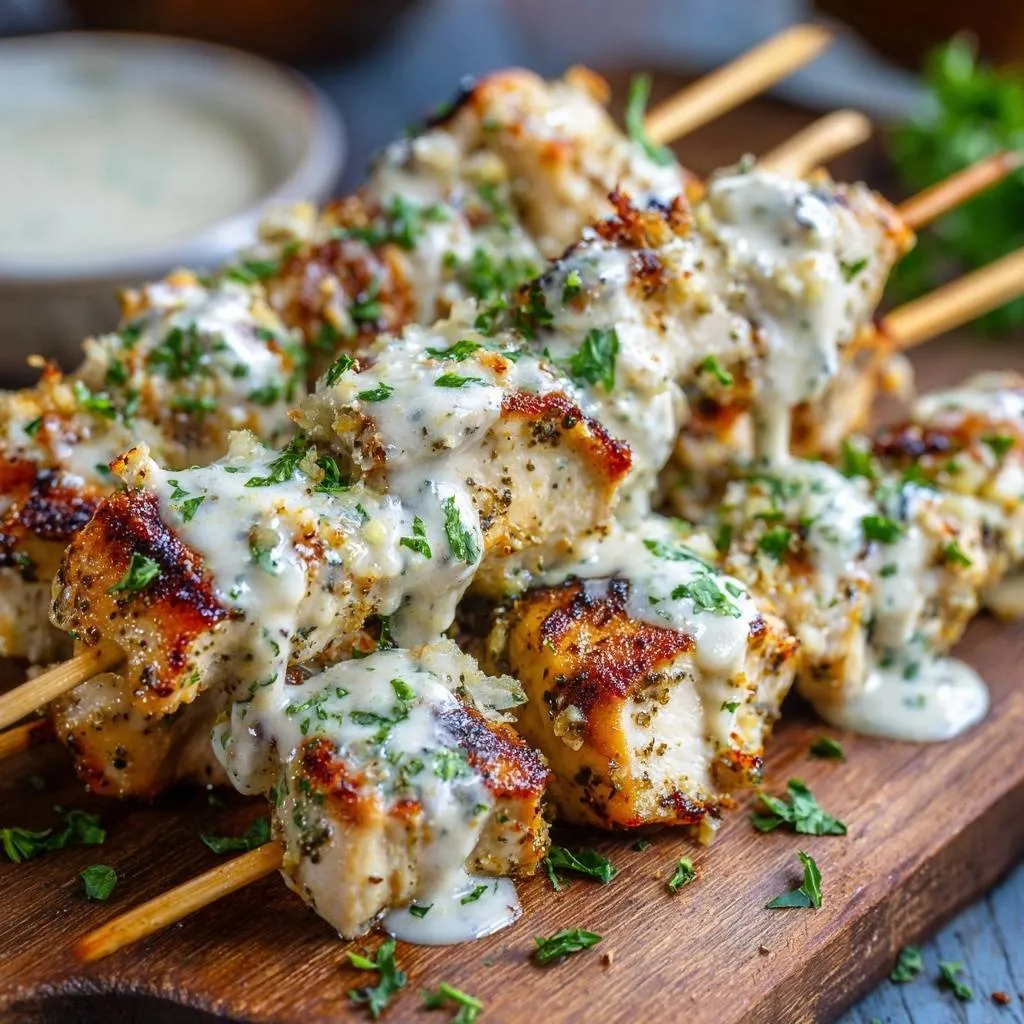
These Garlic Herb Chicken Skewers solve that problem by using a dual-action yogurt marinade and a clever breadcrumb crust technique. Instead of a thin oil-based marinade that drips off into the flames, the thick yogurt clings to the meat, creating a protective layer. This method ensures your chicken stays incredibly tender while developing a golden, textured exterior that looks like it came from a professional kitchen.
The real secret to this recipe’s success is the addition of finely crushed Panko breadcrumbs just before cooking. While the yogurt tenderizes the fibers, the Panko catches the heat to create a delicate crunch. This texture isn’t just for show; those tiny toasted crumbs act like little sponges that hold onto the final garlic cream sauce, ensuring every single bite is packed with flavor.
For more ideas on perfectly seasoned juicy grilled chicken skewers, check out this other great recipe.
The Science of Yogurt-Based Poultry Marinades
If you want the juiciest chicken possible, you have to understand the chemistry of lactic acid found in Greek yogurt. Unlike harsh acids like vinegar or pure lemon juice, which can actually “cook” the surface of the meat and make it mealy, yogurt works slowly and gently. It breaks down the tough collagen and muscle fibers without ruining the integrity of the protein.
Furthermore, the yogurt creates what chefs call a “thermal barrier.” When the skewers hit the hot cast-iron surface, the sugars and proteins in the yogurt caramelize first. This buffer protects the delicate chicken breast from the direct, aggressive heat of the pan. It allows the interior to reach a safe temperature while the exterior develops a beautiful brown color without drying out.
Because yogurt is thick, it also serves as a vehicle for the garlic and herbs. In an oil marinade, spices often sink to the bottom of the bowl. With this Greek yogurt base, the oregano, onion powder, and minced garlic are suspended against the meat. This ensures that every square inch of the chicken is seasoned perfectly from the moment it hits the heat until it reaches your plate.
Essential Components for Garlic Herb Chicken Skewers
Choosing the right cut of meat is the first step toward success. We use boneless skinless chicken breasts here because they provide a clean, uniform canvas for the garlic and herbs. However, you must cut them into consistent 1-inch cubes. If the pieces are too small, they’ll overcook in seconds; if they’re too large, the outside will burn before the center is safe to eat.
The Panko breadcrumbs are another non-negotiable element. Standard breadcrumbs are too fine and can become gummy when mixed with yogurt. Panko is flaky and light, providing that “crusted” appearance that mimics the texture of deep-frying. By lightly tossing the marinated chicken in these crumbs, you create a rugged surface area that is perfect for catching the finishing sauce.
Finally, let’s talk about the garlic. You really want to use fresh cloves rather than the pre-minced stuff from a jar. Jarred garlic often has a metallic or acidic aftertaste that can ruin the delicate cream sauce. Freshly minced garlic provides a pungent, spicy kick that mellows out beautifully when whisked into the cool yogurt and heavy cream.
Selecting and Preparing Your Skewers
You have two main choices for skewers: metal or wood. Metal skewers are great because they conduct heat into the center of the meat, but wooden skewers are often more accessible for home cooks. If you choose wood, you must soak them in water for at least 30 minutes before threading the meat.
Soaking is a critical safety step that prevents the wood from splintering or catching fire on the grill pan. A dry skewer will act like kindling, charring quickly and potentially breaking when you try to flip the chicken. Take the time to submerge them fully in a shallow tray of water while you prep your marinade.
The Role of Panko in Texture Development
When you add the Panko, remember that we aren’t looking for a heavy, thick breading like a chicken schnitzel. You want a “light toss” technique. The goal is to have scattered bits of breadcrumb clinging to the yogurt marinade to create a varied, crusted texture.
This uneven surface is actually a benefit. The crags and crevices created by the Panko will eventually trap the garlic cream sauce. This ensures the sauce doesn’t just slide off the chicken but stays exactly where you want it—on the meat.
Step-by-Step: Preparing the Garlic Herb Marinade
Start by whisking together your marinade base in a large glass bowl. You’ll combine the Greek yogurt, olive oil, half of your minced garlic, and the dried spices. It’s important to divide your garlic and yogurt at the very beginning. This prevents cross-contamination, as you don’t want to use the same spoon for the raw meat marinade and the final “clean” sauce.
The consistency of your marinade should be thick and creamy, almost like a heavy salad dressing. If it feels too thin, add another dollop of yogurt. You want it to cling to the chicken cubes rather than pooling at the bottom of the bowl. Once the chicken is coated, let it sit in the fridge for at least 30 minutes to let the lactic acid do its work.
While the chicken marinates, you’ll notice the aroma of the oregano and garlic intensifying. This resting period is vital for flavor penetration. If you’re in a rush, even 15 minutes will help, but 30 to 60 minutes is the sweet spot for achieving that signature tender texture that makes these skewers stand out.
The Secret Finishing Sauce: Garlic Cream Technique
This isn’t just a side dip; it’s a finishing sauce designed to emulsify on top of the hot chicken. By whisking together the remaining yogurt, olive oil, heavy cream, and garlic, you create a rich, velvety topping. The heavy cream adds a luxurious mouthfeel that balances the tanginess of the Greek yogurt.
Round Out Your Meal
To complement your chicken skewers, consider these other chicken dishes.
- For a fresh take on grilled chicken, try the Garlic Herb Grilled Chicken Salad, featuring similar flavors in a lighter format.
- If you enjoy creamy textures, the Creamy Zesty Chicken and Corn Salad offers a different but equally satisfying chicken preparation.
The addition of lemon juice is the final “brightener” for the dish. It cuts through the fat of the cream and the oil, lifting the entire flavor profile. You’ll notice the sauce thickens slightly as you whisk it. If it feels too stiff to drizzle, you can add a teaspoon of milk to reach a pourable, ribbon-like consistency.
Remember that this sauce should be served at room temperature or slightly chilled. When you drizzle it over the hot, seared chicken, the heat from the meat will warm the sauce just enough to release the aroma of the fresh garlic without breaking the emulsion of the cream.
Assembly: Threading for Even Heat Distribution
When it’s time to assemble, keep the “airflow” principle in mind. A common mistake is smashing the chicken pieces tightly together on the skewer. When you do this, the sides of the chicken touch and steam rather than sear. This results in gray, rubbery meat instead of golden-brown perfection.
Instead, leave a tiny 1/8th inch gap between each cube of chicken. This small space allows the hot air and the surface of the pan to reach all sides of the meat. It ensures the breadcrumbs crisp up evenly and the chicken cooks through at a consistent rate, preventing raw spots between the pieces.
As you thread the meat, try to keep the cubes centered on the skewer. This balance makes it much easier to flip the skewers in the pan. If the meat is lopsided, the skewers will want to roll back to their original side, making it difficult to get an even sear on both faces of the chicken.
Searing Garlic Herb Chicken Skewers to Perfection
Preheat your cast-iron skillet or grill pan until it’s shimmering hot. You want to hear a loud sizzle the moment the chicken touches the metal. Once the skewers are down, follow the “Natural Release” rule: do not touch them. If you try to flip the chicken and it sticks to the pan, it’s not ready yet.
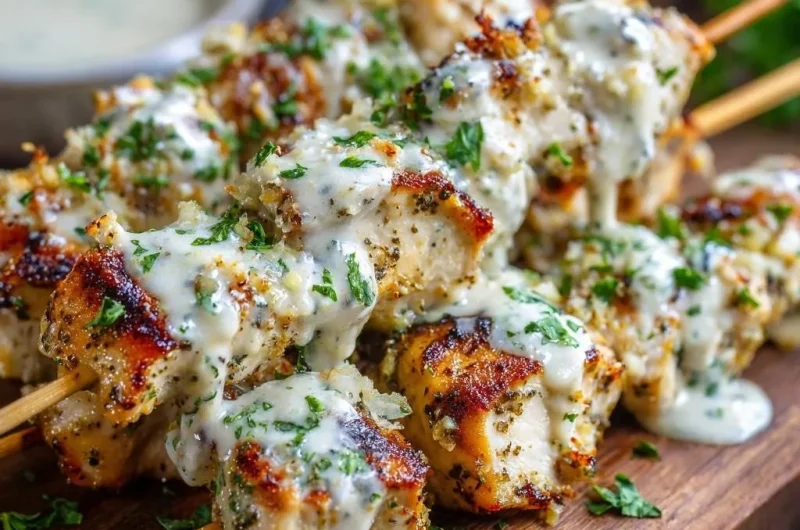
The chicken will naturally release from the surface once the Maillard reaction has occurred and a crust has formed. This usually takes about 5 to 6 minutes on the first side. Once they release easily, flip them over to finish the other side. You’re looking for a deep, golden-brown color that contrasts with the white garlic sauce you’ll add later.
While the USDA recommends an internal temperature of 165°F, an expert move is to pull the skewers off the heat at 162°F. Place them on a clean plate and let them rest for 3 minutes. During this time, “carry-over cooking” will bring the temperature up to the safe 165°F mark while the juices redistribute, ensuring the meat is at its peak juiciness.
Troubleshooting Common Skewer Obstacles
If you find that your breadcrumbs are burning before the chicken is cooked through, your heat is likely too high. Cast iron retains a lot of energy, so don’t be afraid to drop the flame to medium once the initial sear is established. This allows the interior to finish cooking without turning the crust into charcoal.
If the chicken feels dry despite the yogurt marinade, you might have cut the pieces too small or left them on the heat too long. Always use a meat thermometer to be sure. Chicken breast goes from juicy to dry very quickly once it passes the 170°F mark, so monitoring the temperature is your best defense against a rubbery texture.
Sometimes the finishing sauce can turn out a bit too thick to drizzle elegantly. This often happens if your Greek yogurt is particularly dense. Simply whisk in a teaspoon of milk or even water until it reaches a consistency that flows easily from a spoon. It should look like a thick glaze, not a dollop of sour cream.
Optimal Side Dishes for Garlic Herb Poultry
To round out the meal, look for Mediterranean-style pairings that complement the garlic and oregano. A lemon-infused rice pilaf is a fantastic base, as the grains will soak up any extra garlic cream sauce that drips off the skewers. The acidity in the rice provides a nice counterpoint to the rich chicken.
Charred seasonal vegetables, like zucchini or bell peppers, also work beautifully. You can even throw them on the same grill pan after the chicken is done to pick up those leftover brown bits of flavor. The smoky, charred edges of the vegetables pair perfectly with the creamy sauce.
If you want something lighter, a crisp cucumber and tomato salad with a simple vinaigrette is the way to go. The cool, crunchy vegetables provide a refreshing contrast to the warm, savory skewers. The acidity of the tomatoes helps cleanse the palate between bites of the rich garlic cream.
Make-Ahead Strategies and Storage Logistics
You can easily prep these skewers ahead of time for a stress-free dinner. You can marinate the chicken in the yogurt mixture for up to 24 hours. However, don’t go much longer than that, or the yogurt will begin to break down the meat too much, resulting in a texture that is overly soft rather than tender.
If you have leftovers, store them in an airtight container in the refrigerator for up to three days. For the best results, store the extra garlic cream sauce in a separate small container. This prevents the breadcrumb crust from getting soggy while it sits in the fridge overnight.
When it’s time to reheat, avoid the microwave if possible, as it will make the breadcrumbs rubbery. Instead, use an air fryer or a toaster oven at 350°F for a few minutes. This will revive the crunch of the Panko and warm the chicken through without drying it out. Drizzle the fresh sauce on only after the meat is hot.
Expert Tips for Maximum Flavor Impact
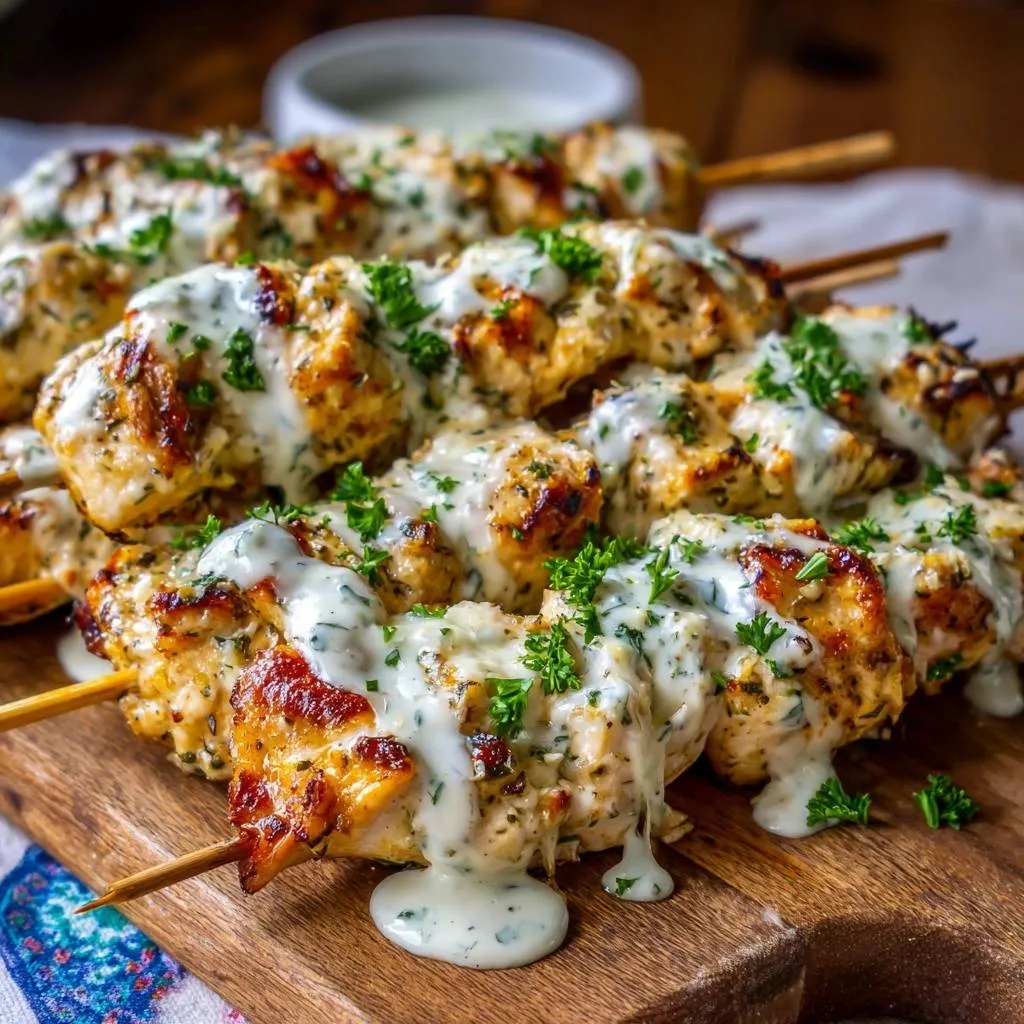
For the best visual and flavor impact, be generous with your fresh parsley garnish. The bright, “grassy” flavor of the parsley provides a necessary contrast to the pungent garlic and rich cream. It wakes up the dish and makes the colors pop against the golden-brown chicken.
Don’t forget the importance of the rest period. Letting the meat sit for 3 minutes before you pour the sauce over it is crucial. If you sauce it immediately, the heat might cause the cream to thin out too much and run off. Resting ensures the chicken is at the perfect temperature to hold that beautiful white glaze.
How long should I soak wooden skewers?
You should soak wooden skewers for at least 30 minutes in cold water. This saturates the wood fibers, preventing them from scorching, burning, or snapping while on the high heat of the grill pan. If you have the time, soaking them for an hour is even better for total peace of mind.
Can I use chicken thighs instead of breasts?
Yes, you can substitute boneless skinless chicken thighs if you prefer dark meat. Thighs are naturally juicier and more forgiving if overcooked. However, they may take an extra minute or two per side to cook through, and you should still aim for that 165°F internal temperature for safety.
Why is my garlic cream sauce breaking or curdling?
The sauce usually breaks if it gets too hot or if the lemon juice is added too quickly to very cold cream. To prevent this, make sure your yogurt and cream are closer to room temperature before whisking. Also, never boil the sauce; it is meant to be a cold or room-temperature finish for the hot meat.
Can I make these skewers in the oven?
While a grill pan gives the best crust, you can bake these at 425°F on a wire rack set over a baking sheet. Cook for about 15-18 minutes, flipping halfway through. To get that golden color, you might need to turn on the broiler for the last 2 minutes, but watch them closely so the breadcrumbs don’t burn.
What can I use if I don’t have Panko breadcrumbs?
If you don’t have Panko, you can crush up plain crackers or even toasted bread into coarse crumbs. Avoid using the very fine, sandy breadcrumbs sold in canisters, as they won’t provide the same distinct “crunch” and can become pasty when mixed with the yogurt marinade.
How do I store and reheat leftovers?
Store the chicken and sauce in separate airtight containers in the fridge for up to 3 days. To reheat, use an air fryer or oven at 350°F until warmed through to maintain the crust’s texture. Do not freeze these skewers, as the yogurt-based sauce and the breadcrumb crust will become grainy and soggy upon thawing.
Garlic Herb Chicken Skewers
Course: Main CourseCuisine: AmericanDifficulty: easy4
servings20
minutes12
minutes310
kcal32
MinutesThese chicken skewers utilize a dual-purpose yogurt marinade to tenderize the meat and a light Panko coating for a crispy texture. Served with a creamy garlic finishing sauce, they are a flavorful solution to dry grilled chicken.
Ingredients
1.5 lbs boneless skinless chicken breasts, cut into 1-inch cubes
1/2 cup plain Greek yogurt (divided: 1/4 cup for marinade, 1/4 cup for sauce)
3 tablespoons olive oil
1/4 cup Panko breadcrumbs, finely crushed
6 cloves garlic, minced (divided)
1 tablespoon dried oregano
1 teaspoon onion powder
1/2 teaspoon black pepper
1 teaspoon salt
2 tablespoons heavy cream or whole milk
1 teaspoon lemon juice
Fresh parsley, chopped for garnish
Wooden skewers, soaked in water for 30 minutes
Directions
- In a large bowl, whisk together 1/4 cup Greek yogurt, 2 tablespoons olive oil, half of the minced garlic, oregano, onion powder, salt, and pepper.
- Add the chicken cubes to the bowl and toss until thickly coated. For the best texture, sprinkle the crushed breadcrumbs over the marinated chicken and toss lightly; this creates the “crusted” appearance shown in the image once seared. Let marinate for at least 30 minutes in the refrigerator.
- Prepare the Finishing Sauce: In a small bowl, whisk the remaining 1/4 cup yogurt, the remaining minced garlic, 1 tablespoon olive oil, heavy cream, and lemon juice until smooth and pourable. Set aside.
- Thread the chicken pieces onto the soaked skewers. Do not crowd them too tightly; leaving a tiny bit of space ensures the heat circulates evenly for a consistent golden-brown finish.
- Preheat a grill pan or cast-iron skillet to medium-high heat. Lightly oil the surface.
- Place skewers on the heat. Sear for 5 to 6 minutes per side. To achieve the deep golden crust seen in the image, do not move the skewers until they naturally release from the pan. Flip once.
- Once the internal temperature reaches 165°F, remove from heat immediately. Let the skewers rest for 3 minutes.
- Generously drizzle the prepared garlic cream sauce over the skewers and garnish with a heavy dusting of fresh parsley before serving.
Notes
- Soak wooden skewers in water for at least 30 minutes to prevent burning. For the best crust, do not move the skewers until they naturally release from the pan surface.