We have all been there. You buy a beautiful, ruffled bunch of curly kale with the best intentions, only to end up with a plate of bitter, leathery greens that feel like a chore to chew. It is the ultimate kitchen frustration because we know how healthy these greens are, yet the texture often misses the mark.
The truth is that most home cooks treat kale like spinach, throwing it raw into a hot pan and hoping for the best. However, kale is a sturdy, fibrous brassica that requires a bit more finesse to reach its full potential. This guide will walk you through the technical roadmap to transform those tough leaves into a delicate, restaurant-grade side dish that balances savory garlic with a bright, clean finish.
The secret to success lies in a two-step cooking process that addresses the cellular structure of the plant. By using a quick flash-blanching technique followed by a cold-start garlic infusion, you can eliminate the “chew factor” entirely. I’ve found that the curly variety is actually superior to Lacinato for this specific method because its deep crevices hold onto the garlic-infused oil much more effectively.
Why Most Garlic Sauteed Curly Kale Fails
Most people fail at this dish because they underestimate the resilience of the kale leaf. Kale is packed with glucosinolates, which are the chemical compounds responsible for that sharp, sulfurous bitterness. When you sauté raw kale, the heat often evaporates the moisture before the fibers can soften, leaving you with dry, acrid greens.
Furthermore, high heat is the enemy of garlic. If you toss minced garlic into a screaming hot pan with raw kale, the garlic burns long before the kale is tender. This creates a double-bitterness effect that is nearly impossible to mask. Understanding how heat affects the cellular walls of the greens is the first step toward mastery.
Therefore, we have to intervene chemically and physically. We need to break down the tough cellulose without turning the vegetable into mush. By treating the garlic and the kale as two separate components that join forces at the very end, we ensure both ingredients shine without competing for dominance.
Essential Components for Garlic Sauteed Curly Kale
Quality starts at the grocery store or farmer’s market. When selecting your two bunches of curly kale, look for deep green leaves that feel turgid and crisp. If the edges are yellowing or the leaves feel limp, the kale is already losing its sweetness and will likely taste more bitter once cooked.
In addition to the greens, your choice of fat is paramount. Extra virgin olive oil acts as the primary flavor carrier here. Since we are cooking over medium-low heat for the infusion, the nuanced flavors of a high-quality oil won’t be destroyed. It provides a silky mouthfeel that coats the tongue and helps neutralize the earthy notes of the kale.
Don’t skimp on the salt, either. Sea salt is essential because it helps draw out the last bit of moisture during the sauté and heightens the natural sugars in the vegetable. When these few high-quality components work together, the result is far greater than the sum of its parts.
The Role of Fresh Garlic and Aromatics
I cannot stress this enough: put down the jar of pre-minced garlic. That stuff is preserved in citric acid and lacks the essential oils needed for a true infusion. For this recipe, we want six whole cloves of fresh garlic, sliced into paper-thin chips.
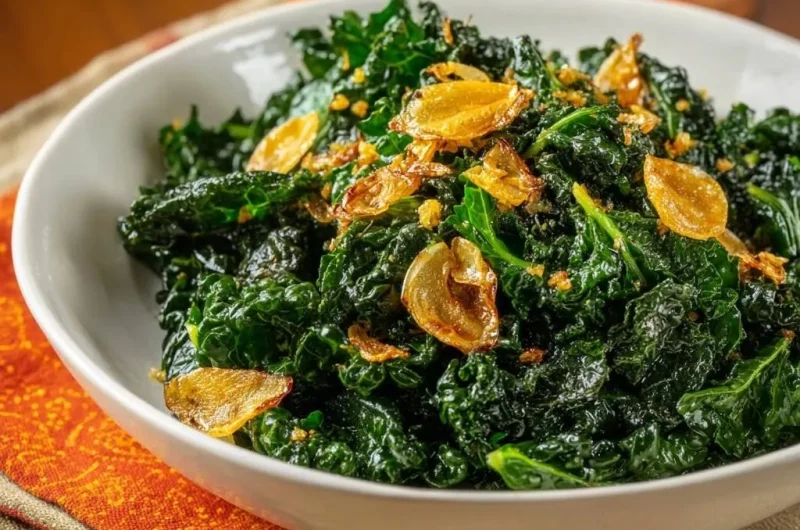
Slicing the garlic instead of mincing it changes the entire flavor profile. Mincing releases more allicin, which creates a sharp, pungent bite. Slicing allows the garlic to brown slowly into “chips,” resulting in a mellow, nutty flavor that provides a beautiful textural contrast to the soft greens.
Acidity and Heat: Balancing the Flavor Profile
Balance is the hallmark of professional cooking. While the garlic and oil provide richness, you need acidity to cut through the density of the greens. Fresh lemon juice is the perfect tool for this because the citric acid interacts with your taste receptors to physically mask bitterness.
In addition to the acid, a pinch of red pepper flakes provides a necessary counterpoint. You aren’t looking to make the dish “spicy” in a traditional sense. Instead, the capsaicin provides a gentle warmth that wakes up the palate and complements the earthy, mineral notes of the kale.
The Secret Technique: Flash-Blanching for Texture
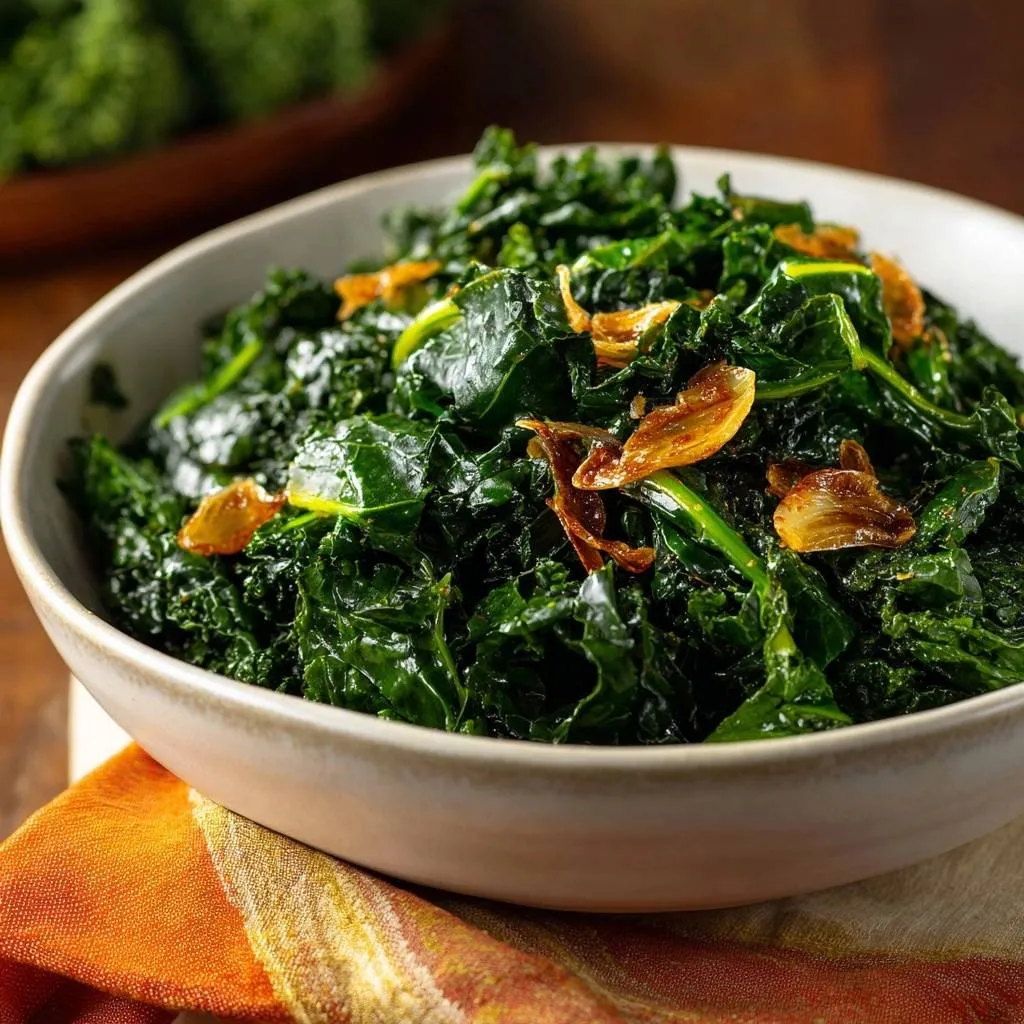
This is the step that changes everything. Flash-blanching the kale in salted boiling water for exactly 60 seconds does two things. First, it “sets” the chlorophyll, which ensures your kale stays a vibrant, emerald green rather than turning a dull, muddy brown in the pan.
Secondly, the boiling water begins to dissolve the tough cellulose fibers that make kale so difficult to chew. It also leaches out those bitter glucosinolates into the water. Think of it as a “pre-wash” that tenderizes the greens so the sauté pan only has to focus on adding flavor, not doing the heavy lifting of cooking the plant through.
You will notice the kale wilts significantly during this minute. Don’t worry about it becoming soggy; as long as you stick to the 60-second rule, the leaves will retain enough structure to stand up to the heat of the skillet later on.
Proper Drainage and Moisture Control
Once you pull the kale out of the boiling water, you must dry it thoroughly. If you put wet kale into a pan of oil, the water will turn to steam. Instead of searing and absorbing the garlic oil, the kale will simply boil further in its own juices, resulting in a limp, watery mess.
I recommend using a salad spinner if you have one, as it is the most efficient way to wick away moisture. If you don’t, spread the blanched leaves out on a clean kitchen towel and pat them firmly. The drier the kale, the better it will “grab” the infused oil in the next step.
Infusing the Oil: The Cold-Start Method
Most recipes tell you to heat the oil first, but we are going to do the opposite. Place your sliced garlic chips and olive oil into a cold skillet before you even turn on the burner. This is a classic chef’s trick for maximum flavor extraction.
As the pan heats up gradually over medium-low heat, the garlic gently releases its essence into the oil without the risk of burning. You will see tiny bubbles start to form around the edges of the garlic slices. This slow rise in temperature ensures the oil is deeply flavored from the inside out.
Keep a close eye on the pan during this stage. You are looking for the garlic to turn a light, golden tan. The aroma should be sweet and toasted, not sharp or acrid. This process usually takes about 3 to 5 minutes depending on your stove.
Achieving the Perfect Garlic Chip
Timing is everything when it comes to garlic chips. You want to remove them with a slotted spoon the moment they look golden. Place them on a paper towel immediately to drain.
Remember that “carry-over cooking” is a real factor here. The garlic is so thin that it will continue to brown for a few seconds after it leaves the hot oil. If you wait until they look dark brown in the pan, they will taste burnt by the time they hit the paper towel.
Step-by-Step: Searing Garlic Sauteed Curly Kale
Now that you have your garlic-infused oil and your blanched, dried kale, it is time for the final assembly. Turn the heat up to medium. You want to hear a gentle sizzle when the greens hit the pan, but it shouldn’t be popping violently.
If you’re aiming for that perfect bite, check out this foolproof method for crispy garlic kale.
Toss the kale constantly using tongs or a wide spatula. Since the kale is already mostly cooked from the blanching step, this part only takes about 2 to 3 minutes. You are essentially “searing” the leaves to coat them in that liquid gold you created with the garlic.
During these few minutes, the kale will absorb the oil and the salt. The texture will shift from “boiled” to “silky.” Once the leaves are hot through and look glossy, you are ready to finish the dish off the heat.
Troubleshooting Common Kale Texture Issues
If you find that your kale is still a bit too “toothy” for your liking, don’t panic. You can add a tablespoon of water or vegetable broth to the pan and cover it with a lid for 30 seconds. This creates a quick burst of steam that can finish softening particularly stubborn batches of older kale.
If the dish tastes flat or dull, it almost always needs more acid or salt. Add another squeeze of lemon juice first. Acidity acts like a volume knob for flavor; it brightens everything it touches. If it still feels like it’s missing something, a tiny pinch of extra sea salt will usually do the trick.
In the event the kale becomes too salty, you can toss in a few more blanched leaves or even some cooked white beans to help absorb the excess seasoning. However, if you follow the measurements provided, the balance should be spot on.
Flavor Variations and Regional Swaps
Once you master the base technique, you can start playing with the flavors. For a Mediterranean twist, toss in a tablespoon of toasted pine nuts at the very end for a buttery crunch. The richness of the nuts pairs beautifully with the earthy greens.
If you want a savory, “cheesy” profile without using dairy, sprinkle a teaspoon of nutritional yeast over the finished kale. It adds a deep umami layer that complements the garlic chips perfectly. Alternatively, you can swap the lemon juice for apple cider vinegar if you want a more rustic, autumnal vibe.
For those who like a bit more texture, try adding some thinly sliced shallots to the oil along with the garlic. They will caramelize and provide a subtle sweetness that balances the red pepper flakes. The possibilities are endless once the texture of the kale is perfected.
Optimal Pairings for Garlic Sauteed Curly Kale
This kale is a versatile workhorse in the kitchen. It is the perfect companion for a roasted chicken, as the bitterness of the greens cuts right through the fatty skin and rich meat. It also works beautifully alongside a seared white fish like cod or halibut.
I also love using this sautéed kale as a base for grain bowls. Pile it on top of some fluffy quinoa or farro, add a soft-boiled egg, and you have a nutrient-dense meal that feels incredibly indulgent. The garlic oil acts as a natural dressing for the grains underneath.
Because it is so savory, it also stands up well to heavier dishes like braised short ribs or a thick ribeye steak. It provides a much-needed hit of freshness and color to a plate that might otherwise be very brown and heavy.
Make-Ahead Strategies and Storage Logistics
You can actually do the hard part of this recipe up to 48 hours in advance. Blanch the kale, dry it thoroughly, and store it in an airtight container in the fridge. When you are ready for dinner, the actual sautéing process will take less than five minutes.
If you have leftovers, they store well in the refrigerator for about 3 days. To reheat, I recommend putting them back into a skillet over medium heat with a tiny splash of water. This prevents the greens from drying out or becoming oily in the microwave.
I do not recommend freezing this dish. The freezing and thawing process breaks down the cell walls too much, and you will lose that beautiful “bite” we worked so hard to achieve. It is much better enjoyed fresh or within a few days of cooking.
Expert Tips for Professional Results
To get that true restaurant finish, use a wide skillet. A larger surface area allows the moisture to evaporate quickly, which prevents the kale from stewing in its own liquid. If you crowd a small pan, the kale will steam rather than sear.
Another pro tip is to use a finishing salt like Maldon. The large, crunchy flakes provide a little burst of saltiness that doesn’t dissolve immediately, adding another layer of texture. Also, always add your lemon juice after you have removed the pan from the heat to keep the flavor bright and zesty.
Selecting the Right Skillet
While a non-stick pan works fine, a stainless steel or cast iron skillet is actually better for this recipe. These materials hold heat more effectively and allow for a slight “char” on the edges of the kale. That tiny bit of caramelization adds a smoky complexity that you just can’t get with non-stick surfaces.
The Importance of Stem Removal
The stems of curly kale are incredibly woody and will never soften at the same rate as the leaves. The most efficient way to remove them is the “zip” method: hold the base of the stem with one hand and run your other hand firmly up the stalk, stripping the leaves off in one motion. Save those stems for your morning smoothie or a vegetable stock instead of putting them in the sauté.
Frequently Asked Questions
Can I use Lacinato (Dino) kale instead?
Yes, you certainly can. Lacinato kale is slightly more tender than curly kale, so you might only need to blanch it for 30 to 45 seconds. However, the curly variety is better at catching and holding the garlic oil in its ruffled edges, which I find more flavorful.
Why is my garlic bitter?
Garlic becomes bitter when it is cooked too fast or at too high a temperature. If it turns dark brown or black, it will taste acrid. The cold-start method described above is designed specifically to prevent this by gently warming the garlic chips until they are just golden.
Is it necessary to blanch the kale first?
While you can skip it, I don’t recommend it. Blanching is the “secret sauce” that removes the bitterness and ensures a tender texture. Without it, you would have to sauté the kale for much longer, which often leads to burnt garlic and unevenly cooked greens.
How do I keep the kale bright green?
The key to the vibrant color is the flash-blanching followed by quick cooling. If you aren’t sautéing the kale immediately after blanching, you can shock it in a bowl of ice water to stop the cooking process and lock in that emerald hue.
Can I use bottled lemon juice?
In a pinch, you can, but fresh lemon juice is significantly better. Bottled juice often has a muted flavor and added preservatives. Since this recipe has so few ingredients, the quality of the acid really stands out in the final flavor profile.
Garlic Kale
Course: Side DishCuisine: AmericanDifficulty: easy4
servings10
minutes8
minutes165
kcal18
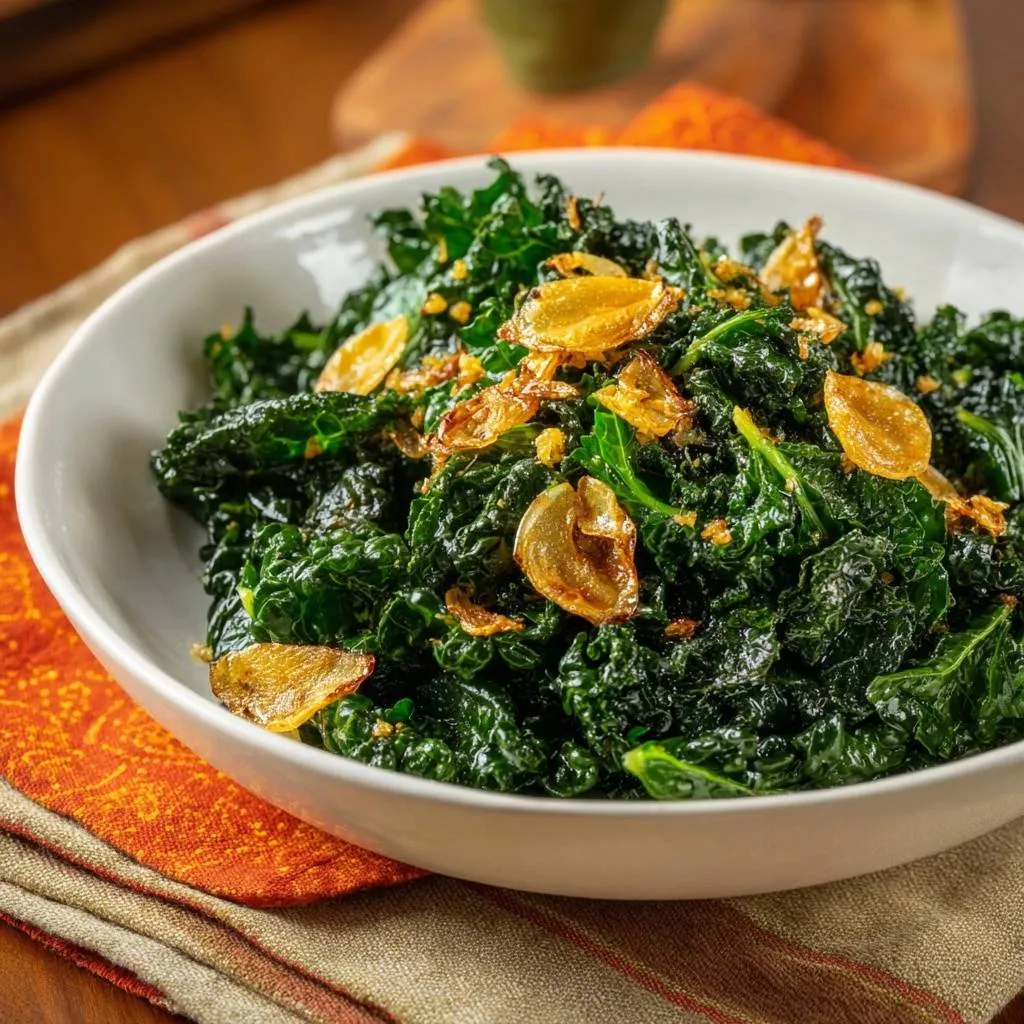
MinutesA foolproof method for preparing curly kale by flash-blanching to remove bitterness and sautéing in garlic-infused olive oil for a tender, flavorful result.
Ingredients
2 large bunches Curly kale, stems removed and leaves torn into bite-sized pieces
6 cloves garlic, very thinly sliced into chips
4 tablespoons extra virgin olive oil
1/2 teaspoon sea salt
1/4 teaspoon red pepper flakes
1 tablespoon fresh lemon juice
Directions
- To solve the bitterness problem, start by bringing a large pot of salted water to a boil. Drop the torn kale leaves into the water for exactly 60 seconds. This flash-blanching breaks down the tough cellulose and leaches out the bitter compounds. Drain immediately and pat very dry with a clean towel.
- Place the olive oil and the sliced garlic chips into a cold skillet. Turn the heat to medium-low. Starting with a cold pan is the secret to perfect garlic chips; it allows the flavor to infuse the oil without the garlic burning or becoming acrid.
- Once the garlic is golden brown and crispy, use a slotted spoon to remove the chips and set them aside on a paper towel.
- Increase the heat to medium. Add the blanched, dried kale to the garlic-infused oil. Toss quickly for 2 to 3 minutes. Because the kale was pre-blanched, it only needs a quick sear to absorb the flavor and reach a perfect, tender texture.
- Season with sea salt and red pepper flakes. Remove from heat and drizzle with fresh lemon juice. The acidity of the lemon is the final step in neutralizing any remaining bitterness.
- Top with the reserved crispy garlic chips and serve immediately.
Notes
- Starting the garlic in a cold pan prevents burning and ensures a mellow, infused flavor throughout the oil. Always pat the kale very dry after blanching to ensure it sears rather than steams in the pan.