Most carrot muffins suffer from a serious identity crisis. They often arrive at the table as heavy, leaden bricks that feel more like a dense bran muffin than a delicate treat. If you’ve ever bitten into a muffin only to find it gummy or oily, you know exactly what I’m talking about.
The good news is that achieving a bakery-style crumb isn’t about luck; it’s about moisture balance. By mastering the “Non-Dense Muffin Trick,” you can create a muffin that is incredibly moist yet light enough to practically melt in your mouth. We’re moving away from those grocery store “rocks” and toward something truly special.
For a similar moist crumb in another baked good, consider this classic carrot cake.
The secret lies in how you handle the carrots and the batter. I’ve found that hand-grating your carrots into long, thin shreds creates tiny pockets of steam during baking. This simple change, combined with a very specific folding technique, ensures your muffins rise high and stay airy for days.
The Science of Moisture and Muffin Density
Baking is essentially a delicious chemistry experiment. In this recipe, we use a combination of baking powder and baking soda to ensure a powerful lift. While the baking powder provides the initial rise, the baking soda reacts with the slight acidity in the other ingredients to create a tender crumb.
However, the real variable is the carrot. Carrots are packed with water, and if that water is released too quickly, it can weigh down the flour. Long shreds of carrot act as structural supports within the batter. As they cook, they release moisture slowly, which turns into steam and helps push the batter upward rather than letting it collapse into a dense mass.
Why Hand-Grating Carrots Changes the Texture
It’s tempting to throw carrots into a food processor and pulse them into oblivion, but that’s a mistake. A food processor often mashes the vegetable, breaking the cell walls and creating a wet, mushy pile. This excess liquid leaks into the batter, often resulting in a “gummy” bottom that never feels fully baked.
When you use a hand grater, you maintain the integrity of the carrot. These distinct shreds distribute evenly throughout the muffin. They provide a beautiful pop of color and a much better mouthfeel than a pulverized carrot paste ever could.
The Role of Vegetable Oil vs. Butter
While butter offers a lovely flavor, vegetable oil is the superior choice for a muffin that stays soft. Oil remains liquid at room temperature, whereas butter solidifies. This means an oil-based muffin will feel much moister on the second or third day than one made with butter.
Furthermore, oil coats the flour proteins more efficiently. This prevents the development of too much gluten, which is the primary culprit behind tough muffins. By using a 1/2 cup of oil, we hit the perfect fat-to-flour ratio for a tender, cake-like interior.
Essential Components for Glazed Carrot Walnut Muffins
Every ingredient in this recipe serves a specific purpose. For example, using room temperature eggs and milk is non-negotiable. Cold ingredients can cause the oil to seize or clump, which prevents a smooth emulsion. When your wet ingredients are at room temperature, they blend seamlessly into a silky liquid.
The choice of flour also matters. All-purpose flour provides just enough protein to hold the walnuts and carrots in suspension without making the muffin feel like a piece of bread. It’s the reliable workhorse that gives us that classic muffin silhouette.
Selecting the Right Walnuts for Toasting
Walnuts bring an earthy, slightly bitter note that perfectly balances the sweetness of the glaze. We divide the walnuts into two portions for a reason. The 1/2 cup inside the batter provides a consistent crunch in every bite.
The remaining 1/4 cup goes right on top of the raw batter. As the muffins bake at 375°F, these surface walnuts undergo the Maillard reaction. They become toasted, fragrant, and incredibly crunchy, providing a professional finish that looks like it came from a high-end cafe.
Cinnamon and Vanilla: Building the Flavor Base
Cinnamon is the natural partner for carrots because it enhances their inherent sweetness. It adds a warmth that makes the kitchen smell incredible while these are in the oven. Don’t be tempted to skip the salt, either; it’s what makes the cinnamon and sugar flavors actually “pop.”
I always recommend using a high-quality vanilla extract. Since this recipe doesn’t have a long list of spices, the vanilla really shines through. It rounds out the flavors and gives the muffins a sophisticated, professional taste that imitation vanilla just can’t replicate.
Step-by-Step: Achieving the Perfect Rise
The way you combine your ingredients is just as important as the ingredients themselves. If you’re looking for that perfect dome and a soft interior, you have to be intentional with your movements. Let’s walk through the transformation from raw ingredients to golden muffins.
Phase 1: Aerating the Dry Ingredients
Whisking your flour, sugar, and leavening agents isn’t just about mixing; it’s about aeration. As you whisk, you’re breaking up any clumps of flour and ensuring the baking powder and soda are perfectly distributed. This prevents “hot spots” where the muffin might rise unevenly.
You’ll know you’re ready when the mixture looks uniform in color and feels light. Creating a “well” in the center of these dry ingredients is a classic technique. It allows the liquid to be incorporated from the center outward, which helps prevent over-mixing later on.
Phase 2: Emulsifying the Wet Mixture
In your second bowl, you want to whisk the eggs, oil, milk, and vanilla vigorously. Unlike the later stages, you can’t really over-mix here. You are looking for a completely homogenous liquid where no streaks of oil are visible on the surface.
This emulsion is what carries the moisture into the flour. If the oil isn’t properly incorporated into the milk and eggs, you might end up with oily pockets in your finished muffins. Take the extra thirty seconds to make sure it’s smooth and well-combined.
Phase 3: The “Gentle Fold” Technique
This is the most critical part of the entire process. Pour your wet mixture into the well of the dry ingredients. Use a large spatula to cut through the center, scrape the bottom, and lift the batter over the top. Rotate the bowl as you go.
You must stop the very second the flour streaks mostly disappear. The batter should still look a bit lumpy and uneven. If you keep stirring until it’s perfectly smooth, you’ve already developed too much gluten. Over-mixing leads to “tunneling,” which are those long, vertical air holes that make a muffin tough and dry.
Finally, fold in your carrots and the first batch of walnuts with just three or four more turns of the spatula. Every stroke counts here. Treat the batter gently, and it will reward you with a light, airy texture that is the hallmark of a great baker.
Baking Parameters for Golden Tops
We bake these at 375°F, which is slightly higher than the standard 350°F. This initial burst of heat is the secret to a great “spring.” It causes the leavening agents to react quickly, pushing the batter up to create a beautiful, rounded dome before the structure sets.
Make sure your oven is fully preheated before the tray goes in. If the oven is still warming up, the muffins will rise slowly and likely end up flat. Consistency in temperature is the key to getting that perfect bakery-style silhouette every single time.
Testing for Doneness Without Deflating
Around the 18-minute mark, you should start checking for doneness. Use a toothpick inserted into the center of a middle muffin. It should come out clean or with just a few moist crumbs attached. If you see wet batter, give them another two minutes.
You can also use the “spring-back” test. Gently press the top of a muffin with your finger. If it bounces back immediately, it’s done. If the indentation stays, it needs more time. Avoid opening the oven door repeatedly, as the rush of cool air can cause the delicate centers to sink.
The Art of the Opaque Sugar Glaze
A great glaze should be thick, white, and opaque, not a thin, watery mess that disappears into the muffin. By using heavy cream instead of water, you get a much richer flavor and a better “cling.” The glaze should be thick enough that it falls off your whisk in a slow, steady ribbon.
If your glaze feels too thin, add another tablespoon of powdered sugar. If it’s too thick to drizzle, add a tiny drop of cream. You want it to sit proudly on top of the muffin, pooling slightly around the toasted walnuts for that signature look.
Temperature Timing for Glaze Application
Timing is everything when it comes to glazing. If the muffins are piping hot, the glaze will melt and run right off. If they are completely cold, the glaze won’t “set” with that beautiful, slightly soft bottom layer that bonds to the muffin top.
Wait about 5 to 10 minutes after taking them out of the pan. They should be warm to the touch but not steaming. This allows the glaze to flow just enough to create those beautiful drips down the sides while remaining thick and white on top.
Troubleshooting Common Muffin Failures
If your muffins come out flat, check the expiration date on your baking powder. It loses its potency over time. Another common issue is muffins sticking to the liners. This often happens if you try to peel the paper off while the muffin is still hot. Let them cool slightly, and the paper should release cleanly.
If your glaze looks gritty, it’s likely because the powdered sugar wasn’t sifted or the mixture wasn’t whisked long enough. A good whisking helps dissolve the sugar crystals into the cream, resulting in a smooth, professional finish that looks as good as it tastes.
Flavor Variations and Ingredient Swaps
While walnuts are classic, pecans make an excellent substitute if you prefer a sweeter, more buttery nut. You can also add a teaspoon of fresh orange zest to the glaze. The citrus notes cut through the sweetness and pair beautifully with the earthy carrot flavor.
For those avoiding dairy, you can easily swap the whole milk for almond or oat milk. Since we rely on oil for the fat content, the structural integrity of the muffin remains intact. Just ensure your plant-based milk is unsweetened so you don’t throw off the sugar balance of the recipe.
Storage and Refreshing Guide
These muffins store surprisingly well thanks to the oil and the moisture from the carrots. Keep them in an airtight container at room temperature for up to three days. However, in very humid environments, the sugar glaze may start to “weep” or become sticky.
If that happens, you can leave the lid of the container slightly cracked to allow for some airflow. If the muffins have been sitting for a couple of days, a quick 10-second zap in the microwave will soften the crumb and make them taste like they just came out of the oven.
Freezing and Reheating for Breakfast Prep
You can freeze these muffins for up to two months. I recommend “flash freezing” them on a baking sheet for an hour before transferring them to a freezer bag. This prevents the glaze from getting smashed or sticking to the other muffins.
To reheat, let them thaw at room temperature for about an hour. If you’re in a hurry, the microwave works well, but be careful not to overdo it, or the glaze will melt completely. A low setting is best for preserving the texture of the muffin and the topping.
Expert Tips for Bakery-Style Presentation
To get those massive, impressive muffin tops, don’t be afraid to fill the cups nearly to the top. Most recipes tell you to fill them 2/3 full, but this specific batter is thick enough to hold its shape as it rises. This creates that iconic “mushroom” shape that everyone loves.
Using a heavy-gauge aluminum muffin tin also helps. These pans distribute heat more evenly than thin, dark pans, which can often burn the bottoms before the centers are cooked. A consistent, even bake is the final step in achieving professional results at home.
Recommended Tools for Consistent Results
If you bake often, a trigger-release ice cream scoop is a game changer. It ensures that every muffin cup gets the exact same amount of batter, which means they will all finish baking at the same time. No more having half the tray overcooked while the other half is raw.
A wire cooling rack is also essential. If you leave the muffins in the hot tin for too long, the steam will get trapped at the bottom, making them soggy. Moving them to a rack after five minutes allows air to circulate, keeping the edges crisp and the centers light.
Frequently Asked Questions
Can I use pre-shredded carrots from a bag?
I strongly recommend against using pre-shredded carrots. Those bagged carrots are usually treated with preservatives to keep them from drying out, which makes them very stiff and woody. They won’t soften properly in the oven and often lack the moisture needed to keep the muffin tender. Hand-grating takes five minutes and makes a world of difference in the final texture.
Why did my walnuts sink to the bottom?
Walnuts usually sink if the batter is too thin or if they are chopped too large. In this recipe, the batter is quite thick, which should hold them in place. However, if you find them sinking, try chopping them into smaller pieces. You can also toss the walnuts in a teaspoon of flour before adding them to the batter; this helps them “grip” the mixture and stay suspended.
Can I substitute honey for the granulated sugar?
Substituting honey for sugar is tricky because honey is a liquid and is much sweeter. If you use honey, you would need to reduce the milk in the recipe to compensate for the extra liquid, and the muffins would likely brown much faster. For the best results and that specific bakery crumb, I suggest sticking with granulated sugar.
How do I get a higher dome on my muffins?
The high dome comes from two things: the 375°F oven temperature and filling the muffin tins almost to the top. The high heat causes a rapid release of steam and CO2, which pushes the batter up quickly. Also, make sure your baking powder is fresh. You can test it by putting a spoonful in hot water; if it bubbles vigorously, it’s still good to use.
My glaze is transparent; how do I make it white and thick?
A transparent glaze usually means there is too much liquid or not enough sugar. To get that bright white, opaque look, you need a high ratio of powdered sugar to liquid. Start with the cup of sugar and add the cream one teaspoon at a time. It should be thick enough that you have to really work to drizzle it. Using heavy cream instead of milk also helps with opacity due to the higher fat content.
Carrot Walnut Muffins
Course: Breakfast and SnacksCuisine: AmericanDifficulty: easy12
servings15
minutes20
minutes295
kcal35
MinutesA delicious muffin recipe featuring long shreds of fresh carrots and toasted walnuts, finished with a thick sugar glaze. The method focuses on moisture balance and minimal mixing to avoid the common pitfall of dense, heavy muffins.
Ingredients
2 cups all-purpose flour
3/4 cup granulated sugar
2 teaspoons baking powder
1/2 teaspoon baking soda
1 teaspoon ground cinnamon
1/2 teaspoon salt
2 cups carrots, coarsely grated (long shreds)
3/4 cup chopped walnuts, divided (1/2 cup for batter, 1/4 cup for topping)
1/2 cup vegetable oil
2 large eggs
1/2 cup whole milk
1 teaspoon vanilla extract
1 cup powdered sugar
1 1/2 tablespoons heavy cream or milk
Directions
- Preheat your oven to 375°F (190°C). Line a standard 12-cup muffin tin with paper liners.
- In a large bowl, whisk together the flour, sugar, baking powder, baking soda, cinnamon, and salt.
- In a separate medium bowl, whisk the eggs, oil, milk, and vanilla until fully emulsified.
- To solve the density issue, create a well in the center of the dry ingredients. Pour in the liquid mixture and use a spatula to fold gently. Stop the very second the flour streaks mostly disappear. Over-mixing at this stage is what causes tough, dense muffins.
- Gently fold in the grated carrots and 1/2 cup of the chopped walnuts until just distributed.
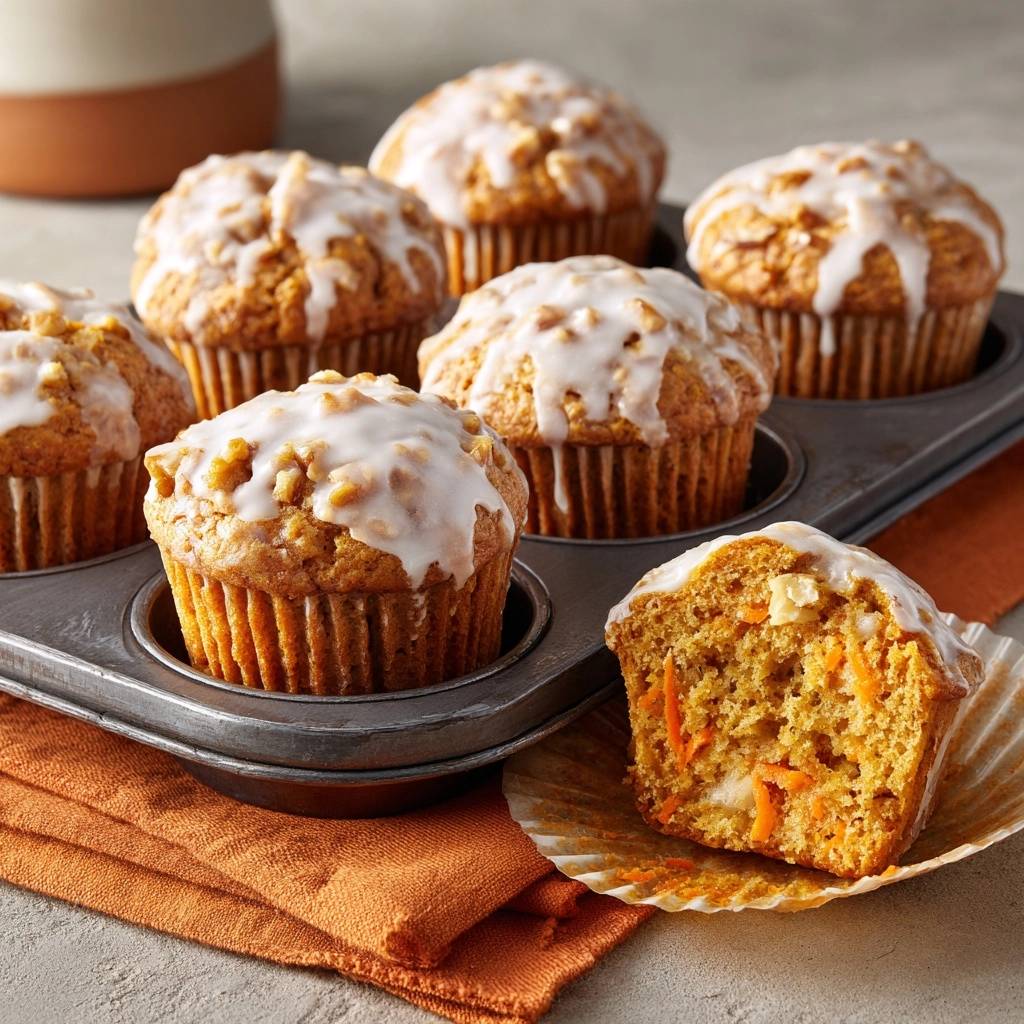
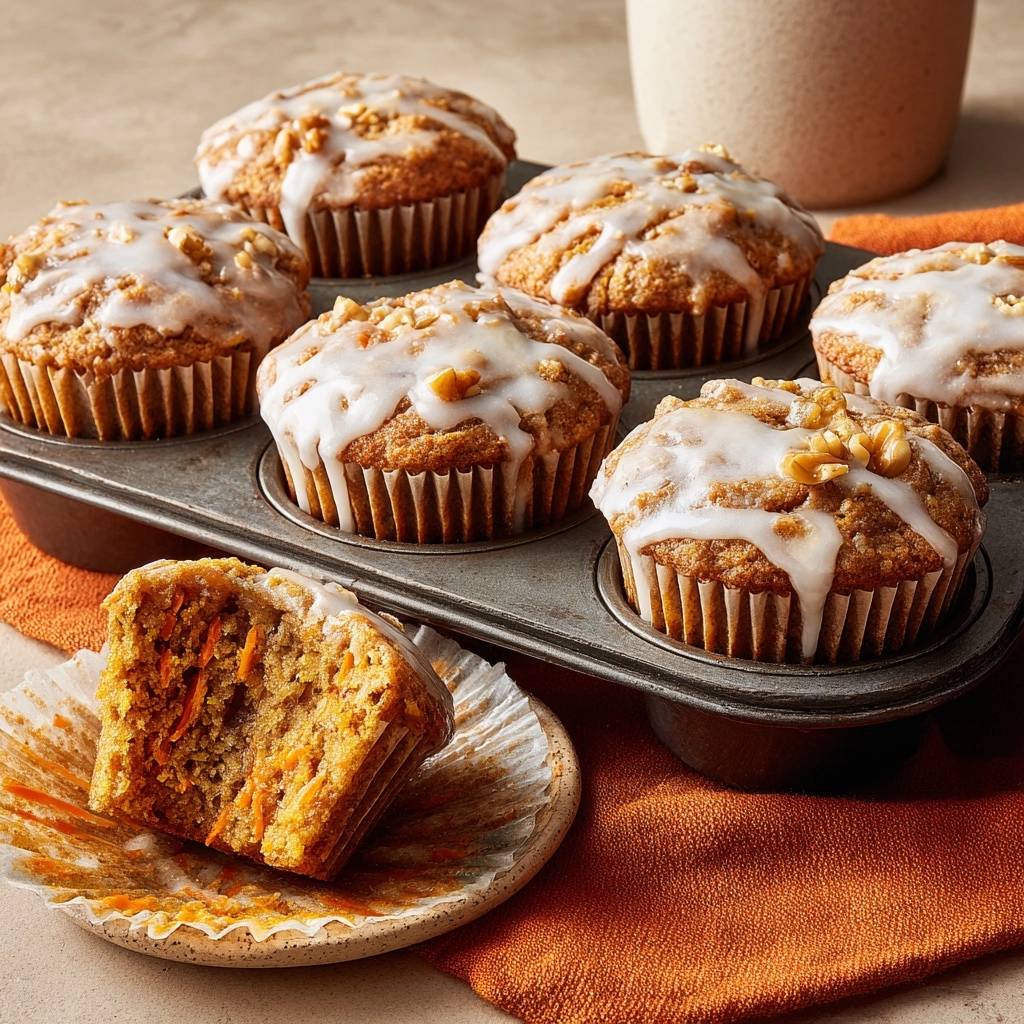
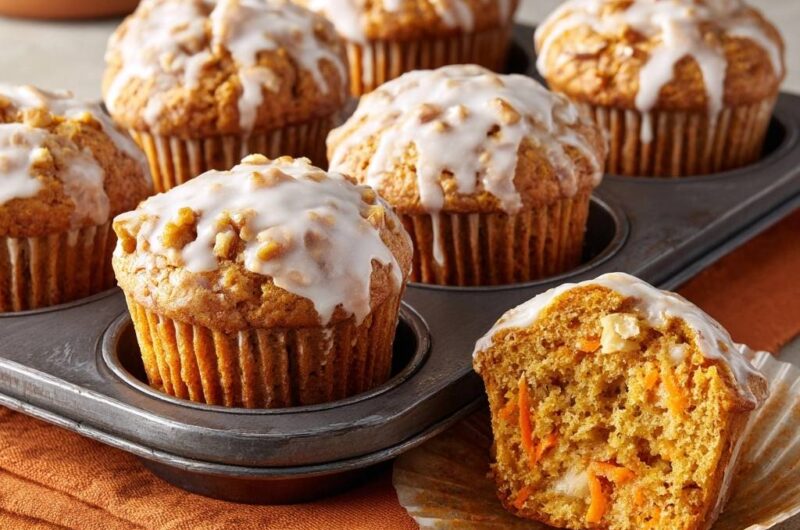
- Divide the batter evenly among the muffin cups, filling them nearly to the top. Sprinkle the remaining 1/4 cup of chopped walnuts over the tops of the raw batter; this ensures the nuts are visible and toasted on the surface as shown in the image.
- Bake for 18 to 22 minutes, or until the tops are golden brown and a toothpick inserted into the center comes out clean.
- Let the muffins cool in the pan for 5 minutes before transferring to a wire rack. They must be slightly warm, but not hot, before glazing.
- Whisk the powdered sugar and heavy cream together to create a thick, opaque glaze. Drizzle generously over the muffins, allowing it to pool slightly around the walnut pieces and drip down the sides for the signature bakery look.
Notes
- The secret to the non-dense texture is to stop mixing the very second the flour streaks disappear. Hand-grating carrots into long shreds provides better moisture distribution than finely minced carrots.