Most home-baked donuts suffer from a bit of an identity crisis. You pull them out of the oven, and instead of a light, springy treat, you’re left with a heavy, dense muffin that just happens to be shaped like a circle. It’s a common frustration, but achieving that professional, coffee-shop crumb is actually a matter of simple kitchen chemistry. These Glazed Pumpkin Walnut Donuts are designed to break the “muffin trap” by focusing on a specific moisture-to-flour ratio that guarantees a velvet-soft interior.
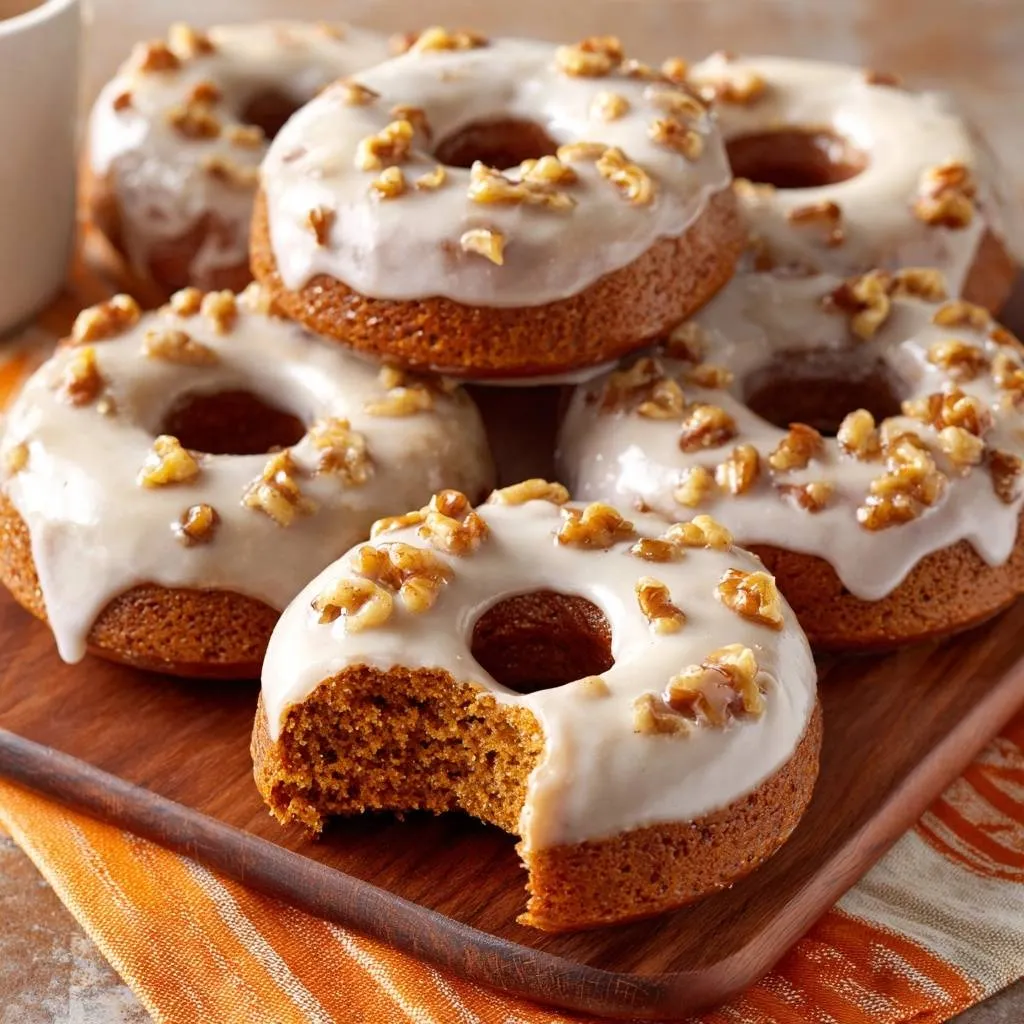
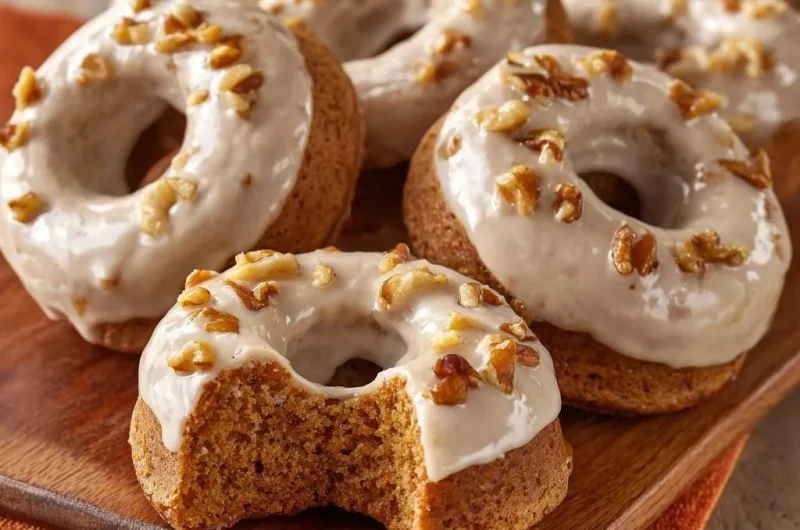
Imagine biting through a thick, opaque maple glaze that shatters slightly before hitting a cloud-like pumpkin spice base. The toasted walnuts provide a necessary, earthy crunch that balances the sweetness of the glaze. This isn’t just another seasonal recipe; it’s a masterclass in texture. By controlling how we handle the batter, we ensure the final product is airy and tender rather than rubbery or bread-like.
The real secret to this recipe’s success lies in the folding technique. While it’s tempting to reach for an electric mixer, that’s the fastest way to ruin a donut. Mechanical mixing over-develops the gluten, leading to a tough bite. Instead, we use a gentle hand and a rubber spatula to keep the air bubbles intact. This careful handling, combined with a precise amount of leavening, creates a donut that stands tall and stays moist for days.
The Science of Non-Dense Baked Donuts
To understand why these donuts are so light, we have to look at the leavening agents. This recipe uses both baking powder and baking soda. While baking powder provides the initial lift in the oven’s heat, the baking soda reacts instantly with the natural acidity found in pumpkin puree. This reaction creates a surge of carbon dioxide bubbles that expand the batter from the inside out, creating those tiny air pockets essential for a springy crumb.
However, all that chemical lifting power is useless if the “walls” of your donut are too strong. This brings us to the “Over-mixing Trap.” Flour contains proteins that, when hydrated and agitated, form gluten. Gluten is great for chewy pizza dough, but it’s the enemy of a delicate donut. If you stir the batter too vigorously, you create a tight web of gluten that traps the air bubbles so firmly they can’t expand. The result is a dense, gummy texture that feels heavy on the tongue.
By using a folding motion, you are essentially “stacking” the ingredients rather than smashing them together. You want to incorporate the dry flour just until it disappears. If you see a few tiny lumps, leave them alone! They will hydrate and disappear during the baking process. This restraint is what separates a professional baker from a novice, ensuring every bite of your Glazed Pumpkin Walnut Donut is as light as air.

Why Room Temperature Ingredients Matter
Emulsification is a fancy word for getting oil and water to play nice together. When your eggs and pumpkin puree are at room temperature, they bond much more easily with the vegetable oil and sugars. This creates a stable fat-in-water emulsion that distributes moisture evenly throughout the batter.
If you use cold eggs, they can cause the oil to seize or clump, leading to an uneven “broken” batter. A broken batter often results in donuts that feel oily on the outside but dry on the inside. Taking twenty minutes to let your ingredients sit on the counter ensures a smooth, homogenous mixture that bakes up perfectly every time.
Essential Components for Glazed Pumpkin Walnut Donuts
Quality ingredients are the foundation of any great bake. The most critical distinction here is using pure pumpkin puree rather than pumpkin pie filling. Pie filling is pre-sweetened and loaded with extra moisture and thickeners, which will completely throw off the delicate balance of this recipe. Pure pumpkin gives you total control over the flavor and the hydration of the dough.
We also use a strategic blend of light brown sugar and granulated sugar. Brown sugar is hygroscopic, meaning it actually attracts and holds onto moisture. This is why the donuts stay soft and “fresh” even on the second day. The granulated sugar, meanwhile, helps the edges of the donut develop a very slight, golden-brown crispness that provides a beautiful structural contrast to the soft center.
Don’t overlook the salt and vanilla, either. Salt doesn’t just make things salty; it acts as a flavor magnifier for the pumpkin and spices. Similarly, a high-quality vanilla extract provides a floral backnote that rounds out the earthy qualities of the squash. When these elements combine with the fats and flours, they create a complex flavor profile that tastes expensive and sophisticated.
The Warm Spice Profile
The spice blend of cinnamon, nutmeg, and ginger is what gives these donuts their “cozy” soul. As the donuts bake, these spices undergo a process called blooming, where the heat releases their essential oils into the surrounding fats. This perfumes the entire donut from the inside out.
If you want to take things to the next level, use freshly grated nutmeg. The pre-ground stuff often loses its volatile oils on the grocery store shelf, leaving it tasting dusty. A quick grate of a whole nutmeg seed provides a bright, peppery punch that makes the maple glaze pop. It’s a small detail that makes a massive difference in the final aroma.
Selecting and Toasting Your Walnuts
Raw walnuts can sometimes have a bitter, “dusty” aftertaste that clashes with a sweet glaze. To fix this, you should always dry-toast your walnut halves in a skillet over medium heat for about 3 to 5 minutes. You’ll know they’re ready when they smell fragrant and look slightly golden.
Toasting the nuts draws the oils to the surface, which deepens their flavor and ensures they stay crunchy even after they’re pressed into the moist glaze. Once they’ve cooled, give them a rough chop. You want a variety of sizes—some fine dust for flavor and some larger chunks for that satisfying, premium crunch.
Step-by-Step: Mixing for Maximum Lift
When it’s time to combine your wet and dry ingredients, put down the whisk and grab a rubber spatula. This is the technical heart of the recipe. Pour the pumpkin mixture into the center of your flour well. Using the spatula, cut straight down through the middle, scrape along the bottom of the bowl, and lift the batter over the top.
Rotate the bowl a quarter turn and repeat. You are looking for the exact moment the last streak of white flour vanishes. The batter should look thick and slightly textured, not perfectly smooth like a pancake mix. If you over-work it here, the donuts will lose their “lift” and become flat and tough. Trust the process and stop sooner than you think you should.
This gentle handling preserves the air you’ve whisked into the dry ingredients and the gases being produced by the baking soda. It feels a bit counter-intuitive to leave lumps, but those lumps are actually tiny pockets of potential fluffiness. Your patience here will be rewarded with a superior, tender crumb that melts in your mouth.
Piping vs. Spooning the Batter
While you can spoon the batter into the pan, it’s messy and often leads to uneven donuts. For a professional look, use a piping bag or a large zip-top bag with the corner snipped off. This allows you to deposit the batter in a clean, continuous circle, ensuring the donut cooks evenly at all points.
Only fill the cavities about three-quarters full. If you overfill them, the batter will spill over the center post, creating “muffin tops” that close up the hole. A properly filled cavity allows the donut to rise upward and outward, maintaining that iconic ring shape that is perfect for dipping into glaze.
Precision Baking and the Spring-Back Test
Oven temperature is king when it comes to baked goods. At 350°F, the donut structure sets quickly enough to hold its shape but slowly enough to allow for maximum expansion. If your oven is too hot, the outside will toughen before the inside has finished rising. If it’s too cool, the donuts will be dry and crumbly.
The best way to tell if they’re done isn’t just by looking at the clock; it’s the “spring-back” test. Gently press the top of a donut with your finger. If it leaves an indentation, it needs another minute. If it bounces back immediately, it’s perfectly baked. You’ll also notice the edges just barely starting to pull away from the sides of the pan.
Avoid over-baking at all costs. Because these are baked and not fried, they don’t have a protective oil barrier. Even two extra minutes in the oven can turn a moist pumpkin treat into a dry, sandy sponge. Keep a close eye on them starting at the 10-minute mark to ensure they stay soft and supple.
The Critical Five-Minute Cooling Window
When the pan comes out of the oven, the donuts are still very fragile. They are undergoing “carry-over cooking,” where the residual heat finishes setting the internal structure. If you try to flip them out immediately, they will likely tear or leave half the donut stuck to the bottom of the pan.
Give them exactly five minutes in the pan. This allows the steam to settle and the crust to firm up just enough to release cleanly. After five minutes, invert them onto a wire rack. If you leave them in the pan too long, they’ll start to “sweat,” which makes the bottoms soggy. That five-minute window is the “Goldilocks” zone for a perfect release.
Achieving a Professional Opaque Maple Glaze
A great glaze should be thick, white, and slow-moving. If your glaze is too thin, it will simply soak into the donut, making it soggy and leaving a translucent, sticky mess. The secret is using heavy cream instead of milk or water. The fat in the cream creates a rich, opaque finish that sits beautifully on top of the dark pumpkin base.
Start with your powdered sugar and two tablespoons of cream. Whisk until it’s completely smooth. You want a consistency that resembles thick glue. When you lift the whisk, the glaze should fall in a thick ribbon that holds its shape for a second before disappearing back into the bowl. If it’s too stiff, add more cream one tiny drop at a time.
Adding a touch of maple extract is optional but highly recommended. It provides a woody, autumnal depth that complements the pumpkin and walnuts perfectly. This glaze will set into a firm, fudge-like coating that doesn’t get messy when you pick the donut up, giving you that high-end bakery aesthetic at home.
The Dipping and Topping Sequence
Wait until the donuts are completely cool before dipping. If they are even slightly warm, the glaze will melt and run off. Use a “dip and twist” motion: press the top of the donut into the glaze, give it a small circular twist to ensure even coverage, and lift straight up. Let the excess drip for just a second before flipping it over.
Timing is everything when it comes to the walnuts. You must press the chopped nuts into the glaze immediately after dipping each donut. If you wait until you’ve dipped the whole batch, the first few will have already started to “crust” over, and the walnuts won’t stick. Work in a “dip-then-sprinkle” rhythm for the best results.
Troubleshooting Common Pumpkin Donut Issues
If your donuts are sticking to the pan despite greasing it, you might be using a spray that contains too much water or lecithin. Try a light coating of melted butter followed by a tiny dusting of flour for a foolproof release. Also, ensure your pan is non-stick and free of any scratched surfaces where batter can take hold.
A gummy or “wet” texture in the center usually points to one of two things: under-baking or using too much pumpkin puree. Make sure you are measuring your puree accurately with a dry measuring cup and leveling it off. If the center is gummy but the outside is dark, your oven might be running too hot, causing the exterior to cook before the interior is set.
If your glaze disappears or looks “wet” after an hour, the donuts were likely still warm when you dipped them, or your kitchen is very humid. To fix a disappearing glaze, you can always give them a second dip once the first layer has dried. For the best spice flavor, check the expiration dates on your jars; spices older than six months lose their potency rapidly.
Storage and Make-Ahead Strategies
Baked donuts are best enjoyed the day they are made, but you can keep them fresh for up to three days if stored correctly. Place them in a single layer in an airtight container. Avoid stacking them, as the glaze can become “weepy” or sticky if the donuts are crowded together. If you live in a very humid climate, leave the lid slightly cracked to allow a tiny bit of airflow.
You can also freeze these donuts with great success, but it’s best to do so before glazing. Wrap the unglazed, cooled donuts tightly in plastic wrap and place them in a freezer bag for up to two months. When you’re ready to serve, thaw them at room temperature and pop them in a 300°F oven for 5 minutes to refresh the crumb. Once they cool back down, apply the fresh glaze and walnuts.
Best Pairings for Spiced Pumpkin Treats
To truly highlight the earthy notes of the pumpkin and the toasted walnuts, pair these donuts with a drink that has some bitterness or spice. A dark roast pour-over coffee is the classic choice, as the acidity of the coffee cuts through the sweetness of the maple glaze. It creates a balanced palate that keeps you coming back for another bite.
For more pumpkin goodness, explore these gooey s’mores muffins.
If you prefer something tea-based, a hot spiced chai latte is a fantastic companion. The ginger and cardamom in the tea echo the spices inside the donut, creating a layered flavor experience. For a crisp, refreshing option, a glass of cold-pressed apple cider provides a bright fruitiness that contrasts beautifully with the rich, nutty topping.
Frequently Asked Questions
How do I store leftover donuts so they don’t get soggy?
Store the donuts in an airtight container at room temperature for up to 3 days. To prevent the glaze from becoming “weepy” or sticky, place a piece of parchment paper between layers if you must stack them, though a single layer is best. Do not refrigerate them, as the cold air will dry out the cake-like crumb and cause the glaze to break down. If they do get a bit soft, a quick 5-second zap in the microwave can revive the texture.
Why did my donuts turn out tough and rubbery?
The most common cause of a tough donut is over-mixing the batter. When you mix flour with wet ingredients, gluten begins to form. If you stir too much or use an electric mixer, the gluten becomes strong and elastic, resulting in a bread-like texture rather than a tender cake. Always use a rubber spatula and stop mixing the very second the flour streaks disappear. Small lumps are perfectly fine and will disappear during baking.
Can I use pumpkin pie filling instead of pumpkin puree?
No, you should not substitute pumpkin pie filling for pure pumpkin puree. Pie filling contains added sugar, water, and spices that will alter the moisture content and sweetness of the recipe, likely resulting in a donut that is too dense or fails to rise properly. If you only have pie filling, you would need to significantly reduce the sugar and spices in the recipe, but the texture will still be noticeably different.
What can I use if I don’t have a donut pan?
If you don’t have a specialized donut pan, you can use a standard muffin tin. To get the “hole” in the middle, you can roll up small pieces of aluminum foil into cylinders and place them in the center of each muffin cavity before piping the batter around them. Alternatively, you can just bake them as pumpkin walnut muffins, though you may need to increase the baking time by 3 to 5 minutes since muffins are deeper than donuts.
My glaze is too thin and keeps running off. How do I fix it?
A runny glaze usually means there is too much liquid or the donuts were still warm when dipped. To fix the glaze itself, whisk in more powdered sugar, one tablespoon at a time, until it reaches a thick, honey-like consistency. It should be thick enough to coat the back of a spoon opaquely. Always ensure your donuts are completely cool to the touch before dipping to prevent the sugar from melting on contact.
Can I make these gluten-free?
Yes, you can substitute the all-purpose flour with a high-quality “1-to-1” gluten-free flour blend that contains xanthan gum. Because gluten-free flours absorb moisture differently, you may find the batter is slightly thicker. Do not over-bake them, as gluten-free treats can dry out faster than traditional ones. The pumpkin puree actually helps keep gluten-free versions quite moist and tender compared to other baked goods.
Pumpkin Walnut Donuts
Course: DessertCuisine: AmericanDifficulty: easy12
donuts15
minutes12
minutes245
kcal27
MinutesThese baked donuts avoid the common pitfall of being too dense by using a specific folding technique and moisture-to-flour ratio. Topped with a rich maple glaze and crunchy walnuts, they offer a professional coffee-shop quality at home.
Ingredients
2 cups all-purpose flour
1.5 teaspoons baking powder
0.5 teaspoon baking soda
1.5 teaspoons ground cinnamon
0.5 teaspoon ground nutmeg
0.25 teaspoon ground ginger
0.5 teaspoon salt
1 cup pumpkin puree (not pumpkin pie filling)
0.5 cup light brown sugar, packed
0.25 cup granulated sugar
0.5 cup vegetable oil
2 large eggs, room temperature
1 teaspoon vanilla extract
1.5 cups powdered sugar
2-3 tablespoons heavy cream (for a thick, opaque glaze)
0.5 teaspoon maple extract (optional)
0.5 cup toasted walnut halves, roughly chopped
Directions
- Preheat your oven to 350°F (175°C). Generously grease a non-stick donut pan with butter or baking spray.
- In a large bowl, whisk together the flour, baking powder, baking soda, cinnamon, nutmeg, ginger, and salt until well combined.
- In a separate medium bowl, whisk the pumpkin puree, brown sugar, granulated sugar, oil, eggs, and vanilla extract until the mixture is completely smooth and emulsified.
- To solve the density problem, pour the wet ingredients into the dry. Using a rubber spatula, gently fold the mixture by cutting through the center and lifting up the sides. Stop the very second you no longer see streaks of white flour. Small lumps are okay; over-mixing at this stage creates a rubbery, bread-like texture.
- Transfer the batter to a piping bag or a large zip-top bag with a 1/2-inch corner snipped off. Pipe the batter into the donut cavities until they are about three-quarters full.
- Bake for 10 to 12 minutes. The donuts are done when they have risen and the tops spring back immediately when lightly touched with a finger.
- Let the donuts cool in the pan for 5 minutes. This allows the structure to set so they don’t tear. Invert them onto a wire rack to cool completely.
- While the donuts cool, prepare the glaze: Whisk the powdered sugar, 2 tablespoons of heavy cream, and maple extract. If the glaze is too thick to dip, add the remaining tablespoon of cream one drop at a time until it reaches a thick, slow-dripping consistency that will stay opaque on the donut.
- Dip the top half of each cooled donut into the glaze. Lift straight up and let the excess drip for a second before turning upright.
- Immediately press chopped walnuts into the wet glaze before it sets. Let the glaze firm up for at least 15 minutes before serving to achieve the professional look shown in the image.
Notes
- To ensure a light texture, stop mixing the batter the moment white flour streaks disappear. Over-mixing develops gluten and leads to a rubbery, bread-like consistency.