Nothing ruins a slow Saturday morning faster than a fruit roll that looks beautiful on top but hides a gummy, purple mess underneath. You know the type: the dough is saturated with juice, the center is raw, and the bottom of the pan is a sticky puddle. It’s a common heartbreak for home bakers who try to stuff fresh berries into a standard cinnamon roll dough.
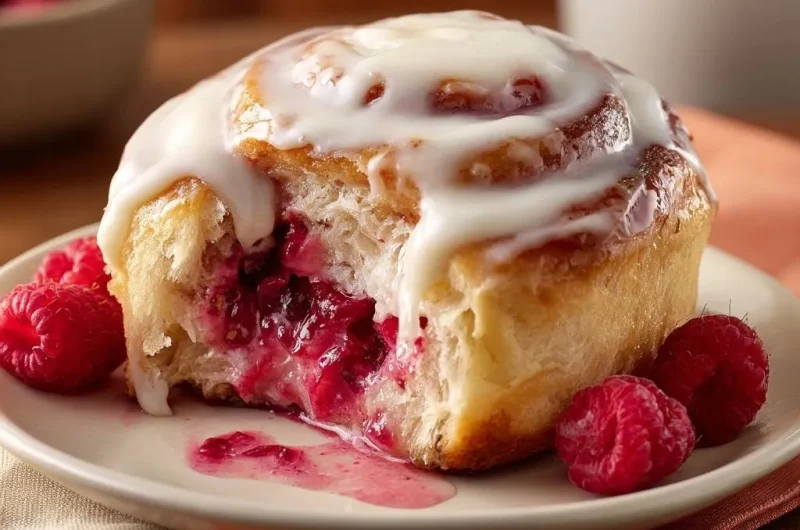
The secret to achieving a bakery-standard roll—one that stands tall with fluffy, distinct layers and a jammy, concentrated center—is all about moisture management. You want the vibrant punch of real raspberries without the water content that compromises the bread’s structure. This recipe fixes the structural flaws of traditional fruit pastries by treating the filling as a science rather than an afterthought.
For a touch of warmth, consider the old-fashioned gingerbread cake next.
I’ve found that the most critical step isn’t the kneading or the flour choice, but the temperature of your filling. If you spread a warm raspberry reduction onto your dough, it will melt the butter in the layers and kill the rise before the pan even hits the oven. Patience in the chilling phase is what separates a professional pastry from a soggy disappointment.
For more precise baking, consider trying this glazed pecan cinnamon rolls method.
The Science of Moisture Control in Fruit Pastries
When you bake raw raspberries, the heat causes the cell walls to break down, releasing a massive amount of water through osmosis. In a confined space like a rolled dough, that steam has nowhere to go. Instead of evaporating, it soaks into the surrounding flour, creating a “gum line” where the dough stays dense and wet regardless of how long you bake it.
By using a cornstarch-thickened reduction, we pre-release that moisture on the stovetop. The cornstarch acts as a stabilizer, binding the remaining juices into a thick gel that stays put during the second rise and the bake. This process also concentrates the natural sugars and acids in the fruit, giving you a much more intense raspberry flavor than raw berries ever could.
Furthermore, this thickened filling protects the air pockets in your dough. When the yeast produces carbon dioxide, the dough expands. A watery filling would collapse those delicate bubbles, but a stable jam supports them. This ensures your rolls stay light and airy, even with a heavy fruit center.
Essential Components for Glazed Raspberry Sweet Rolls
For the best results, use all-purpose flour rather than bread flour. While bread flour provides a great chew, all-purpose flour keeps these rolls tender and soft, more like a brioche. The protein content is just high enough to hold the shape without making the rolls feel like a loaf of crusty bread.
Whole milk is non-negotiable here because the fat content enriches the crumb. Similarly, ensure your egg is at room temperature before mixing. A cold egg can cause the melted butter to seize into tiny clumps, preventing it from distributing evenly through the dough. This even distribution of fat is what creates that “melt-in-your-mouth” texture.
Always reach for unsalted butter so you can control the salt levels yourself. Different brands of salted butter vary wildly in sodium content, which can sometimes inhibit yeast activity if it’s too high. Using unsalted butter ensures your dough rises predictably every single time.
Selecting and Preparing the Raspberry Reduction
You can use fresh or frozen raspberries for this recipe with great success. However, keep in mind that frozen berries often release more liquid because the freezing process breaks down their cellular structure. If you use frozen, you might need to simmer the reduction for an extra two or three minutes to reach the desired thickness.
The addition of lemon juice is a small but vital detail. Beyond adding a bright citrus note that cuts through the sugar, the acidity helps activate the natural pectin in the raspberries. This works alongside the cornstarch to create a filling that sets firmly as it cools, making the rolling process much cleaner.
The Role of Fat and Sugar in Dough Elasticity
Sugar does more than just sweeten the dough; it acts as a tenderizer by absorbing some of the water that would otherwise hydrate the gluten. This results in a shorter gluten strand and a softer bite. The melted butter adds to this effect, coating the flour particles and creating a rich, silky dough that is a joy to handle.
Be extremely careful with your milk temperature. It should feel like warm bath water, right around 110°F. If the milk is too hot, you will kill the yeast instantly. If it’s too cold, the yeast will remain dormant, and your dough will take hours to rise, often resulting in a heavy, sour-tasting roll.
Complementary Bites
Round out your sweet roll meal with these savory accompaniments.
- For a creamy, satisfying corn dish, consider making the Cheesy Bacon Corn Casserole.
- Another great way to enjoy corn is with the Creamy Baked Cheesy Corn.
Step-by-Step: Preparing the Thickened Raspberry Filling
Start by combining your berries, sugar, cornstarch, and lemon juice in a small saucepan. As the mixture heats up, use a wooden spoon to mash the berries slightly. You want some texture, but you don’t want huge chunks of fruit that will tear the dough during the rolling process.
Watch for the mixture to change from a cloudy pink to a deep, translucent red. This color change indicates the cornstarch has reached its thickening power. It should easily coat the back of a spoon, and if you run your finger through it, the trail should stay perfectly clear without any liquid running back into the gap.
Once thickened, you must chill the filling until it is completely cold. Spreading warm jam on raw dough is the fastest way to ruin the recipe. The heat will melt the butter in the dough, causing the rolls to slide apart in the pan and preventing a proper second rise. Plan ahead and make the filling at least two hours before you need it.
Kneading and Fermentation: Building the Perfect Crumb
When kneading, look for the dough to transition from a shaggy mass to a smooth, elastic ball. You can check your progress with the “windowpane test.” Pull off a small piece of dough and gently stretch it out; if you can see light through it without it tearing, the gluten is sufficiently developed.
There is a fine line between “sticky” and “tacky.” Sticky dough leaves a residue on your fingers, while tacky dough feels moist but pulls away cleanly. If your dough is sticking to everything, add flour one tablespoon at a time. Be careful not to over-flour, or your rolls will turn out dry and tough.
Place the dough in a greased bowl in a warm, draft-free spot. The first rise is where the flavor develops. The yeast consumes the sugars and releases gases that stretch the gluten. If your kitchen is cold, try placing the bowl inside a turned-off oven with the oven light on to provide just enough warmth.
Precision Shaping and the Dental Floss Technique
After the first rise, roll the dough into a 12 x 18 inch rectangle. Spread your softened butter first, then the chilled raspberry filling. Leave a half-inch border around the edges. This border acts as a seal, preventing the filling from leaking out the sides as you roll the cylinder tightly.
Forget using a knife to cut your rolls. Even the sharpest serrated blade will squish the dough, compressing the air pockets and smearing the filling. Instead, use a long piece of unflavored dental floss. Slide the floss under the log, cross it over the top, and pull quickly in one motion.
This “strangling” motion cuts through the dough from all sides simultaneously. It preserves the beautiful spiral shape and ensures the layers remain distinct. You’ll get 12 perfectly even rolls that look like they came straight from a professional pastry case.
The Proofing Phase: Ensuring Maximum Volume
The second rise, or proofing, is just as important as the first. Once the rolls are in the baking pan, they need another 30 to 45 minutes to puff up. They should look crowded and soft, touching each other slightly. This ensures they grow upward rather than outward during the bake.
If you under-proof the rolls, they will be dense and might “blow out” in the oven, losing their shape. If you over-proof them, the yeast will exhaust itself, and the rolls might collapse as they bake. Look for them to look visibly swollen and leave a small indentation when gently poked with a finger.
Baking Parameters for Golden-Brown Success
Position your oven rack in the middle to ensure even heat distribution. If the rack is too low, the bottoms might burn before the centers are done. If it’s too high, the tops will brown too quickly. A standard 350°F oven usually takes about 22 to 25 minutes to reach perfection.
If you want to be absolutely sure they are done, use a digital thermometer. The internal temperature of the center roll should reach 190°F. This guarantees the dough is fully cooked through without being over-baked. The tops should be a deep, golden brown, and the raspberry filling should be bubbling slightly at the edges.
Engineering the Perfect Cream Cheese Glaze
A great glaze needs a balance of tang and sweetness. Ensure your cream cheese and butter are completely softened to room temperature before you start mixing. If they are even slightly cold, you will end up with tiny white lumps that are impossible to whisk out later.
The timing of the glazing is a strategic choice. If you glaze the rolls the second they come out of the oven, the frosting will melt into a thin liquid and run to the bottom of the pan. If you wait until they are cold, the glaze will just sit on top like a thick slab.
Wait about 5 to 10 minutes after baking. The rolls should still be quite warm to the touch. This allows the bottom layer of the glaze to melt slightly into the spirals, while the top layer stays thick and creamy. It creates a beautiful, professional finish that holds its shape.
Troubleshooting Common Sweet Roll Failures
If your dough didn’t rise, the most likely culprit is the yeast. Either the milk was too hot and killed it, or the yeast was expired. Always check for foam during the activation step; if it doesn’t bubble after 10 minutes, throw it out and start over with fresh yeast.
If the filling leaked out everywhere, your reduction was likely too thin or you didn’t leave a border when rolling. Make sure the jam is thick enough to hold a shape before spreading. If the rolls are dry, you probably added too much flour during the kneading process or baked them five minutes too long.
Doughy centers usually happen when the pan is too crowded or the oven temperature is slightly off. Using a 9 x 13 inch pan for 12 rolls provides the perfect amount of space. If the tops are browning too fast but the centers are raw, tent the pan with foil for the last 10 minutes of baking.
Make-Ahead Strategies and Storage Logistics
You can easily prepare these rolls the night before for a stress-free morning. After cutting the rolls and placing them in the pan, cover them tightly with plastic wrap and put them straight into the refrigerator. The cold environment slows down the yeast, allowing for a long, slow ferment that actually improves the flavor.
In the morning, take the pan out and let it sit on the counter for about 45 to 60 minutes to take the chill off and finish proofing before baking. This “overnight method” is a favorite for holidays because it moves all the messy flour work to the day before.
For long-term storage, you can freeze the baked rolls. It is best to freeze them without the glaze if possible, though glazed rolls still freeze reasonably well. Wrap them individually in plastic wrap and then foil. To reheat, pop them in a 300°F oven for 10 minutes until they feel soft again.
Flavor Variations and Seasonal Adaptations
This reduction technique works perfectly with other berries. Blackberries make a sophisticated, dark purple roll, while blueberries offer a classic sweetness. You can even do a mixed berry version. Just follow the same simmering and thickening steps to ensure the moisture is controlled.
To add another layer of flavor, try adding citrus zest to the dough. Lemon zest in the dough pairs beautifully with the raspberry filling, while orange zest adds a warm, floral note. You can also swap the vanilla extract in the glaze for almond extract for a “raspberry-almond” flavor profile that tastes very high-end.
Expert Tips for Professional Presentation
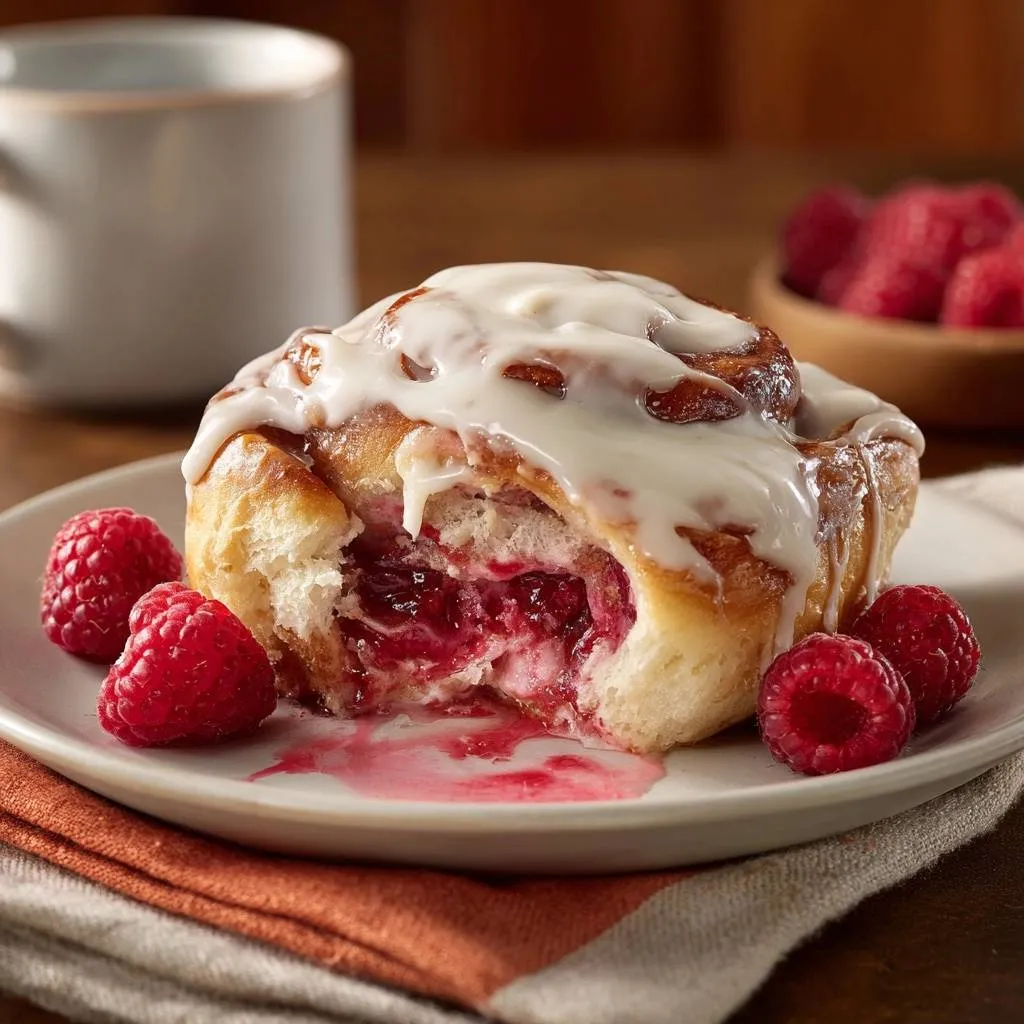
For a stunning presentation, save a handful of fresh raspberries to scatter over the top of the glazed rolls just before serving. A tiny sprig of fresh mint adds a pop of green that makes the red berries stand out. It looks much more intentional than just serving the rolls plain.
Using a heavy ceramic or glass baking dish helps distribute heat more evenly than thin metal pans. This results in a more consistent bake across all 12 rolls. Plus, a beautiful ceramic dish can go straight from the oven to the table, keeping the rolls warm for your guests while they eat.
How should I store leftover raspberry rolls?
Store any leftover rolls in an airtight container at room temperature for up to two days. Because of the cream cheese glaze, if your kitchen is very warm, it is safer to keep them in the refrigerator for up to four days. To enjoy them later, microwave a single roll for 15 seconds to restore that soft, fresh-baked texture. Do not freeze the raw dough after the second rise, as the yeast may not survive the freezing process well; it is better to freeze them either before the second rise or after they are fully baked.
Why did my raspberry filling soak into the dough?
This usually happens if the raspberry reduction wasn’t simmered long enough or if it was spread onto the dough while still warm. The cornstarch needs to fully hydrate and thicken on the stove to create a barrier. If the filling is runny or warm, the moisture will migrate into the dough’s flour, creating a gummy texture. Always ensure your filling is chilled and has a thick, jam-like consistency before you begin the assembly process.
Can I use gluten-free flour for this recipe?
You can substitute a high-quality 1:1 gluten-free flour blend that contains xanthan gum. However, keep in mind that gluten-free dough does not have the same elasticity as wheat dough. It won’t “stretch” as much during the rise, so your rolls may be slightly smaller and denser. You also won’t need to knead the dough for 7 minutes; just mix until the ingredients are fully combined and the dough is smooth.
What if I don’t have dental floss to cut the rolls?
If you don’t have unflavored dental floss, the next best option is a very sharp serrated knife, like a bread knife. Use a gentle sawing motion rather than pressing straight down. Avoid using a standard chef’s knife, as the flat blade will almost certainly squish the layers together. Another trick is to use a piece of thin, clean sewing thread, which works similarly to the dental floss method.
My dough isn’t rising, can I save it?
If your dough hasn’t moved after an hour, try moving it to a warmer spot, like the top of a running dishwasher or near a warm oven. If the yeast was truly dead, the dough won’t save. You can test this by taking a small piece of dough and dropping it into warm water; if it doesn’t float or show any signs of life, you’ll need to start over. Always ensure your milk is between 105°F and 115°F to keep the yeast happy.
Can I use heavy cream instead of whole milk in the dough?
While you can use heavy cream, it may make the dough too heavy and oily, which can actually hinder the yeast’s ability to lift the dough. Whole milk provides the perfect balance of fat and hydration. If you only have heavy cream on hand, I recommend diluting it with a little water (use 3/4 cup cream and 1/4 cup water) to mimic the consistency and fat content of whole milk.
Raspberry Sweet Rolls
Course: Dessert / BreakfastCuisine: AmericanDifficulty: medium12
rolls20
minutes25
minutes380
kcal120
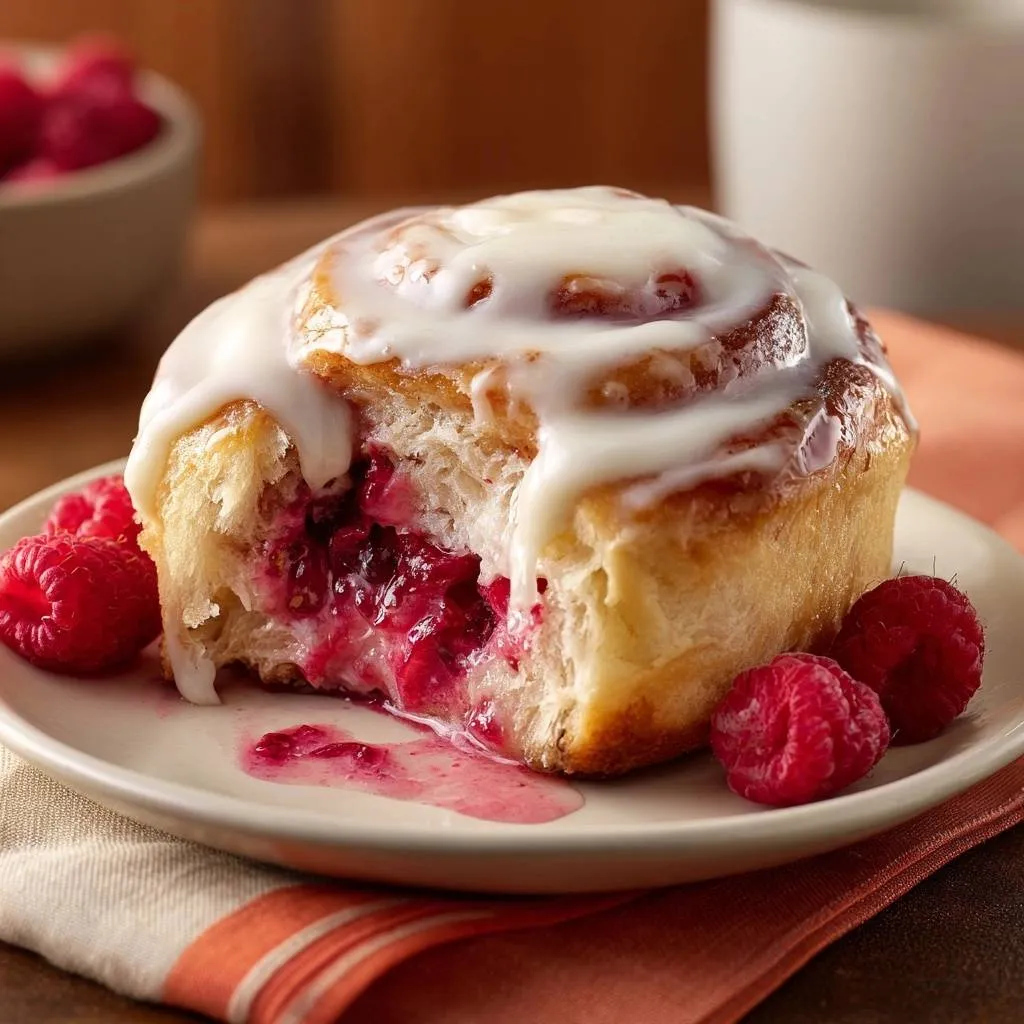
MinutesThese raspberry sweet rolls solve the common problem of mushy fruit fillings by using a chilled berry reduction. The result is a vibrant, jammy center with a perfect dough rise, finished with a decadent cream cheese frosting.
Ingredients
For the Dough:
1 package (2 1/4 tsp) active dry yeast
1 cup warm whole milk (110°F)
1/4 cup granulated sugar
1/3 cup unsalted butter, melted and cooled
1 large egg, room temperature
3.5 to 4 cups all-purpose flour
1/2 teaspoon salt
For the Filling:
2 cups fresh or frozen raspberries
1/3 cup granulated sugar
1 tablespoon cornstarch
1 tablespoon lemon juice
2 tablespoons unsalted butter, softened (for spreading on dough)
For the Cream Cheese Glaze:
4 oz cream cheese, softened
1/4 cup unsalted butter, softened
1.5 cups powdered sugar
1 teaspoon vanilla extract
1-2 tablespoons heavy cream or milk
Directions
- Prepare the Filling: In a small saucepan, combine raspberries, 1/3 cup sugar, cornstarch, and lemon juice. Simmer over medium heat for 5-8 minutes, mashing slightly, until thickened into a heavy jam-like consistency. Transfer to a bowl and chill in the refrigerator until completely cold. This step is vital to prevent a soggy bottom.
- Activate Yeast: In a large bowl or the bowl of a stand mixer, dissolve yeast in warm milk with a pinch of the sugar. Let sit for 5-10 minutes until foamy.
- Mix Dough: Add the remaining sugar, melted butter, egg, and salt. Gradually add 3.5 cups of flour. Using a dough hook or by hand, knead for 5 to 7 minutes. If the dough is too sticky, add remaining flour 1 tablespoon at a time until the dough is smooth, elastic, and clears the sides of the bowl.
- First Rise: Place dough in a greased bowl, cover with a damp cloth, and let rise in a warm spot for 1 to 1.5 hours or until doubled in size.
- Shape: Punch down the dough and roll it out on a lightly floured surface into a 12 x 18 inch rectangle. Spread the 2 tablespoons of softened butter over the dough, then spread the chilled raspberry reduction evenly, leaving a half-inch border at the edges.
- Roll and Cut: Roll the dough up tightly starting from the long edge. Slice into 12 even rolls using unflavored dental floss or a sharp serrated knife to ensure clean layers without squishing.
- Second Rise: Place rolls in a greased 9 x 13 inch baking pan. Cover and let rise for another 30-45 minutes until puffy.
- Bake: Preheat oven to 350°F (175°C). Bake for 22-25 minutes until the tops are deeply golden brown and the centers are set.
- Make Glaze: While rolls bake, beat together softened cream cheese and butter until smooth. Add powdered sugar, vanilla, and enough cream to reach a thick, pourable consistency.
- Finish: Let the rolls cool for 5-10 minutes (so the glaze doesn’t completely melt off), then spread the thick glaze generously over the warm rolls. Serve with extra fresh raspberries.
Notes
- The secret to preventing a soggy bottom is chilling the raspberry reduction until completely cold before spreading it on the dough. Use unflavored dental floss for the cleanest cuts when slicing the rolls.