There is something deeply satisfying about the rhythmic “snap” of a perfectly baked biscotti. As you pull these Golden Almond Biscotti from the oven, the kitchen fills with the warm, toasted aroma of nuts and sweet vanilla. However, many home bakers dread the slicing phase, fearing their beautiful logs will simply shatter into a pile of dry crumbs.
This recipe changes that narrative by focusing on structural integrity and a specific moisture balance. We aren’t just making a cookie; we’re engineering a treat that stands up to a deep dunk in hot coffee without dissolving. By using a unique surface-pressing technique for the almonds, you get that professional, bakery-style look where every slice showcases beautiful, intact nut slivers.
The secret to avoiding the “shatter” lies in the cooling window. If you cut the logs while they’re piping hot, the steam escapes too fast and the structure collapses. If you wait until they’re cold, they become brittle bricks. I’ve found that exactly ten minutes of cooling creates the perfect “leather-like” texture that yields beautifully to a serrated blade.
The Anatomy of a Non-Crumbling Biscotti
Biscotti literally translates to “twice-baked,” a process that removes moisture to create a long-lasting, crunchy biscuit. While traditional recipes can be rock-hard, this version uses a higher ratio of eggs to flour to ensure the dough remains cohesive. The protein in three large eggs acts as the primary binder, creating a flexible internal web that holds the flour together during the first bake.
Therefore, the “stiff but tacky” consistency of the dough is your best friend. If the dough is too dry, it will crumble before it even hits the oven. If it’s too wet, it will spread into a flat pancake. This specific balance ensures the logs hold their height, providing that classic arched shape we all love in a premium biscotti.
Why Room Temperature Eggs are Non-Negotiable
Using room temperature eggs is a small step that makes a massive difference in the final texture. When eggs are at room temperature, they emulsify much more easily with the sugar and extracts. This creates a smooth, uniform batter without the microscopic air pockets that often lead to structural cracks during the second bake.
If you forgot to take your eggs out of the fridge, don’t worry. Simply place the cold eggs in a bowl of warm (not hot) water for about five to ten minutes. This gentle warmth ensures the sugar dissolves properly, leading to a more consistent crumb and a sturdier cookie.
The Role of Almond Extract vs. Vanilla
While vanilla extract provides a familiar, comforting base, the almond extract is what gives these cookies their “bakery-style” punch. It amplifies the flavor of the toasted nuts and adds a sophisticated depth. However, almond extract is incredibly potent, so you must measure it with a steady hand.
In addition to flavor, these extracts contribute to the liquid content of the dough. Stick to the measurements provided to maintain the moisture balance. Too much liquid can make the dough difficult to shape, while too little will leave the biscotti tasting flat and uninspired.
Essential Components for Golden Almond Biscotti
Every ingredient in this list serves a functional purpose beyond just flavor. For instance, we use granulated sugar because it helps create a crisp, sharp “snap” once the cookies cool. Brown sugar contains molasses, which introduces too much moisture and can result in a chewy cookie rather than a crunchy one.
Salt and baking powder might seem like minor players, but they are essential. The salt cuts through the sweetness and highlights the nuttiness of the almonds. Meanwhile, the baking powder provides just enough lift so the biscotti aren’t unpleasantly dense, making them easier to bite into.
Selecting the Right Sliced Almonds
For this specific recipe, you want to look for “sliced” almonds, which are paper-thin shavings. Slivered almonds or whole almonds are too thick and will often catch on your knife, causing the dough to tear or break during the slicing phase. Sliced almonds provide the best surface area for toasting and look stunning on the finished product.
I always recommend using raw sliced almonds. Since these cookies spend a significant amount of time in the oven over two separate baking sessions, raw nuts will toast to a perfect golden brown. If you start with pre-toasted nuts, they may end up tasting burnt or bitter by the time the biscotti are finished.
For more nutty goodness, consider trying these chewy peanut butter cookies.
Flour Density and Measuring Techniques
The most common reason for crumbly biscotti is using too much flour. If you scoop your measuring cup directly into the flour bag, you are likely packing it down and using up to 25% more than the recipe requires. This extra flour creates a “sandy” dough that lacks the moisture needed to stay together.
Instead, use the “spoon and level” method. Gently spoon the flour into your measuring cup until it overflows, then sweep the excess off with the flat back of a knife. This ensures your dough remains tacky and pliable, which is the key to a successful slice.
Phase One: Mixing and Shaping the Logs
When you begin mixing the wet ingredients into the dry, the dough will initially look a bit shaggy and loose. However, as you continue to stir, it will transform into a stiff, slightly tacky mass. Don’t be tempted to add more flour unless the dough is sticking aggressively to your hands; a little tackiness is exactly what you want.
Once the dough is ready, fold in the first half-cup of almonds gently. You want them distributed throughout, but the real “showstopper” almonds will be added later. This internal portion of nuts provides flavor in every bite without compromising the structural integrity of the log.
Dividing and Sizing for Uniform Baking
Divide your dough into two equal portions and shape them into logs roughly 10 inches long and 2 inches wide. It is important to keep the logs uniform in thickness from end to end so they bake evenly. If the ends are tapered and thin, they will burn before the center is fully set.
Space the logs at least 3 inches apart on your parchment-lined baking sheet. Although the dough is stiff, the baking powder will cause the logs to expand and puff up. Giving them plenty of “breathing room” ensures the hot air can circulate around the entire surface, leading to a better crust.
The Secret to Visible Surface Almonds
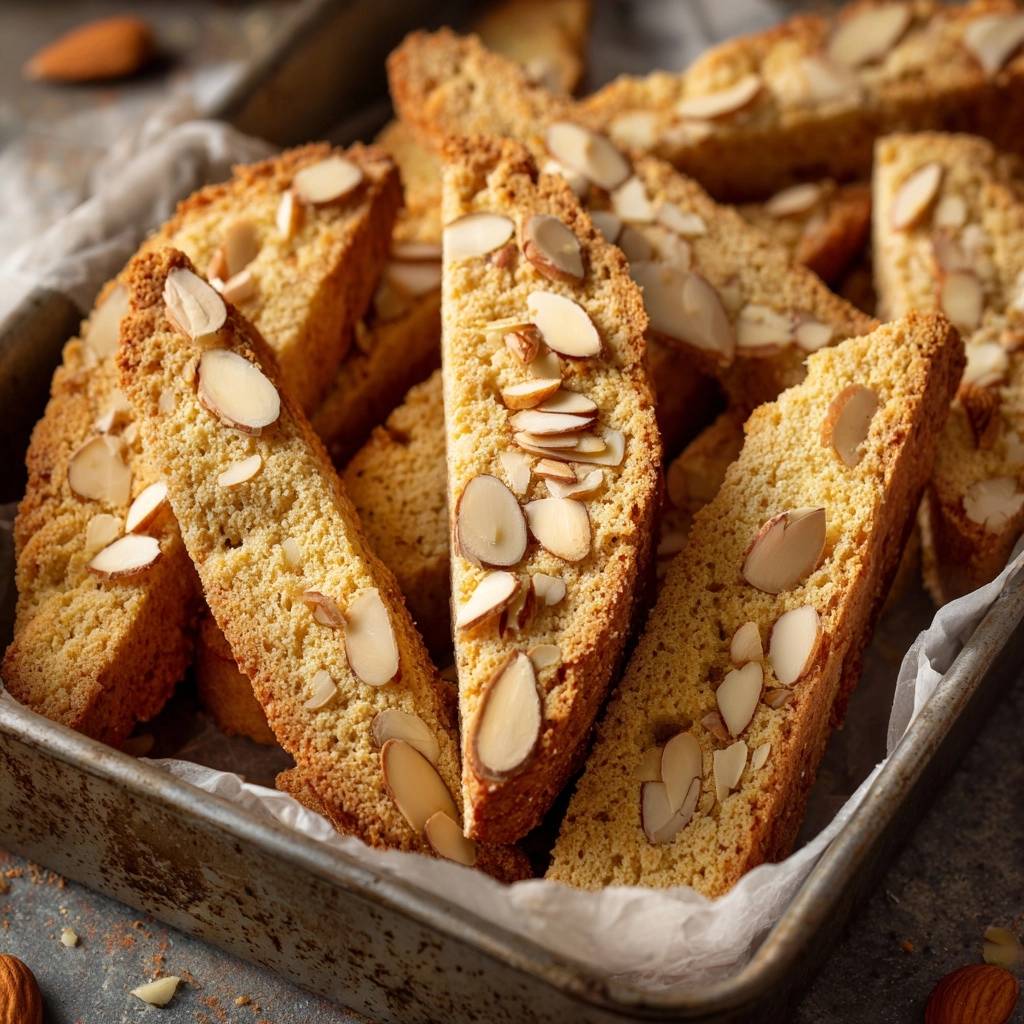
Most recipes tell you to mix all the nuts into the dough, but that is often why the cookies break. When your knife hits a hard, whole nut inside the dough, it creates a stress point that shatters the surrounding cookie. By pressing the majority of the almonds onto the exterior, we bypass this problem entirely.
This “Visual Match” step ensures that every single biscotti looks like it came from a high-end Italian cafe. The almonds on the surface get direct heat from the oven, turning them a beautiful mahogany color and releasing their natural oils for maximum flavor.
Applying the Egg Wash “Glue”
To get those almonds to stay put, you need a reliable “glue.” Whisk one egg white with a tablespoon of water until it’s slightly frothy, then brush it generously over the tops and sides of your dough logs. This wash serves a dual purpose: it holds the nuts in place and creates a shiny, golden-brown finish.
After brushing, take your remaining sliced almonds and press them firmly into the wet surface of the logs. Don’t be afraid to really push them in. The egg wash will set during the first bake, locking those almonds into a mosaic-like pattern that stays intact even after slicing.
The First Bake and the 10-Minute Rule
During the first bake at 350°F, you are looking for the logs to become firm to the touch and turn a very pale golden color. They shouldn’t be fully browned yet, as they still have a second trip to the oven ahead of them. This stage is all about setting the internal structure of the dough.
Once you pull the pan out, set a timer for exactly 10 minutes. This is the most critical window in the entire process. During these ten minutes, the residual heat finishes cooking the center while the exterior softens slightly from the trapped steam. This makes the log feel like soft leather—perfect for slicing without cracking.
Precision Slicing: Tools and Techniques
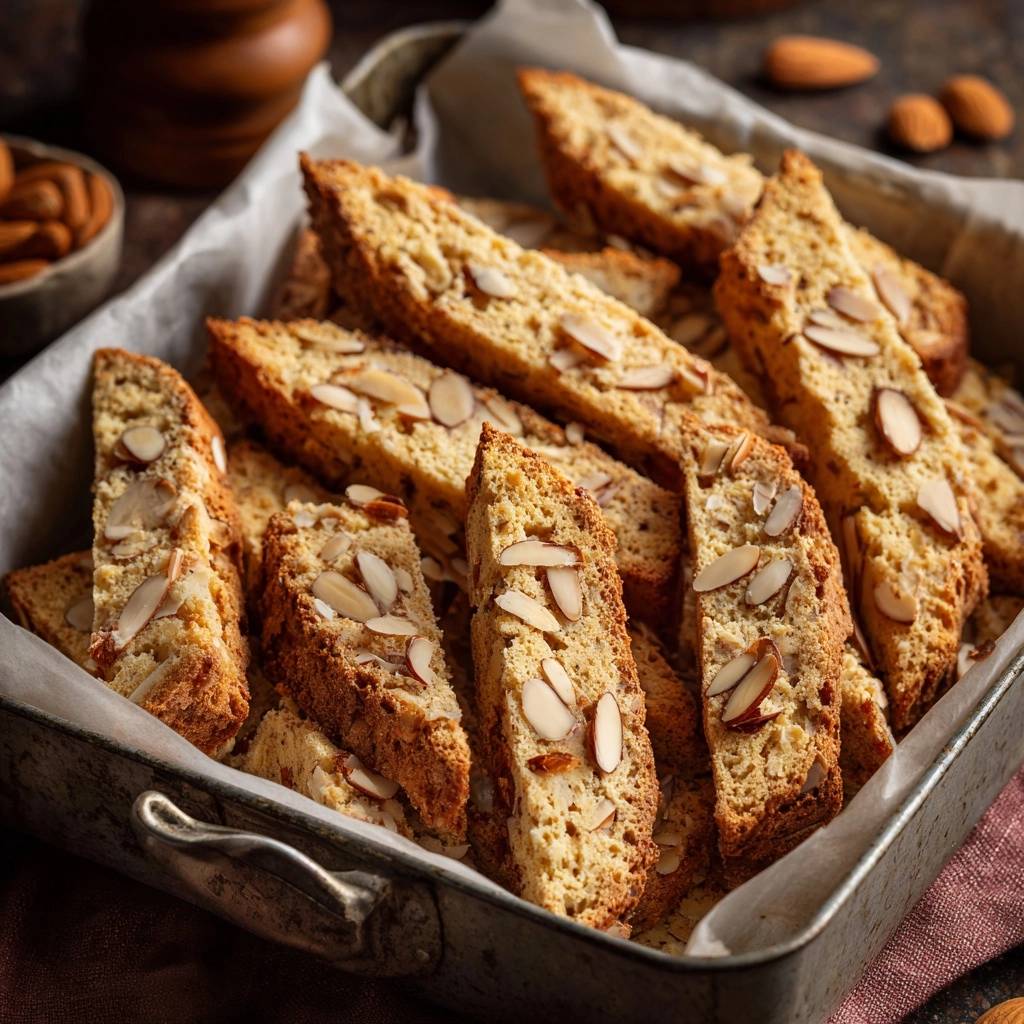
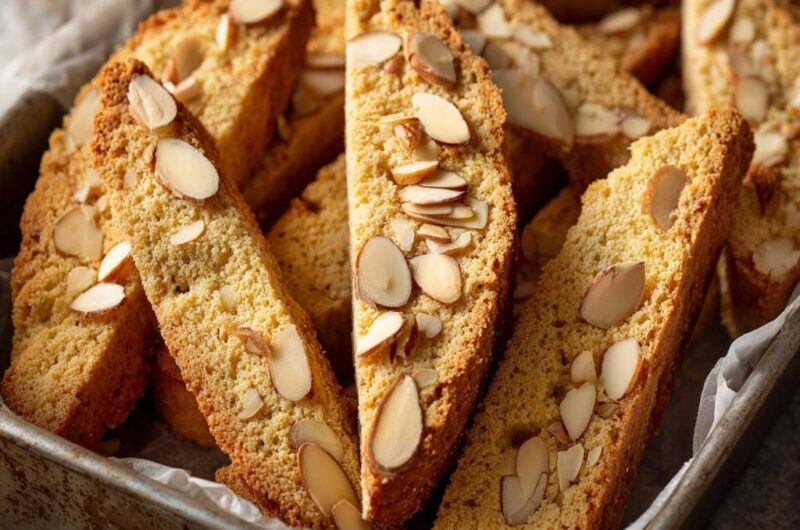
When it’s time to slice, put away your chef’s knife and reach for a sharp serrated bread knife. The “teeth” of the serrated blade are designed to saw through the crust without applying downward pressure. If you try to chop straight down, you will almost certainly crush the delicate crumb.
Use a long, gentle sawing motion and let the knife do the work. Aim for slices about 3/4-inch thick. I like to cut mine on a slight diagonal, which creates that elegant, elongated shape that looks so beautiful when served in a tall glass or tucked next to a cup of tea.
The Second Bake: Achieving the Perfect Snap
For the second bake, we drop the oven temperature to 325°F. This stage isn’t really about “cooking” the dough anymore; it’s about dehydrating it. You want to draw out the remaining moisture until the centers are dry and the edges are a deep, toasted gold.
You can stand the slices upright or lay them on their sides. If you lay them flat, remember to flip them halfway through the 20-minute bake time to ensure both sides get equal exposure to the heat. Once they feel dry to the touch, move them to a wire rack. They will continue to crisp up significantly as they cool to room temperature.
Troubleshooting Common Biscotti Failures
If your logs spread too thin during the first bake, your oven might be too cool, or your eggs might have been exceptionally large. Next time, try adding one extra tablespoon of flour to the dough. If the almonds fall off after baking, it usually means the egg wash was applied too thinly or the nuts weren’t pressed firmly enough into the dough.
If you find the centers are still a bit soft after the cookies have cooled, don’t panic. You can simply pop them back into a 300°F oven for another 5-10 minutes. Biscotti are very forgiving in this regard, and a quick “third bake” can often save a batch that didn’t get quite dry enough the first time around.
Optimal Storage and Moisture Control
Moisture is the ultimate enemy of a good biscotti. To keep that signature “snap,” store your cooled cookies in an airtight glass jar or a tin. Plastic containers can sometimes trap trace amounts of moisture, which might soften the cookies over time. If stored properly, these will stay fresh and crunchy for up to two weeks.
You can also prepare the logs in advance. If you don’t have time to do the full double-bake in one day, you can complete the first bake, let the logs cool completely, and wrap them tightly in plastic wrap. The next day, simply slice them and proceed with the second bake as directed.
Serving Suggestions and Dipping Etiquette
In Italy, biscotti are traditionally served with a drink for dipping. While coffee and espresso are the most common partners, these Golden Almond Biscotti are also fantastic with a thick, stovetop hot chocolate or even a warm spiced apple cider. The sturdy structure of this recipe ensures the cookie absorbs the liquid without falling apart.
Because these cookies aren’t overly sweet, they also make a great addition to a dessert board. Pair them with some fresh berries or a small bowl of honey for a light, sophisticated end to a meal. They are the ultimate “slow-eating” cookie, designed to be savored one crunchy bite at a time.
Customizing the Flavor Profile
Once you master this base recipe, you can easily tweak the flavors. Adding the zest of one large orange to the sugar before mixing provides a bright, citrusy lift that pairs beautifully with the almond. Alternatively, you can add a teaspoon of cinnamon for a warmer, spiced version that feels perfect for the autumn months.
For a more indulgent treat, wait until the biscotti are completely cool, then drizzle them with melted dark chocolate. Since we aren’t using any prohibited ingredients, a high-quality dark chocolate drizzle adds a touch of luxury without changing the fundamental texture of the cookie. Just let the chocolate set completely before storing.
Expert Tips for Professional Results
For the most consistent results, I highly recommend using a kitchen scale to measure your flour in grams. This eliminates the variables of “packing” the flour and ensures your dough is the same every single time. Also, always use parchment paper rather than silicone mats; parchment allows for better airflow, which helps the bottoms of the biscotti dry out properly.
Finally, never settle for a dull knife. If your serrated knife hasn’t been sharpened in years, it might tear the dough rather than sawing through it. A sharp blade is your best insurance policy against crumbling. With these techniques in hand, you’ll be producing bakery-quality biscotti that are as beautiful to look at as they are to eat.
How should I store these biscotti and how long do they last?
Store your Golden Almond Biscotti in an airtight container, preferably a glass jar or a metal tin, at room temperature. Because they are twice-baked and low in moisture, they have an excellent shelf life and will stay perfectly crunchy for up to two weeks. If you live in a very humid environment, you can toss a small food-safe desiccant packet into the jar to keep them from softening. These cookies also freeze remarkably well; just wrap them tightly in plastic wrap and place them in a freezer bag for up to three months.
Why did my biscotti logs crumble when I tried to slice them?
Crumbling usually happens for one of three reasons: the dough was too dry, the logs were too hot when sliced, or you used the wrong knife. Ensure you use the “spoon and level” method for flour so the dough stays tacky. Most importantly, wait exactly 10 minutes after the first bake before slicing. This allows the structure to set while remaining slightly soft. Always use a sharp serrated knife and a gentle sawing motion; pressing straight down with a smooth blade will cause the log to shatter every time.
Can I substitute the all-purpose flour with a gluten-free blend?
You can use a high-quality “1-to-1” gluten-free flour blend that contains xanthan gum, but be aware that the texture will be slightly different. Gluten provides the “stretch” and structural strength that allows the biscotti to be sliced thinly. Without it, the cookies may be more prone to breaking. If using gluten-free flour, I recommend cutting the slices slightly thicker (about 1 inch) to give them more stability, and perhaps adding an extra 5 minutes to the second bake to ensure they are fully dried out.
What can I use if I don’t have almond extract?
If you don’t have almond extract, you can simply double the amount of vanilla extract. While you will lose that specific “bakery” aroma, the toasted almonds themselves will still provide plenty of flavor. Alternatively, you could use a half-teaspoon of orange or lemon extract for a citrus-forward version. Avoid using imitation almond flavoring if possible, as it can sometimes leave a chemical aftertaste that becomes more pronounced during the double-baking process.
My biscotti are too hard to bite into. What went wrong?
Biscotti are meant to be very firm, but they shouldn’t be tooth-shattering. If yours are too hard, you may have over-baked them during the second stage. The second bake is meant to dry the cookie, not turn it into a rock. Next time, reduce the second bake to 8 minutes per side. Also, remember that biscotti are traditionally designed for dipping; a five-second soak in hot coffee or tea will soften the crumb just enough to make it melt in your mouth while still retaining its shape.
Almond Biscotti
Course: DessertCuisine: Italian and AmericanDifficulty: medium24
cookies15
minutes50
minutes110
kcal65
MinutesA reliable recipe for twice-baked almond cookies designed to prevent crumbling. By pressing almonds onto the surface and following a specific cooling window, you achieve beautiful, intact slices with a classic crunch.
Ingredients
2 cups all-purpose flour
1 cup granulated sugar
1 teaspoon baking powder
1/2 teaspoon salt
3 large eggs, room temperature
1 teaspoon vanilla extract
1/2 teaspoon almond extract
1 1/4 cups sliced almonds (divided)
1 egg white + 1 tablespoon water (for egg wash)
Directions
- Preheat your oven to 350°F (175°C) and line a large baking sheet with parchment paper.
- In a large bowl, whisk together the flour, sugar, baking powder, and salt.
- In a separate bowl, beat the 3 eggs with the vanilla and almond extracts until well combined.
- Gradually add the wet ingredients to the dry ingredients. Stir until a stiff, slightly tacky dough forms. Fold in 1/2 cup of the sliced almonds.
- Turn the dough onto a lightly floured surface. Divide in half. Shape each half into a log about 10 inches long and 2 inches wide. Transfer to the prepared baking sheet, spacing them 3 inches apart.
- Lightly whisk the egg white and water. Brush the tops and sides of the logs generously with the egg wash.
- VISUAL MATCH STEP: Press the remaining 3/4 cup of sliced almonds firmly into the surface of the wet logs. This ensures the almonds are visible and toasted on the outside as shown in the image.
- Bake for 25-30 minutes until the logs are firm to the touch and pale golden.
- THE CRITICAL STEP: Remove from the oven and let the logs cool on the pan for exactly 10 minutes. This allows the internal structure to set without becoming brittle.
- Transfer logs to a cutting board. Using a sharp serrated knife, use a gentle, long sawing motion to cut the logs into 3/4-inch thick slices on a slight diagonal. Do not press down hard; let the teeth of the knife do the work.
- Place the slices back on the baking sheet, standing upright or laid on their sides. Reduce oven heat to 325°F (165°C).
- Bake for 8-10 minutes per side (total 16-20 minutes) until the centers are dry and the edges are deeply golden.
- Transfer to a wire rack to cool completely. The biscotti will continue to crisp up as they cool.
Notes
- To prevent cracking, let the logs cool for exactly 10 minutes before slicing with a serrated knife. Pressing almonds onto the exterior prevents the knife from catching on internal nuts.