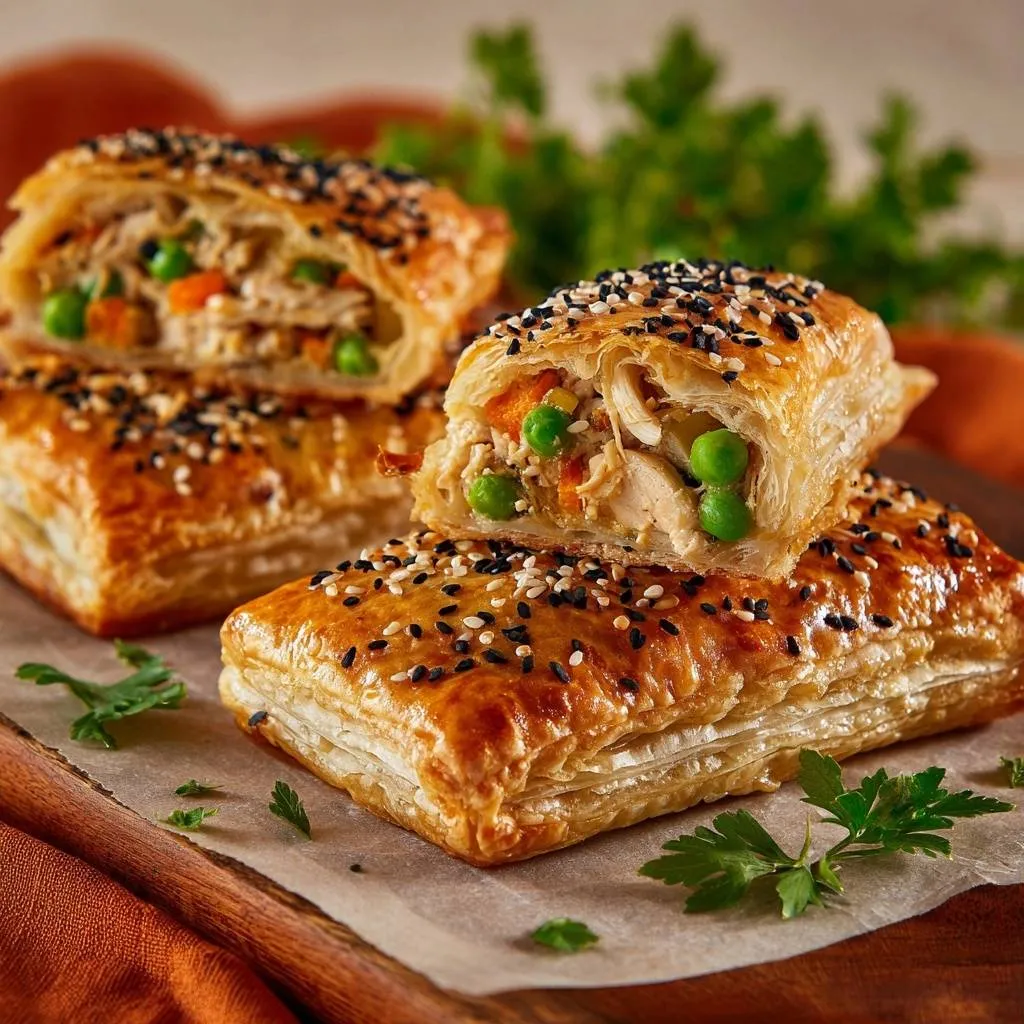
There is nothing quite like the sound of a shatteringly crisp puff pastry shell giving way to a steaming, savory center. However, most home cooks have experienced the heartbreak of a “soggy bottom.” You pull a beautiful, golden pie from the oven, only to find the underside is a limp, doughy mess that can’t support its own weight. It’s a common frustration that turns a handheld delight into a fork-and-knife disaster.
The secret to a perfect Golden Chicken and Vegetable Hand Pie lies in managing moisture and heat. When the liquid from the filling seeps into the raw dough before it has a chance to set, you lose that iconic flake. My “Anti-Soggy Bottom Hack” changes the game by using thermal physics to seal the crust the second it touches the pan. You’ll get that professional, bakery-style crunch every single time.
Expertise in pastry isn’t about luck; it’s about temperature control. By preheating your baking sheet until it’s screaming hot, you create an immediate sear on the bottom pastry layer. This creates a waterproof barrier of cooked dough that keeps the creamy chicken filling exactly where it belongs. Let’s dive into how you can master this technique in your own kitchen.
The Science of Shatteringly Crisp Puff Pastry
Puff pastry is a marvel of culinary engineering, consisting of hundreds of thin layers of dough separated by even thinner layers of fat. When the pastry hits a hot oven, the water in the dough and fat turns to steam. This steam expands, pushing the layers apart to create that incredible “lift” and airy texture we crave.
However, this process requires the fat to stay solid until the very last second. If your dough gets too warm during assembly, the fat melts into the flour, and you end up with a flat, greasy cracker instead of a flaking masterpiece. Therefore, you must work quickly and keep your pastry chilled until it is ready to meet the heat.
The preheated baking sheet acts as a “heat sink,” providing an intense burst of bottom-up energy. While the ambient air in the oven works on the top layers, the hot metal instantly sets the base of the pie. This prevents the heavy cream and chicken juices from migrating into the flour, ensuring the bottom is just as crisp as the top.
Essential Components for the Savory Filling
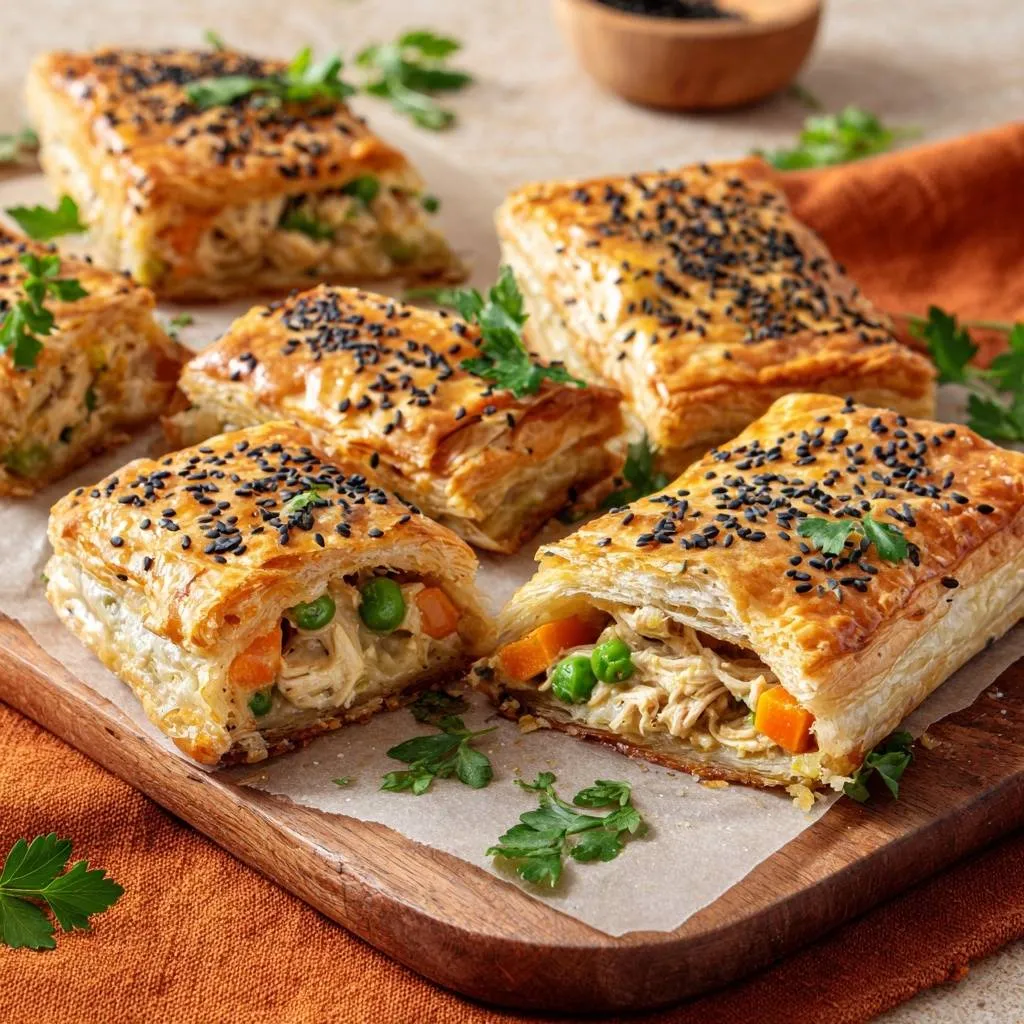
For the best structural integrity, I always recommend using shredded chicken breast. Unlike cubed meat, shredded chicken creates a dense, interlocking web that holds the sauce in place. This prevents the filling from shifting or “leaking” when you take that first big bite.
Vegetables add color and nutrition, but they are also hidden sources of water. If you’re using frozen peas and carrots, make sure they are fully thawed and patted dry with a paper towel. Any extra ice crystals or surface moisture will turn into steam inside the pie, which can cause the pastry to blow open at the seams.
Cornstarch is our secret weapon for the sauce. While flour can sometimes leave a pasty aftertaste, cornstarch creates a “tight,” translucent glaze that binds the chicken and vegetables together. It ensures the filling is high-viscosity, meaning it stays thick and luscious rather than weeping liquid onto the crust.
Finally, we use dried thyme and garlic powder to build a concentrated flavor profile. Because these are dried, they “bloom” in the heavy cream as it heats, releasing deep herbal notes without adding the bulk or moisture of fresh aromatics. This keeps the filling potent and savory without thinning out our sauce.
Phase One: Preparing the High-Viscosity Filling
Start by whisking your cornstarch into cold heavy cream until it’s completely smooth. Adding cornstarch to a hot liquid causes instant clumping, so starting cold is a non-negotiable step for a silky result. Once combined, pour it over your chicken and vegetables in the skillet.
As you stir over medium heat, you’ll see the mixture transform from a thin liquid into a heavy, velvet-like coating. You want the sauce to cling tightly to the chicken, leaving almost no pooling liquid in the pan. This high viscosity is what keeps the pie stable during the bake.
The most important rule of this phase is the “Cooling Mandate.” You must let the filling cool completely before it touches the pastry. If you put warm filling on cold dough, the fat in the pastry will melt instantly, destroying your layers before the pie even reaches the oven.
Phase Two: Architecture and Assembly of the Pies
When rolling out your puff pastry, aim for a light touch. Use just enough flour to prevent sticking, as too much flour can make the crust tough. Cut your sheets into equal rectangles, keeping in mind that symmetry is your friend when it comes to a clean seal.
Place a generous scoop of filling in the center, but always respect the 1/2-inch border. This “no-fly zone” is essential for the pastry to expand and create a proper bond. If the filling touches the edges, the egg wash won’t be able to act as a glue, and your pie will likely burst.
Use a fork to crimp the edges firmly. This isn’t just for decoration; it creates a mechanical lock that traps steam inside. This steam helps cook the interior while the pressure forces the pastry layers to puff outward, creating those beautiful, visible ridges along the sides.
Phase Three: The High-Heat Baking Protocol
Once your oven and baking sheet are at a steady 400°F, it’s time for the most critical transition. Carefully pull the hot sheet out and lay down a piece of parchment paper. You’ll hear a slight sizzle when the pies hit the pan—that is the sound of success and a guaranteed crisp bottom.
Before sliding them back in, brush the tops with a beaten egg wash. This provides the protein and sugar needed for the Maillard reaction, which results in a deep, mahogany shine. Without the egg wash, your pies will look pale and dusty rather than rich and appetizing.
For an even more satisfying crust, consider trying creamy chicken empanadas with a similar egg wash technique.
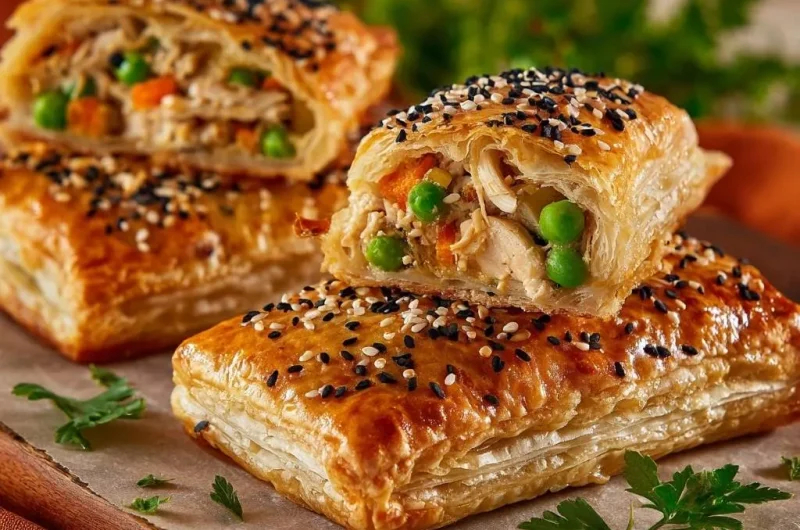
Sprinkle the sesame seeds heavily over the wet egg wash. The black and white seeds provide a beautiful visual contrast, but they also add a nutty crunch that complements the buttery pastry. Bake until the pies are tall, golden, and the layers look like the pages of a well-worn book.
Avoiding Common Hand Pie Failures
If your pastry didn’t puff, the most likely culprit is temperature. If the dough sits out too long on a warm counter, the layers of fat and flour meld together. If you find yourself working slowly, don’t be afraid to pop the assembled pies back in the fridge for 10 minutes before baking.
Leaking filling usually stems from overfilling or poor crimping. It’s tempting to pack in as much chicken as possible, but the steam needs room to circulate. If the pressure gets too high and the seal is weak, the filling will find the path of least resistance and blow out the side.
If the bottom is still soft despite your best efforts, your baking sheet likely wasn’t hot enough. Ensure your oven has been at the target temperature for at least 15 minutes before you start the baking process. A thin, cheap baking sheet may also lose heat too quickly; use a heavy-rimmed sheet if possible.
Make-Ahead Strategies and Freezing Instructions
These hand pies are perfect for meal prep. You can assemble the pies completely, but instead of baking, place them on a tray in the freezer for an hour. Once they are firm, transfer them to a freezer-safe bag. This “flash-freeze” method prevents them from sticking together.
When you’re ready for a quick dinner, you can bake them straight from the freezer. Do not thaw them, as this will make the pastry gummy. Simply add about 5 to 8 minutes to the total baking time. Ensure the internal temperature reaches 165°F to make sure the chicken and cream are heated through.
Flavor Variations and Seasonal Swaps
Once you master the base technique, you can experiment with different flavors. For a “Garden” variation, swap the chicken for roasted butternut squash and chopped kale. Just ensure the squash is roasted long enough to remove excess moisture so the filling stays thick.
If you’re craving something bold, try a “Curry” variation. Replace the dried thyme with a tablespoon of yellow curry powder and add some canned chickpeas. The earthy spices pair beautifully with the richness of the heavy cream and the buttery puff pastry.
For a classic “Roast” vibe, use leftover rotisserie chicken and swap the thyme for fresh rosemary. You can even add a tiny bit of cranberry sauce to the center of the filling for a sweet and savory holiday-inspired treat that feels like a full Sunday dinner in a handheld package.
Optimal Side Dish Pairings
Since these hand pies are rich and buttery, they pair best with something bright and acidic. A simple arugula salad dressed with lemon juice and olive oil provides a peppery bite that cuts through the heavy cream. The acidity cleanses your palate between every savory mouthful.
Alternatively, a sharp vinegar-based slaw or a side of pickled red onions can add a much-needed crunch and tang. If you want something warmer, a light vegetable consommé or a clear tomato broth offers a delicate balance without competing with the richness of the pastry.
Expert Baking Troubleshooting
Can I use store-bought pie crust instead of puff pastry?
You can, but the result will be very different. Standard pie crust is “short,” meaning it is crumbly and sturdy rather than light and flaky. You won’t get the dramatic rise or the 1,000-layer crunch, but it will still be delicious. If using pie crust, you may need to lower the oven temperature to 375°F to prevent the edges from burning before the center is hot.
Why did my sesame seeds fall off after baking?
This usually happens if the egg wash dried too much before you sprinkled the seeds, or if the wash was applied too thinly. The egg acts as a culinary glue. For the best results, brush one pie with egg wash and immediately sprinkle the seeds before moving on to the next pie. This ensures the seeds are “set” into the wet protein layer.
How do I reheat leftovers without losing the crunch?
Never use a microwave for puff pastry! The microwave heats the water molecules inside the filling, which steams the crust from the inside out, making it rubbery. Instead, use an air fryer at 350°F for 3-5 minutes or a toaster oven. This dry, circulating heat recrisps the fat in the pastry and restores that original shatteringly crisp texture.
My pastry is browning too fast; what should I do?
If the tops are looking dark but the 20-minute timer hasn’t gone off, simply “tent” the pies with a piece of aluminum foil. Lay the foil loosely over the top without sealing the edges. This reflects the direct heat away from the surface while allowing the internal temperature to continue rising, ensuring the filling is hot and the bottom is fully cooked.
Resting and Serving for Maximum Crunch
The “Wire Rack Rule” is the final step in your journey to the perfect hand pie. After removing the pies from the oven, move them immediately to a wire cooling rack. If you leave them on the flat baking sheet or a plate, the residual heat will create steam underneath the pie.
That trapped steam has nowhere to go but back into your crust, which will soften that beautiful bottom you worked so hard to crisp. Five minutes on a rack allows air to circulate 360 degrees around the pastry. Finish with a sprinkle of fresh parsley for a pop of color and a fresh, grassy finish that balances the savory fats.
Chicken Hand Pies
Course: Main CourseCuisine: AmericanDifficulty: easy4
servings20
minutes25
minutes450
kcal45
MinutesThese savory puff pastry hand pies feature a creamy chicken and vegetable filling. The recipe utilizes a high-heat technique to ensure a shatteringly crisp bottom crust every time.
Ingredients
1 package frozen puff pastry (2 sheets), thawed but cold
2 cups cooked shredded chicken breast
1 cup frozen peas and diced carrots, thawed
1/2 cup heavy cream
1 tablespoon cornstarch
1 teaspoon garlic powder
1 teaspoon dried thyme
1/2 teaspoon salt
1/4 teaspoon black pepper
1 egg, beaten (for egg wash)
2 tablespoons mixed black and white sesame seeds
Fresh parsley for garnish
Directions
- Place a heavy, rimmed baking sheet inside your oven and preheat to 400°F (200°C). This is the critical step. Placing the pies onto a screaming hot surface seals the bottom pastry instantly, preventing the filling from soaking in.
- In a small bowl, whisk the cornstarch into the cold heavy cream until smooth.
- In a medium skillet over medium heat, combine the shredded chicken, peas, carrots, garlic powder, thyme, salt, and pepper. Pour the cream mixture over the chicken and vegetables. Stir constantly for 2 to 3 minutes until the sauce is very thick and coats the ingredients heavily.
- Remove the filling from the heat and let it cool completely. Using a hot filling is the number one cause of soggy pastry.
- Roll out the puff pastry sheets on a lightly floured surface. Cut each sheet into 4 equal rectangles (8 total).
- Place a generous scoop of the cooled filling onto 4 of the rectangles, leaving a 1/2-inch border. Top with the remaining 4 rectangles. Use a fork to crimp the edges tightly around all four sides to lock in the steam and create the signature ridged edge.
- Brush the tops generously with the beaten egg wash. This provides the deep mahogany shine seen in the image. Sprinkle heavily with the mixed black and white sesame seeds.
- Carefully pull the hot baking sheet from the oven and line it with a piece of parchment paper. Quickly transfer the pies onto the hot sheet.
- Bake for 20 to 25 minutes until the pastry is deep golden brown, puffed, and the layers are visible.
- Let the pies rest for 5 minutes on a wire rack to allow air to circulate underneath, maintaining that perfect crunch. Garnish with fresh parsley before serving.
Notes
- The critical secret to avoiding a soggy bottom is preheating the baking sheet and ensuring the filling is completely cool before assembling the pies.