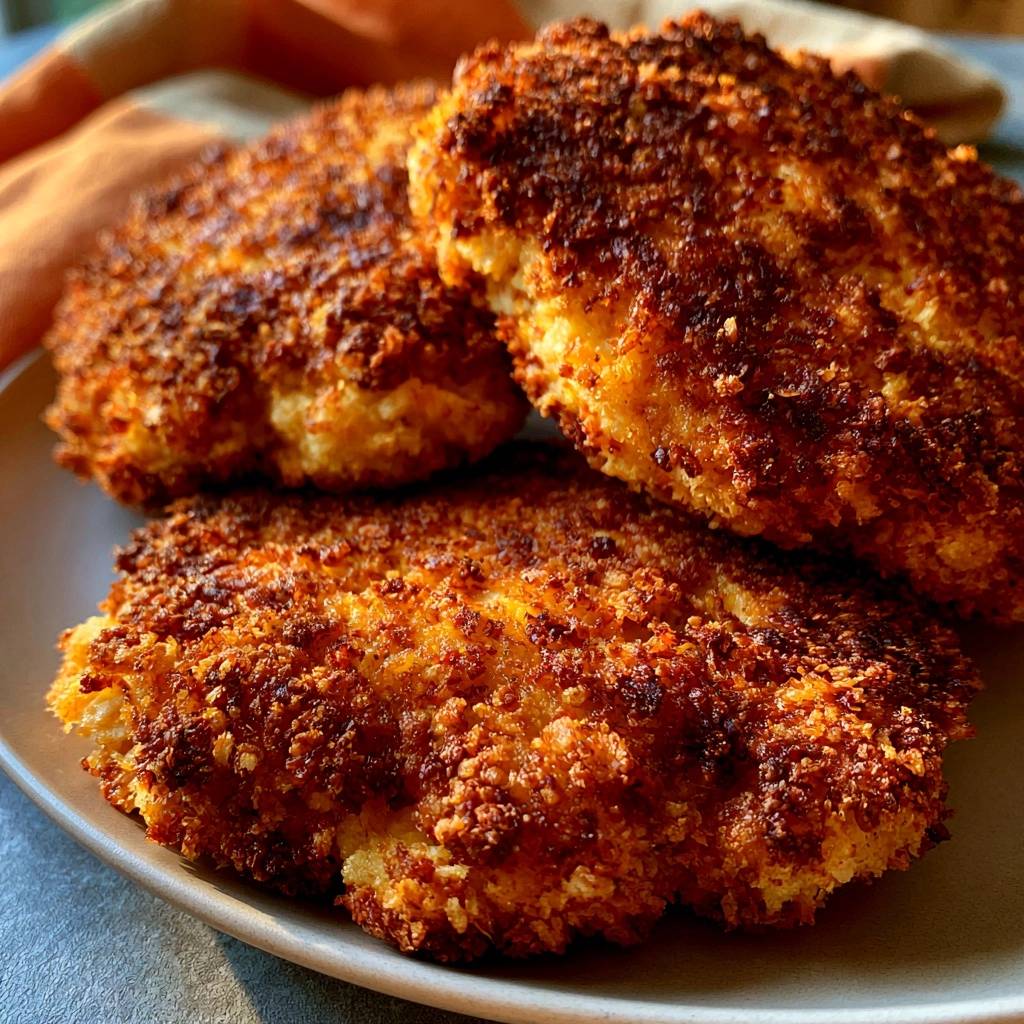
Imagine biting into a chicken cutlet so crisp that the sound echoes across the table. The crust is a deep, mahogany gold, shattering instantly to reveal juicy, tender meat inside. This isn’t just a lucky outcome; it’s the result of mastering moisture and heat.
Most home cooks struggle with the dreaded “soggy bottom,” where the underside of the chicken turns into a mushy mess before it even hits the plate. We’re going to fix that today by focusing on technical mastery, from the way you press the breading to how the meat cools. You’ll learn how to control steam and oil to ensure every bite stays perfectly crunchy.
The real secret to a professional-grade cutlet is the resting period after breading but before frying. Giving the chicken just five minutes to sit allows the flour to hydrate and the egg to set. This creates a structural bond that prevents the breading from sliding off in the pan like a loose jacket.
The Anatomy of a Shatter-Crisp Crust
Panko breadcrumbs are the undisputed kings of the frying world because of their unique structure. Unlike traditional sandy breadcrumbs, Panko is made from crustless bread that is processed into large, airy flakes. These flakes have a massive surface area, which creates more “crags” for the oil to crisp up.
When these flakes hit the hot oil, they undergo the Maillard reaction, a chemical process between amino acids and reducing sugars. We aim for a deep-mahogany finish rather than a pale yellow because that darker color signals a complex, savory flavor profile. The air pockets within the Panko also act as tiny insulators, keeping the meat moist while the exterior turns into a brittle, delicious shell.
Essential Components for Golden Panko Chicken Cutlets
Quality starts with the basics, and for this dish, that means choosing the right salt and oil. Kosher salt is vital here because its coarse grains are easier to pinch and distribute evenly than fine table salt. It draws out just enough surface moisture to help the initial flour layer stick without curing the meat.
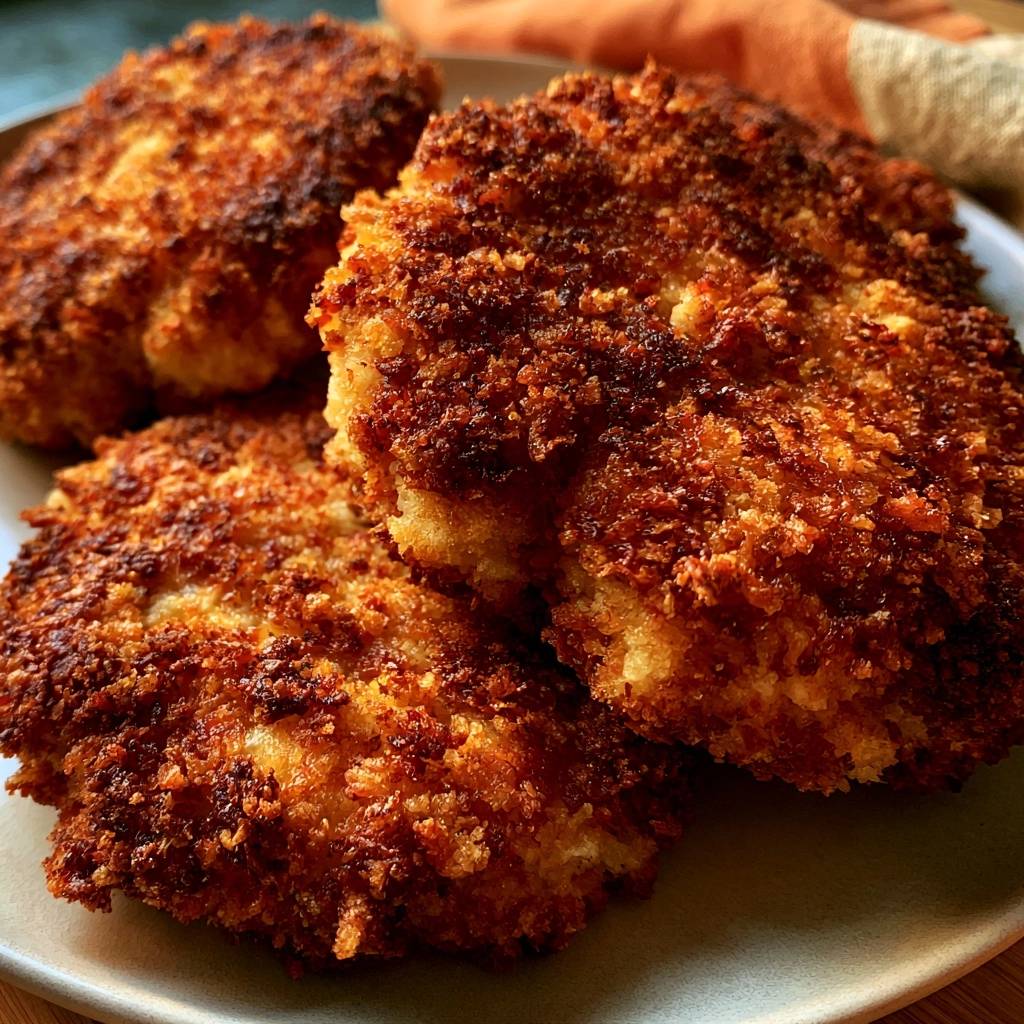
Your choice of oil determines whether your kitchen stays clean or fills with smoke. You need a neutral oil with a high smoke point, such as vegetable, canola, or grapeseed oil. These oils can handle the 350°F heat required for a perfect fry without breaking down or adding unwanted flavors like butter or extra virgin olive oil would.
Dry Spices and Aromatics
We build the flavor foundation directly into the flour dredge using garlic powder, onion powder, and smoked paprika. These dry aromatics are essential because they can withstand high-heat frying without burning. If you used fresh minced garlic, the tiny pieces would turn bitter and black in the hot oil long before the chicken finished cooking.
The Role of the Egg Wash Binder
The egg wash acts as the “glue” in our three-step dredging process. By beating two large eggs with a tablespoon of water, you perform a process called lysing. The water thins the thick proteins of the egg white, creating a much more fluid and even coating. This prevents the breading from becoming “cakey” or peeling away from the meat in large, disappointing sheets.
The Science of Breading Adhesion
Successful breading relies on a “Protein-Starch-Protein” bridge. The flour (starch) bonds to the wet surface of the chicken (protein), and the egg (protein) bonds to the flour. If there is too much moisture on the chicken at the start, the flour turns into a slippery paste instead of a dry bond. This is why patting the chicken bone-dry with paper towels is the most important step in the entire process.
The Press-and-Set Method
Don’t just toss the chicken in the crumbs; you need to be assertive. Use the heels of your palms to firmly press the Panko into the egg-coated meat. This physical force fuses the flakes into the binder, creating a dense, craggy texture. Letting the breaded cutlets rest for five minutes on a plate before frying allows the starch to fully hydrate, ensuring the crust stays attached during the turbulence of the flip.
Step-by-Step: Preparing the Chicken for Frying
Start by pounding your chicken breasts to a uniform 1/2-inch thickness. This ensures the meat cooks through at the exact same moment the crust reaches peak crispiness. Set up your station with three shallow bowls: flour and spices first, egg wash second, and Panko third. Use one hand for dry ingredients and the other for wet to keep your fingers from becoming breaded themselves.
Dredge the chicken in the flour and shake it vigorously until only a fine, translucent dust remains. Dip it into the egg wash, making sure there are absolutely no dry spots left behind. Finally, move it to the Panko and use that “press-and-set” technique. You should see a thick, textured coating that looks like it’s part of the meat itself.
Thermal Control: Managing Oil Temperature
The “Goldilocks zone” for frying chicken cutlets is between 350°F and 360°F. If the oil is too cold, the breading will act like a sponge and soak up grease, resulting in a heavy, oily meal. If it’s too hot, the Panko will burn to a crisp while the chicken inside remains dangerously raw. A heavy-bottomed skillet is your best friend here because it holds heat steadily even when cold meat is added.
If you don’t have a kitchen thermometer, use the breadcrumb test. Drop a single Panko flake into the oil; it should sizzle violently and stay on the surface. If it sinks, the oil is too cold. If it turns black in three seconds, pull the pan off the heat immediately to cool it down.
The Danger of Pan Crowding
It is tempting to cram all the chicken into the pan at once, but this is a recipe for sogginess. Adding too much cold meat at once causes the oil temperature to plummet. Work in batches of two cutlets at a time. This maintains the “violent sizzle” necessary to instantly sear the crust and create a steam barrier that keeps the oil out of the meat.
Executing the Perfect Shallow Fry
When you lay the chicken into the pan, lay it away from you to avoid oil splashes. You should hear a loud, consistent hiss the moment it touches the oil. Let it cook undisturbed for 3 to 4 minutes. You’ll see the edges of the cutlet turn a beautiful golden brown, which is your cue that the bottom layer has set and is ready for the flip.
Use a wide spatula or tongs to gently turn the meat over. The second side usually takes a minute less than the first. You are looking for a uniform, deep-gold color across the entire surface. If you see pale spots, gently press down on the chicken with your spatula to ensure the meat is making full contact with the hot oil.
Solving the Soggy Bottom Problem
The biggest mistake people make is placing hot, fried chicken directly onto a flat plate or a pile of paper towels. This traps the escaping steam against the bottom of the crust, turning it mushy in seconds. Instead, immediately transfer your cutlets to a wire cooling rack set over a baking sheet. This allows air to circulate 360 degrees around the chicken.
By elevating the meat, the steam evaporates into the air instead of back into the breading. This “Wire Rack Workflow” is the single most effective way to preserve that shattering crunch. While the chicken is still glistening with a bit of hot oil, hit it with a final pinch of kosher salt so it sticks perfectly to the crust.
Troubleshooting Common Coating Failures
If your breading is falling off in the pan, you likely had too much excess flour or didn’t let the chicken rest before frying. Next time, shake the flour off more thoroughly. If the crumbs are burnt but the meat is raw, your oil was too hot; try lowering the flame and using a thicker pan for better heat distribution.
A greasy texture usually means your oil temperature dropped too low during the fry. Ensure you aren’t crowding the pan and let the oil come back up to temperature between batches. Finally, if the meat is tough, it was either overcooked or not pounded to an even thickness. Use a meat thermometer to pull the chicken at 165°F for the juiciest results.
Flavor Variations and Global Twists
Once you master the technique, you can play with the flavors. For a “Zesty Herb” version, mix dried oregano and lemon zest into the Panko. If you want some “Spicy Heat,” add a teaspoon of mustard powder and a pinch of cayenne to the egg wash. The liquid in the egg wash carries the heat deep into the breading layers.
You can also swap the spices in the flour dredge for a curry powder blend or even some finely grated parmesan cheese mixed into the Panko. Just remember that cheese burns faster than breadcrumbs, so you’ll need to watch the temperature closely if you go the cheesy route.
Optimal Side Dish Pairings
Fried foods crave acidity to balance out the richness of the oil. A bright arugula salad with a sharp lemon vinaigrette is the classic pairing for a reason. The peppery greens and citrus cut right through the savory crust. A chilled cucumber salad with white vinegar and dill also provides a refreshing, crunchy contrast.
Avoid heavy, creamy sides like mashed potatoes with gravy, which can make the whole meal feel weighed down. If you want something warm, try roasted root vegetables or sautéed green beans with a squeeze of fresh lemon. The goal is to keep the sides light so the “shatter-crisp” chicken remains the star of the show.
Make-Ahead and Reheating Instructions
You can actually bread these cutlets up to four hours in advance. Just keep them on a parchment-lined tray in the fridge, uncovered, so the breading stays dry. If you want to freeze them, place the breaded (but unfried) cutlets on a tray in the freezer for an hour, then transfer them to a freezer bag. Fry them directly from frozen, adding two minutes to the cook time per side.
If you have leftovers, never use the microwave! It will turn the crust into a rubbery mess. Instead, place the cutlets on a wire rack in a 375°F oven or air fryer for about 5 to 8 minutes. This dry heat will reactivate the oil in the crust and bring back that original crunch almost perfectly.
Expert Tips for Professional Results
Always use a heavy-bottomed cast iron or stainless steel skillet. These pans have high thermal mass, meaning they don’t lose much heat when the chicken hits the oil. This stability is the key to a consistent, golden-brown color across every batch you fry.
Remember to season the chicken directly with salt and pepper before you start the dredging process. Many people only season the flour, but seasoning the meat itself ensures the flavor is embedded in every bite, not just the outer shell. Finally, always finish with a sprinkle of flakey salt the moment the chicken hits the wire rack for that professional, high-end restaurant touch.
How do I store leftover chicken cutlets so they stay crispy?
Store leftovers in an airtight container in the refrigerator for up to three days. To maintain as much texture as possible, place a piece of parchment paper between the cutlets to prevent them from steaming each other. When you are ready to eat, avoid the microwave at all costs. Reheat them in a 375°F oven or air fryer on a wire rack until the crust sizzles again, which usually takes about 5 to 7 minutes.
Why does the breading fall off my chicken when I fry it?
This usually happens for two reasons: moisture or excess flour. If the chicken isn’t patted completely dry before dredging, the flour turns into a slick paste that slides off. Similarly, if you don’t shake off the excess flour, it creates a dusty barrier that prevents the egg from sticking to the meat. Always ensure a “fine dust” of flour and let the breaded chicken rest for 5 minutes before frying to help the layers bond together.
Can I use regular breadcrumbs instead of Panko?
You can use regular breadcrumbs, but the texture will be significantly different. Regular crumbs are smaller and denser, resulting in a sandy, compact crust rather than the light, “shatter-crisp” texture of Panko. If you must substitute, try to find “coarse” breadcrumbs. Keep in mind that regular crumbs brown much faster than Panko, so you may need to lower your oil temperature slightly to avoid burning the exterior before the chicken is cooked through.
What is the best oil for frying chicken cutlets?
The best oils are neutral-flavored ones with high smoke points, such as vegetable, canola, grapeseed, or peanut oil. These can handle the 350°F-360°F heat without smoking or imparting a heavy flavor to the meat. Avoid using butter or extra virgin olive oil for the main frying, as they have low smoke points and will burn, leaving bitter black specks on your beautiful golden crust.
How do I know the chicken is cooked through without a thermometer?
While a meat thermometer is the safest method (aim for 165°F), you can use visual cues. The chicken is usually done when the juices run clear rather than pink when pierced with a fork. Additionally, the meat will feel firm to the touch rather than squishy. Because these cutlets are pounded to a 1/2-inch thickness, they cook very quickly—usually 3 to 4 minutes per side is plenty of time over medium-high heat.
Can I make this recipe gluten-free?
Yes, you can easily adapt this for a gluten-free diet. Substitute the all-purpose flour with a 1:1 gluten-free flour blend or cornstarch. For the breading, use gluten-free Panko-style crumbs, which are widely available in most grocery stores. The technique remains exactly the same, though you should watch the browning closely as some gluten-free crumbs can color faster than wheat-based ones.
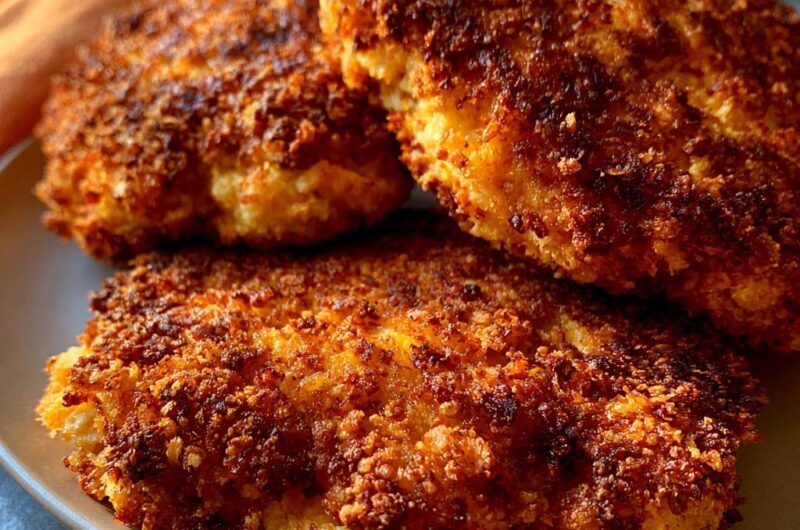
Golden Panko Chicken Cutlets
Course: Main CourseCuisine: AmericanDifficulty: easy4
servings15
minutes10
minutes25
Minutes410
kcalAmerican
Ingredients
4 boneless skinless chicken breasts, pounded to 1/2-inch thickness
1.5 cups Panko breadcrumbs
0.5 cup all-purpose flour
2 large eggs, beaten with 1 tablespoon of water
1 teaspoon garlic powder
1 teaspoon onion powder
0.5 teaspoon smoked paprika
1 teaspoon kosher salt (plus more for finishing)
0.5 teaspoon cracked black pepper
0.75 cup neutral oil (vegetable, canola, or grapeseed) for shallow frying
Directions
- Pat the chicken completely dry with paper towels. This is the critical first step to preventing the breading from sliding off. Season both sides of the meat generously with salt and pepper.
- Set up three shallow bowls. Place flour mixed with garlic powder, onion powder, and paprika in the first. Place the egg wash (eggs beaten with water) in the second. Place Panko breadcrumbs in the third.
- Dredge each piece of chicken in the flour, shaking off all excess until only a fine dust remains. Dip into the egg wash, ensuring no dry spots. Finally, place the chicken in the Panko and firmly press the crumbs into the meat with your palms. Flip and press again to create the thick, craggy texture shown in the image. Let the breaded cutlets rest on a plate for 5 minutes before frying to help the crust adhere.
- Heat the oil in a large heavy-bottomed skillet over medium-high heat. The oil should be about 1/4-inch deep. Heat until it reaches 350°F-360°F; a single breadcrumb dropped in should sizzle violently immediately.
- Carefully lay the chicken in the hot oil, working in batches to avoid crowding the pan (which drops the oil temperature and causes sogginess). Fry for 3 to 4 minutes per side. The crust should be a deep, dark golden brown. The chicken is done when it reaches 165°F (74°C) in the thickest part.
- To solve the soggy bottom problem, do not rest the chicken on a flat plate or paper towels. Immediately transfer the cutlets to a wire cooling rack set over a baking sheet. This allows air to circulate under the chicken, preventing steam from softening the bottom crust. Sprinkle with a pinch of salt while hot and serve immediately.
Notes
- To prevent sogginess, always rest the fried chicken on a wire cooling rack instead of paper towels to allow air circulation. Ensure oil is between 350 and 360 degrees Fahrenheit before frying.