
Most home cooks avoid making fish at home because they’re tired of the “soggy bottom” syndrome. You know the one: you spend time breading a beautiful fillet, only to have it emerge from the oven sitting in a sad pool of its own juices, the bottom crust turned into a mushy paste. It’s frustrating to lose that crunch you were craving.
The secret to restaurant-quality fish isn’t a fancy oven or a secret spice blend. It’s all about moisture management and airflow. By changing how the heat hits the fish, you can ensure every bite is as crisp as the last. This method transforms a standard weeknight dinner into a technical masterpiece that stays shatteringly crisp from top to bottom.
I’ve found that the real trick lies in the elevation. Using a wire rack isn’t just a suggestion; it’s the fundamental law of crispy fish. When you lift the cod off the baking sheet, you allow hot air to circulate 360 degrees, effectively “air-frying” the crust while the delicate white flakes stay buttery and moist inside.
The Physics of a Perfect Herb Crusted Baked Cod
Fish is naturally high in water content. When protein fibers in the cod heat up, they contract and squeeze out moisture. If your fillet is sitting flat on a metal pan, that moisture has nowhere to go. It gets trapped under the fish, creating a miniature steam chamber that destroys your breading.
This is where the “Anti-Soggy Bottom” philosophy comes into play. By using a wire rack set inside a rimmed baking sheet, we break the cycle of steaming. The air flows underneath, drying out the surface of the fish and crisping the bottom sear we’ve already established in the pan.
Furthermore, the initial sear in the skillet creates a structural base. This “pre-sets” the proteins on the bottom of the fillet. It acts as a barrier, preventing the protein-rich juices, known as albumin, from soaking into the Panko crumbs and turning them into dough during the roasting process.
Essential Components for the Herb Crust
The crust is the star of the show, so the ingredients need to be chosen with intention. Panko breadcrumbs are non-negotiable here. Unlike standard breadcrumbs, which are fine and sandy, Panko is flaky and jagged. These larger flakes create more surface area and tiny air pockets, which lead to a much louder crunch.
We also skip the traditional egg wash. While eggs are great for fried chicken, they can be too heavy for delicate cod. Instead, we use Dijon mustard. It acts as a powerful “glue” that grips the crumbs tightly. More importantly, the vinegar in the mustard provides a sharp acidity that cuts through the richness of the butter.
Quality butter is your best friend in this recipe. Since we are using unsalted butter, you have total control over the seasoning. When you mix the melted butter into the Panko, you’re essentially pre-toasting the crumbs, ensuring they turn a deep, nutty brown in the oven without burning the fish.
Selecting the Right Cod Fillets
When you’re at the seafood counter, look for thick-cut Atlantic cod loins rather than thin tail pieces. Atlantic cod is generally thicker and flakier than Pacific cod, making it more resilient to high-heat roasting. You want a fillet that is at least an inch thick so the crust can brown before the center overcooks.
Freshness is easy to spot if you know what to look for. The fish should be translucent and bright, never dull or milky. It should feel firm to the touch and, most importantly, it shouldn’t smell “fishy” at all. A fresh fillet should smell like nothing more than clean, salty ocean air.
The Herb and Spice Profile
Fresh thyme is the backbone of this flavor profile. It has a floral, earthy aroma that pairs beautifully with white fish. I prefer using fresh thyme for the fragrance, but I actually use dried parsley for the crust itself. Dried parsley holds its green color better under high heat, whereas fresh parsley can sometimes turn dark and bitter in a 425°F oven.
Paprika is our secret weapon for color. It doesn’t add much heat, but it provides a gorgeous sunset hue to the Panko. Without it, your crust might look pale even when the fish is done. Garlic and onion powders provide a savory depth that makes the crust taste complete and well-rounded.
Step-by-Step: Achieving the Shatter-Crisp Texture
Success with this dish comes down to three distinct phases. If you follow these steps, you’ll never have a soggy piece of fish again. It’s all about the transition from the stovetop to the oven.
Phase 1: Moisture Removal and Binding
The very first thing you must do is pat the cod fillets extremely dry. I mean bone-dry. Use multiple paper towels if you have to. If the surface is wet, the Dijon mustard will just slide right off, and the crust will never bond to the fish. Moisture is the absolute enemy of the Maillard reaction.
Once dry, brush on a thin, even layer of Dijon. You don’t want it gloopy; you just want enough to make the surface tacky. When you apply the herb-crumb mixture, don’t just sprinkle it on. Press it down firmly with the palm of your hand. You want to pack those crumbs into the mustard so they stay put during the sear.
Phase 2: The Bottom-Sear Technique
Heat your olive oil in an oven-safe skillet until it’s shimmering. You’ll know it’s ready when a single breadcrumb sizzles instantly upon contact. Carefully place the fillets in the pan. You are only searing the bottom side here. This creates a golden, crispy “floor” for the fish.
Don’t get impatient and try to move the fish too early. If you try to flip or slide it before the crust has set, the delicate flesh will tear. Let it sit for a full two minutes. This short sear develops flavor and provides the structural integrity needed for the next step.
Phase 3: The Elevated Convection Roast
Now, carefully move the fillets from the skillet to the wire rack on your baking sheet. Place them seared-side down. This might feel counterintuitive, but it allows the heat to finish the bottom while the top gets blasted by the oven’s convection. The 425°F heat will cause the butter in the crumbs to bubble and “fry” the topping.
For a similar bright flavor, try this lemon thyme baked cod next.
Watch for visual cues. The fish is done when the topping is deep golden brown and the thickest part of the cod feels firm but gives slightly when pressed. If you poke a fork into the side, the layers should separate into large, moist flakes. This usually takes about 10 to 12 minutes depending on the thickness.
Troubleshooting Common Baked Fish Failures
If your breading falls off, it’s usually because the mustard layer was too thick or the fish wasn’t dried properly. Think of the mustard as a thin coat of primer, not a thick layer of paint. Also, make sure you aren’t overcrowding the pan during the sear, which can cause the temperature to drop and the fish to stick.
Dry fish is almost always a result of overcooking. Cod is lean, so it doesn’t have much fat to protect it. If you have an instant-read thermometer, pull the fish out of the oven when it hits 140°F. The carryover heat will bring it to the perfect 145°F while it rests on the counter.
If the bottom is still wet despite using the rack, check your oven calibration. Many ovens run cool. You can also try moving the rack to the upper third of the oven. This puts the fish closer to the top heating element, which helps intensify the crunch on the herb crust.
Flavor Variations and Ingredient Swaps
You can easily adapt this recipe to fit your pantry. If you need a gluten-free option, crushed rice crackers or almond flour mixed with a little cornstarch work surprisingly well. The almond flour won’t be quite as crunchy as Panko, but it offers a lovely toasted nut flavor that complements the cod.
For a Mediterranean twist, swap the thyme for dried oregano and add a tablespoon of lemon zest directly into the breadcrumbs. You can even mix in some finely crumbled feta cheese. The cheese will melt slightly and create little salty pockets of flavor within the crust.
Side Dishes to Complement Herb Crusted Baked Cod
Since the fish has a significant crunch, you want sides that offer a textural contrast. A silky cauliflower purée or creamy mashed potatoes provide a soft landing for the crispy fillets. The smoothness of the purée makes the “shatter” of the Panko feel even more pronounced.
Bright, green vegetables are also a must. Blanched asparagus or sautéed green beans with a hint of garlic keep the meal feeling light. If you want a salad, go with something peppery like arugula. A simple lemon vinaigrette will echo the flavors in the fish without competing with them.
The Lemon-Butter Pan Sauce Finish
The final touch is a simple lemon-butter “silk” sauce. This isn’t a heavy gravy; it’s a light emulsion. By whisking the butter into the lemon juice over low heat, you create a glossy sauce that coats the back of a spoon. It adds a hit of moisture and fat right before serving.
Always pour the sauce around the base of the fish on the plate, never over the top. If you pour it over the crust, you’ll undo all that hard work you did to keep it crispy! Serving it at the base allows you to dip each forkful of flaky fish into the sauce while keeping the topping perfectly dry.
Expert Tips for Seafood Preparation
One of the best professional secrets is the “Finger Test.” Gently press the top of the fish; if the flakes begin to separate easily, it’s done. If it feels bouncy or rubbery, it needs another minute. Cod should feel like it wants to fall apart into large petals.
Don’t forget to let the fish rest for about two minutes before you plate it. This allows the internal juices to redistribute. If you cut into it the second it leaves the oven, all that moisture will run out onto the plate, and you’ll end up with a dry dinner.
When zesting your lemon for garnish or the sauce, be careful to only take the yellow skin. The white part underneath, called the pith, is incredibly bitter and can ruin the delicate flavor of the cod. A light touch with a microplane is all you need for that bright citrus punch.
Frequently Asked Questions
Can I use frozen cod for this recipe?
Yes, you can use frozen cod, but you must thaw it completely in the refrigerator first. Frozen fish tends to release much more water than fresh fish. To prevent a soggy crust, you should double-pat the fillets dry. Press down on them with paper towels to squeeze out any excess moisture that was trapped during the freezing process.
What other white fish works with this crust?
This method works beautifully with other firm white fish like Halibut, Haddock, or even Pollock. Halibut is a bit firmer and meatier, so it may require an extra minute or two of baking time. Haddock is very similar to cod but has a slightly sweeter flavor. Avoid very thin fillets like tilapia or sole, as they will overcook before the Panko gets crispy.
How do I store and reheat leftovers?
Store any leftovers in an airtight container in the fridge for up to two days. Whatever you do, do not use the microwave to reheat this fish! The microwave will turn the cod rubbery and the crust into mush. Instead, use a toaster oven or an air fryer at 350°F for about 5 minutes. This will re-crisp the Panko and gently warm the center.
Is there a substitute for Dijon mustard?
If you don’t have Dijon, a thin coating of mayonnaise is an excellent substitute. Mayonnaise is mostly oil and egg, so it helps the crust brown beautifully while keeping the fish moist. You could also use a honey-mustard blend if you prefer a bit of sweetness, though the traditional Dijon provides the best savory balance.
Why use unsalted butter instead of salted?
Using unsalted butter is a standard professional practice because it allows you to control the salt levels of the dish. Panko breadcrumbs often contain a small amount of sodium, and we season the fish directly with salt. Using salted butter can quickly make the dish too salty. By using unsalted, you ensure the delicate flavor of the cod remains the star.
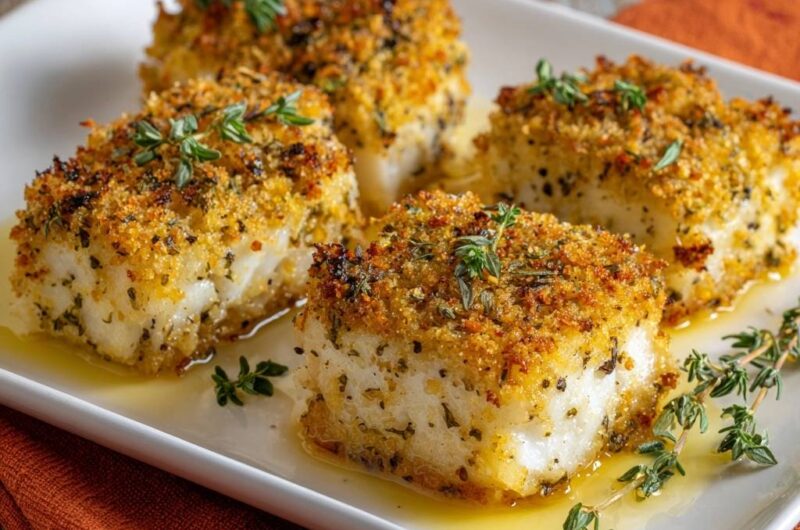
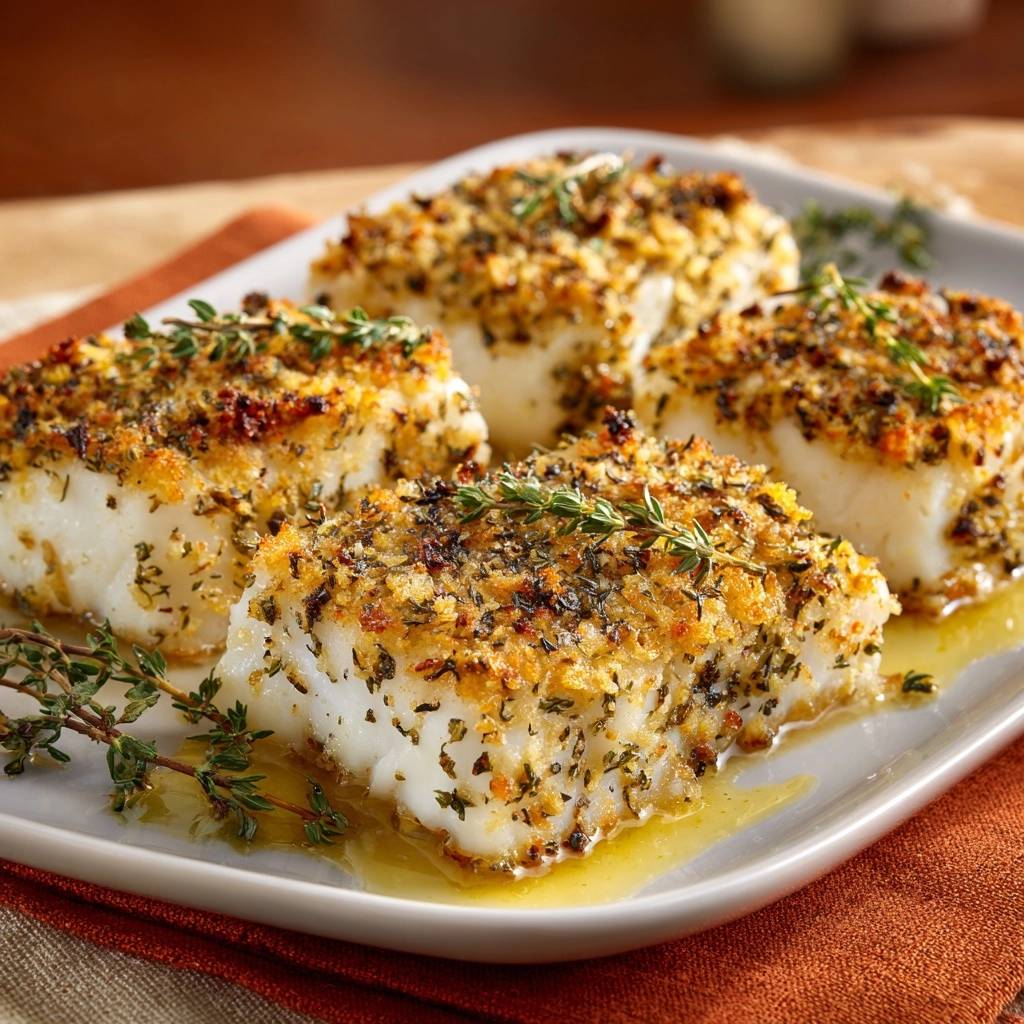
Herb Crusted Baked Cod
Course: Main CourseCuisine: AmericanDifficulty: easy4
servings10
minutes12
minutes310
kcal22
MinutesA high-heat baking method that ensures a shatteringly crisp Panko and herb crust while keeping the cod buttery and flakey, finished with a bright lemon-butter sauce.
Ingredients
4 thick-cut cod fillets (about 6 ounces each)
1 cup Panko breadcrumbs
2 tablespoons fresh thyme, finely chopped (plus extra sprigs for garnish)
1 tablespoon dried parsley
1 teaspoon garlic powder
1/2 teaspoon onion powder
1/2 teaspoon paprika
6 tablespoons unsalted butter (4 melted for crumbs, 2 for the pan)
2 tablespoons olive oil
1/4 cup Dijon mustard (to act as a binder)
Salt and black pepper to taste
1/2 lemon, juiced
Directions
- Preheat your oven to 425°F. Place a wire cooling rack inside a large rimmed baking sheet. This is the secret to the Anti-Soggy Bottom: airflow must circulate under the fish so the bottom crust crisps instead of steaming.
- Pat the cod fillets extremely dry with paper towels. Any surface moisture will ruin the crust. Season all sides with salt and pepper.
- In a small bowl, combine the Panko, thyme, parsley, garlic powder, onion powder, and paprika. Stir in 4 tablespoons of the melted butter until the crumbs are evenly moistened and golden.
- Lightly brush the top and sides of each fillet with a thin layer of Dijon mustard. This ensures the heavy herb crust adheres to the fish during the high-heat roast.
- Press a generous amount of the herb-crumb mixture onto the top and sides of each fillet, packing it down firmly.
- Heat the olive oil in a large oven-safe skillet over medium-high heat. Once the oil is shimmering, sear only the bottom of the cod fillets for 2 minutes without moving them. This creates a pre-set golden base.
- Carefully transfer the fillets from the pan and place them seared-side down onto the wire rack on your baking sheet.
- Bake for 10 to 12 minutes, or until the topping is deep golden brown and the fish flakes easily with a fork.
- While the fish bakes, wipe out the skillet used for searing. Melt the remaining 2 tablespoons of butter over low heat and whisk in the lemon juice to create a light silk sauce.
- Plate the fish and pour the lemon-butter sauce around the base of the fillets. Garnish with fresh thyme sprigs and serve immediately.
Notes
- The secret to the Anti-Soggy Bottom is using a wire cooling rack inside the baking sheet to allow airflow to circulate under the fish.