You know that disappointing moment when you reach for a roasted vegetable and it limply collapses under your fork? We’ve all been there. Most oven-roasted side dishes end up as a pile of water-logged mush because the moisture has nowhere to go, turning your dinner into a soggy mess.
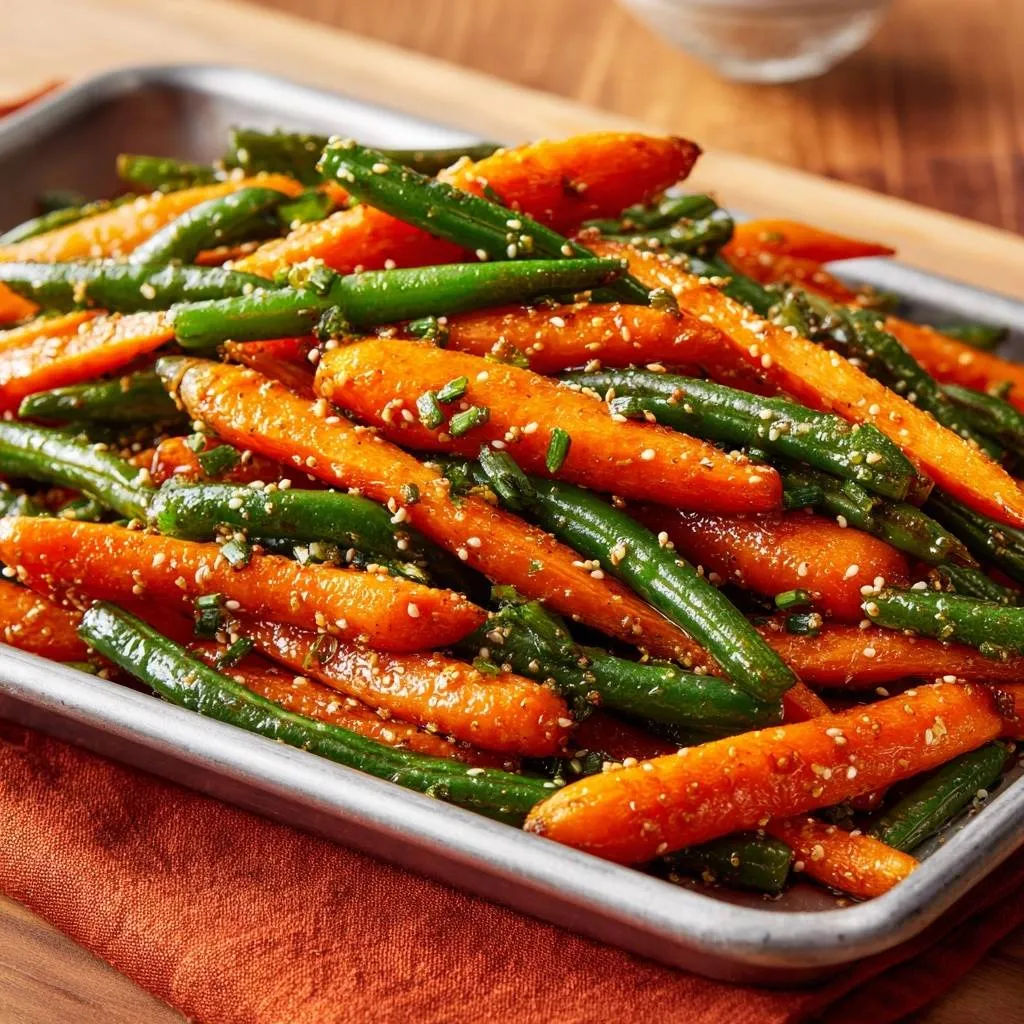
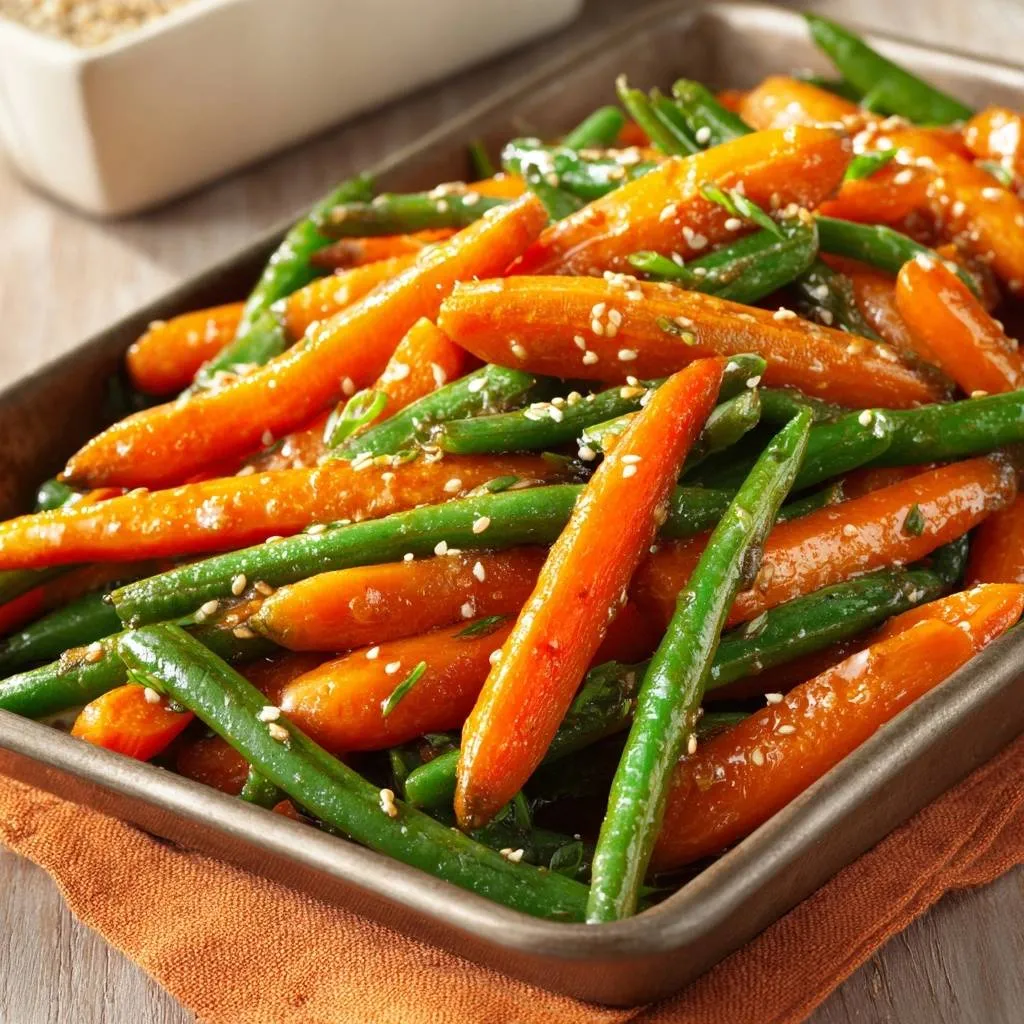
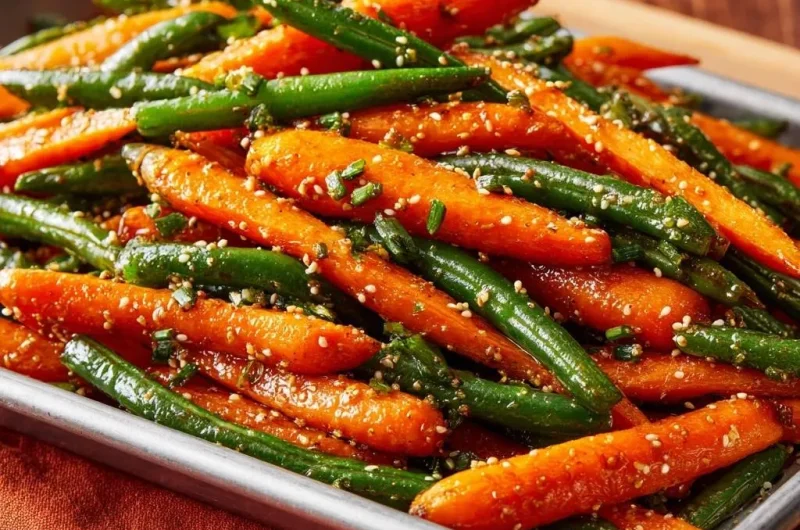
The secret to these Honey Glazed Roasted Carrots and Green Beans is all about the snap. By using a high-heat method and a specific glazing timeline, you get carrots that are tender-crisp and green beans that retain their vibrant, garden-fresh crunch. It’s a total game-changer for your weeknight rotation.
I’ve found that the real trick lies in the timing of the sugar. If you toss your veggies in honey before they hit the oven, they’ll burn and release water simultaneously. Instead, we wait until the very end to apply the glaze, creating a tacky, lacquer-like finish that clings to the vegetables without making them soft.
You can achieve a similar roasted sweetness in cheesy roasted butternut squash by following a similar preparation method.
The Science of Preventing Soggy Roasted Vegetables
Roasting is essentially a battle against moisture. When vegetables heat up, their cell walls break down and release water. If the oven temperature is too low, that water sits on the surface and steams the food rather than evaporating. This is why we crank the heat to 425°F.
At this “magic number,” the Maillard reaction occurs rapidly. This chemical reaction between amino acids and reducing sugars creates that beautiful browning and deep flavor we crave. However, if you crowd the pan, you create a micro-climate of steam that prevents this reaction. You need air circulation to ensure every bean and carrot stays snappy.
Thermal Mass: Why Preheating the Baking Sheet Matters
Think of your baking sheet as a searing tool. By sliding an empty rimmed baking sheet into the oven while it preheats, you’re building up thermal mass. When those oiled vegetables finally hit the hot metal, you’ll hear a satisfying sizzle.
This immediate contact heat sears the bottom surface of the vegetables instantly. It locks the internal moisture inside the vegetable’s structure while the dry oven air crisps the outside. If you start with a cold pan, the vegetables slowly warm up and leak juices, leading to that dreaded limp texture.
Essential Components for Honey Glazed Roasted Carrots and Green Beans
Quality ingredients are the backbone of this dish. I always recommend using whole baby carrots with the tops trimmed rather than the “baby-cut” bagged versions. Real baby carrots have a more concentrated, earthy sweetness and a better structural integrity for high-heat roasting.
Fresh green beans are absolutely non-negotiable here. Frozen or canned beans have already had their cell walls compromised by ice crystals or processing, meaning they will never achieve that signature snap. Look for beans that feel firm and break with a sharp “pop” when bent.
Olive oil acts as your primary heat conductor. It coats the vegetables, ensuring the heat from the oven is distributed evenly across the surface. Don’t be tempted to skimp on the oil; it’s what prevents the garlic powder and pepper from burning before the glaze is added.
The Glaze Chemistry: Honey and Soy Sauce Synergy
Honey is a complex ingredient with a high glucose content, which makes it prone to burning if exposed to high heat for too long. By whisking it with soy sauce, you’re introducing salt and umami. This balance is crucial because it cuts through the cloying sweetness of the honey.
The soy sauce also provides a bit of liquid that helps the honey spread evenly. When this mixture hits the hot vegetables in the final five minutes of cooking, the water in the soy sauce evaporates quickly. This leaves behind a thick, concentrated syrup that acts like a savory candy coating.
Aromatic Additions: Garlic, Sesame, and Chives
Garlic powder is used during the initial roast because fresh minced garlic would likely burn at 425°F. The powder infuses the oil and permeates the vegetables with a savory base note. It’s the foundation that the sweeter glaze sits upon.
Toasted sesame seeds provide a fatty, nutty crunch that contrasts beautifully with the tacky glaze. Finally, the fresh chives are added at the very end. Their mild, onion-like bite provides a necessary hit of sulfur to cut through the richness of the honey and oil.
Phase One: Preparing and Seasoning for High Heat
Start by trimming your green beans. You can line them up and slice the stem ends off with a chef’s knife, or use the “snap” method if you find it therapeutic. For the carrots, a light peel is usually best to remove any bitter skin, leaving them smooth and ready to absorb the oil.
The most important rule in this phase is the “Dry-First” rule. If your vegetables are damp from washing, the oil won’t stick, and they will steam in the oven. Pat them bone-dry with a clean kitchen towel before tossing them in a large bowl with the olive oil, salt, pepper, and garlic powder.
Toss them thoroughly. You want every single millimeter of the vegetables to have a thin, glistening coat of oil. This ensures that the seasoning stays put and the heat transfers efficiently once they hit that preheated baking sheet.
Phase Two: The Initial Sear and Moisture Evaporation
Carefully pull the hot baking sheet from the oven and dump the vegetables onto it. Use tongs to spread them out into a single layer immediately. If you hear that sizzle, you’re doing it right! Make sure there is at least a half-inch of space between the pieces.
Roast them for 12 to 15 minutes. During this time, you’ll notice the green beans starting to blister and the carrots becoming slightly flexible. This is the moisture evaporation phase. We are cooking the vegetables through before we introduce the sugars that could potentially burn.
Keep an eye on the color. You’re looking for the beans to turn a deep, charred green and the carrots to show small brown spots. This is the sign that the natural sugars in the vegetables are caramelizing and the texture is setting.
Phase Three: Applying the Tacky Honey Reduction
Once the vegetables are nearly done, whisk your honey and soy sauce together. Pull the tray out and drizzle the mixture over the hot vegetables. Use your tongs to toss everything quickly, ensuring the glaze gets into every nook and cranny.
Return the tray to the oven for exactly five more minutes. This is the “5-Minute Finish.” The high heat will cause the honey mixture to bubble and reduce rapidly. It transforms from a thin liquid into a thick, lacquer-like coating that clings to the vegetables.
When you pull them out for the final time, the glaze should look shiny and feel slightly tacky. Immediately sprinkle on the toasted sesame seeds and chopped chives. The residual heat will wake up the aroma of the chives without wilting them into nothingness.
Troubleshooting Common Roasting Errors
If your carrots are still hard but your green beans are starting to look dark, your carrots might be too thick. Next time, slice larger carrots in half lengthwise so they cook at the same rate as the beans. Consistency in size is the key to even roasting.
Is your glaze looking a bit too thin? It likely needs another minute or two in the oven to reduce. Conversely, if the glaze looks like it’s burning or turning black, your oven’s heating element might be too close to the tray. Move the rack to the center position for a more even heat distribution.
If the vegetables look dull rather than shiny, you might have used too little honey or too much oil. The ratio is important for that “lacquered” look. A perfectly roasted batch should be bright, glossy, and hold its shape when lifted from the tray.
Flavor Variations and Ingredient Swaps
If you don’t have honey on hand, maple syrup is a fantastic alternative. It offers a deeper, woodsy sweetness that pairs exceptionally well with carrots. For those avoiding soy, coconut aminos work perfectly as a 1:1 replacement for the soy sauce, offering a similar salty-umami profile.
You can also play with the spice levels. A pinch of red pepper flakes added to the glaze provides a “hot honey” vibe that is incredible with the earthy carrots. If you want more depth, a dusting of smoked paprika during the initial seasoning phase adds a wonderful campfire aroma.
Seasonal Adjustments: Working with Thicker Winter Carrots
During the winter months, baby carrots can be harder to find. If you’re using large, mature carrots, use a “roll cut” or “diagonal cut” to create more surface area. This exposes more of the interior to the heat, helping them cook faster and catch more of that delicious glaze.
Older carrots also tend to have more starch and less moisture than young ones. You might find they need an extra 3-4 minutes during the initial roasting phase. Just keep testing them with a fork; you want them to be tender but still offer a bit of resistance.
Strategic Pairings for a Balanced Meal
This side dish is quite bold, so it pairs best with proteins that are savory and relatively simple. A roasted chicken with lemon and herbs is a classic choice, as the acidity of the lemon cuts through the sweetness of the honey glaze. It’s also a stellar companion for seared salmon or white fish.
For a complete meal on one pan, check out this sheet pan blackened salmon.
If you’re looking for a vegetarian option, serve these over a bed of fluffy quinoa or farro. The extra glaze from the pan will soak into the grains, making the whole bowl feel cohesive. The crunch of the vegetables provides a great textural contrast to soft, nutty grains.
Round Out Your Meal
Complement your roasted carrots and green beans with these dishes.
- For a different take on vegetables, consider these sesame chicken meatballs with zucchini noodles, offering a light yet flavorful pairing.
- If you enjoy hearty flavors, try the glazed beef tips and mashed potatoes for a satisfying contrast.
Make-Ahead Logistics and Storage Realities
I’ll be honest with you: these are best served immediately. The “snappy” texture is at its peak the moment they come out of the oven. As they sit, the salt in the glaze will eventually draw out more moisture, and they will lose that crispness over time.
However, if you have leftovers, don’t toss them! Store them in an airtight container in the fridge for up to three days. To reheat, avoid the microwave at all costs—it will turn them into mush. Instead, toss them back onto a baking sheet or into an air fryer at 350°F for a few minutes to wake up the glaze and restore some of the texture.
Expert Tips for Professional Presentation
For a professional look, use a wide, white platter. The neutral background makes the bright orange of the carrots and the deep green of the beans really pop. Instead of just dumping them on the plate, try to stack them slightly to create height, which always looks more appetizing.
Timing your garnish is the final “chef’s touch.” Wait until the very last second to add the chives. If they sit on the hot vegetables for too long, they turn a dull olive color. Adding them right before the plate hits the table ensures they stay bright green and fragrant.
Frequently Asked Questions
Can I use frozen green beans for this recipe?
It is not recommended. Frozen green beans have been blanched and frozen, which breaks down the cell walls. When they thaw and roast, they release a significant amount of water, making it impossible to get that “snappy” texture. Stick to fresh beans for the best results.
Why is my honey glaze smoking in the oven?
Honey has a low burn point. If your glaze is smoking, your oven rack might be too high, or you may have left the vegetables in for longer than the recommended 5-minute glazing window. Ensure the tray is in the middle of the oven and keep a close eye on it during the final minutes.
Do I really have to peel the carrots?
While you don’t strictly have to, peeling removes the outer layer which can sometimes be bitter or tough after roasting. Peeling also creates a perfectly smooth surface that allows the honey glaze to coat the carrot more evenly, resulting in a much better mouthfeel and appearance.
Can I add other vegetables like broccoli to the mix?
You can, but be careful with cook times. Broccoli florets cook much faster than carrots and have a lot of surface area that can burn easily. If you want to add broccoli, add it halfway through the initial roasting phase so it doesn’t turn to charcoal before the carrots are tender.
How do I scale this recipe for a large holiday crowd?
The biggest danger when scaling up is overcrowding the pan. If you double the recipe, use two separate baking sheets. Rotate their positions in the oven halfway through the cooking time to ensure even browning. Never try to cram two pounds of veggies onto one standard tray, or they will steam.
What if I don’t have garlic powder?
You can omit it, but don’t swap it for fresh minced garlic at the start of the roast, as it will burn and taste bitter. If you only have fresh garlic, mince it very finely and mix it into the honey and soy sauce glaze instead. This way, it only cooks for the final five minutes, which is just enough time to mellow the flavor without burning.
Honey Glazed Roasted Carrots and Green Beans
Course: Side DishCuisine: AmericanDifficulty: easy4
servings10
minutes20
minutes145
kcal30
MinutesA vibrant vegetable side dish featuring tender-crisp carrots and snappy green beans tossed in a sweet and savory honey-soy glaze, finished with toasted sesame seeds and fresh chives.
Ingredients
1 pound whole baby carrots, peeled
1 pound fresh green beans, trimmed
2 tablespoons olive oil
3 tablespoons honey
1 tablespoon soy sauce
1 teaspoon garlic powder
1/2 teaspoon salt
1/4 teaspoon black pepper
1 tablespoon toasted sesame seeds
2 tablespoons fresh chives, chopped
Directions
- Preheat your oven to 425 degrees F. This high temperature is crucial for immediate moisture evaporation to prevent sogginess.
- Place a large rimmed baking sheet in the oven while it preheats. Getting the metal hot before the food touches it is the secret to an instant sear.
- In a large bowl, toss the carrots and green beans with olive oil, salt, pepper, and garlic powder. Do not add the honey or soy sauce yet. Adding sugar-based glazes at the start causes burning and creates a watery mess.
- Carefully spread the vegetables onto the preheated hot baking sheet in a single layer. Ensure there is space between the pieces. If they are touching, they will steam.
- Roast for 12 to 15 minutes until the carrots are just starting to soften.
- While the vegetables roast, whisk together the honey and soy sauce in a small bowl.
- Remove the tray from the oven and drizzle the honey mixture over the vegetables. Toss quickly with tongs to coat every piece.
- Return to the oven for 5 more minutes. This short window allows the glaze to reduce into a thick syrup that clings to the vegetables without making them limp.
- Remove from the oven and immediately garnish with toasted sesame seeds and fresh chives for a pop of texture and brightness. Serve right away while the glaze is tacky and the vegetables are crisp.
Notes
- The secret to preventing sogginess is preheating the baking sheet and adding the honey-soy glaze only during the last 5 minutes of roasting to ensure a tacky, caramelized coating.