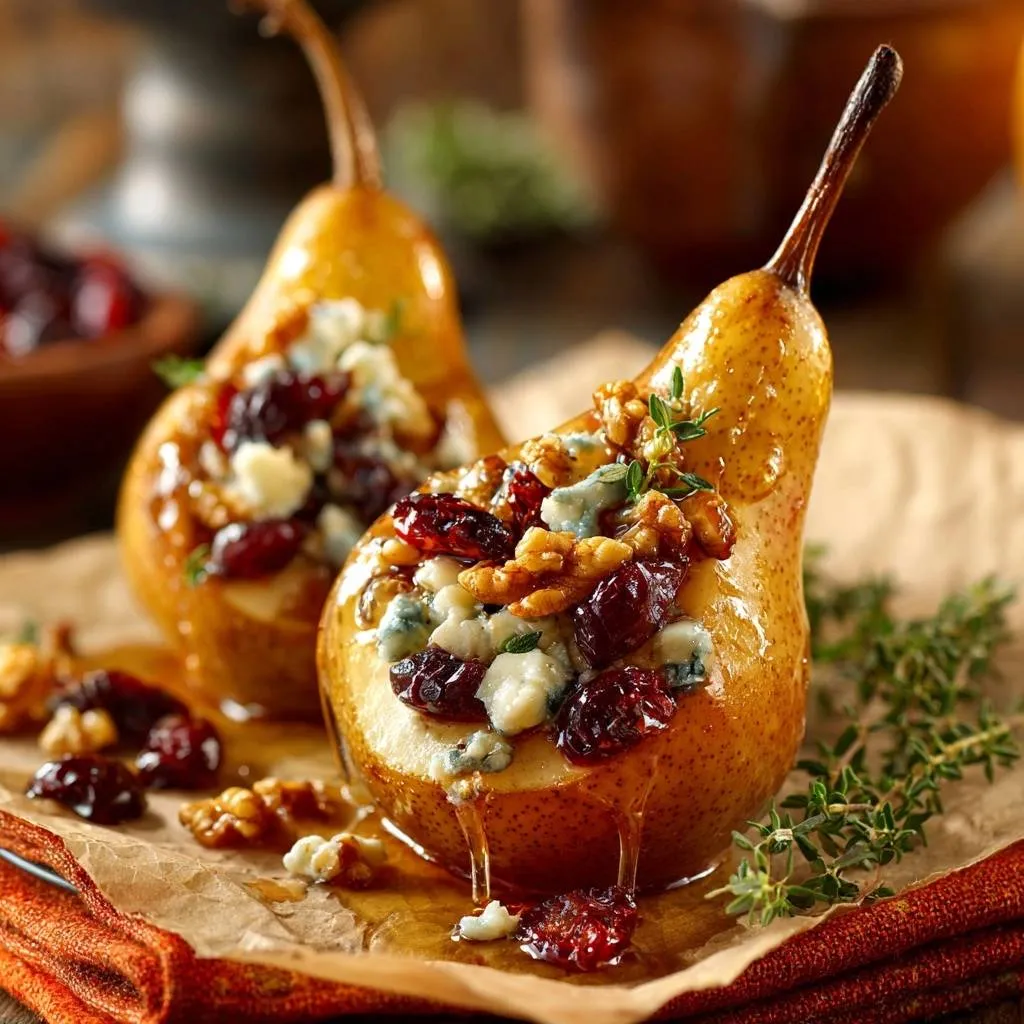
Imagine the first bite of a warm, roasted pear where the fruit remains firm to the tooth while a molten center of tangy blue cheese and sweet honey floods your palate. It’s a sophisticated balance of textures that most home cooks struggle to achieve, often ending up with a sad, watery puddle on the plate.
The frustration of mushy baked fruit is real, but it’s entirely avoidable with the right approach. By focusing on a specific “Anti-Soggy Bottom” philosophy, you can transform a simple piece of produce into a restaurant-quality masterpiece. We’re moving away from low-and-slow baking and embracing a technique that prioritizes structural integrity and flavor concentration.
The secret to this success lies in the “pre-roast” method. By roasting the pear halves alone at a high temperature before adding the heavy toppings, you allow surface moisture to evaporate and the natural sugars to seal the fruit. This creates a sturdy vessel that holds its shape even under a generous mountain of walnuts and cheese.
Selecting the Best Fruit for Honey Roasted Stuffed Pears
When you’re standing in the produce aisle, the variety of pear you choose dictates the success of your dish. For this recipe, Bosc pears are the non-negotiable gold standard. Their dense, wood-like flesh and lower water content allow them to withstand the intense 400-degree heat of the oven without collapsing into sauce.
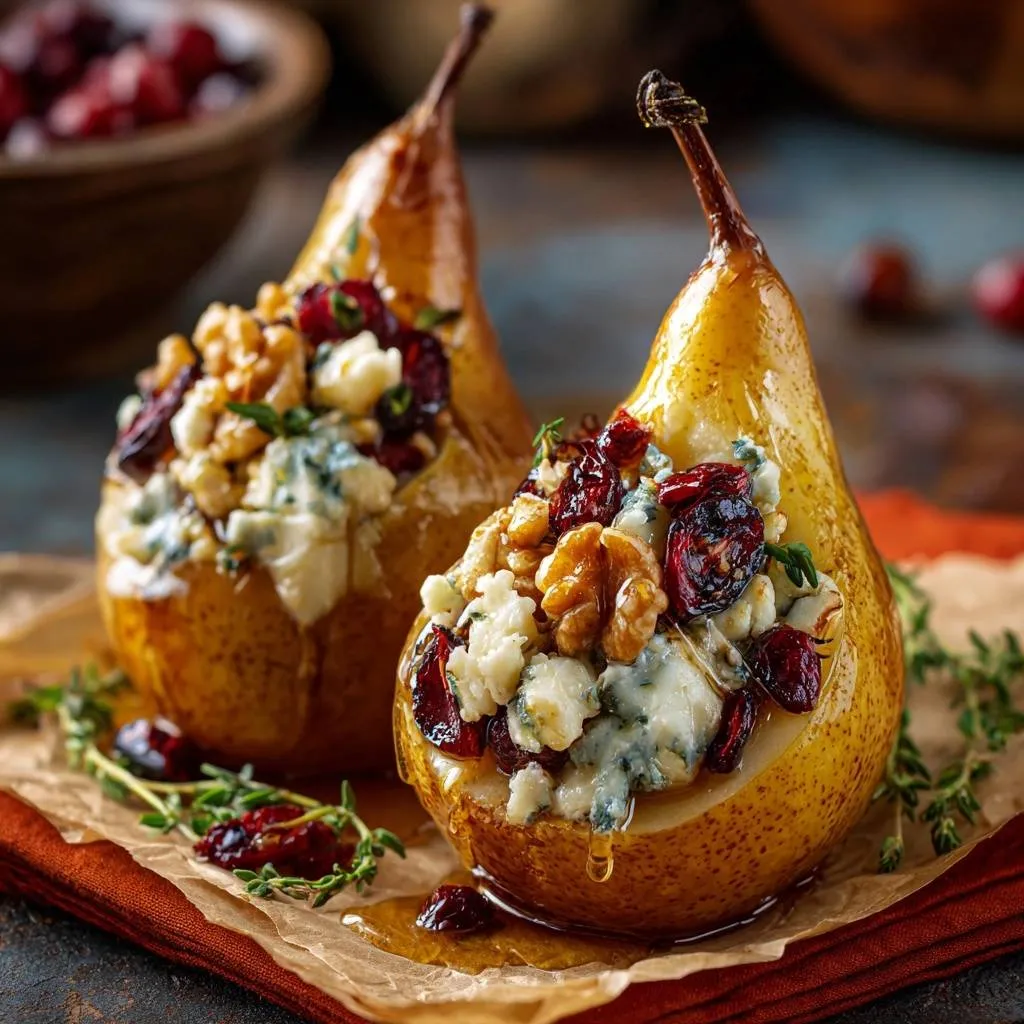
In contrast, varieties like Bartlett or Anjou are lovely for eating raw, but they tend to turn grainy or disintegrate when baked. Bosc pears also feature a beautiful cinnamon-colored skin that becomes incredibly fragrant and slightly crisp when roasted. They provide that elegant, elongated silhouette that looks stunning on a serving platter.
To check for ripeness, use the “check the neck” method. Gently press your thumb near the stem end; it should give just a little bit under pressure. If the body of the pear is soft, it’s overripe and will likely become too mushy in the oven. You want a fruit that feels heavy for its size and firm to the touch.
Essential Components for the Honey and Blue Cheese Filling
The filling is a study in contrast, pitting the sharp, salty bite of cheese against the tart chew of dried cranberries. Gorgonzola is a fantastic choice if you want a creamier, milder funk that melts into a silky consistency. However, if you prefer a bolder, more crumbly texture that holds its own against the honey, a high-quality Stilton is the way to go.
Lemon juice plays a silent but vital role in this assembly. Beyond adding a necessary hit of acidity to cut through the fat, it prevents enzymatic browning. Brushing the pears with lemon juice immediately after slicing ensures they maintain a bright, appetizing appearance rather than turning a dull, muddy brown during the prep phase.
Fresh thyme is another essential element that shouldn’t be swapped for the dried version. The high heat of the oven can make dried herbs taste dusty or bitter. Fresh thyme leaves, however, release their essential oils as they roast, perfuming the honey and the fruit with a subtle, earthy aroma that balances the sweetness perfectly.
If you enjoy experimenting with herbs, you might also appreciate the flavor combinations in a peanut butter berry crumble pie.
The Role of High-Quality Honey and Fats
The honey you choose acts as the glue and the glaze for this entire dish. A mild Clover honey is a safe bet, but a Wildflower honey adds complex floral notes that elevate the pears. Avoid overly processed honeys; you want something with a thick, viscous pour that will caramelize rather than just run off the fruit.
Using unsalted butter is a deliberate choice here. Blue cheese is naturally very high in sodium, and using salted butter can easily push the dish into “too salty” territory. The melted butter helps the honey spread evenly and creates a glossy, professional sheen on the pear’s skin that looks incredible under dining room lights.
The Science of Preventing Soggy Roasted Pears
To understand why pears often fail in the oven, we have to look at cellular breakdown. Fruit is mostly water held together by pectin and cellulose. When heat is applied, those cell walls weaken and release moisture. If you stuff a raw pear and bake it, that trapped moisture has nowhere to go, resulting in a soggy, steamed texture.
The 15-minute pre-roast is your insurance policy. By placing the pears cut-side up in a hot oven without any filling, you’re essentially “searing” the fruit. The high heat causes the moisture on the surface to evaporate rapidly, creating a slightly dehydrated, firmer top layer. This layer acts as a barrier, protecting the interior fibers from the weight of the cheese and nuts.
This initial blast of heat also kickstarts the Maillard reaction. You’ll notice the edges of the pear starting to turn a deep golden brown. This isn’t just for looks; it’s the development of complex, toasted flavors that you simply can’t get from a shorter baking time. Once that structure is set, the pear is ready to handle the moisture from the melting cheese.
Step-by-Step: Preparing and Coring for Stability
Preparation starts with a steady hand and a sharp knife. When you slice the pears in half, try to cut right through the center of the stem. Keeping the stem attached is a classic chef’s trick that makes the final plate look like it came out of a professional kitchen. It adds a rustic, organic touch that’s hard to beat.
For a similar texture, try these strawberry cheesecake bars.
Stability is the next priority. Pears are naturally rounded, which makes them prone to rolling around on the baking sheet. To fix this, flip the pear half over and slice a tiny, thin sliver off the rounded back. This creates a flat “kickstand” that keeps the pear perfectly level, ensuring your filling stays inside the well instead of sliding into the pan.
For the core, put down the spoon and reach for a melon baller. This tool allows you to carve out a perfectly circular, deep well without jagged edges. You want to remove the seeds and the tough fibers, creating enough space for a generous amount of stuffing while leaving enough fruit wall to maintain the pear’s shape.
Executing the High-Heat Roasting Process
Preheating your oven to a true 400 degrees Fahrenheit is non-negotiable. If the oven is too cool, the pear will sit and stew in its own juices before the exterior has a chance to brown. You want to hear a very faint sizzle when the butter-brushed fruit hits the hot air. This temperature ensures the skin crisps up while the inside becomes tender.
During the first 15 minutes, keep an eye on the color. You’re looking for the flesh to transition from a solid white to a slightly translucent, creamy yellow. The very tips of the pear should show the first signs of browning. This is the signal that the fruit has softened enough to be palatable but is still structurally sound enough for the second phase.
Using parchment paper is a mandatory step here. As the honey and natural fruit sugars bubble over, they will turn into a sticky caramel. Without parchment, your pears will likely glue themselves to the metal tray, causing the beautiful skin to tear when you try to lift them. Parchment ensures a clean release and an easy cleanup.
Assembling the Walnut and Cranberry Stuffing
Once the pears have had their head start, it’s time for the assembly. Mixing the walnuts, cranberries, and blue cheese in a separate bowl before adding them to the pear ensures every bite has a bit of everything. Don’t be shy with the filling; pile it high into the wells you’ve created.
We add the nuts and cheese during the final 5 to 8 minutes of roasting for a very specific reason. Walnuts have a high oil content and can go from perfectly toasted to burnt and bitter in a matter of seconds. By adding them late, you get a satisfying crunch without the scorched flavor. Similarly, the blue cheese only needs a few minutes to soften into a luscious, gooey state.
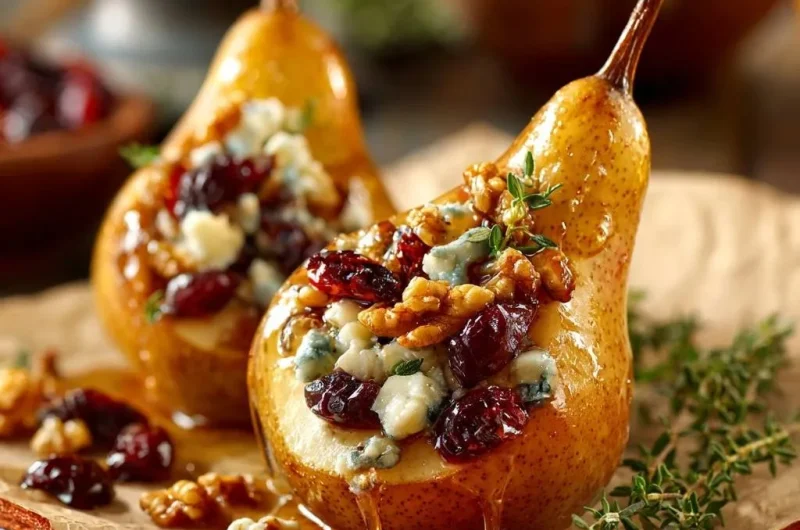
As you fill the pears, let some of the mixture spill over the edges. This “overflow” technique creates a more abundant, appetizing look. The honey drizzle at this stage acts as a glaze that binds the nuts and fruit together, creating a beautiful, jewel-like topping that sparkles under the oven light.
Flavor Variations and Ingredient Substitutions
While the walnut and blue cheese combo is a classic, this recipe is a versatile canvas. If you find blue cheese too pungent, goat cheese is a spectacular alternative. It offers a creamy, tart profile that pairs beautifully with honey. Feta can also work if you want a saltier, more Mediterranean vibe, though it won’t melt as much as other cheeses.
For the crunch factor, pecans are a natural substitute for walnuts, offering a slightly sweeter, more buttery flavor. If you’re dealing with a nut allergy, toasted pumpkin seeds (pepitas) provide a great textural contrast. For the fruit, dried figs or chopped dates can replace cranberries for a deeper, more jammy sweetness.
You can also play with the herb profile. If thyme isn’t your favorite, fresh rosemary adds a piney, sophisticated depth that stands up well to the honey. Just be sure to chop rosemary finely, as the needles can be quite tough. A tiny pinch of flaky sea salt over the finished pears can also help pop all these different flavors.
Pairing Suggestions for Honey Roasted Stuffed Pears
These pears are incredibly versatile and can bridge the gap between a savory appetizer and a light dessert. If you’re serving them as a starter, they pair beautifully with a glass of sparkling apple cider. The bubbles and crisp acidity of the cider cut through the richness of the blue cheese and the sweetness of the honey.
What to Serve Alongside Your Stuffed Pears
To round out your meal, consider these complementary dishes that share bright flavors and satisfying textures.
- For a refreshing contrast, pair your honey roasted stuffed pears with a vibrant Apple Cranberry Pecan Blue Cheese Salad, featuring crisp apples that echo the sweet fruitiness of the pears.
- Another choice that complements the sweetness of the pears is the Sweet Potato Kale Cranberry Chicken Roulade, offering a savory main to balance the dessert-like quality of the pears.
For a more substantial meal, these pears make an excellent side dish for roasted poultry. The sweetness of the fruit complements the savory skin of a roasted chicken or turkey perfectly. If you’re serving them as a standalone autumn appetizer, consider placing them on a bed of wild arugula tossed in a light lemon vinaigrette to add a peppery bite to the plate.
Troubleshooting Common Roasting Issues
Even with the best intentions, things can go sideways in the kitchen. If your pears are still quite hard after the initial 15 minutes, don’t panic. Pears vary in ripeness and density; simply extend the pre-roast by 5 minutes. It’s better to wait for that slight translucency than to end up with a crunchy, undercooked fruit.
On the flip side, if you notice the honey starting to smoke or smell like it’s burning, your oven rack might be too high. Move the baking sheet to a lower rack position. The sugars in honey have a low smoke point, so they need heat but not direct contact with the heating elements. Always keep an eye on the oven during those final minutes.
If you forgot the parchment paper and the pears are stuck, let them cool for just a minute, then use a thin metal spatula to gently pry them up. Don’t wait until they are completely cold, or the sugar will harden like concrete. A little bit of warmth keeps the caramel pliable enough to move.
Managing Texture in Overripe Fruit
If you find yourself with pears that are already quite soft and ripe, you need to pivot your strategy. Reduce the initial roast time to 8 or 10 minutes. You want to give them just enough heat to start the evaporation process without letting the internal structure collapse entirely.
You can also increase the oven temperature to 425 degrees F for a “flash-caramelization.” This shorter, hotter burst of heat will brown the outside quickly before the inside has a chance to turn to mush. It’s a bit of a balancing act, but it’s the best way to rescue fruit that’s a day or two past its prime.
Expert Tips for Plating and Presentation
The difference between a home-cooked meal and a “wow” moment is often in the final sixty seconds. Once the pears come out of the oven, they will have absorbed some of the honey. For that glossy, magazine-ready look, give them one final, thin drizzle of fresh honey while they are still steaming hot.
The residual heat will thin the honey out, allowing it to coat the nuts and fruit in a shimmering layer. Add a few fresh sprigs of thyme on top of the melted cheese. The heat will hit the fresh herbs and release a final burst of aroma just as you set the plate down in front of your guests. Serve them immediately while the contrast between the cool plate and the warm, gooey center is at its peak.
How should I store leftover stuffed pears?
Store any leftovers in an airtight container in the refrigerator for up to two days. Keep in mind that the walnuts will lose their crunch as they sit in the moisture of the pear and cheese. To reheat, place them in a toaster oven or a 350-degree oven for about 10 minutes until warmed through; avoid the microwave, as it will make the pear rubbery and the cheese oily.
Why did my pears turn out watery despite the pre-roast?
This usually happens if the pears were overripe or if the oven wasn’t fully preheated. Overripe pears have already begun to break down their cellular structure, releasing water much faster. Additionally, if the oven isn’t hot enough (400°F), the pear steams in its own juice rather than roasting. Always ensure your oven thermometer confirms the temperature before the pears go in.
Can I use a different cheese if I don’t like blue cheese?
Absolutely. While blue cheese provides a classic savory-sweet contrast, goat cheese (chevre) is a popular and delicious substitute that offers a creamy texture and mild tang. You could also use Brie or Camembert for a very rich, buttery result. If you want something firmer, a few shavings of aged Manchego or Sharp White Cheddar can also work beautifully.
Can I make these ahead of time for a dinner party?
You can prep the pears by slicing and coring them up to 4 hours in advance, provided you brush them thoroughly with lemon juice and keep them tightly wrapped in the fridge. You can also mix the stuffing beforehand. However, for the best texture, the actual roasting should happen right before serving. The contrast of the warm fruit and melted cheese is the highlight of the dish.
What if I can’t find Bosc pears?
If Bosc pears aren’t available, the next best option is the Anjou pear (either red or green). They are relatively firm and hold their shape better than Bartletts. If you must use a softer variety, cut the roasting time down by several minutes and keep a close eye on them to ensure they don’t collapse. Avoid Asian pears for this specific recipe, as their texture is more like an apple and won’t soften in the same luscious way.
Is there a way to make this nut-free?
Yes, you can easily swap the walnuts for toasted pepitas (pumpkin seeds) or sunflower seeds to maintain that essential crunch. Another great nut-free option is to use granola or even crushed gingersnap cookies for a more dessert-focused version of the dish. Just be sure to add these during the last few minutes of roasting so they don’t burn.
Stuffed Pears
Course: Appetizer or DessertCuisine: AmericanDifficulty: easy4
servings10
minutes25
minutes240
kcal35
MinutesA sophisticated dish featuring Bosc pears roasted at high heat to prevent sogginess, then stuffed with a savory-sweet blend of blue cheese, walnuts, and dried cranberries, finished with fresh thyme and honey.
Ingredients
2 large Bosc pears (firm but ripe, with stems intact)
1/4 cup crumbled blue cheese (Gorgonzola or Stilton)
1/4 cup dried cranberries
1/4 cup walnut halves
3 tablespoons honey (plus extra for drizzling)
1 tablespoon unsalted butter, melted
1 teaspoon fresh thyme leaves (plus sprigs for garnish)
1 tablespoon lemon juice
Directions
- Preheat your oven to 400 degrees F. This high heat is crucial to caramelize the exterior quickly before the interior fibers break down into mush.
- Slice the pears in half lengthwise, cutting directly through the stem if possible to maintain the visual aesthetic shown in the image. Use a melon baller to remove the core, creating a clean, circular well. To prevent the “soggy bottom” issue, slice a tiny sliver off the rounded back of each pear half so they sit perfectly flat and stable on the baking sheet.
- In a small bowl, whisk the melted butter, 1 tablespoon of honey, and lemon juice. Brush this mixture over the cut side and the skin of the pears. This creates the glossy, golden sheen seen in the image and helps the skin crisp up.
- Place pears cut-side up on a parchment-lined baking sheet. Roast for 15 minutes. This initial roast without the filling allows excess moisture to evaporate from the fruit’s surface and begins the caramelization of the natural sugars.
- While pears roast, toss the walnuts, cranberries, and blue cheese together in a small bowl.
- Remove pears from the oven. The centers should be slightly softened but the pear should still hold its shape firmly. Fill the wells generously with the cheese and nut mixture, allowing some to spill over the edges. Drizzle the remaining 2 tablespoons of honey over the top and sprinkle with fresh thyme leaves.
- Return to the oven for 5 to 8 minutes, just until the cheese is soft and the honey is bubbling.
- Serve immediately. For the visual finish shown in the image, garnish with additional fresh thyme sprigs and a final drizzle of honey while the pears are still hot.
Notes
- The secret to the perfect texture is the ‘pre-roast’ at 400 degrees F and slicing a tiny sliver off the back of the pear so it sits flat on the baking sheet.