Forget everything you know about those limp, rubbery potato skins that tear the moment your fork hits them. Most home cooks make the fatal mistake of wrapping their spuds in aluminum foil, which effectively steams the skin into a chewy, sad wrapper. If you want a potato that actually stands up to a mountain of toppings, you need to embrace the high-heat, salt-rubbed method.
The secret to a truly elite Loaded Twice-Baked Potato lies in the dramatic contrast between the exterior and the interior. We are aiming for a skin that is so crisp it practically shatters, protecting a center that remains as light and airy as a cloud. By ditching the foil and focusing on moisture evaporation, you create a structural masterpiece that holds its shape from the oven to the table.
I’ve found that the real magic happens when you stop treating the filling like a smooth mash. Instead of whipping the life out of the potato, we use a “fluffing” technique that creates craggy peaks and deep valleys. This isn’t just for looks; those uneven surfaces catch the melting cheese and crispy bacon bits, ensuring every single bite is packed with texture. The secret is using room-temperature dairy to keep the starches from seizing up into a gummy mess.
The Science of the Perfect Russet Potato
When it comes to baking, the Russet potato is the undisputed king because of its high starch content. Specifically, Russets are loaded with amylose starch, which allows the cells to separate easily when cooked, resulting in that classic mealy, fluffy texture. Waxy potatoes like Red Bliss or Yukon Gold contain more amylopectin, which makes them hold together—great for potato salad, but a disaster for a light filling.
Dry heat is your best friend here. When you bake a Russet uncovered, the moisture inside the potato escapes through the skin, allowing the starch granules to swell and burst into a light powder. If you use foil, that moisture stays trapped, essentially boiling the potato inside its own skin. This leads to a dense, heavy interior and a skin that feels like wet cardboard.
The “Anti-Soggy Secret” is all about surface dehydration. By rubbing the skin with oil and salt and placing it directly on the oven rack, you turn the skin into a savory, toasted crust. This crust acts as a reinforced bowl, which is essential when you’re stuffing it back to the brim with heavy ingredients like sour cream and sharp cheddar.
Essential Components for the Loaded Filling
Quality ingredients make or break this dish, starting with the cheese. Always reach for a block of sharp cheddar and grate it yourself. Pre-shredded cheese is coated in potato starch or cellulose to prevent clumping in the bag, which interferes with a smooth melt. Sharp cheddar also has a lower moisture content and a higher fat-to-flavor ratio, providing a punchy tang that cuts through the earthy potato.
Temperature management is the next pillar of success. You must use softened, room-temperature butter and slightly warmed milk or sour cream. If you add cold dairy to hot potatoes, the starch molecules undergo a “thermal shock” and become gummy or gluey. Room-temperature fats emulsify beautifully, coating the potato granules without breaking them down into a paste.
Don’t underestimate the role of kosher salt in the initial bake. While table salt is fine for seasoning the filling, the large grains of kosher salt are vital for the skin. They draw out the last bits of surface moisture and create a seasoned, sandpaper-like texture that makes the skin just as delicious as the filling itself.
Phase One: Achieving the Shatter-Crisp Exterior
To start, preheat your oven to a steady 400°F. This high temperature is non-negotiable for achieving that rapid moisture loss. After scrubbing your potatoes, make sure they are bone-dry before you apply the oil. Any water left on the surface will create steam, which is exactly what we are trying to avoid.
Use the “Direct Rack” method for maximum airflow. By placing the potatoes directly on the center oven rack, heat hits the entire surface area simultaneously. However, don’t forget to place a baking sheet on the rack below to catch any oil drips. This prevents your oven from smoking and keeps your kitchen smelling like toasted potatoes rather than burnt oil.
The Salt-Rub Technique Explained
Think of the olive oil as a heat conductor. It helps the oven’s dry air penetrate the skin quickly, while the kosher salt acts as a dehydrator. As the potato bakes, the salt pulls moisture to the surface where it evaporates, leaving behind a crisp, savory shell. You’ll know they’re done when the skin feels like fine-grit sandpaper and a knife slides into the center with zero resistance.
Phase Two: The Art of the Fluffy Scoop
Once the potatoes come out of the oven, timing is everything. You need to let them cool for about 10 minutes. This brief rest allows the internal steam to settle so the flesh doesn’t turn into mush when you handle it, but they must still be hot enough to melt the butter you’re about to add. Slice them lengthwise with a sharp serrated knife to avoid crushing the crisp skin.
When scooping, leave a 1/4 inch wall of potato flesh attached to the skin. This is your structural insurance policy. If you scoop too close to the skin, the “bowl” will collapse under the weight of the filling. If you leave too much, the potato feels heavy and you lose out on that high ratio of seasoned filling to crispy exterior.
Avoiding the “Gummy” Mash Trap
This is where most people ruin their twice-baked potatoes. If you use a food processor or an electric mixer, the rapid blades tear the starch granules apart, releasing a sticky substance that turns your filling into edible glue. Instead, use a simple hand masher or even a sturdy fork to break the potato flesh into small, irregular crumbles.
You want the filling to look textured, not like smooth baby food. When you stir in your butter and sour cream, do it gently. Stop the moment the ingredients are incorporated. By maintaining these small “islands” of potato, you ensure the final product is light and airy. This texture is what allows the filling to stand tall in the shell rather than slumping over the sides.
Phase Three: Folding and Structural Stuffing
Now it’s time to build the flavor profile. Fold in your first half-cup of shredded cheddar while the mixture is still warm. This allows the cheese to begin softening without fully liquefying. If the cheese melts too early, it can make the filling greasy. By folding it in gently, you create pockets of cheesy goodness throughout the potato.
When you return the filling to the shells, put down the spoon and pick up a fork. Instead of packing the mixture down and smoothing it over, use the tines of the fork to “fluff” the potato upward. You want to create a craggy, uneven surface with plenty of little peaks. These peaks will brown and crisp up during the second bake, providing even more texture.
Phase Four: The Final Melt and Garnish
The second bake is all about the “Soft-Melt.” Slide the stuffed potatoes back into the oven for about 10 minutes. You are looking for the cheese to become gooey and draped over the potato peaks, but it should still retain some of its shredded shape. If you bake it until the cheese turns into a flat, oily sheet, you’ve gone too far.
Add your crispy bacon bits during this stage so they can nestle into the melting cheese. This “glues” them in place so they don’t fall off the moment you take a bite. Once they emerge from the oven, hit them immediately with the fresh green onions. The residual heat will wake up the onion’s aroma without wilting them into brown bits.
Troubleshooting Common Potato Pitfalls
If your potato skin tears during the scooping process, don’t panic. You can usually “glue” it back together by placing a little extra shredded cheese over the tear before the second bake; the melted cheese acts as a delicious culinary cement. If the filling feels too dry or crumbly, add an extra tablespoon of milk. The moisture level of potatoes varies, so trust your eyes over the recipe measurements.
For skins that aren’t quite crisp enough after the first bake, you can give them a quick blast of high heat. However, the best fix is ensuring you used enough oil and salt initially. If the cheese isn’t melting evenly, it’s likely because it was cold from the fridge. Let your shredded cheese sit on the counter for 15 minutes before topping to ensure a perfect, uniform melt.
Make-Ahead Strategies and Storage Logistics
These are fantastic for dinner parties because you can do 90% of the work in advance. You can bake, scoop, and stuff the potatoes up to 24 hours ahead of time. Simply cover them loosely with plastic wrap and store them in the refrigerator. When you’re ready to serve, let them sit at room temperature for 20 minutes before performing the final bake.
To store leftovers, place them in an airtight container in the fridge for up to three days. Whatever you do, avoid the microwave for reheating. A microwave will turn that shatter-crisp skin into a soggy, chewy mess in seconds. Instead, use an air fryer at 350°F for 5-7 minutes or a toaster oven. This revives the crunch of the skin while heating the center through perfectly.
Optimal Pairings for Loaded Twice-Baked Potatoes
Since these potatoes are incredibly rich and savory, they pair best with proteins that have a bit of a char or acidity. A lean grilled steak or a lemon-herb roasted chicken provides a great balance. Because we are avoiding pork, beef bacon or even crispy smoked turkey bits make excellent salty toppers that provide that essential crunch.
To cut through the density of the cheddar and sour cream, serve these alongside a bright, acidic side dish. A vinegar-based coleslaw or a simple arugula salad with a sharp lemon vinaigrette works wonders. The acidity cleanses your palate between bites of the creamy, buttery potato, making the whole meal feel much lighter than it actually is.
For a similarly delightful side, explore this creamy cauliflower salad.
Expert Tips for Customizing Your Filling
Once you master the base technique, you can start experimenting with flavors. Roasted garlic is a game-changer; mash 3-4 cloves of soft, caramelized garlic into the butter before mixing it into the potatoes. You can also swap the green onions for fresh chives for a more delicate, refined onion flavor that doesn’t overpower the cheese.
If you want to add more bulk without making the filling heavy, try folding in some finely chopped caramelized onions. Just remember the golden rule: keep the moisture levels consistent. If you add “wet” ingredients like sautéed mushrooms, make sure you cook all the liquid out of them first, or you’ll end up with a weeping potato filling that ruins your crispy skin.
Frequently Asked Questions
Can I use red or gold potatoes for this recipe?
It is not recommended. Red and gold potatoes are “waxy,” meaning they have more moisture and less starch. When you try to mash them for a filling, they often become gummy or translucent rather than fluffy. Furthermore, their skins are very thin and won’t develop the structural “shatter-crisp” crunch that a thick-skinned Russet provides.
Why did my potato filling turn out heavy and dense instead of light?
This usually happens for two reasons: over-mixing or cold ingredients. If you beat the potatoes too much, you break the starch cells and create a glue-like consistency. Additionally, if your butter and sour cream were cold, they didn’t emulsify properly with the hot potato. Always use a fork or hand masher and ensure your dairy is at room temperature.
Can I freeze these potatoes for later?
Yes, you can freeze them, but there is a catch. Potatoes can sometimes become slightly grainy after freezing. To minimize this, freeze them after they are stuffed but before the second bake. Wrap them tightly in plastic wrap and then foil. To reheat, bake them directly from frozen at 350°F for about 30-40 minutes until the center is hot.
How do I get the bacon bits to stay on top of the peaks?
The trick is the “double-cheese” method. Fold some cheese into the filling, then fluff the potato with a fork. Sprinkle your bacon bits over the craggy surface first, then top with the remaining shredded cheese. As the top layer of cheese melts, it acts as a blanket that traps the bacon bits against the potato peaks, preventing them from rolling off.
What if I don’t have a baking sheet to catch drips?
You can use a large piece of aluminum foil on the rack below the potatoes. Just make sure the foil isn’t touching the potatoes themselves. The goal is to allow the hot air to circulate entirely around the potato skin. If you place the potatoes directly on a pan, the bottom will steam rather than crisp, defeating the purpose of the salt-rub technique.

Twice-Baked Potatoes
Course: Side DishCuisine: AmericanDifficulty: medium4
servings15
minutes1
hour450
kcal60
MinutesA specialized recipe focusing on a salt-rubbed, no-foil baking method to ensure crispy skins. The filling is textured and fluffed rather than mashed smooth, then topped with sharp cheddar, crispy bacon, and fresh green onions.
Ingredients
4 large Russet potatoes, scrubbed and dried thoroughly
2 tablespoons olive oil
1 tablespoon kosher salt
1/2 cup sour cream
1/4 cup whole milk
4 tablespoons unsalted butter, softened
1.5 cups shredded sharp cheddar cheese
1/2 cup crispy bacon bits (finely chopped)
3 green onions, thinly sliced
Salt and black pepper to taste
Directions
- Preheat your oven to 400°F (200°C). To solve the soggy skin problem, do not use aluminum foil. Prick the potatoes several times with a fork. Rub the skins generously with olive oil and kosher salt. Place them directly on the center oven rack with a baking sheet on the lower rack to catch any drips. Bake for 45 to 60 minutes until the skins are crisp and a knife slides easily into the center.
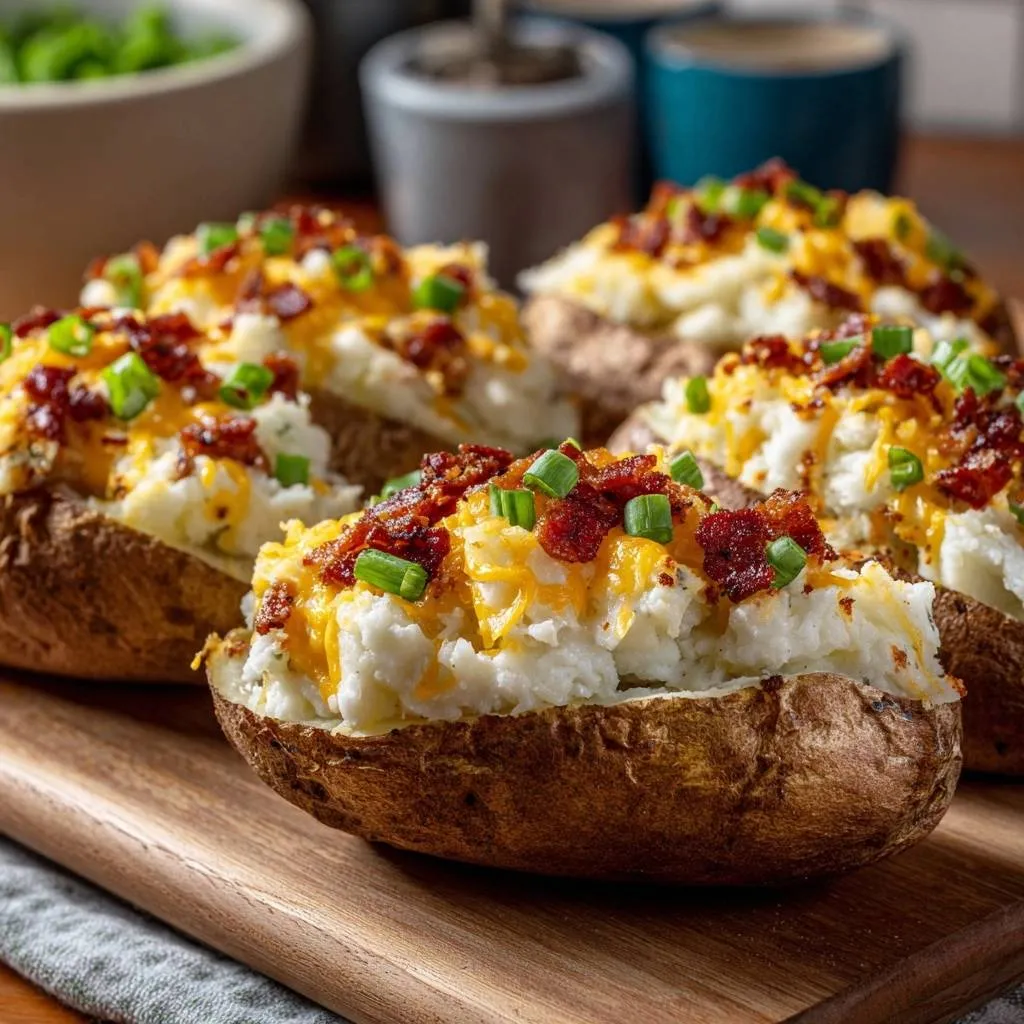
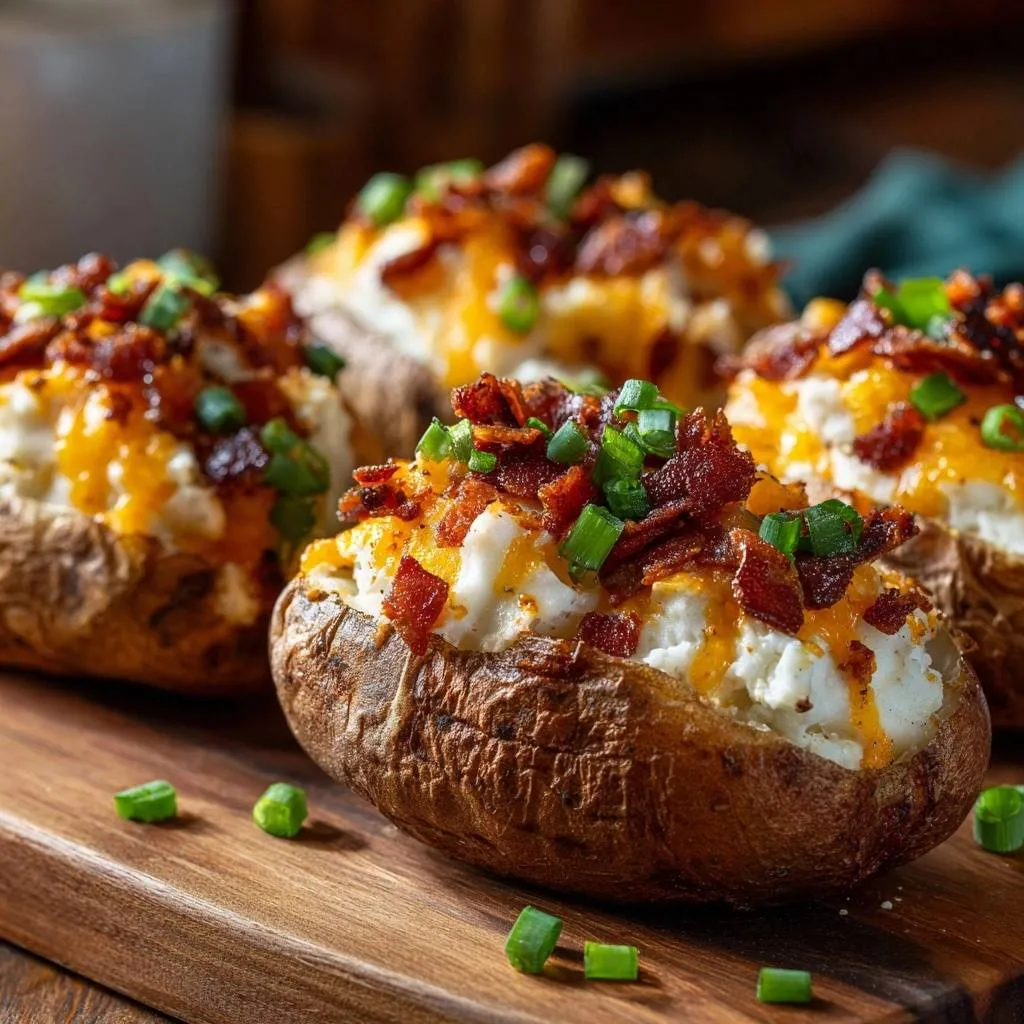
- Remove potatoes and let them cool for 5 to 10 minutes-just enough to handle. Slice each potato in half lengthwise. Carefully scoop out the flesh into a large bowl, leaving a sturdy 1/4 inch shell to maintain the structure shown in the image.
- For the “fluffy” texture seen in the photo, do not over-process the filling. Use a potato masher or fork to break up the potato flesh into small crumbles. Add the room-temperature butter, milk, and sour cream. Mix gently until combined but still textured-avoid whipping it into a smooth paste. Season with salt and pepper.
- Fold in 1/2 cup of the shredded cheese. Spoon the mixture back into the potato shells. Instead of smoothing the top, use a fork to “fluff” the filling upward, creating an uneven, craggy surface.
- Top the potatoes with the remaining 1 cup of cheese and the bacon bits. Return the potatoes to the oven for 10 minutes, or until the cheese is melted. For the specific look in the image, do not over-melt the cheese into a liquid; it should hold its shredded shape slightly while being soft and gooey.
- Remove from the oven and immediately garnish with the fresh green onions. Serve while the skins are at their maximum crunch and the filling is steaming.
Notes
- Do not use aluminum foil as it steams the skin. For the best visual results, use a fork to fluff the filling into peaks rather than smoothing it down.