Old-Fashioned Coconut Ice Squares are the crown jewel of nostalgic confectionery, evoking memories of school bake sales and grandmother’s kitchen counters. However, many traditional versions suffer from a fatal flaw: they are often dry, crumbly, and leave a trail of sugary dust with every bite. This recipe reimagines that classic treat by focusing on a “No-Crumble” creamy texture that feels more like a dense, chewy fudge than a brittle candy.
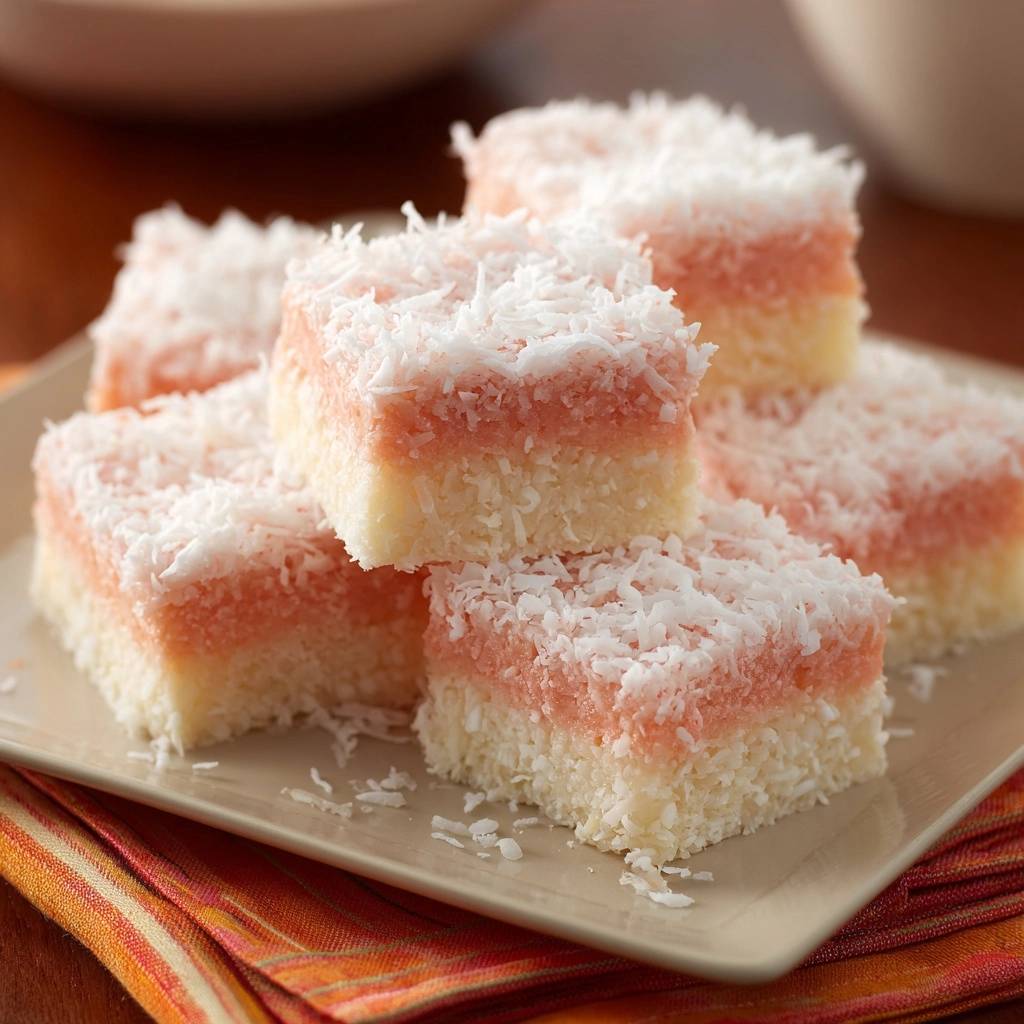
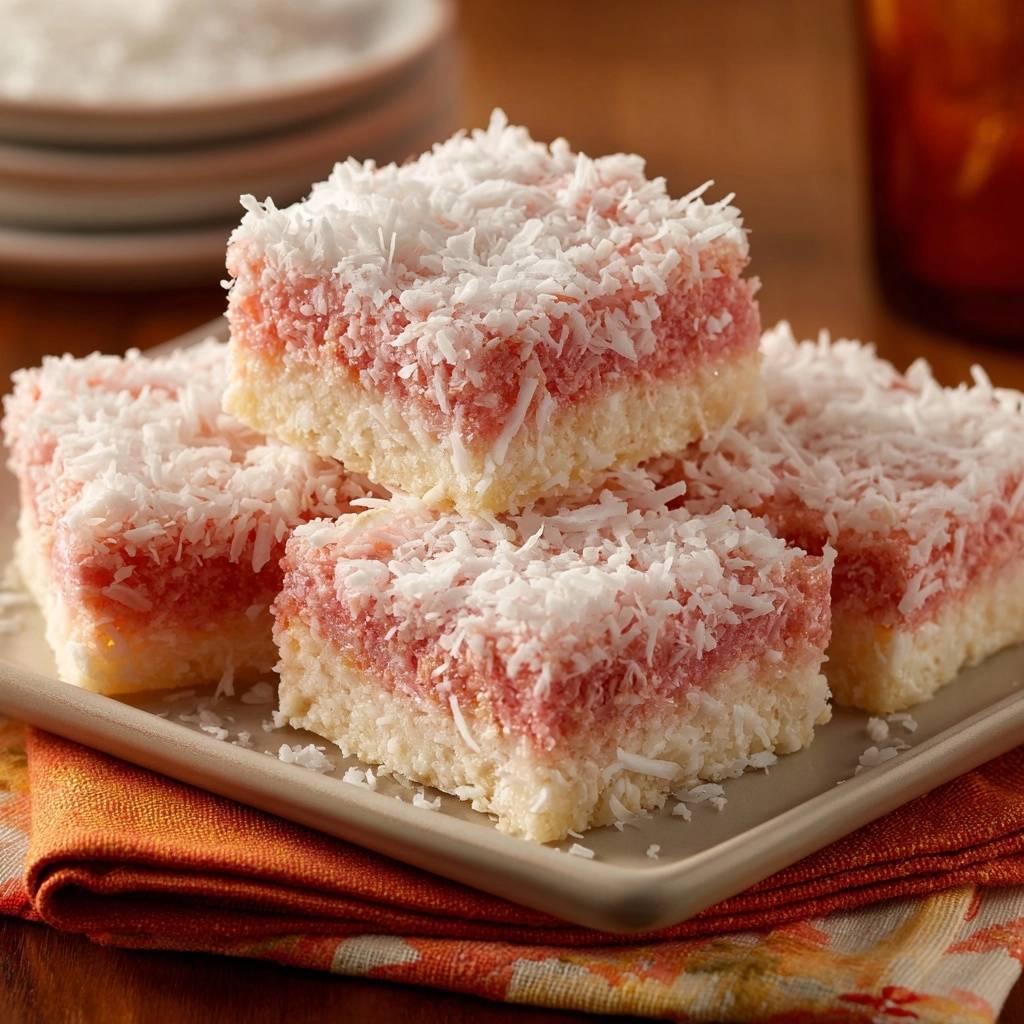
The sensory experience of a perfect coconut ice square is all about the contrast between the tropical chew of the coconut and the silky melt of the sugar. You get that immediate hit of sweetness followed by a rich, milky finish that lingers on the palate. Visually, the sharp, clean lines of the white and pink layers make these squares look like they came straight from a professional sweet shop, yet the process is surprisingly simple for any home cook.
For another take on this sweet confection, see this pink and white coconut ice.
The secret to achieving this professional-grade density lies in the moisture bind. While many old recipes rely on a finicky boiling sugar syrup that can easily crystallize, we use a cold-set method that ensures a moist, stable square. By controlling the hydration of the coconut through a specific folding technique, you create a confection that holds its shape perfectly while remaining soft enough to bite through with ease.
For a similar burst of tropical sweetness, check out these toasted coconut chocolate chip bars.
The Evolution of Traditional Coconut Ice
Coconut ice has a long and storied history, tracing its primary roots back to British confectionery traditions. As the British Empire expanded, this simple sweet traveled to Australia and South Africa, where it became a staple of tea time and community gatherings. Originally, the recipe was a test of a cook’s skill with a sugar thermometer, as it required boiling sugar and water to the “soft ball” stage before beating in the coconut.
However, those traditional boiled methods are notoriously temperamental. If the syrup is boiled a few degrees too high, the squares become rock hard; if it isn’t beaten enough, they turn out grainy and translucent. The introduction of sweetened condensed milk revolutionized this treat for the modern home cook. This method bypasses the risk of crystallization entirely, providing a consistent, fudge-like base that stays moist for days.
In South Africa and Australia, these squares are often the first items to disappear at “fetes” or markets. The modern condensed milk version has largely overtaken the boiled variety because it offers a superior mouthfeel. It creates a “tacky” matrix that binds the coconut fibers together, ensuring that the treat doesn’t shatter when you slice it or take a bite. It is the perfect marriage of old-world flavor and modern culinary reliability.
Essential Components for Old-Fashioned Coconut Ice Squares
Success with this recipe starts with your choice of coconut. You must use fine desiccated coconut for the base of the squares. Unlike the long, moist shreds used for cake toppings, fine desiccated coconut has a smaller surface area that allows it to integrate seamlessly with the powdered sugar. If you use large shreds in the base, the squares will lack the structural integrity needed to stay together, leading to that dreaded crumbling effect.
Powdered sugar acts as the primary structural binder here, but it must be sifted. Even small lumps of sugar can create “pockets” of air or unhydrated powder, which weakens the final block. Sifting ensures that every grain of sugar is ready to absorb the moisture from the condensed milk. Additionally, don’t skip the fine sea salt. While it might seem counterintuitive in a candy recipe, the salt is the “secret” ingredient that cuts through the intense sugar, highlighting the nutty notes of the coconut.
Vanilla extract provides a floral backnote that rounds out the flavor profile. Without it, the squares can taste one-dimensional. When you combine these dry elements with the thick, syrupy condensed milk, you aren’t just mixing ingredients; you are creating a stable emulsion that will firm up into a sliceable block without the need for baking or high-heat cooking.
Selecting the Right Coconut Texture
This recipe specifically calls for two different textures of coconut to achieve the best results. The fine desiccated coconut is mandatory for the internal structure because it absorbs the milk more efficiently, creating a dense “dough.” The large-flake sweetened coconut is reserved strictly for the topping. This provides a beautiful, rustic visual appeal and a varied texture that makes the squares feel more artisanal and less like a mass-produced candy.
The Role of Sweetened Condensed Milk
Sweetened condensed milk is the engine that drives this recipe. Because it has already been reduced to remove most of its water content, it acts as a powerful stabilizer. The proteins and sugars in the milk create a tacky matrix that “glues” the coconut and powdered sugar together. Unlike water, which would just dissolve the sugar, the thick consistency of condensed milk allows the mixture to remain pliable while it sets into a firm, fudge-like state.
The Slow-Fold Technique for Perfect Density
The most critical phase of this recipe is the “Slow-Fold” method. When you pour the condensed milk into the dry ingredients, your goal is total hydration. You aren’t just stirring; you are using a heavy spoon to press the liquid into the coconut and sugar. This ensures that no dry pockets remain, which is the primary cause of a grainy or sandy mouthfeel in finished coconut ice.
As you fold, the mixture will transition from a loose pile of crumbs into a stiff, tacky paste. It should feel heavy and offer significant resistance to your spoon. If you find the mixture is too soft—perhaps due to high humidity in your kitchen—you can troubleshoot by adding an extra quarter cup of powdered sugar. You are looking for a consistency that can hold a sharp edge when pressed, rather than something that slumps or flows like a batter.
This manual hydration process allows the coconut fibers to soften slightly as they sit in the milk. By the time you are ready to press the mixture into the pan, it should feel like a cohesive dough. This physical transformation is what guarantees a “No-Crumble” finish. Every grain of coconut is essentially “welded” to its neighbor by the sugar-milk paste, creating a solid, uniform block.
Step-by-Step: Constructing the Iconic Dual Layers
To get those perfect, distinct layers, you must use the “Pressure-Pack” technique. After dividing your mixture, press the white half into the parchment-lined pan. Don’t just use your fingers; use the flat bottom of a measuring cup or a heavy glass to press down with significant force. This compression forces out any air gaps and ensures the base is a solid, level foundation for the next layer.
When coloring the second half, start with just two drops of pink food coloring. You want a soft, pastel hue that looks classic and inviting. Over-saturating the color can make the candy look artificial. Once the pink layer is uniform, spread it over the white base. Use that same flat-bottomed tool to press the pink layer firmly into the white one. This “fuses” the two layers together so they don’t slide apart when you eventually lift the block out of the pan.
Finally, add the large-flake coconut to the top. Press these flakes down lightly with your palms so they embed into the pink layer. This ensures the topping stays put during the slicing process. By the time you finish, the block should look perfectly flat and tightly packed. This attention to detail during assembly is what separates a messy home experiment from a professional-looking confection.
Achieving Clean Lines and Sharp Edges
The parchment paper overhang is your best friend here, as it allows you to lift the entire block out cleanly once it has set. To get those sharp, professional edges, use a long, thin-bladed knife. Dip the knife in hot water, wipe it completely dry, and make one long, smooth cut. It is vital to clean and re-heat the knife between every single slice. This prevents the pink layer from “bleeding” into the white layer, maintaining that pristine contrast.
Why Chilling is Non-Negotiable
While it is tempting to slice into the squares immediately, the four-hour chill time is non-negotiable. This isn’t just about the candy getting cold; it is about “moisture migration.” During this resting period, the coconut continues to pull moisture from the condensed milk, which softens the coconut fibers and fully stabilizes the sugar structure. This is what creates the final “set.”
If you rush this step, the squares will be too soft and may shatter or deform under the pressure of the knife. Overnight chilling is even better, as it allows the flavors to meld and the texture to become incredibly dense and fudge-like. Patience during the setting phase ensures that every square you cut is a perfect, sturdy cube that can be handled without falling apart.
Troubleshooting Common Confectionery Hurdles
If your layers separate when you try to eat them, it usually means you didn’t apply enough pressure during the packing phase. Next time, really lean into that measuring cup to fuse the layers. If the mixture feels too soft to cut even after chilling, it is likely that the sugar wasn’t measured correctly or the humidity was very high. You can often fix this by kneading in a little more powdered sugar before pressing it back into the pan.
A gritty texture is almost always caused by skipping the sifting process or using a coconut that is too coarse. Always stick to fine desiccated coconut for the body of the sweet. Conversely, if the mixture feels too dry and won’t come together into a paste, you can add more condensed milk one teaspoon at a time. The goal is a “tacky” feel—if it feels like dry sand, it needs more moisture to bind properly.
Storage and Make-Ahead Logistics
These coconut ice squares are incredibly hardy, making them perfect for gifting or holiday platters. Store them in an airtight container to prevent the coconut from drying out or absorbing “fridge smells” like onions or garlic. They will stay fresh and creamy in the refrigerator for up to two weeks. If you prefer a slightly softer bite, you can leave them at room temperature for a few hours before serving.
More Sweet Treats to Try
If you enjoyed these coconut ice squares, you might like these other baked goods.
- For a fruity and slightly tangy biscuit, consider the apricot and raisin buttermilk scones, offering a similar baking technique.
- You can also try the lemon scones for a bright citrus note that complements sweet flavors.
Because of their high sugar content and stable structure, these squares are excellent candidates for shipping. They don’t melt easily and can withstand the rigors of a gift box without losing their shape. Just be sure to place a piece of parchment paper between layers if you are stacking them, which prevents the large-flake coconut on top from sticking to the bottom of the square above it.
Expert Tips for Flavor Variations
While the vanilla-pink classic is iconic, you can easily customize this recipe. For a tropical twist, swap the vanilla for a teaspoon of fresh lime zest and a drop of coconut extract. If you prefer to avoid synthetic dyes, a tiny drop of beet juice can provide a beautiful natural pink hue without affecting the flavor. Just remember to keep your liquid-to-dry ratios the same to maintain that “No-Crumble” integrity.
For another bright fruit option, consider raspberry coconut jam bars.
Another sophisticated variation is to use almond extract instead of vanilla. This gives the squares a flavor profile reminiscent of high-end marzipan. Regardless of the flavor you choose, the technique remains the same: press firmly, chill thoroughly, and slice with a hot knife. These small details ensure that your homemade sweets look and taste like they came from a high-end boutique.
Pairing Suggestions for Tea Time
Because these squares are quite sweet, they pair beautifully with beverages that offer a bit of astringency or bitterness. A hot cup of Earl Grey tea, with its citrusy bergamot notes, provides a perfect counterpoint to the creamy coconut. Alternatively, a strong dark roast coffee or a simple glass of cold milk can balance the sugar, making for a truly indulgent afternoon treat.
Frequently Asked Questions
How should I store leftover coconut ice squares?
Store the squares in an airtight container in the refrigerator for up to 14 days. The airtight seal is crucial because coconut is highly porous and will easily absorb odors from other foods in your fridge. For the best texture, let them sit at room temperature for about 10 minutes before serving so they soften slightly.
Why did my coconut ice turn out crumbly?
Crumbling is usually caused by one of two things: using coconut that is too coarse or not pressing the mixture firmly enough into the pan. Fine desiccated coconut is essential because it creates a tighter bond. Additionally, you must use a flat-bottomed tool to “Pressure-Pack” the mixture into the pan to eliminate air pockets and fuse the ingredients together.
Can I use a different type of milk?
No, you cannot substitute regular milk, evaporated milk, or heavy cream for the sweetened condensed milk. The high sugar content and thick, syrupy consistency of condensed milk are what provide the structural “glue” for this no-cook recipe. Without it, the squares will not set and will remain a loose pile of coconut and sugar.
Can I freeze these for later?
Yes, these squares freeze remarkably well. Wrap the entire block or individual squares tightly in plastic wrap and place them in a freezer-safe bag. They will last for up to 3 months. Thaw them in the refrigerator overnight before serving. Freezing does not change the texture, making this a great make-ahead treat for the holidays.
What if I don’t have pink food coloring?
The pink layer is traditional, but it is purely aesthetic. You can leave the entire batch white, or use any other color you prefer. If you want a natural alternative, a tiny drop of pomegranate juice or beet juice will provide a lovely pink tint. Just be careful not to add too much liquid, or the mixture may become too soft to set properly.
Why is my coconut ice gritty?
A gritty texture usually happens if the powdered sugar wasn’t sifted or if the mixture wasn’t allowed to chill long enough. Sifting removes clumps that don’t hydrate properly. The 4-hour chill time is also vital because it allows the sugar to fully dissolve into the moisture of the condensed milk, resulting in a smooth, fudge-like finish.

Coconut Ice Squares
Course: DessertCuisine: BritishDifficulty: easy16
squares15
minutes185
kcal240
MinutesA traditional sweet treat reimagined for a moist and creamy texture. These pink and white layered squares use sweetened condensed milk and a specific folding method to ensure they hold their shape without being dry or grainy.
Ingredients
3 cups unsweetened shredded coconut (fine desiccated works best for the base)
3 cups powdered sugar, sifted
1 can (14 oz) sweetened condensed milk
1 teaspoon vanilla extract
1/8 teaspoon fine sea salt (to balance sweetness)
2 drops pink food coloring
1 cup large-flake sweetened shredded coconut (for the visual topping)
Directions
- Line an 8×8 inch square baking pan with parchment paper, leaving an overhang on two sides for easy removal.
- In a large mixing bowl, combine the 3 cups of unsweetened shredded coconut, sifted powdered sugar, and salt. Stir until the coconut is evenly distributed through the sugar.
- Pour in the sweetened condensed milk and vanilla extract. Use a heavy wooden spoon or stiff spatula to fold the mixture together. This is the critical step: fold until the sugar is fully hydrated and a stiff, tacky paste forms. If the mixture feels too wet to hold a sharp edge, add an extra 1/4 cup of powdered sugar.
- Divide the mixture exactly in half into two separate bowls.
- Press the first half (white) firmly into the bottom of the prepared pan. Use the bottom of a flat measuring cup to pack it down with significant force. This “Pressure-Pack” technique is what prevents the squares from crumbling and creates the clean line seen in the photo.
- Add two drops of pink food coloring to the remaining half of the mixture and stir until the color is a uniform pastel pink.
- Spread the pink layer over the white layer. Again, use the flat measuring cup to press down firmly, fusing the two layers together into a solid block.
- Sprinkle the 1 cup of large-flake coconut generously over the top. Press down lightly with your palms so the flakes embed into the top pink layer.
- Refrigerate for at least 4 hours, or preferably overnight. This chill time allows the coconut to absorb the moisture from the milk, locking the texture in place.
- Lift the block out using the parchment paper. Using a long, sharp knife dipped in hot water and wiped dry, slice into 16 clean squares. Clear the knife between every cut for the professional finish shown in the image.
Notes
- The Pressure-Pack technique is essential to prevent crumbling. If the mixture feels too wet, add an extra 1/4 cup of powdered sugar before pressing into the pan.