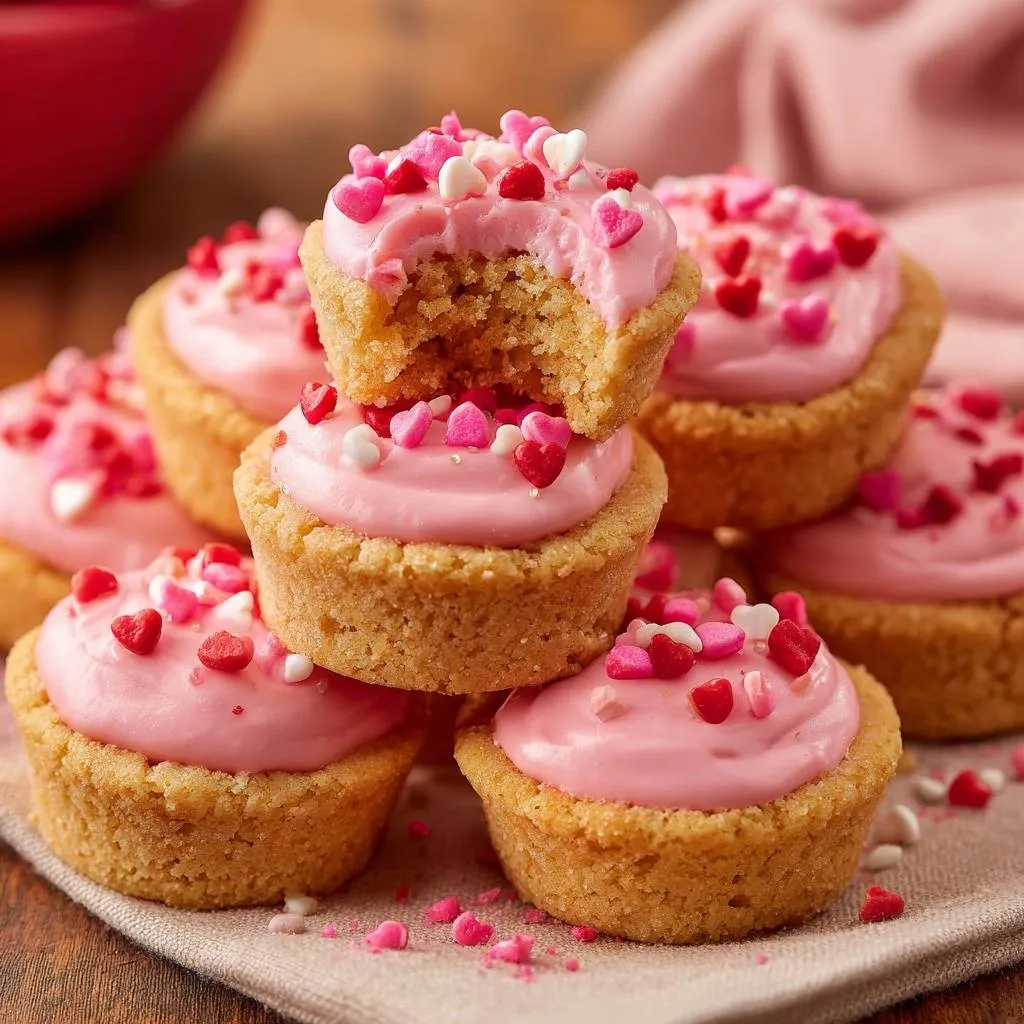
Nothing ruins a beautiful cookie cup faster than a soft, mushy base that collapses under the weight of the frosting. Most recipes fail because the center stays underbaked while the edges burn, leaving you with a soggy mess. These Pink Frosting Sugar Cookie Cups solve that problem with a specialized double-bake method that ensures a perfectly crisp, structural shell.
Imagine biting through a crunchy, buttery sugar cookie into a cloud of tangy, vibrant pink cream cheese frosting. The contrast in textures is what makes this dessert a standout at any gathering. You get the snap of a shortbread-style cookie paired with a silky filling that stays exactly where you pipe it.
Perhaps you’ll also enjoy making these creamy lemon crumble bars for a bright, tangy treat.
The secret to this success is “cauterizing” the interior of the cookie well during a second brief stint in the oven. By pressing the well into the hot dough and baking it for three more minutes, you create a moisture-proof barrier. This prevents the frosting from soaking into the crumb, keeping your treats fresh and firm for days.
For a similar smooth texture, see the glazed raspberry thumbprint cookies.
The Structural Integrity of a Perfect Cookie Cup
Creating a cookie cup is essentially an exercise in edible engineering. Standard sugar cookie dough is designed to spread and puff, which is the exact opposite of what you want when building a vessel. If the dough is too soft, the walls will slump down the sides of the muffin tin, leaving you with a flat disc instead of a cup.
This recipe uses a specific ratio of butter to flour to ensure the walls are sturdy enough to hold a heavy mound of frosting. The inclusion of a single egg provides just enough protein to act as a binder without making the cookie cakey. Therefore, the resulting shell is dense and strong, capable of supporting the rich cream cheese center without cracking or leaking.
Essential Components for Pink Frosting Sugar Cookie Cups
Quality ingredients are the foundation of a great bake, and for these cups, the butter is the star. You must use unsalted butter to maintain total control over the salt levels in the dough. Since different brands of salted butter vary wildly in their sodium content, starting with unsalted ensures your cookies don’t end up surprisingly savory.
The all-purpose flour provides the necessary gluten structure to keep the “walls” of your cup standing tall. While you might be tempted to use cake flour for a softer bite, it lacks the strength needed for this specific shape. Additionally, ensure your egg is at room temperature so it emulsifies perfectly into the creamed butter and sugar, creating a smooth, uniform dough.
Selecting the Right Pink Gel Colorant
When it comes to that iconic pink hue, the type of coloring you choose matters immensely. I always recommend gel food coloring over the liquid drops found in the grocery store baking aisle. Liquid colors are water-based and can thin out your frosting, making it runny and difficult to pipe.
Gel is highly concentrated, so you only need a tiny amount to achieve a vibrant, bakery-style pink. Because it doesn’t add extra moisture, your cream cheese frosting stays thick and stable. This allows you to create those beautiful, high swirls that hold their shape even after sitting out on a dessert table.
The Role of Cream Cheese in Frosting Stability
While a standard buttercream is fine, a cream cheese-based frosting is superior for cookie cups. The natural tanginess of the cheese cuts through the intense sweetness of the powdered sugar and the buttery cookie shell. It creates a more balanced flavor profile that keeps people coming back for a second piece.
Furthermore, the fat content in full-fat cream cheese contributes to a “pipeable” texture that is remarkably resilient. Once chilled, this frosting sets firmly, making the cookie cups easier to transport. Just make sure you use the block-style cream cheese rather than the whipped variety found in tubs, which is too airy for piping.
The Anti-Soggy Bottom: A Double-Bake Strategy
The “Anti-Soggy Bottom” technique is the core value of this recipe. When you first pull the cookies out of the oven, the centers are still soft and malleable. By pressing a well into them immediately, you are shaping the vessel, but the interior of that well is still technically “wet” and porous.
Returning the tin to the oven for an additional three minutes is the game-changer. This second blast of heat dries out the surface of the interior well, effectively sealing the crumb. Think of it like “blind baking” a pie crust; you are creating a protective crust that acts as a shield against the moisture in the frosting.
Without this step, the sugar in the frosting would eventually draw moisture out of the cookie, leading to a soft, bread-like texture. With it, you get a satisfying crunch that lasts. This structural integrity is what allows these cookie cups to be made a day in advance without losing their quality.
Step-by-Step: Crafting the Cookie Shells
Start by creaming your butter and sugar until the mixture looks noticeably lighter in color and increases in volume. This usually takes about three minutes of high-speed beating. You are looking for a pale, fluffy texture where the sugar granules have mostly dissolved into the fat.
When you add the dry ingredients, mix just until a stiff, cohesive dough forms. You’ll know it’s ready when the dough pulls away from the sides of the bowl and feels firm to the touch. Avoid overmixing at this stage, as too much agitation will develop the gluten and make the cookies tough rather than crisp.
Precision Scooping and Initial Baking
Use a cookie scoop to place 1.5 tablespoons of dough into each greased muffin slot. It is vital that you leave them as mounds rather than pressing them down. This allows the dough to bake evenly from the outside in, creating a soft center that is easy to indent later.
Place your tin on the middle rack of the oven to ensure even heat distribution. If your oven has hot spots, rotate the pan halfway through the initial 10-minute bake. You are looking for the very edges to turn a pale golden brown while the tops still look slightly underdone.
The Tamper Technique: Creating the Well
As soon as the timer goes off, work quickly while the cookies are hot and the sugars are still molten. Use the back of a small measuring spoon or a tart tamper to press firmly into the center of each mound. You want to push the dough down and outward, forcing it up the sides of the muffin tin.
If the dough sticks to your tool, dip the bottom of the spoon in a little bit of flour or powdered sugar. Aim for a uniform thickness across the bottom and sides of the cup. Once all 24 wells are formed, slide the tray back into the oven for that final, crucial three-minute bake.
Whipping the Perfect Pink Cream Cheese Frosting
To achieve a silky, lump-free frosting, your cream cheese and butter must be at the exact same softened temperature. If the butter is colder than the cheese, you will end up with tiny yellow flecks that won’t beat out. Let them sit on the counter for at least an hour before you start mixing.
Add your powdered sugar one cup at a time, starting the mixer on the lowest speed. This prevents a “sugar cloud” from covering your kitchen. Once the sugar is incorporated, turn the speed to high and beat for two full minutes until the frosting is light, airy, and holds a stiff peak.
Achieving a Professional Pipeable Consistency
The ideal frosting should be thick enough to hold its shape but soft enough to squeeze through a piping tip without straining your hand. If the frosting feels too runny, add another quarter cup of powdered sugar. If it feels too stiff, add a single teaspoon of milk to loosen it up.
Test the consistency by taking a spoonful and turning it upside down. If the frosting stays on the spoon without sliding off, it is ready for the piping bag. Remember that the warmth of your hands will soften the frosting as you pipe, so work efficiently or pop the bag in the fridge for five minutes if it gets too soft.
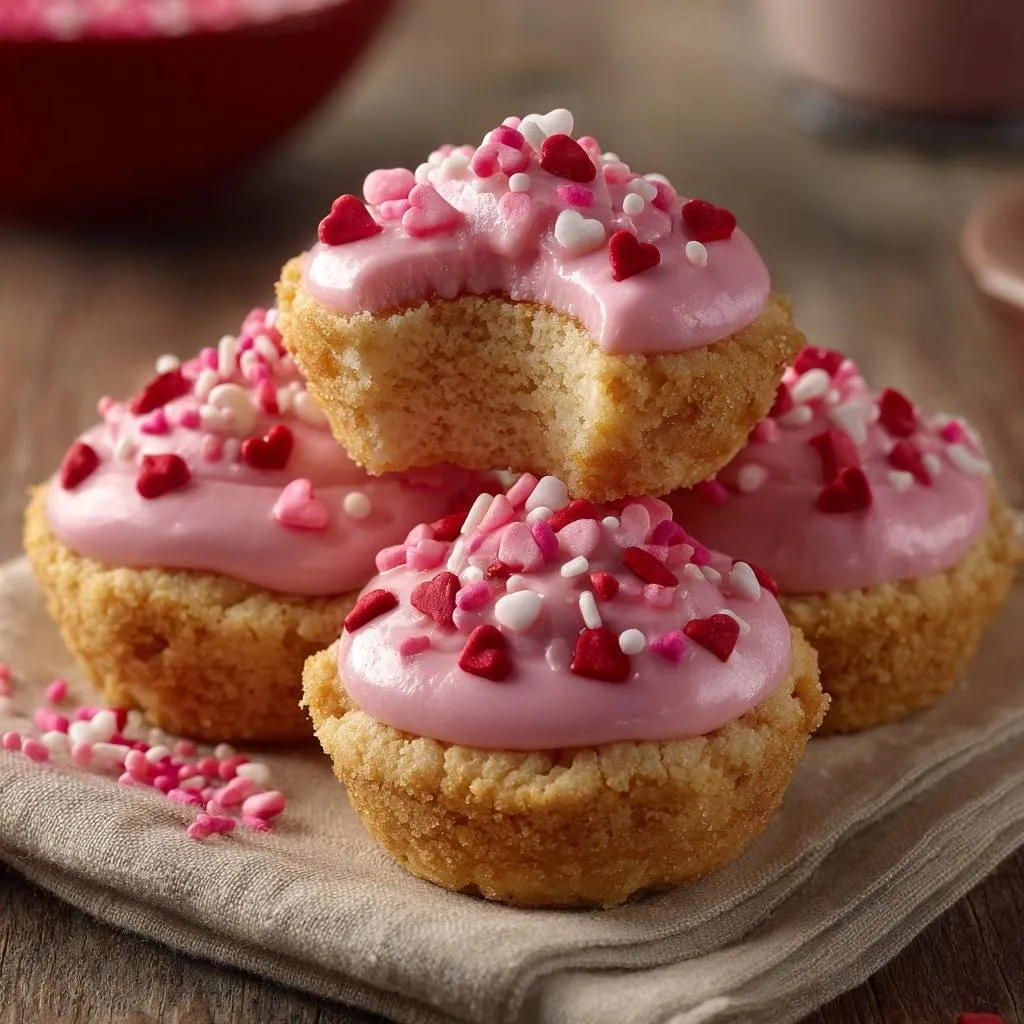
Assembly and Decorative Finishing Touches
Patience is mandatory during the assembly phase. The cookie shells must be completely cold to the touch before you even think about adding the frosting. If the shells are even slightly warm, the fat in the cream cheese will melt, causing your beautiful swirls to slump into a puddle.
Once cooled, pipe a generous mound of pink frosting into each well, allowing it to rise slightly above the rim of the cookie. Immediately top with your heart-shaped sprinkles while the frosting is still “tacky.” If you wait too long, the surface of the frosting will crust over, and the sprinkles will just bounce off.
Troubleshooting Common Cookie Cup Failures
If your cookies are sticking to the tin, you likely need to be more generous with your non-stick spray or butter. For extra insurance, you can run a thin paring knife around the edge of each cup after they have cooled for ten minutes. This releases any caramelized sugar that might be acting like glue.
If your shells crack when you try to press the well, the dough might be too dry or you waited too long after taking them out of the oven. Ensure you measure your flour using the “spoon and level” method rather than scooping directly with the measuring cup, which packs the flour down and leads to a dry, crumbly dough.
Make-Ahead Logistics and Storage Standards
These are fantastic for parties because you can break the work into stages. You can bake the empty shells up to two days in advance and store them in an airtight container at room temperature. They will stay perfectly crisp thanks to that double-bake method.
What Else to Bake?
If you enjoyed these sugar cookie cups, you might like other sweet treats. Consider trying these fluffy pancake recipes next.
- For a breakfast treat that complements the sweetness of cookies, try these Fluffy Diner-Style Pancakes for a pillowy start to your day.
- If you’re seeking another light and airy baked good, these Fluffy Golden Pancakes offer a similar comforting texture.
Once frosted, the cookie cups should be stored in the refrigerator because of the cream cheese content. However, they are best served at room temperature, so take them out about 30 minutes before serving. In the fridge, they will stay fresh and delicious for up to three days without the bottom becoming soggy.
Expert Tips for High-Volume Baking
If you are scaling this recipe for a large event, use multiple mini-muffin tins to speed up the process. However, avoid crowding the oven; bake only two tins at a time to ensure the air can circulate properly. This maintains the consistent heat needed for that golden-brown finish.
Be mindful of oven hot spots when baking in bulk. If you notice one side of the tray browning faster than the other, rotate the pans 180 degrees halfway through the first bake. This ensures every single cookie cup has the same structural strength and color.
Frequently Asked Questions
Can I use store-bought refrigerated dough?
I don’t recommend using store-bought dough for this specific recipe. Commercial doughs often contain high amounts of leavening agents designed to make cookies spread and puff significantly. When you try to create a well in store-bought dough, it often puffs back up during the second bake, causing the “cup” shape to disappear entirely.
How do I prevent the frosting from sweating?
Frosting “sweats” when there is a drastic temperature change or high humidity. To prevent this, ensure your cookie cups are fully cooled before frosting and store them in a container that isn’t completely airtight if you are moving them from a cold fridge to a warm room. The stabilized cream cheese base in this recipe is quite hardy, but keeping them in a cool, dry place is always best.
Can these cookie cups be frozen?
Yes, you can freeze the un-frosted shells for up to three months. Wrap them tightly in plastic wrap and place them in a freezer bag. To thaw, let them sit at room temperature for an hour. I do not recommend freezing the finished product with the frosting, as the cream cheese can change texture and the sprinkles may bleed color upon thawing.
What is the best substitute for a tart tamper?
If you don’t own a professional tart tamper, don’t worry. The back of a 1/2 tablespoon measuring spoon works perfectly. You can also use a small, cleaned pill bottle or even a shot glass if the diameter fits inside your muffin tin. The goal is simply to have a flat, blunt surface to displace the dough while it is hot.
Why did my cookies spread too much?
Excessive spreading is usually caused by butter that was too warm or over-creaming the butter and sugar. If you beat the butter and sugar for too long, you incorporate too much air, which expands in the oven and then collapses. Also, make sure your dough is firm; if your kitchen is very hot, chill the dough for 15 minutes before scooping it into the tin.
Sugar Cookie Cups
Course: DessertCuisine: AmericanDifficulty: easy24
cookie cups20
minutes15
minutes185
kcal35
MinutesA structural and delicious sugar cookie cup designed to stay crunchy. Using a unique double-bake technique, these cookie shells are ‘cauterized’ to prevent frosting moisture from softening the base, resulting in a professional-quality treat.
Ingredients
1 cup unsalted butter, softened
1 cup granulated sugar
1 large egg
1 teaspoon vanilla extract
2.5 cups all-purpose flour
1/2 teaspoon baking powder
1/4 teaspoon salt
8 oz cream cheese, softened
1/4 cup unsalted butter, softened (for frosting)
3 cups powdered sugar
1 teaspoon milk (if needed for consistency)
3 drops pink gel food coloring
1/2 cup mixed pink, red, and white heart-shaped sprinkles
Directions
- Preheat your oven to 350°F (175°C) and generously grease a standard mini-muffin tin with non-stick spray or butter.
- In a large bowl, cream together 1 cup of softened butter and the granulated sugar until light and fluffy. Beat in the egg and vanilla extract until well combined.
- In a separate bowl, whisk together the flour, baking powder, and salt. Gradually mix the dry ingredients into the wet ingredients until a stiff, cohesive dough forms.
- Scoop approximately 1.5 tablespoons of dough into each muffin slot. Do not press them down; leave them as mounds.
- Bake for 10-12 minutes until the edges are just starting to turn a light golden brown.
- Remove the tin from the oven. This is the critical step for the Anti-Soggy Bottom: immediately use the back of a small measuring spoon or a tart tamper to press a deep, wide well into the center of each hot cookie, pushing the dough up against the sides of the tin.
- Return the tin to the oven for an additional 3 minutes. This second blast of heat “cauterizes” the interior of the well, drying out the crumb to create a moisture-proof barrier that prevents the frosting from soaking into the cookie.
- Let the shells cool in the pan for at least 10 minutes before carefully transferring them to a wire rack to cool completely. The shells must be cold before frosting.
- For the frosting, beat the cream cheese and 1/4 cup butter until smooth. Gradually add powdered sugar one cup at a time. Add pink food coloring and beat on high until thick and pipeable. If too thick, add a teaspoon of milk.
- Using a piping bag or a spoon, fill the cooled cookie wells generously, allowing the frosting to mound slightly above the rim.
- Top immediately with heart sprinkles. The double-baked base will remain perfectly crisp and firm even after refrigeration.
Notes
- The critical step is the second 3-minute bake after pressing the wells; this creates a moisture-proof barrier. Ensure shells are completely cold before adding the cream cheese frosting.