There is nothing quite as disappointing as slicing into a beautiful sheet cake only to find a gummy, dense layer hiding at the bottom. While the “Pink Velvet” aesthetic is all about soft hues and a delicate crumb, many home bakers struggle with a base that feels more like wet dough than airy sponge. This recipe changes that by focusing on structural integrity and a specific moisture-lock technique.
The “Anti-Soggy Bottom” philosophy isn’t just a catchy name; it’s a technical approach to heat distribution. By adjusting how we prep the pan and manage the oven temperature, we ensure the cake stays light from the top sprinkle to the very last crumb. You’ll get that professional, bakery-style finish without the common pitfalls of heavy, sunken centers.
The secret to this success lies in the temperature-staged baking and the use of a wire cooling rack. Most people leave their cake to cool on the counter, which traps steam and creates a vacuum of moisture at the base. I’m going to show you how to break that cycle and achieve a perfect velvet texture every single time.
The Chemistry of a Perfect Velvet Crumb
A true velvet cake is defined by its tight, fine-grained crumb that feels smooth on the tongue. This isn’t just a standard vanilla sponge; it relies on the mechanical aeration of creamed butter and sugar. When you beat these together, the sugar crystals carve tiny air pockets into the fat, which then expand in the oven to create a lift that is both sturdy and soft.
Unlike a traditional Red Velvet cake, we are omitting cocoa powder entirely. Cocoa contains tannins that can slightly toughen a crumb and, more importantly, it would muddy our vibrant pink color. By sticking to a vanilla-forward profile, we maintain a bright, clean hue and a flavor that is pure, sweet, and nostalgic. The baking powder provides a reliable chemical leavening that works in tandem with the air you’ve whipped into the butter.
The interaction between the fats in the butter and the proteins in the flour is what creates that “velvet” mouthfeel. We want enough structure to hold up a thick glaze, but enough tenderness that the cake melts away as you eat it. Achieving this balance requires precision in how we handle the ingredients before they even hit the oven.
Why Temperature-Staged Baking Prevents Gummy Bases
Baking in a 9×13 inch pan presents a unique challenge because the edges always cook faster than the middle. If you wait for the center to set at a constant temperature, the perimeter often becomes dry and overbaked. Conversely, pulling it out too early leaves you with that dreaded gummy, undercooked center.
Our method uses a 20-minute initial bake to set the structure of the perimeter. By rotating the pan for the final 5 to 8 minutes, you force the oven’s convection currents to hit the center more effectively. This ensures the internal temperature reaches the sweet spot of 210°F, which fully hydrates the starches and prevents the middle from collapsing into a soggy mess once cooled.
Essential Components for Pink Velvet Sheet Cake Squares
Success starts with your ingredients, specifically their temperature. You must use room-temperature eggs because cold eggs will cause your creamed butter to seize and curdle. When the emulsion breaks, the cake loses its ability to trap air, resulting in a heavy, flat bake. If you’re in a rush, place your eggs in a bowl of warm water for five minutes to take the chill off.
We use all-purpose flour here rather than cake flour for a very specific reason: strength. A sheet cake needs to be sliced into clean, handheld squares. All-purpose flour has a slightly higher protein content, providing the “bones” necessary to support the weight of the heavy cream glaze and those beautiful gold sprinkles without the cake compressing under its own weight.
Don’t skimp on the salt or the vanilla extract. The salt acts as a flavor sharpener, cutting through the sugar to make the vanilla taste more complex. Use a high-quality vanilla bean paste if you want those gorgeous little black specks to show through the pink crumb, though a standard clear or brown extract works perfectly for that classic birthday cake aroma.
Selecting the Right Pink Gel Colorant
When it comes to “Pink Velvet,” the type of coloring you use matters immensely. Avoid the liquid drops found in the grocery store baking aisle, as they are mostly water. Adding extra liquid can throw off the pH of the batter and lead to a streaky, inconsistent color. It can also contribute to the very sogginess we are trying to avoid.
Gel food coloring is highly concentrated and provides a vibrant, neon-to-pastel range without changing the batter’s consistency. A tiny toothpick-dip of gel is usually enough to achieve a soft rose petal pink. Remember that the color will deepen slightly as the cake bakes, so aim for a shade just a hair lighter than your desired final result.
The Role of Whole Milk in Moisture Retention
Whole milk is a non-negotiable for this recipe. The fat content in whole milk (about 3.25%) is essential for coating the flour proteins, which limits gluten development. This is what keeps the cake tender for days. If you use skim or 1% milk, you lose that protective fat, and the cake can turn out bread-like or dry.
The milk also provides the sugars (lactose) necessary for a beautiful, light golden browning on the surface. This thin “crust” acts as a seal, helping the cake retain its internal moisture while it cools. It creates a barrier so the glaze sits on top rather than soaking into the sponge.
Step-by-Step: Achieving the Moisture-Lock Seal
The process begins with creaming your butter and sugar for at least three full minutes. You are looking for a visual change: the mixture should turn from a dense yellow to a pale, almost white, fluffy cloud. This is the most important step for texture. Once you start adding eggs, do it one by one, ensuring each is fully incorporated before the next one hits the bowl.
When it’s time to combine the wet and dry ingredients, use the “alternating method.” Start with a third of the flour, then half the milk, then more flour, the rest of the milk, and finish with the flour. This technique prevents the batter from saturating too quickly, which can cause the fats to separate. Mix only until you see no more streaks of white flour. Overmixing at this stage is the fastest way to a tough, rubbery cake.
As you pour the batter into the pan, use an offset spatula to push it into the corners. The batter should be thick and luscious, holding its shape. If it’s runny, your butter might have been too warm. Don’t worry, it will still bake, but the crumb might be slightly more open than a traditional velvet cake.
Preparing the Pan for Maximum Airflow
To truly defeat the soggy bottom, you need a dual-layer defense. First, grease the pan thoroughly with butter or non-stick spray. Then, line the bottom with a rectangular piece of parchment paper. This creates a physical heat barrier that prevents the bottom of the cake from caramelizing too quickly or becoming greasy.
The parchment also makes it incredibly easy to lift the entire cake out of the pan if you prefer to slice it on a cutting board. By preventing the cake from sticking to the metal, you ensure that the bottom “skin” of the cake remains intact, which is vital for a clean, dry base.
The Cooling Rack Requirement
This is the step most people skip, and it’s the most dangerous for your cake’s texture. As soon as the cake comes out of the oven, place the entire pan on a wire cooling rack. This allows air to circulate under the hot metal. If you place a hot pan directly on a flat countertop, the heat trapped underneath creates condensation.
That condensation has nowhere to go but back into the bottom of your cake, turning a perfectly baked sponge into a gummy mess. Let it cool completely in the pan. This “carry-over cooking” period allows the internal structure to firm up. If you try to glaze a warm cake, the frosting will melt and seep into the pores, ruining the velvet crumb.
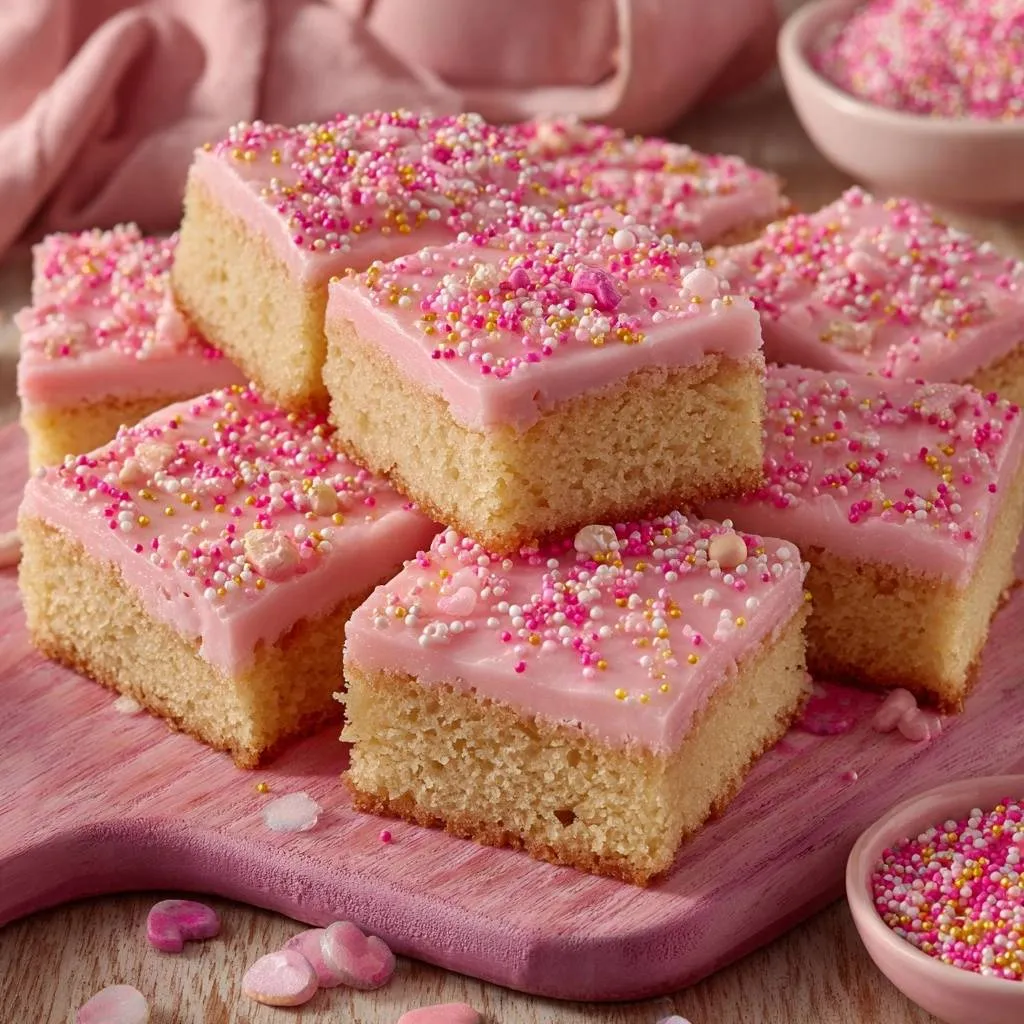
Crafting the High-Gloss Pink Glaze
The glaze for these squares needs to be thick and opaque, almost like a liquid fondant. By whisking together powdered sugar, heavy cream, and a touch of melted butter, you create a topping that is rich and glossy. The heavy cream provides a much better mouthfeel and a whiter base for your pink coloring than water or milk ever could.
You are looking for the “Ribbon Stage.” When you lift the whisk, the glaze should fall back into the bowl in a thick ribbon that holds its shape for a second or two before disappearing. If it’s too thin, add more sugar; if it’s too thick to pour, add cream a teaspoon at a time. This thickness ensures the glaze stays on top of the cake as a distinct, beautiful layer.
Timing the Sprinkle Application
Because this glaze contains melted butter, it will begin to “set” or form a thin crust as soon as it hits the cool cake. You have a very narrow window of opportunity—usually about two minutes—to apply your sprinkles. If you wait too long, the nonpareils will simply bounce off the surface instead of sticking.
Have your pink, white, and gold sprinkles ready in a bowl before you even pour the glaze. Start from the edges and work your way in, ensuring every square inch is covered. This doesn’t just look pretty; the sprinkles add a necessary crunch that contrasts beautifully with the soft velvet cake and smooth glaze.
Troubleshooting Common Sheet Cake Failures
If your cake sinks in the middle, it’s usually due to one of two things: over-mixing the batter or under-baking the center. Over-mixing incorporates too much air that the structure can’t support, causing a collapse. Always use the toothpick test in the very center of the pan; it should come out clean or with just a few dry crumbs.
A coarse, cornbread-like texture usually means your butter was too cold or you didn’t cream it long enough. That initial three-minute whip is vital for a fine crumb. If the glaze slides off the edges, the cake was likely still holding internal heat. Patience is your best friend here; the pan should feel cold to the touch before you decorate.
For those struggling with crumbly cuts, the fix is simple: wait. The 30-minute firming period after glazing allows the moisture to redistribute and the fats to set. If you cut into it immediately, the cake will tear. A little bit of chill time makes all the difference for those sharp, professional edges.
Storage and Make-Ahead Strategies
These Pink Velvet squares stay remarkably fresh thanks to the whole milk and butter content. You can store them in an airtight container at room temperature for up to three days. If your kitchen is particularly warm, move them to the fridge, but let them sit out for 20 minutes before serving so the butter in the cake can soften back up.
For similar creamy baked goodness, check out this skillet baked mac and cheese.
If you want to make this ahead of time, you can bake the cake base, wrap it tightly in plastic wrap once cool, and freeze it for up to a month. I recommend glazing it fresh on the day you plan to serve it. While you can freeze the finished squares, the sprinkles may bleed their color into the glaze as they thaw, so fresh is always better for presentation.
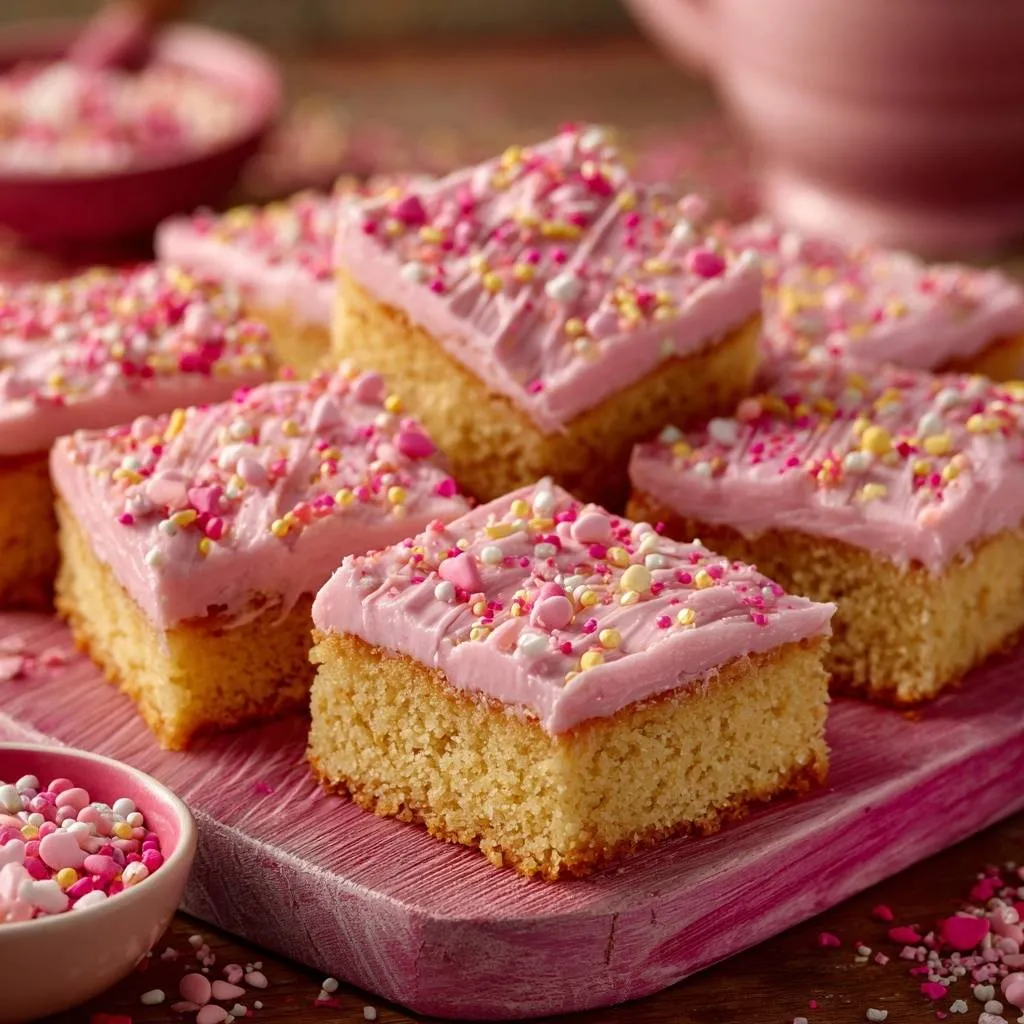
Expert Tips for Clean Slicing
To get those perfect, Instagram-worthy squares, use a long, sharp chef’s knife. Dip the blade into a tall glass of hot water, wipe it completely dry with a clean towel, and make one long, smooth cut. Repeat the dipping and drying process for every single slice.
This prevents the glaze from sticking to the blade and dragging through the pink interior. By keeping the knife hot and dry, you melt through the glaze and “sear” the edge of the cake, resulting in a perfectly flat, clean surface that shows off the beautiful velvet texture of the crumb.
Frequently Asked Questions
Can I use cake flour instead of all-purpose?
You can use cake flour, but be aware that the cake will be much more fragile. Cake flour has less protein, which results in a very soft bite but might struggle to support the weight of the heavy glaze and sprinkles. If you prefer a softer texture, try a 50/50 blend of all-purpose and cake flour to get the best of both worlds.
How do I prevent the pink color from fading?
Food coloring can sometimes fade if exposed to high heat for too long or direct sunlight. To keep your pink vibrant, ensure you aren’t over-baking the cake, which creates a brown crust that masks the pink. Once the cake is glazed and cut, keep it in a cool, shaded spot rather than right next to a sunny window.
What is the best way to measure flour for this recipe?
The most common mistake in baking is packing the flour into the measuring cup, which leads to a dry, dense cake. Use the “spoon and level” method: fluff the flour with a spoon, gently scoop it into your measuring cup until it overflows, and then level it off with the back of a knife. This ensures your cake stays light and airy.
Can I substitute the heavy cream in the glaze?
You can substitute whole milk for the heavy cream if you’re in a pinch, but the glaze will be thinner and more translucent. Heavy cream provides a rich, white opacity that makes the pink color pop. If you use milk, start with half the amount called for and add it slowly until you reach the desired thickness.
Pink Velvet Cake
Course: DessertCuisine: AmericanDifficulty: easy12
servings15
minutes25
minutes340
kcal40
MinutesThese Pink Velvet Sheet Cake Squares are designed to stay light and structured. By using a specific baking and cooling method, this recipe ensures a perfect crumb from top to bottom, finished with a smooth pink glaze and decorative sprinkles.
Ingredients
2 cups all-purpose flour
1 and 1/2 cups granulated sugar
1 tablespoon baking powder
1/2 teaspoon salt
3/4 cup unsalted butter, softened
3 large eggs, room temperature
1 cup whole milk
2 teaspoons vanilla extract
1/2 teaspoon pink gel food coloring (optional, for cake batter)
For the Glaze & Topping:
2 cups powdered sugar
3 tablespoons heavy cream
1 tablespoon melted butter
1/2 teaspoon vanilla extract
1-2 drops pink gel food coloring
1/2 cup pink, white, and gold nonpareil sprinkles
Directions
- Preheat your oven to 350°F (175°C). Grease a 9×13 inch baking pan and line the bottom with parchment paper. This is the first step in preventing a moisture trap at the base.
- In a large bowl, cream the softened butter and sugar until pale and fluffy (about 3 minutes). Add eggs one at a time, beating well after each addition. If a pink interior is desired, mix in the food coloring now.
- In a separate bowl, whisk together flour, baking powder, and salt.
- Gradually add the dry ingredients to the butter mixture, alternating with the milk and vanilla. Mix until just combined. Do not overmix, as this develops gluten and leads to a heavy, dense base.
- Pour the batter into the prepared pan. To solve the soggy bottom issue, bake at 350°F for 20 minutes, then rotate the pan and bake for an additional 5 to 8 minutes until a toothpick comes out clean. This ensures the heat penetrates the center of the pan evenly.
- Remove from the oven and let the cake cool completely in the pan on a wire rack. The wire rack is essential; it allows air to circulate under the pan, preventing steam from condensing and making the bottom crust soft.
- Prepare the glaze: Whisk powdered sugar, heavy cream, melted butter, vanilla, and pink coloring until smooth and thick. It should be pourable but heavy enough to hold its shape.
- Once the cake is completely cool, pour the glaze over the top, spreading it to the edges with an offset spatula. Immediately top with a generous layer of nonpareil sprinkles so they adhere before the glaze sets.
- Allow the glaze to firm up for 30 minutes before slicing into uniform squares. This ensures clean edges and a perfect “velvet” crumb structure.
Notes
- The use of a wire rack during cooling is essential to prevent steam from condensing at the bottom of the pan. Ensure the cake is completely cool before glazing to maintain the velvet crumb structure.