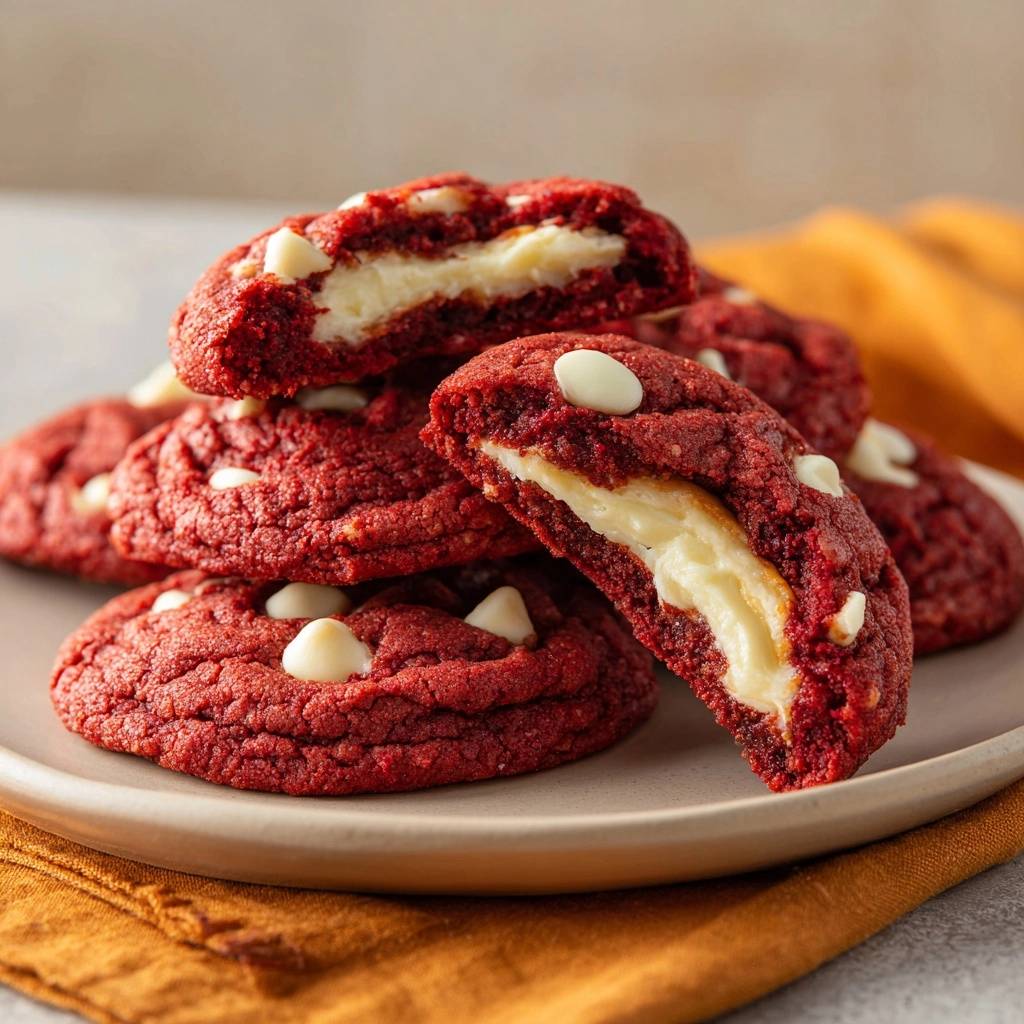
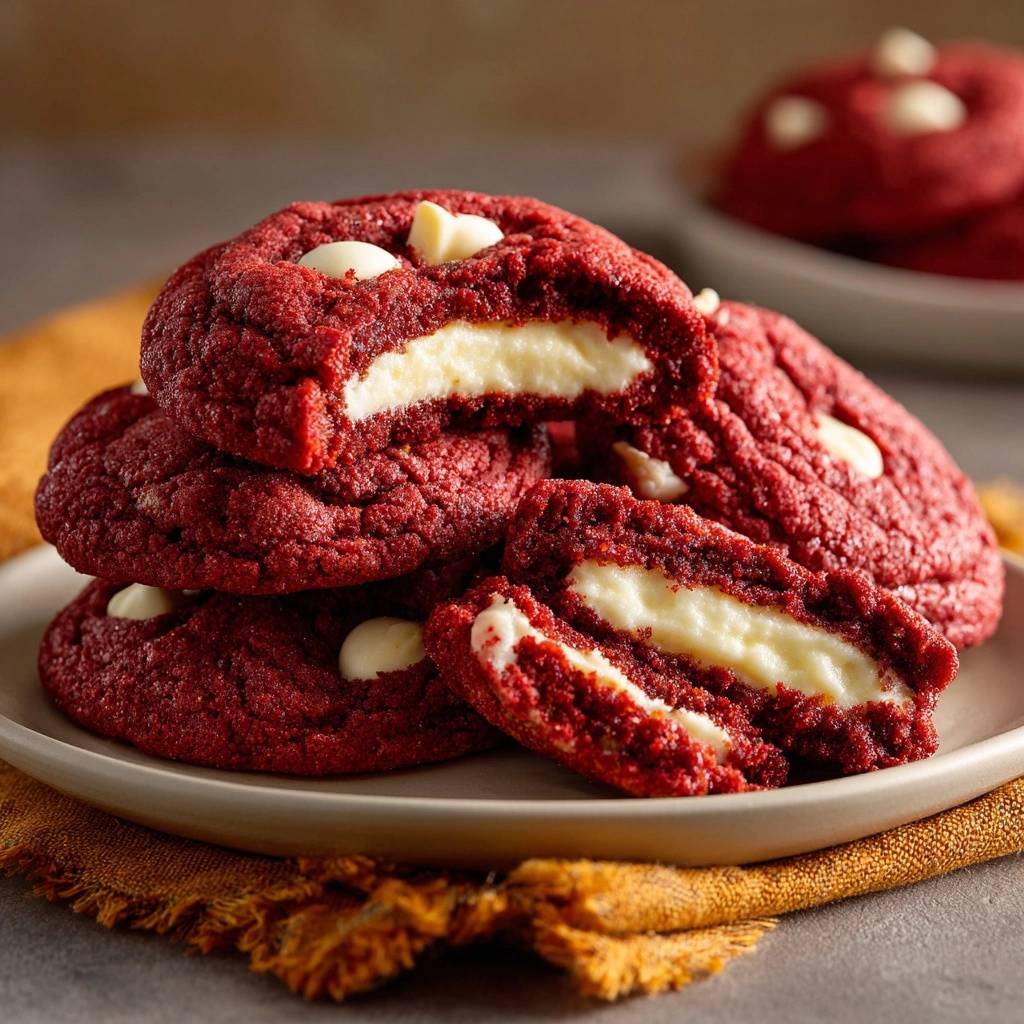
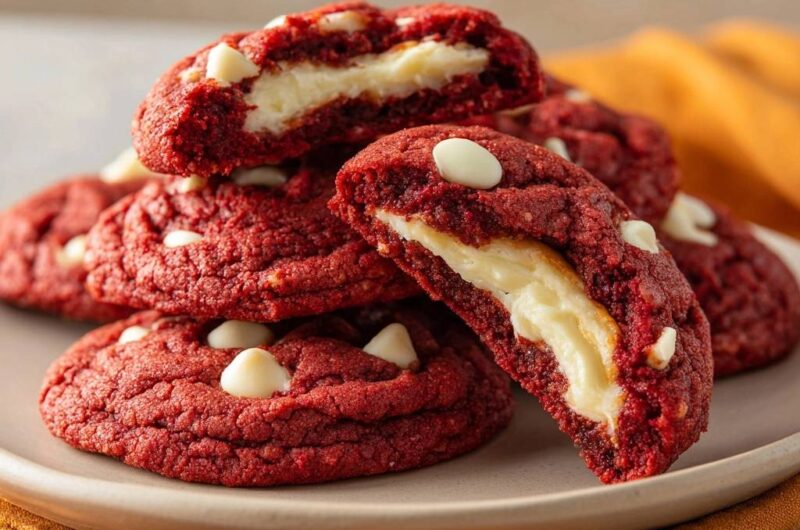
Imagine biting into a cookie with a deep crimson, cocoa-scented crumb that gives way to a thick, molten core of tangy cheesecake. The contrast between the slightly salty, fudgy dough and the sweet, creamy center is enough to make any dessert lover swoon. These aren’t your average flat bakery rounds; they are hefty, decadent masterpieces studded with ivory white chocolate chips that pop against the vibrant red dough.
Most bakers struggle with stuffed cookies because the filling often decides to make a run for it, leaving a hollow shell and a burnt mess on the baking sheet. This recipe solves that “blowout” frustration by focusing on thermal control and structural integrity. You get a cookie that stays tall and proud, keeping that luscious cheesecake surprise perfectly tucked inside every single bite.
Many bakers find a similar approach helpful for achieving a moist chocolate bundt cake.
The secret to success lies in the temperature of your filling. I’ve found that flash-freezing the cream cheese discs until they are rock-solid is the only way to ensure they don’t melt faster than the dough sets. If you skip the freezing step, the steam from the cream cheese will rupture the dough, but a frozen core buys the cookie enough time to build its golden-brown walls in the oven.
For a similar smooth texture, explore the creamy pumpkin swirl cheesecake.
The Chemistry of a Perfect Red Velvet Crumb
Red velvet is more than just chocolate cake with a dye job; it’s a specific chemical reaction. The cocoa powder acts as an acid, and when it meets the baking soda, it creates a tiny bit of lift that results in a velvety, tight crumb. This reaction is what gives the cookie its signature “fudgy but light” texture that distinguishes it from a standard chocolate chip cookie.
More Sweet Creations
If you enjoyed these red velvet cheesecake cookies, you might like these other sweet treats.
- For a breakfast that feels like a dessert, check out these S’mores Pancakes, offering a similar campfire-inspired sweetness.
- If you appreciate a rich, layered dessert, consider the Loaded Sausage Gravy Tater Tot Bowl for a savory twist on indulgent comfort food.
To keep these cookies from becoming tough or bread-like, I always add a teaspoon of cornstarch. Cornstarch acts as a tenderizer by softening the harsh proteins in the all-purpose flour. It mimics the effect of cake flour, giving you a soft, melt-in-your-mouth bite while still providing enough strength to hold that heavy cheesecake center without collapsing.
Why Gel Food Coloring Outperforms Liquid
When you want that iconic, “stop-in-your-tracks” red color, gel food coloring is the only way to go. Liquid dyes are mostly water, and adding too much can throw off the hydration of your dough, making it sticky and difficult to seal. Gels are highly concentrated, meaning you only need a small amount to achieve a vivid hue without compromising the dough’s elasticity or causing it to crack during the bake.
Essential Components for Red Velvet Cheesecake Stuffed Cookies
Quality ingredients are the foundation of a great stuffed cookie. I recommend using a high-fat, unsalted butter because it has less water content than cheaper brands. This leads to a richer flavor and a more controlled spread in the oven. Since we are stuffing these, we need the dough to stay thick rather than puddling out into a thin disc.
Brown sugar is another non-negotiable player here. Always pack it firmly into your measuring cup to ensure you’re getting the right amount of moisture and molasses. The acidity in brown sugar helps activate the baking soda and provides the chewiness required to encase the filling. Without it, the cookie would be too crisp and brittle to handle the “Double-Pinch” technique.
Selecting the Right Cream Cheese
For the filling, you must use full-fat block cream cheese. Avoid the whipped spreads or the tubs labeled “softened,” as these contain extra air and moisture. Low-fat versions are also a mistake here; the higher water content will turn into steam in the hot oven, causing your cookies to explode like little red volcanoes. The block variety stays stable and creamy under heat.
White Chocolate: Chips vs. Hand-Chopped Chunks
While hand-chopped chocolate is great for puddles of goo, stabilized white chocolate chips are actually better for the “topped” look of these cookies. Chips are designed to hold their shape at higher temperatures. This structural integrity ensures that the chips on top of the cookie stay visible and beautiful, providing a stark, professional-looking contrast against the red dough.
Phase One: Preparing the Frozen Cheesecake Core
This is the most critical technical step in the entire process. You are essentially creating a “thermal delay” by freezing the cream cheese, vanilla, and sugar mixture. By dropping rounded teaspoons onto parchment and freezing them for at least an hour, you ensure the center is a solid ice cube before it hits the heat.
If you try to stuff the cookies with room-temperature filling, the cream cheese will liquefy before the cookie dough has a chance to set its structure. This leads to the dreaded “flat cookie” syndrome. Rushing this stage is the number one reason for failure, so give those cheesecake discs the time they need to get rock-hard.
Phase Two: Mixing and Chilling the Red Velvet Dough
When creaming your butter and sugars, aim for a light and fluffy texture, which usually takes about three minutes of beating. Interestingly, I use a cold egg for this specific recipe. While most baking calls for room-temperature ingredients, a cold egg helps keep the overall dough temperature lower, which is vital when you’re about to wrap it around frozen filling.
After mixing in your dry ingredients, the dough needs a 30-minute nap in the fridge. This chilling period allows the flour to fully hydrate and the butter to firm up. When you pull it out, the dough should feel tacky but shouldn’t stick to your hands like glue. This consistency makes it much easier to manipulate during the assembly phase.
The Double-Pinch Technique: Securing the Filling
To assemble, take about two and a half tablespoons of dough and roll it into a smooth ball. Flatten it in your palm until it’s a wide, thin disc. Place your rock-frozen cheesecake cube right in the center. Now, carefully fold the edges of the dough up and over the filling, pinching the seams together tightly to seal the deal.
The “Double-Pinch” is my favorite trick: after you’ve rolled the stuffed dough back into a ball, pinch the top and bottom one more time. This eliminates any hidden air pockets. Air pockets are the enemy; they expand in the oven and cause the dough to rupture. A tight, seamless seal is your insurance policy against a cheesecake blowout.
Thermal Precision: Baking and the Carryover Cook
Oven calibration is everything when it comes to stuffed treats. You want to bake these at 350°F just until the edges are set and the tops show a slight crackle. They will look slightly underdone in the very center, and that is exactly what you want. If you wait until they look “finished,” the cheesecake inside will be overcooked and grainy.
The “Carryover Cook” happens during the 15 minutes the cookies rest on the hot baking sheet. The residual heat continues to firm up the dough while gently setting the cheesecake center. This resting period is what creates that perfect, creamy texture that stays put when you finally break the cookie open.
Troubleshooting Common Stuffed Cookie Failures
If your cookies turned into a “Puddle Effect,” your dough was likely too warm or your butter was too soft. Next time, chill the dough longer. If you experienced a “Blowout,” it usually means the seams weren’t pinched tightly enough or there was an air bubble trapped inside. Always double-check those seals before the cookies go into the oven.
A “Grainy Filling” usually happens if you over-mix the cream cheese and sugar or if you over-bake the cookies. Over-beating breaks down the protein structure of the cheese, making it watery. Mix the filling just until smooth and pull the cookies out of the oven the moment the edges look stable to keep that center silky.
Storage Logistics: Maintaining the Molten Center
Because these contain cream cheese, you should store them in an airtight container in the refrigerator. They will stay fresh for up to four days. To regain that “fresh from the oven” experience, pop a cookie in the microwave for about 10 to 15 seconds. This softens the dough and turns the cheesecake center back into a molten delight without drying out the edges.
Freezing Dough Balls for Future Baking
You can actually “Flash Freeze” these unbaked, stuffed dough balls for a rainy day. Place the assembled balls on a tray in the freezer until solid, then toss them into a freezer bag. When you’re ready to bake, just add two extra minutes to the baking time. You don’t even need to thaw them, making it the ultimate hack for instant dessert cravings.
Expert Baking Inquiries
Can I use natural cocoa powder instead of Dutch-processed?
Natural cocoa powder is more acidic than Dutch-processed. While it will still work, it may react more aggressively with the baking soda, potentially making the cookies rise more and look slightly lighter in color. For that deep, dark red and a fudgy texture, Dutch-processed is generally the preferred choice for red velvet recipes.
How do I prevent the white chocolate chips from browning?
White chocolate has a low burn point because of its high sugar and milk solid content. To keep them looking snowy white, save a handful of chips and press them into the tops of the cookies immediately after you pull them out of the oven. The residual heat will melt them just enough to stick without browning them.
Why did my cheesecake filling turn liquid?
This usually happens if you over-beat the cream cheese with the powdered sugar. Over-mixing incorporates too much air and breaks down the emulsifiers in the cheese. Another culprit is using “spreadable” cream cheese from a tub, which has a much higher moisture content than the block variety required for baking.
Is the cornstarch really necessary?
Yes, cornstarch is vital for the structural “softness” of the cookie. It interferes with gluten development, ensuring the cookie remains tender and easy to bite into even after it has been refrigerated. Without it, the cookie can become quite hard once chilled, which ruins the contrast with the soft cheesecake center.
Red Velvet Cookies
Course: DessertCuisine: AmericanDifficulty: medium12
large cookies30
minutes12
minutes320
kcal60
MinutesA vibrant red velvet cookie dough infused with cocoa and white chocolate chips, stuffed with a creamy cheesecake filling. The recipe utilizes a flash-freezing method and a double-pinch technique to ensure the filling stays inside the cookie during baking.
Ingredients
Cheesecake Filling:
6 oz cream cheese, cold and firm
1/2 cup powdered sugar
1/2 teaspoon vanilla extract
Red Velvet Cookie Dough:
1/2 cup unsalted butter, softened
1/2 cup brown sugar, packed
1/4 cup granulated sugar
1 large egg, cold
1 teaspoon vanilla extract
1 tablespoon red food coloring (gel preferred for vibrancy)
1 3/4 cups all-purpose flour
1/4 cup unsweetened cocoa powder
1 teaspoon cornstarch (for softness)
3/4 teaspoon baking soda
1/4 teaspoon salt
3/4 cup white chocolate chips (divided)
Directions
- Prepare the Filling: In a small bowl, beat the cream cheese, powdered sugar, and vanilla until smooth. Line a plate with parchment paper. Drop 12 rounded teaspoons of the mixture onto the plate. Freeze for at least 1 hour until completely solid. This is the “No-Leak” secret; if the filling is soft when baking, it will steam and burst the dough.
- Make the Dough: In a large bowl, cream together the softened butter, brown sugar, and granulated sugar until light and fluffy (about 2-3 minutes). Beat in the egg, vanilla, and red food coloring until the color is vibrant and uniform.
- Mix Dry Ingredients: In a separate bowl, whisk together the flour, cocoa powder, cornstarch, baking soda, and salt. Gradually add the dry ingredients to the wet ingredients, mixing until just combined. Fold in 1/2 cup of the white chocolate chips.
- Chill the Dough: Refrigerate the dough for 30 minutes. Cold dough prevents the cookies from spreading too thin and exposing the filling.
- Assemble: Scoop about 2.5 tablespoons of dough and roll into a ball. Flatten it into a large, thin disc in your palm. Place one rock-frozen cheesecake disc in the center.
- The Double-Pinch Technique: Fold the edges of the dough over the filling and pinch the seams tightly. Roll it back into a smooth ball, then pinch the top and bottom again to ensure there are no air gaps or thin spots.
- Top and Bake: Place the balls on a parchment-lined baking sheet, spaced 3 inches apart. Press the remaining white chocolate chips into the tops of the dough balls.
- Bake: Bake at 350°F (175°C) for 11-13 minutes. The edges should be set and the tops should have a slight crackle, but the centers should still look slightly soft.
- Cool: Allow the cookies to cool on the pan for at least 15 minutes. This resting period is crucial for the cheesecake center to set so it maintains the creamy texture shown in the image rather than running out.
Notes
- The secret to preventing leaks is flash-freezing the cheesecake discs for at least 1 hour and using the double-pinch technique when sealing the dough. Allow cookies to cool for 15 minutes to let the center set properly.