Few things in the baking world are as disappointing as a cookie that looks like a masterpiece but feels like a wet sponge. You know the type: a beautiful golden top that hides a greasy, limp bottom. This happens because butterscotch chips have a high sugar content, causing them to liquefy and pool at the base of the cookie during baking. It creates a sticky mess that ruins the structural integrity of your treat.
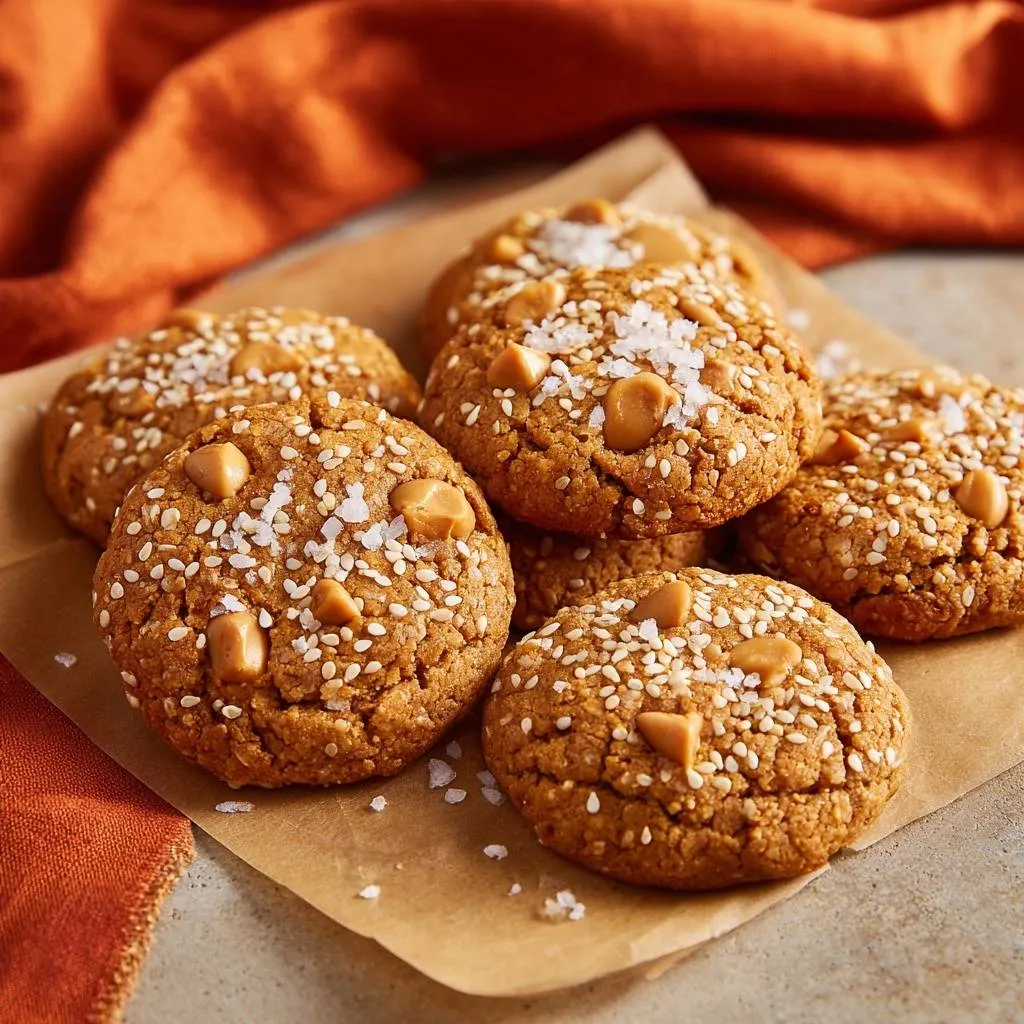
These Salted Butterscotch Sesame Cookies solve that frustration through a specific temperature-controlled method. By pairing the deep, buttery sweetness of caramel with the earthy, nutty crunch of white sesame seeds, you get a flavor profile that is sophisticated and balanced. The addition of flaky sea salt cuts through the richness, ensuring every bite is a complex mix of savory and sweet.
The secret to this professional-grade texture isn’t a fancy oven or expensive tools. It’s all about the chill time. When you let the dough rest, you’re allowing the flour to fully hydrate and the fats to solidify. This prevents the “puddle effect” and ensures your cookies have a sturdy, crisp foundation that can actually hold up all those delicious mix-ins.
For a similar sweet treat, consider these caramel pecan cookies for a comforting change.
The Chemistry of the Anti-Soggy Cookie Base
To understand why cookies turn out greasy, we have to look at the science of fat and hydration. When you mix dough and immediately put it in the oven, the butter melts faster than the flour can set. This results in a cookie that spreads too thin, leaving the butterscotch chips to melt directly onto the parchment paper. This creates that dreaded “soggy bottom” that lacks any snap or crunch.
Chilling the dough for at least 60 minutes is a non-negotiable step for this recipe. During this hour, the starch granules in the flour absorb the moisture from the eggs and vanilla. This hydration makes the dough more cohesive and concentrated. Simultaneously, the butter returns to a solid state, which means it will take much longer to melt once it hits the heat of the oven.
Because the butter stays solid longer, the edges of the cookie have time to set and brown before the center spreads. This creates a structural “wall” that keeps the butterscotch chips suspended in the dough rather than sinking to the bottom. You’ll notice the difference immediately in the weight and firmness of the finished cookie.

Why Temperature Control Prevents Greasy Bottoms
Successful emulsification is the backbone of a great cookie. When you use room temperature eggs and softened (not melted) butter, they bond together to create a smooth, creamy base. If your eggs are too cold, they’ll cause the butter to seize and clump, breaking the emulsion and leading to an oily finished product.
A broken emulsion can’t hold onto the sugar and flour properly. During baking, the fat will separate from the solids, leaking out of the dough and frying the bottom of the cookie in a way that makes it heavy and limp. Taking the time to let your ingredients reach the same temperature ensures a stable dough that bakes up light and crisp.
Essential Components for Salted Butterscotch Sesame Cookies
Every ingredient in this recipe serves a specific purpose beyond just flavor. We aren’t just making a sweet snack; we’re building a texture profile. Using high-quality unsalted butter allows you to control the salt levels perfectly, while the combination of two sugars provides both lift and chewiness. If you find your butter is too hard, don’t microwave it! Just let it sit on the counter for 30 minutes until your finger leaves a slight indent when pressed.
Dark Brown Sugar vs. Light Brown Sugar
While you can use light brown sugar in a pinch, dark brown sugar is the MVP here. It contains a higher concentration of molasses, which adds a deep, acidic note that balances the intense sweetness of the butterscotch. That extra molasses also attracts more moisture, giving the cookie its signature chewy center that contrasts so well with the crisp sesame exterior.
The Role of White Sesame Seeds in Texture
Sesame seeds aren’t just for decoration. They contain natural oils that toast beautifully in the oven, providing a savory, nutty aroma that fills your kitchen. Structurally, the seeds create a protective “crunch layer” on the top of the cookie. This adds a physical barrier that prevents the top from becoming too soft, giving you a satisfying snap when you take a bite.
If you enjoy the nutty notes of sesame, you’ll want to try these chewy tahini sesame cookies.
Selecting the Right Flaky Sea Salt
Don’t swap the flaky sea salt for standard table salt at the end. Table salt is fine for the dough because it dissolves and balances the leavening agents. However, for the finish, you want large, crunchy crystals. These flakes provide a sudden burst of saltiness that cleanses the palate between the rich hits of butterscotch, making the cookies much more addictive.
Step-by-Step: Preparing the Butterscotch Sesame Dough
Start by creaming your butter and sugars for a full three minutes. You’re looking for a specific visual cue: the mixture should turn a pale, sandy color and look significantly fluffier than when you started. This process incorporates tiny air bubbles into the fat, which helps the baking soda do its job later on. If you skip this, your cookies will be dense and heavy.
When it’s time to add the dry ingredients, put the mixer on the lowest setting or use a sturdy spatula. You want to mix until you see just a few streaks of flour left, then stop. Over-mixing at this stage develops gluten, which turns a tender cookie into a tough, bread-like disc. Gently fold in the butterscotch chips by hand to keep the dough light.
The Chilling Phase: Why Patience Improves Flavor
While the dough rests in the fridge, something called enzymatic breakdown occurs. The proteins and starches in the flour begin to break down into simple sugars. This doesn’t just help with the texture; it actually deepens the flavor. A chilled dough will have much more pronounced notes of caramel and toasted nuts than a dough baked immediately.
If you’ve ever had a cookie that tasted “flat” or just like plain sugar, it likely wasn’t chilled long enough. That one-hour rest allows the vanilla and butterscotch flavors to permeate the entire dough. It’s the difference between a good home-cooked cookie and a professional bakery-style treat that people can’t stop talking about.
Precision Baking for a Golden, Crunchy Crust
When you’re ready to bake, scoop the dough into balls about the size of a golf ball. Only roll the top half of the ball in the sesame seeds. This is a crucial tip: leaving the bottom of the dough ball “naked” ensures it makes direct contact with the parchment paper. This contact is what creates that perfectly flat, golden-brown crust on the bottom.
The “Press-In” Method for Visual Appeal
To get that “Instagram-ready” look, don’t mix all your butterscotch chips into the dough. Save a handful and press two or three directly into the top of each dough ball before they go into the oven. This prevents the chips from being buried and ensures they don’t touch the hot pan, which can cause them to burn and turn bitter.
Carryover Cooking on the Hot Baking Sheet
The most important part of the “anti-soggy” method happens after the timer goes off. When you pull the tray out, the cookies will look slightly underdone in the middle. Leave them on the hot metal baking sheet for exactly five minutes. The residual heat from the pan continues to “fry” the bottom of the cookie, setting the crust and ensuring it stays crisp even after it cools down.
Troubleshooting Common Butterscotch Baking Issues
If your cookies are spreading into one giant pancake, your oven might be too cool, or your butter was too soft to begin with. Always use an oven thermometer if you can. On the flip side, if the sesame seeds aren’t sticking to the dough, your dough might have dried out in the fridge. Simply roll the balls in your palms for a few seconds to warm up the surface before dipping them in the seeds.
Preventing Butterscotch Chip Scorching
Butterscotch chips have more sugar than dark chocolate, meaning they burn easily. If you notice the bottoms of your cookies are getting too dark before the tops are done, move your oven rack up one level. This increases the distance between the cookies and the heating element, allowing the tops to set without charring the sugar on the bottom.
Optimal Storage and Moisture Control
To keep that hard-earned crispness, store these cookies in an airtight container once they are completely cool. Never put them in a container while they are still even slightly warm, as the steam will soften the crust. While many people suggest putting a piece of bread in the jar to keep cookies soft, don’t do that here! The bread will add too much moisture and ruin the specific “snap” of the sesame crust.
Complementary Treats
Enjoy these recipes alongside your Salted Butterscotch Sesame Cookies.
- For a refreshing pause, try our Creamy Copycat Iced Coffee, a perfect counterpoint to the cookie’s sweetness.
- If you’re in the mood for more baked goods, our Glazed Carrot Walnut Muffins offer a different texture and warm spice notes.
Expert Baking Techniques FAQ
Can I use black sesame seeds instead of white?
Yes, you can use black sesame seeds, but be aware that they have a much stronger, slightly more bitter flavor than white seeds. They provide a stunning visual contrast against the golden dough, but they might overpower the delicate butterscotch. A 50/50 mix of black and white seeds is often the best middle ground for both flavor and aesthetics.
Why are my cookies cakey instead of chewy?
Cakey cookies are usually the result of too much flour or over-beating the eggs. When you measure your flour, use a spoon to fluff it up and level it off with a knife rather than scooping directly with the measuring cup. Scooping packs the flour down, meaning you end up with way more than the recipe calls for. Also, only beat the eggs until they are just incorporated to avoid adding too much air.
Can this dough be frozen for later use?
This dough freezes beautifully. Roll the balls and coat them in sesame seeds, then freeze them on a tray before transferring them to a zip-top bag. You can bake them straight from the freezer; just add an extra 2 minutes to the baking time. This is a great way to have fresh, crisp cookies on demand without having to make a full batch every time.
What is the best alternative to parchment paper?
While silicone mats are popular, parchment paper is actually superior for achieving a crisp bottom. Silicone is an insulator, which means it slows down the heat transfer from the pan to the cookie. Parchment is thin and allows the heat to hit the dough directly, resulting in a better “fry” on the bottom of the cookie. Avoid greasing the pan with butter or spray, as this will cause the cookies to spread too much.
How do I achieve perfectly round cookies?
If your cookies come out of the oven looking a bit wonky, use the “scooting” technique. Immediately after taking the tray out, place a circular cookie cutter or a large glass over a hot cookie and gently move it in a circular motion. This pulls in the edges and creates a perfect circle while the dough is still soft and pliable. Do this quickly before the 5-minute carryover cooking time is up!

Salted Butterscotch Sesame Cookies
Course: DessertCuisine: AmericanDifficulty: medium24
cookies1
hour12
minutes240
kcal60
MinutesA unique twist on butterscotch cookies that solves the common ‘soggy bottom’ problem. These cookies feature a nutty sesame crust, rich dark brown sugar base, and a finishing touch of flaky sea salt.
Ingredients
1 cup unsalted butter, softened
3/4 cup granulated sugar
3/4 cup packed dark brown sugar
2 large eggs, room temperature
1 teaspoon vanilla extract
2 1/2 cups all-purpose flour
1 teaspoon baking soda
1/2 teaspoon salt
1 1/2 cups butterscotch chips (divided)
1/2 cup white sesame seeds
2 tablespoons flaky sea salt
Directions
- In a large bowl, cream together the softened butter, granulated sugar, and dark brown sugar until light and fluffy (about 3 minutes). Beat in the eggs one at a time, then stir in the vanilla.
- In a separate bowl, whisk the flour, baking soda, and salt. Gradually add the dry ingredients to the wet ingredients until just combined. Fold in 1 cup of the butterscotch chips.
- To solve the soggy bottom issue, you must chill the dough for at least 1 hour. This solidifies the fats and hydrates the flour, preventing the cookies from spreading too thin and becoming greasy.
- Preheat your oven to 350 degrees F. Line your baking sheets with parchment paper.
- Scoop rounded tablespoons of dough (about 2 tablespoons each) and roll them into balls.
- Place the sesame seeds in a shallow bowl. Roll the top half of each dough ball in the sesame seeds, pressing firmly so they adhere.
- Place the balls on the baking sheet sesame-side up, spaced 2 inches apart. Press 2-3 of the remaining butterscotch chips into the top of each cookie to match the visual aesthetic of the image.
- Bake for 10 to 12 minutes until the edges are golden brown and the centers are set but still slightly soft.
- The secret to the perfect crunch: Leave the cookies on the hot baking sheet for exactly 5 minutes after removing them from the oven. This carryover cooking sets the bottom crust against the hot metal.
- While still warm, sprinkle generously with flaky sea salt. Transfer to a wire cooling rack to allow air to circulate underneath, preventing steam from softening the base.
Notes
- The secret to the perfect crunch is leaving the cookies on the hot baking sheet for exactly 5 minutes after baking to set the bottom crust, then transferring to a wire rack to prevent steaming.