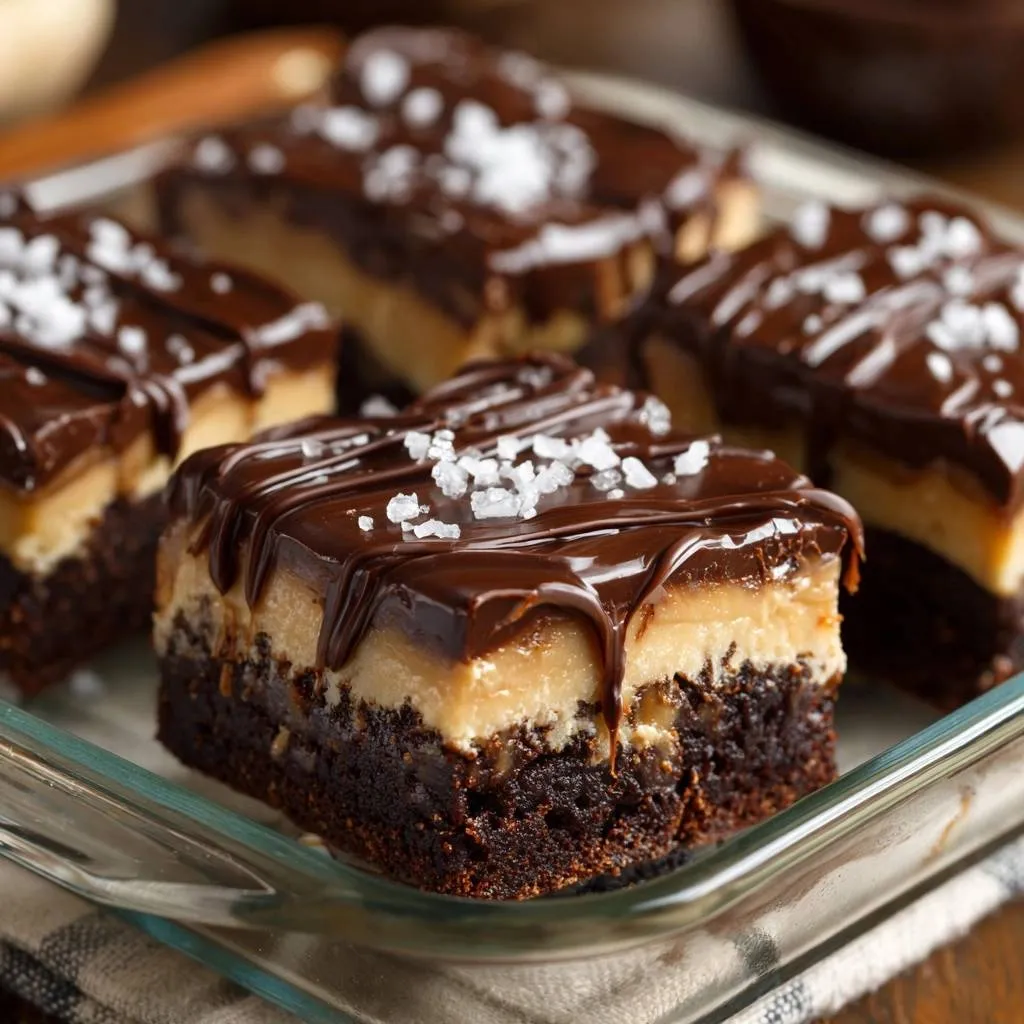
Imagine biting through a snap of dark chocolate ganache into a pool of buttery, liquid gold caramel that never sticks to your teeth. Beneath that sits a brownie so fudgy and dense it almost feels like a truffle. Most people shy away from making this at home because caramel is notoriously finicky, often turning into a gritty, crystallized mess before it even hits the pan.
You don’t have to be a professional pastry chef to master the art of the perfect layer. The secret to this recipe isn’t just in the ingredients, but in the way we stabilize the sugar molecules to ensure they stay silky smooth. We’re going to walk through a foolproof method that guarantees a professional result every single time you bake.
The real trick to these Salted Caramel Layered Brownies lies in using an “interfering agent” during the caramelization process. By adding a small amount of corn syrup, you prevent the sucrose from bonding into jagged crystals. This simple chemistry hack ensures your caramel stays glossy and soft, even after it sets in the fridge.
For a similar gooey delight, try these salted molten lava brownie cookies.
The Chemistry of Smooth Homemade Caramel
Sugar is a temperamental ingredient that wants to return to its solid, crystalline state the moment you start melting it. When you heat sugar and water or butter, the molecules break apart, but they are constantly looking for a reason to hook back together. If one tiny undissolved sugar crystal remains on the side of your pot, it can trigger a chain reaction that turns your entire batch grainy.
Therefore, we use light corn syrup as our secret weapon. Corn syrup is a glucose-rich liquid that physically gets in the way of the sucrose molecules. It acts as a stabilizer, making it nearly impossible for those gritty crystals to form. This ensures that your middle layer remains a creamy, melt-in-your-mouth experience rather than a sandy disappointment.
Why Temperature Control Prevents Crystallization
In addition to using stabilizers, timing is everything when you reach the “soft ball” stage of candy making. This stage occurs when the water content has evaporated enough that the sugar concentration is high, but the mixture remains flexible. For this recipe, that sweet spot happens after exactly three minutes of boiling.
However, you must resist the urge to stir the pot once the mixture starts bubbling vigorously. Stirring can splash sugar syrup onto the cooler sides of the pan, where it will crystallize and fall back into the mix. Let the heat do the work, and only intervene when it’s time to whisk in the dairy at the very end.
The Role of Fat and Dairy in Stability
Butter and heavy cream do more than just provide a rich flavor; they add essential fats that coat the sugar molecules. When you pour the heavy cream into the boiling sugar, it will hiss and steam violently. Don’t panic! This is the water in the cream evaporating instantly as it hits the high-heat syrup.
Using a heavy-bottomed saucepan is non-negotiable here because it distributes heat evenly across the base. Thin pots create hot spots that can scorch the dairy or cause the sugar to burn in one corner while the rest stays undercooked. A thick pot acts as a heat sink, giving you total control over the emulsion.
Essential Components for Salted Caramel Layered Brownies
Quality ingredients are the foundation of any great bake, especially when you have so few of them. Since we aren’t using any artificial flavorings, the taste of your butter and cocoa will shine through. I always recommend using unsalted butter so you can control the salt levels yourself.
If you use salted butter, the final result might become overwhelmingly salty once you add the flaky sea salt on top. By starting with a blank slate, you ensure the contrast between the sweet caramel and the savory salt is perfectly balanced. It’s all about that intentional layering of flavors.
Selecting the Right Chocolate and Cocoa
For the brownie base, I prefer a high-quality unsweetened cocoa powder. Natural cocoa powder provides a fruity, acidic punch that cuts through the richness of the caramel. If you want a darker, more “Oreo-like” color, you can use Dutch-processed cocoa, which is neutralized and offers a smoother, earthier chocolate profile.
For a truly fudgy cocoa brownie experience, explore the science of fudgy cocoa brownies.
When it comes to the ganache, semi-sweet chocolate chips are the ideal choice. They contain just enough sugar to be palatable but enough cocoa solids to stay firm at room temperature. Milk chocolate would make the entire dessert far too cloying, while extra dark chocolate might overpower the delicate caramel notes.
The Importance of Flaky Sea Salt
Never swap out flaky sea salt for standard table salt or kosher salt in this recipe. Table salt is too fine and will simply dissolve into the chocolate, making it taste “salty” rather than “salted.” You want those distinct, crunchy pyramids of salt that sit on top of the ganache.
Flaky salt provides a textural contrast and a sudden burst of salinity that resets your palate after a bite of rich sugar. It makes the chocolate taste more like chocolate and the caramel taste more like butter. It is the finishing touch that moves this from a home-baked treat to a gourmet dessert.
Preparing the Fudgy Brownie Foundation
The base of this dessert needs to be sturdy enough to hold up the heavy caramel and ganache layers. We achieve this by whisking the melted butter and sugar together until they are fully combined. This creates a dense, fudgy structure rather than a light, airy one.
When you add your dry ingredients, stop stirring the moment you no longer see streaks of flour. Over-mixing develops gluten, which turns a brownie from fudgy to bread-like. You want a batter that is thick, glossy, and just smooth enough to spread into the corners of your pan.
Setting Up the Baking Environment
I highly recommend using an 8×8 inch glass baking dish for this recipe. Glass conducts heat more slowly than metal, which helps the brownies bake evenly from the edges to the center. To make your life easier, always use a “parchment sling.”
Cut a piece of parchment paper so it covers the bottom and two sides of the pan with a bit of overhang. Grease the pan first so the paper sticks to the glass and doesn’t slide around while you’re spreading the batter. This sling allows you to lift the entire chilled block of brownies out of the pan for perfect slicing later.
Executing the Foolproof Caramel Layer
Once your brownie base is completely cool, it’s time for the main event. Combine your brown sugar, butter, and corn syrup in your heavy saucepan. Watch for the mixture to transition from a grainy paste to a bubbling, golden liquid. This is where the magic happens.
Set a timer for exactly three minutes once the entire surface is covered in uniform bubbles. If you cook it for too short a time, the caramel will be runny and leak out when you cut the brownies. If you go too long, it will become hard and tacky like a toffee. Three minutes is the “Goldilocks” zone for a soft, set caramel.
Achieving the Perfect Emulsion
When the timer goes off, remove the pan from the heat and slowly whisk in your heavy cream. At first, it might look like the fat is separating from the sugar, creating an oily mess. Don’t worry! Just keep whisking steadily.
As you incorporate the cream, the mixture will transform into a glossy, unified sauce. It should look like liquid silk. Pour it over the cooled brownies immediately while it’s still fluid, then give the pan a gentle shake to level it out before it goes into the fridge.
Assembling the Ganache and Decorative Drizzle
Ganache is all about patience. When you pour the hot cream over your chocolate chips, let it sit undisturbed for at least five minutes. This allows the heat to penetrate the center of the chocolate chips without introducing too much air.
After five minutes, whisk from the center outward in small circles. You’ll see the cream and chocolate slowly marry into a thick, dark glaze. For the decorative drizzle, a simple sandwich bag with the corner snipped off works just as well as a professional piping bag. Just make sure your lines are quick and confident!
Troubleshooting Common Layering Obstacles
The most common mistake is adding the warm caramel to a warm brownie. If the base hasn’t cooled completely, the heat from the caramel will melt the top of the brownie, causing the layers to bleed together. Patience is your best friend here; let that base get to room temperature first.
If your caramel seems too soft after two hours in the fridge, it likely didn’t reach a high enough temperature. You can usually save this by popping the pan into the freezer for 30 minutes before adding the ganache. The extra cold will help stabilize the sugars so the layers stay distinct.
Fixing Seized Chocolate
If a drop of water gets into your melting chocolate for the drizzle, it might “seize” and turn into a clumpy, dry paste. Don’t throw it away! You can often fix this by whisking in a teaspoon of boiling water or a tiny bit of vegetable oil. This thins the chocolate back out and restores the shine.
Always make sure your bowls and whisks are bone-dry before starting the ganache. Even a tiny bit of moisture from a recently washed spoon can ruin the texture of the chocolate. Work slowly and keep your environment dry for the best results.
The Art of the Clean Slice
To get those beautiful, sharp layers you see in professional bakeries, you need a hot knife. Run your knife under hot tap water for a few seconds, then wipe it completely dry with a clean towel. The heat will glide through the ganache and caramel like butter.
Crucially, you must wipe the knife clean after every single cut. If you don’t, the chocolate from the top layer will smear down into the amber caramel, ruining the visual contrast. It takes a little extra time, but the “wow factor” of those clean lines is worth the effort.
Make-Ahead Strategies and Storage Logistics
These brownies actually taste better the second day. The moisture from the caramel seeps slightly into the brownie base, making it even fudgier. You can easily make these 24 to 48 hours before a party and keep them tightly covered in the refrigerator.
When you’re ready to serve, take them out of the fridge about 20 minutes beforehand. This allows the caramel to soften just enough to be gooey while keeping the ganache firm. Store any leftovers in an airtight container to prevent the fridge from drying out the exposed edges.
Freezing and Thawing Protocols
If you want to save these for later, they freeze remarkably well. Wrap individual squares tightly in plastic wrap and then place them in a freezer-safe bag. They will stay fresh for up to three months, making them a great “emergency” dessert for unexpected guests.
To thaw, move the brownies to the refrigerator overnight. Avoid thawing them on the counter, as the rapid temperature change can cause condensation to form on the chocolate. This moisture can make the salt dissolve and leave white spots on your beautiful ganache.
Expert Tips for Professional Results
If you live in a very humid climate, your caramel might take longer to set. Humidity introduces extra moisture into the sugar, which can prevent it from reaching the proper consistency. In these cases, using a digital candy thermometer is a lifesaver. Aim for 235°F to 240°F for the perfect soft-set caramel.
Another pro tip is to use high-quality vanilla bean paste instead of extract in the brownie base. The tiny black specks of vanilla add a sophisticated look and a much deeper aroma that complements the burnt sugar notes of the caramel layer.
Customizing the Salt Profile
While flaky sea salt is the classic choice, you can experiment with different varieties to change the flavor profile. Smoked sea salt adds a campfire-like depth that pairs beautifully with dark chocolate. Alternatively, a vanilla-infused salt can enhance the sweetness of the caramel.
Just remember that the salt is there to provide balance. Don’t overdo it! A light, even sprinkle is all you need to elevate these brownies from a simple snack to a complex, multi-dimensional dessert that will have everyone asking for the recipe.
Frequently Asked Questions
Can I substitute the corn syrup in the caramel?
While you can technically use honey or maple syrup, I don’t recommend it for this specific recipe. Corn syrup is a pure invert sugar that is specifically designed to prevent crystallization. Honey has its own sugar crystals and a very strong flavor that can overpower the butter. If you skip the corn syrup entirely, your caramel has a much higher chance of turning out grainy.
What to Try Next
Continue your sweet exploration with these caramel-themed treats.
- For a crunchy, sweet snack that echoes the caramel notes, try this Classic Caramel Popcorn recipe.
- If you enjoy the crisp texture of caramel, this Classic Crunchy Caramel Popcorn offers a delightful, non-sticky alternative.
Why did my caramel leak out of the sides when I cut the brownies?
This usually happens for two reasons: either the caramel didn’t boil long enough to reach the soft-ball stage, or the brownies weren’t chilled long enough. Ensure you boil the mixture for a full three minutes and give the pan at least two hours (or even overnight) in the fridge before slicing. Using a cold knife can also cause the caramel to drag, so stick to the hot knife method!
Can I use a 9×9 pan instead of an 8×8?
You can, but your layers will be significantly thinner. A 9×9 pan has about 25% more surface area than an 8×8. If you use the larger pan, reduce the baking time for the brownie base by 5 minutes to prevent it from drying out. The caramel layer will also be thinner, so it will set much faster in the refrigerator.
How do I prevent the parchment paper from sticking to the caramel?
The best way to handle this is to ensure the caramel is fully set and cold before you try to peel the paper away. If the caramel is still room temperature, it will be tacky and stick to everything. Once the brownies are chilled, the parchment should peel off cleanly in one smooth motion. If you’re still worried, you can lightly spray the inside of the parchment with non-stick cooking spray before pouring the caramel.
Why is my ganache dull instead of shiny?
A dull ganache usually means the emulsion broke or the chocolate was overheated. To keep it shiny, make sure you don’t boil the cream—just bring it to a gentle simmer. Also, avoid over-whisking the chocolate, as this introduces air bubbles that take away the gloss. If it’s already dull, a tiny bit of room-temperature butter whisked in at the very end can help bring back some of that professional sheen.
Salted Caramel Layered Brownies
Course: DessertCuisine: AmericanDifficulty: medium12
servings25
minutes35
minutes550
kcal180
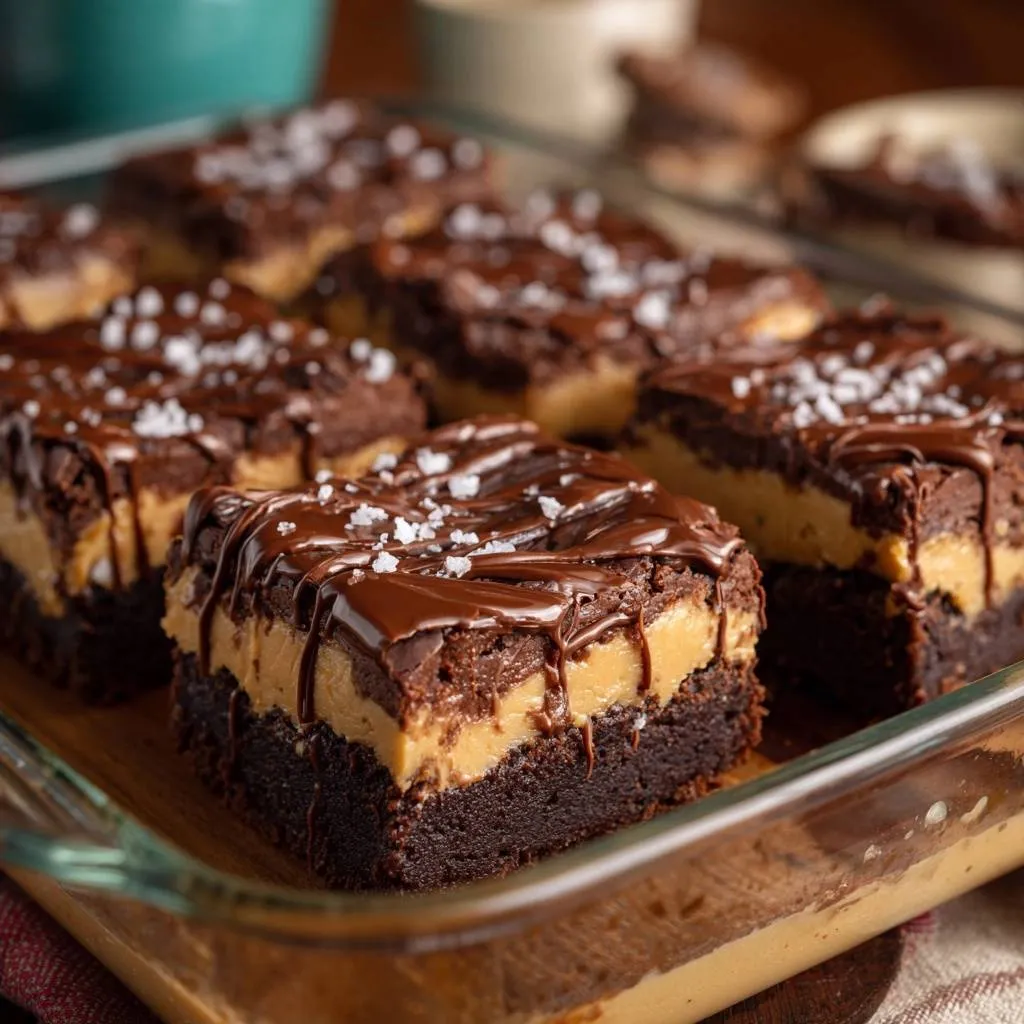
MinutesThese layered brownies feature a fudgy base, a thick and creamy caramel center stabilized with corn syrup to prevent crystallization, and a decadent chocolate ganache finished with flaky sea salt.
Ingredients
Brownie Base:
1 cup unsalted butter, melted
2 cups granulated sugar
4 large eggs
1 teaspoon vanilla extract
3/4 cup unsweetened cocoa powder
1 cup all-purpose flour
1/2 teaspoon salt
Caramel Layer:
1/2 cup unsalted butter
1 cup light brown sugar, packed
1/4 cup light corn syrup (essential for preventing crystallization)
1/2 cup heavy cream
1/4 teaspoon salt
Ganache & Drizzle:
1 cup semi-sweet chocolate chips (divided: 3/4 cup for topping, 1/4 cup for drizzle)
1/2 cup heavy cream
Coarse flaky sea salt for topping
Directions
- Preheat your oven to 350°F (175°C). Grease an 8×8 inch glass baking dish and line it with parchment paper, leaving an overhang on the sides for easy removal.
- In a large bowl, whisk the melted butter and granulated sugar. Add eggs and vanilla, beating until well combined. Sift in the cocoa powder, flour, and salt. Stir until just smooth. Pour into the prepared pan and bake for 25 to 30 minutes. Let the brownie base cool completely in the pan.
- To solve the grainy caramel problem, combine the brown sugar, 1/2 cup butter, and corn syrup in a heavy-bottomed saucepan over medium heat. The corn syrup acts as an interfering agent that prevents sugar crystals from bonding.
- Stir constantly until the butter is melted and the mixture begins to bubble. Once bubbling, stop stirring and let it boil for exactly 3 minutes to reach the “soft ball” stage. Slowly whisk in 1/2 cup of heavy cream and 1/4 teaspoon salt. The mixture will hiss and steam. Continue to whisk for 1 minute until perfectly smooth and glossy.
- Pour the warm caramel over the cooled brownie base. Refrigerate for at least 2 hours until the caramel is set and firm.
- For the ganache topping, heat the 1/2 cup heavy cream until simmering. Pour over 3/4 cup of the chocolate chips in a small bowl. Let sit for 5 minutes, then whisk until a smooth, thick glaze forms. Pour this over the chilled caramel layer and spread evenly.
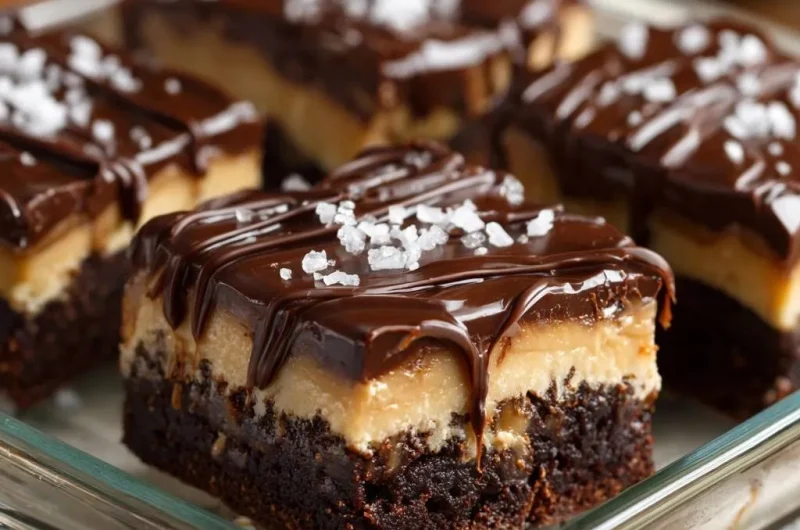
- Melt the remaining 1/4 cup of chocolate chips in the microwave in 15-second bursts. Transfer to a small piping bag or use a spoon to create the decorative horizontal drizzle lines seen in the image.
- While the drizzle is still wet, sprinkle generously with coarse flaky sea salt. Chill for another 30 minutes. Use a hot, clean knife to slice into squares for professional, clean layers.
Notes
- The corn syrup is essential to prevent sugar crystallization. Use a hot, clean knife to achieve professional, clean layers when slicing.