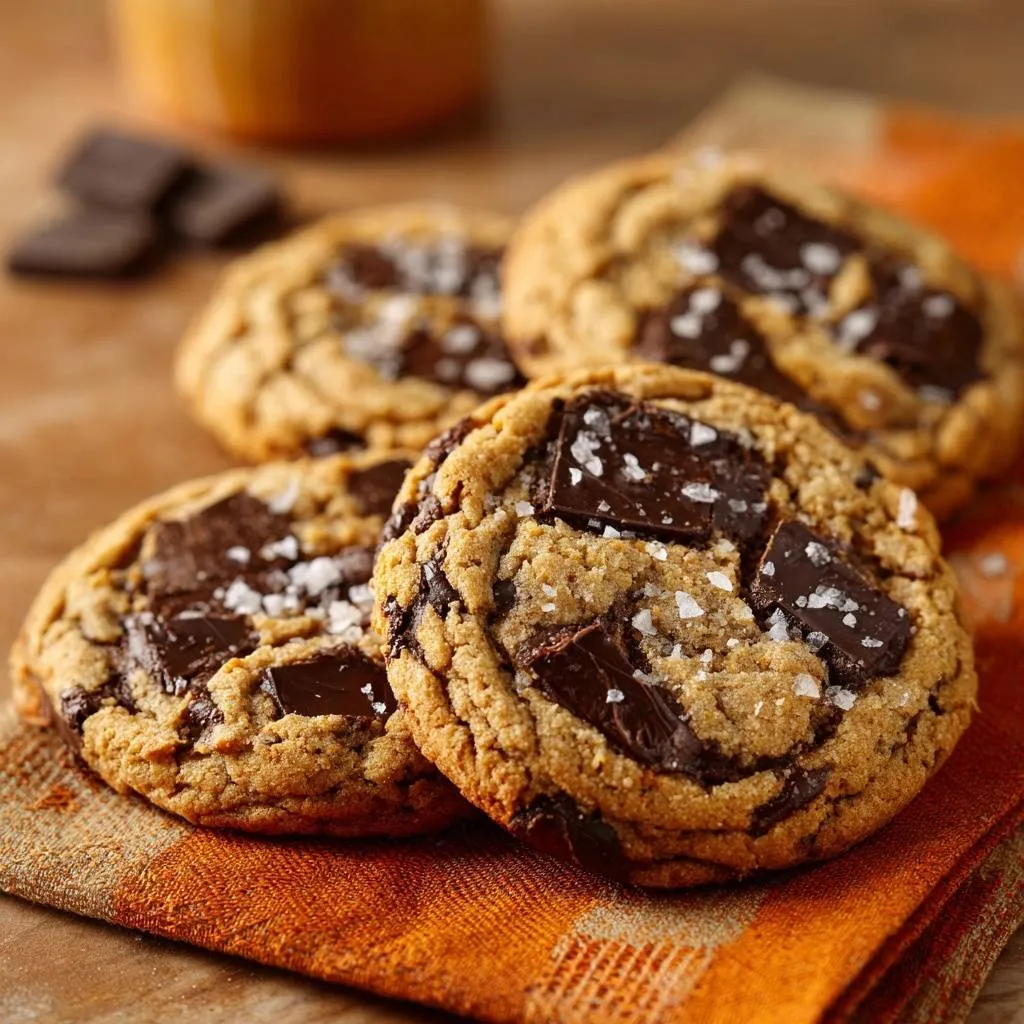
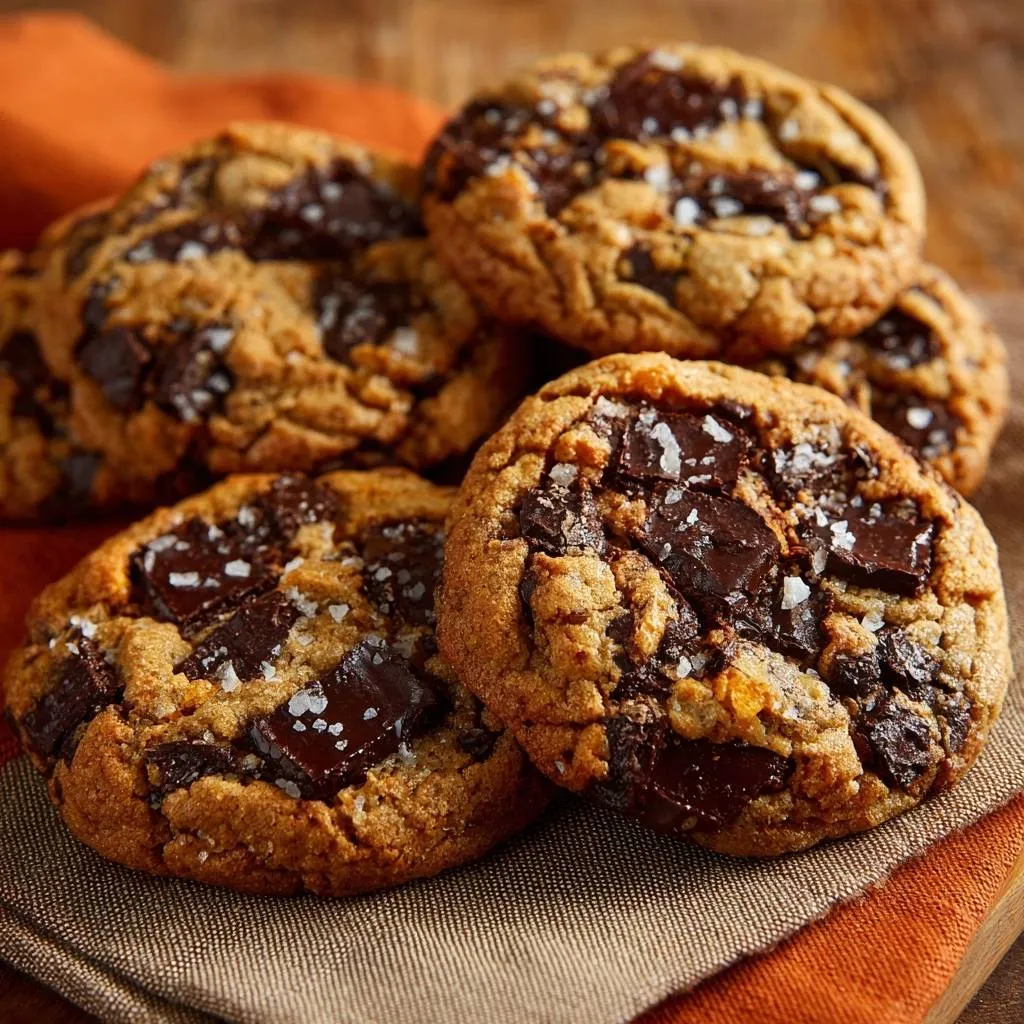
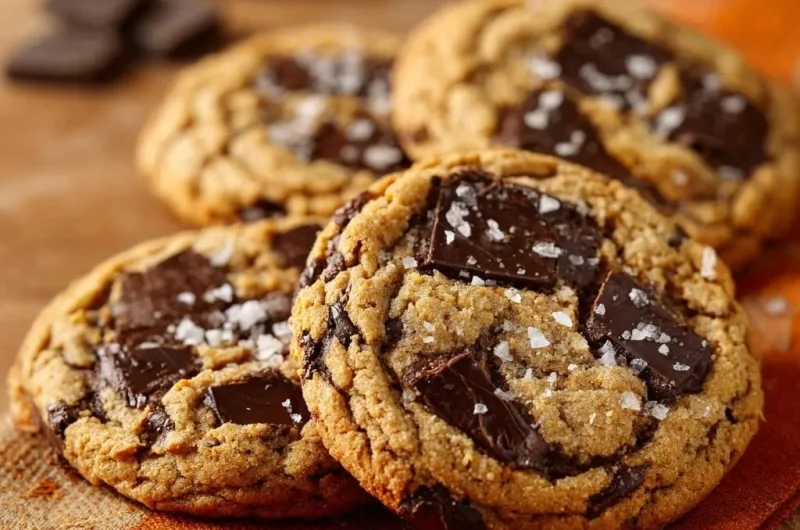
Imagine biting into a cookie where the edges shatter with a satisfying crunch, leading you toward a center that stays soft and molten. The real star, however, is the base. A truly great cookie needs a golden, sturdy bottom that stands up to heavy pools of dark chocolate without feeling greasy or limp.
For a similar satisfying texture, try these glazed raspberry thumbprint cookies.
Most home bakers struggle with the “soggy bottom” syndrome, where the fat melts too quickly and turns the cookie into a thin, oily puddle. This recipe solves that frustration by focusing on structural integrity and precise temperature control. We aren’t just mixing ingredients; we’re engineering a cookie that holds its shape and delivers a sophisticated flavor profile.
The secret to this architectural success lies in the chilling phase. By allowing the dough to rest, you control how the fat interacts with the oven’s heat. This ensures your cookies have the strength to support those massive, high-quality chocolate shards while maintaining a crisp, toasted underside that tastes like caramelized toffee.
The Anatomy of a Non-Greasy Cookie Base
A cookie is a delicate balance of moisture and fat. When you bake, the sugar melts and the flour sets, but if the moisture has nowhere to go, it gets trapped against the baking sheet. This creates a steamed, spongy texture instead of the crisp snap we crave. To prevent this, we focus on “structural baking,” ensuring the dough has enough aeration to lift itself up.
By creating a stable emulsion of butter and sugar, you build a network of tiny air pockets. These pockets act as a barrier, preventing the heavy dark chocolate shards from sinking straight through to the bottom. This results in a cookie that feels light despite being packed with rich, decadent ingredients.
Why Butter Temperature Dictates Final Texture
You’ve likely heard that butter should be “room temperature,” but that’s often too warm for a perfect cookie. If your butter is shiny or oily, it’s already lost its ability to hold air. You want butter that is softened but still cool to the touch, roughly 65°F. It should yield to a firm press of your finger without collapsing into a greasy mess.
When butter is too warm, it melts the instant it hits the oven. This causes the dough to spread before the flour has a chance to set, leading to those thin, translucent edges and a soggy middle. Keeping the butter slightly cool ensures a slow, controlled spread and a much cleaner finish on the palate.
The Role of Dark Brown Sugar in Aeration
Dark brown sugar contains more molasses than its light counterpart, which does more than just add a deep, smoky sweetness. The acidity in the molasses reacts vigorously with the baking soda. This chemical reaction creates a significant lift, pushing the dough upward and preventing a dense, soggy center.
In addition to the lift, dark brown sugar contributes to the “chew” factor. It holds onto just enough moisture to keep the middle soft while the granulated sugar works on crisping up the exterior. This contrast is exactly what makes a professional-grade cookie stand out from a standard batch.
Essential Components for Salted Dark Chocolate Chunk Cookies
The quality of your ingredients directly impacts the structural success of the bake. Using high-quality fats and sugars isn’t just about flavor; it’s about how those molecules behave under heat. For instance, using large, room-temperature eggs ensures they emulsify perfectly with the creamed butter, creating a smooth dough that won’t break or leak oil during the baking process.
Vanilla extract acts as a flavor enhancer, much like salt does for savory food. It bridges the gap between the bitter notes of the dark chocolate and the sweetness of the dough. Always use pure extract rather than imitation, as the alcohol base evaporates during baking, leaving behind a complex floral aroma that permeates the entire cookie.
Selecting High-Percentage Dark Chocolate Shards
Standard chocolate chips are designed to hold their shape, which means they contain stabilizers that prevent them from melting into those glorious pools we want. Instead, grab a high-quality chocolate bar with 60% to 72% cacao and chop it yourself. This creates “shards” of varying sizes that layer throughout the dough.
The flat surfaces of chopped chocolate bars create a beautiful layering effect. When you bite in, you get distinct strata of chocolate and dough rather than isolated bumps. The higher cocoa butter content in bar chocolate also ensures a much silkier mouthfeel that stays molten long after the cookies have left the oven.
For more ideas on shaping chocolate, explore how to make frosted dark chocolate toffee cookies.
Flour Protein and Structural Support
All-purpose flour is the workhorse here because it has the perfect protein content to provide structure without making the cookie tough. However, how you measure it is critical. If you scoop the flour directly with the measuring cup, you’ll pack it down and end up with a dry, cakey cookie that doesn’t spread at all.
Use the “spoon and level” method: fluff the flour with a spoon, sprinkle it into the measuring cup until it overflows, and then level it off with a flat edge. This ensures you have the exact amount of flour needed to support the chocolate shards without turning the dough into a heavy “puddle” or a stiff biscuit.
Step-by-Step: Engineering the Perfect Cookie Crunch
Creating the perfect crunch requires a bit of patience and a lot of mechanical action. You aren’t just stirring things together; you are building a foundation. Every step in the mixing process is designed to manage the moisture and air within the dough to ensure that final, golden-brown result.
Pay close attention to the visual changes in your bowl. The dough will go through several stages, from a gritty paste to a smooth, cohesive mass. Understanding these transformations helps you know exactly when to stop mixing, which is the key to avoiding a tough, over-worked cookie.
Creaming for Mechanical Leavening
The first step is the most important: cream your butter and sugars for at least three full minutes. You’ll watch the mixture transform from a grainy, yellow paste into a pale, voluminous fluff. This isn’t just about mixing; you are physically beating air into the fat, creating a “skeleton” that supports the cookie’s height.
If you skip this step or cut it short, your cookies will be dense and more likely to turn out greasy. That air you’ve worked so hard to incorporate will expand in the oven, providing the lift necessary to keep the bottom from becoming compressed and soggy against the pan.
Folding Techniques for Chocolate Distribution
Once the flour is added, put away the electric mixer. Use a sturdy spatula to fold in the chocolate chunks by hand. This prevents you from overworking the gluten, which would make the cookies tough. Use a “cut and fold” motion, scraping the bottom of the bowl to ensure no pockets of dry flour remain.
More Sweet Ideas
Since you enjoyed these salted dark chocolate chunk cookies, consider these other sweet treats that bring similar comfort and rich flavors.
- For another breakfast indulgence with a warm, spiced character, try making Cinnamon French Toast Stacks, which share a sweet, baked goodness.
- If you’re in the mood for playful, campfire-inspired flavors, these S’mores Pancakes offer a fun twist on breakfast that echoes the sweetness of chocolate.
Pro tip: reserve the largest, flattest shards of chocolate. After you’ve scooped your dough balls, press these shards firmly into the top. This “top-press” method ensures that every cookie looks like it came from a high-end bakery, with visible, melty chocolate right on the surface.
The Science of Chilling Cookie Dough
Chilling the dough is not an optional step if you want a crisp bottom. When the dough sits in the fridge for 1 to 24 hours, the fat solidifies completely. This means that when the cookies hit the hot oven, the edges have time to set and crisp up before the fat in the center has a chance to melt and spread.
Furthermore, chilling allows for an enzymatic breakdown of the starches in the flour. This process might sound technical, but the result is simple: a much deeper, toffee-like flavor and a more uniform golden-brown color. It’s the difference between a good cookie and a legendary one.
Hydration and Flavor Concentration
During the rest period, the flour fully absorbs the moisture from the eggs and vanilla. This “hydration” phase is crucial for a consistent bake. If the flour isn’t fully hydrated, the moisture can migrate to the bottom of the cookie during baking, leading to that dreaded sogginess.
As the moisture is absorbed, the flavors of the sugar, salt, and vanilla become more concentrated. You’ll notice the dough becomes darker and more fragrant after a night in the fridge. This patience is rewarded with a cookie that has a complex, nuanced sweetness rather than a one-dimensional sugar hit.
Oven Mechanics: Achieving the Golden Bottom
The way heat moves from your oven to the cookie determines the final texture. You want rapid, even heat transfer to the bottom of the dough to set the structure immediately. This is why the choice of baking equipment is just as important as the ingredients themselves.
Preheating your oven thoroughly is also vital. Don’t just wait for the beep; let the oven sit at temperature for an extra ten minutes to ensure the walls and racks are radiating heat evenly. This prevents “hot spots” that could burn one side of your batch while leaving the other side undercooked.
Parchment Paper vs. Silicone Mats
If you want a truly crisp, golden bottom, ditch the silicone mats. Silicone is an insulator; it slows down the heat transfer and traps moisture underneath the cookie, essentially steaming the base. This is the primary cause of a soft, pale, and limp underside.
Parchment paper is the superior choice here. It allows for better airflow and lets moisture evaporate, which encourages the bottom of the cookie to brown and crisp beautifully. It also makes cleanup a breeze without sacrificing the structural integrity of your bake.
The Importance of Heavy-Duty Baking Sheets
Thin, cheap baking sheets are prone to warping in the heat, which causes the dough to slide and bake unevenly. They also create hot spots that can scorch the bottom of your cookies before the centers are done. Invest in heavy-gauge aluminum pans, often called “half-sheet pans.”
These heavy-duty pans distribute heat with incredible uniformity. Because they are light-colored, they reflect just enough heat to prevent over-browning, allowing you to achieve that perfect “deep golden” look without the risk of a burnt, bitter base.
Troubleshooting Common Baking Failures
Even with the best recipe, things can go wrong. The most common issue is the “puddle” effect, where cookies merge into one giant sheet. This usually happens because the dough was too warm when it entered the oven or the oven temperature was too low, preventing the edges from setting quickly.
Another common frustration is a cookie that looks done on top but is raw in the middle. This is often due to an oven that runs too hot. If you notice the edges browning too fast, try lowering the temperature by 15 degrees and extending the bake time by a minute or two.
Correcting Excessive Dough Spread
If your cookies are spreading too much, check your butter temperature first. If the dough feels soft or sticky, put it back in the fridge for another 30 minutes. You should be able to roll the dough into balls without it sticking to your palms.
Also, ensure you aren’t placing dough balls onto a hot baking sheet from a previous batch. This will melt the fat instantly and cause immediate spreading. Always let your pans cool completely to room temperature before loading them up for the next round.
Managing Molten Chocolate and Salt Timing
The timing of the flaky sea salt is a “window of adhesion.” If you sprinkle the salt before baking, it will dissolve into the dough and lose its crunch. If you wait until the cookies are cold, the salt will simply bounce off the surface.
The sweet spot is immediately after the pan comes out of the oven. The chocolate shards will be molten and the surface of the cookie will be slightly tacky. This allows the salt flakes to nestle into the chocolate and stick to the dough, providing that perfect salty-sweet contrast in every bite.
Storage and Preservation of Texture
To keep that hard-earned crisp bottom, you must store the cookies correctly. If you put them in a container while they are even slightly warm, the residual steam will soften the entire batch, turning your crisp cookies into soft, cakey ones overnight.
Wait until the cookies are completely cool to the touch before moving them. A wire rack is essential for this, as it allows air to circulate around the entire cookie, preventing moisture from pooling on the bottom as they cool down.
Room Temperature Air-Tight Storage
Store your cookies in an airtight container at room temperature for up to three days. While many people suggest putting a slice of bread in the container to keep cookies soft, avoid that for this recipe. The bread adds moisture, which will ruin the crisp, toasted bottom we worked so hard to achieve.
If the cookies do soften more than you’d like, you can “refresh” them in a 300°F oven for about 3 to 5 minutes. This will recrisp the edges and remelt the chocolate, making them taste like they were just baked.
Freezing Dough Balls for Future Bakes
This dough freezes beautifully. Scoop the dough into balls, place them on a tray, and freeze until solid. Once frozen, transfer them to a heavy-duty freezer bag. This allows you to bake just one or two cookies whenever the craving strikes.
When baking from frozen, do not thaw the dough. Simply place the frozen balls on your parchment-lined sheet and bake at the usual temperature. You will likely need to add 2 to 3 minutes to the total bake time. This method actually results in an even thicker cookie with a very fudgy center.
Expert Baking FAQ
Can I use milk chocolate instead of dark chocolate?
You can, but keep in mind that milk chocolate has a much higher sugar content and a lower melting point. This will make the cookies significantly sweeter and may cause them to spread a bit more. If you use milk chocolate, you might want to slightly increase the flaky sea salt to balance the extra sugar.
Why did my sea salt disappear into the cookie?
This usually happens if the salt is applied too early. If you sprinkle it on before the cookies go into the oven, the moisture in the dough will dissolve the salt crystals. For that beautiful, sparkling look and distinct salty crunch, always apply the salt the second the cookies come out of the oven.
My cookies turned out puffy and cakey instead of flat and chewy. What happened?
Puffy cookies are usually the result of too much flour or over-beating the eggs. If you use the “scoop and level” method for flour and only mix the eggs until just combined, you’ll avoid the cakey texture. Also, ensure your baking soda is fresh, as old leavening can sometimes cause unpredictable textures.
Can I use a hand mixer instead of a stand mixer?
Absolutely. A hand mixer works perfectly for this recipe. Just be sure to follow the timing cues rather than just looking at the dough. It may take an extra minute of creaming with a hand mixer to achieve the same level of aeration and “pale fluffiness” that a stand mixer provides.
How do I get those perfectly round, bakery-style cookies?
Use the “scooting” technique. Immediately after taking the cookies out of the oven, place a circular glass or a large round cookie cutter over a hot cookie. Gently move the glass in a circular motion, “scooting” the edges of the cookie inward. This smooths out any uneven bits and creates a perfect circle while the cookie is still soft.
Salted Dark Chocolate Chunk Cookies
Course: DessertCuisine: AmericanDifficulty: easy18
cookies15
minutes10
minutes240
kcal60
MinutesA specialized cookie recipe designed to eliminate soggy bottoms. By using cool softened butter, a specific chilling period, and avoiding silicone mats, these cookies achieve a perfect structural balance between a crunchy base and a soft, chocolate-filled center.
Ingredients
1 cup unsalted butter, softened but still cool to the touch
3/4 cup granulated sugar
3/4 cup packed dark brown sugar
2 large eggs, room temperature
1 teaspoon vanilla extract
2 1/4 cups all-purpose flour
1 teaspoon baking soda
1/2 teaspoon salt
8 ounces high-quality dark chocolate, cut into large, flat squares/shards
Flaky sea salt for topping
Directions
- To prevent a soggy bottom, start with butter that is softened but not oily. Cream the butter and both sugars together for at least 3 minutes until very pale and fluffy. This creates the air pockets needed for structure.
- Add eggs one at a time, followed by the vanilla, mixing well after each addition.
- In a separate bowl, whisk the flour, baking soda, and salt. Gradually add the dry ingredients to the wet ingredients, mixing just until combined.
- Fold in half of the dark chocolate chunks by hand. Reserve the largest, flattest chocolate shards to press into the tops later.
- The secret to the perfect crisp bottom: Chill the dough for at least 1 hour (up to 24 hours). This solidifies the fat so the cookies do not melt and become greasy the moment they hit the heat.
- Preheat your oven to 375°F (190°C). Line a heavy-duty baking sheet with parchment paper. Avoid silicone mats if you want a truly crisp bottom, as they trap moisture and prevent browning.
- Scoop 2-tablespoon sized balls of dough onto the parchment, spacing them 3 inches apart. Press the reserved large chocolate shards firmly into the top of each dough ball.
- Bake for 9 to 11 minutes. The key is to pull them out when the edges are deeply golden brown and set, but the centers still look slightly soft.
- Immediately sprinkle generously with flaky sea salt while the chocolate is still molten.
- Let the cookies rest on the hot baking sheet for 5 to 8 minutes. This carry-over cooking finishes the bottom to a perfect crunch without overbaking the top. Transfer to a wire rack to finish cooling.
Notes
- Avoid silicone mats to ensure a truly crisp bottom; parchment paper is preferred. Ensure butter is cool to the touch and chill the dough for at least 1 hour to prevent spreading.