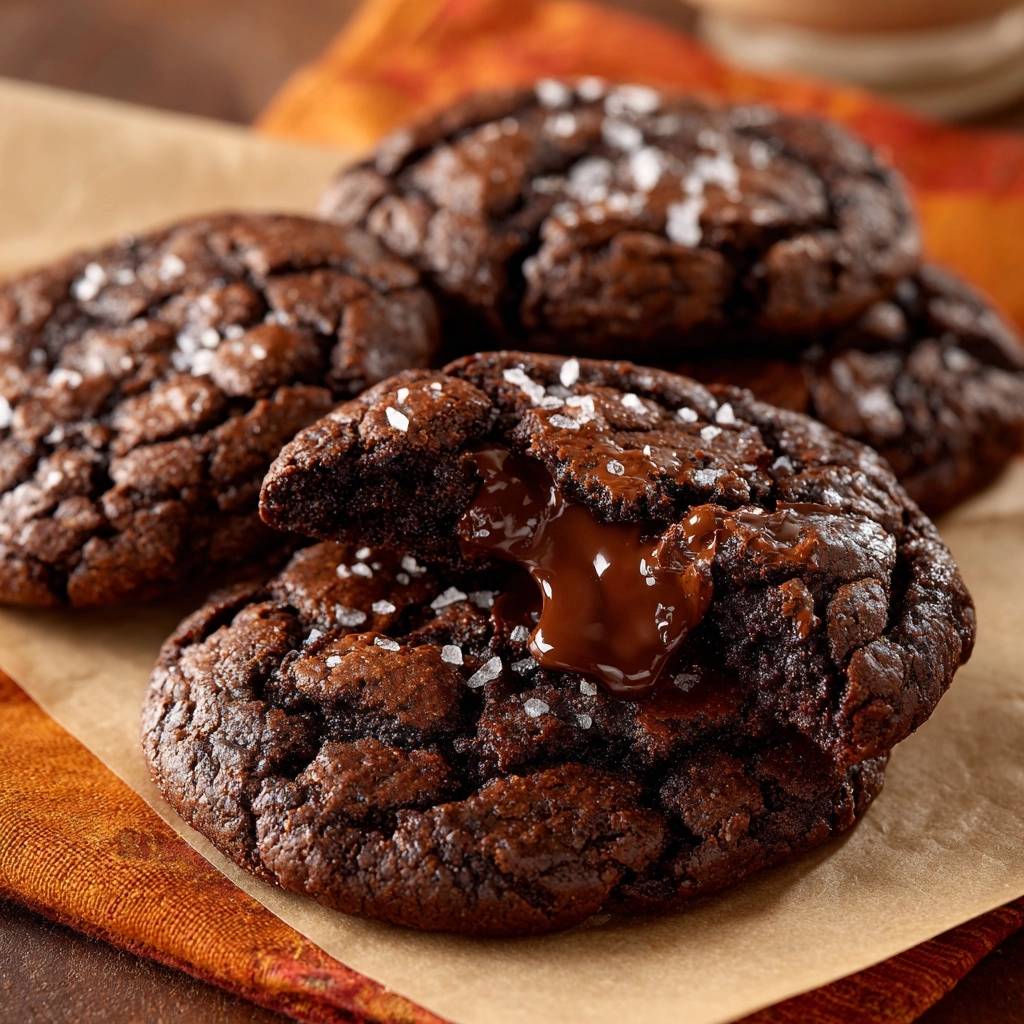
Imagine biting into a warm, deeply dark brownie cookie with a brittle, meringue-like crust that shatters under your teeth. Suddenly, a river of rich, liquid chocolate ganache flows out, creating the ultimate sensory contrast. Most recipes for lava cookies end up with a soggy, undercooked dough center that feels more like raw flour than a decadent treat. This recipe solves that problem by using a specific temperature differential that guarantees a professional result every single time.
The secret to achieving that distinct “lava” flow without the mess lies in the frozen ganache core. By freezing high-fat chocolate discs before they ever touch the dough, you create a thermal delay. This allows the outer brownie shell to bake into a fudgy, stable structure before the center even begins to melt. It is the difference between a failed, leaky cookie and a masterpiece that looks like it came from a high-end bistro.
For more cookie inspiration, discover the no-spread method for glazed raspberry thumbprint cookies.
To ensure you get that iconic crackled top, you must whisk your egg and sugars vigorously for at least two minutes. This process dissolves the sugar and aerates the egg, creating a thin, shiny layer that rises and cracks as the cookie expands. If you skip this step, your cookies will taste fine, but they will lack that professional, glossy finish that makes people stop and stare.
The Physics of the Molten Ganache Center
Baking is essentially a game of heat transfer, and these Salted Molten Lava Brownie Cookies are a masterclass in thermodynamics. When you use a room-temperature filling, the heat of the oven penetrates the dough and the filling simultaneously. This often leads to the filling soaking into the surrounding crumb, resulting in a “soggy” middle rather than a liquid one. By starting with a rock-solid frozen core, you protect the center from the initial blast of heat.
Furthermore, the choice of ganache over oil-based spreads is vital for the perfect viscosity. Heavy cream contains water and fat that, when emulsified with chocolate, creates a stable liquid that stays fluid even as it cools slightly. Oil-based spreads often become too thin and greasy when heated, whereas a ganache maintains a luxurious, velvety mouthfeel that coats the palate perfectly.
Why Dutch-Process Cocoa is Non-Negotiable
If you want that deep, midnight-black color and a mellow, earthy chocolate flavor, you must use Dutch-process cocoa powder. Unlike natural cocoa, which is acidic and sharp, Dutch-process cocoa has been treated with an alkalizing agent. This process neutralizes the acidity, resulting in a smoother flavor profile that doesn’t compete with the sweetness of the sugars.
In addition to flavor, the pH level of your cocoa affects how the leavening agents react. Since Dutch-process cocoa is neutral, it relies on the baking powder in this recipe to provide the lift. This combination ensures the cookies puff up enough to create a cavity for the lava while maintaining a dense, fudgy texture that mimics a traditional brownie.
Essential Components for the Lava Core
The lava core is a simple two-ingredient ganache, but the quality of those ingredients dictates the success of the “flow.” You need a semi-sweet chocolate with roughly 55% to 60% cacao. This range provides enough sugar to keep the center sweet but enough cocoa butter to ensure it sets firmly in the freezer and melts beautifully in the oven.
Heavy cream is the second essential component, providing the fat necessary for that signature silkiness. Do not try to substitute milk or half-and-half here; the lower fat content will make the ganache too watery, which can cause the cookie dough to steam from the inside out and fall apart. The high fat content in the cream acts as a barrier, keeping the liquid contained within the brownie shell.
Selecting the Right Flour and Leavening Agents
All-purpose flour provides the structural “skeleton” for these cookies. You need just enough gluten to hold the liquid center in place without making the cookie tough or bread-like. Because we are stuffing these cookies, the dough needs to be pliable yet strong, which is why we avoid cake flour or low-protein alternatives.
The crackled surface is achieved through a dual-action leavening approach. Baking powder provides the primary lift, while a touch of baking soda reacts with the brown sugar to encourage browning and a slight spread. This combination creates the tension needed for the surface to stretch and crack, revealing the dark, fudgy brownie underneath.
Step-by-Step: Engineering the Liquid Chocolate Heart
Start by melting your chocolate chips and heavy cream in short, 20-second bursts in the microwave. Stirring between each interval is crucial to prevent the chocolate from scorching. Once the mixture is glossy and smooth, let it sit for a few minutes to thicken slightly so it holds its shape when scooped.
Drop teaspoon-sized mounds onto a parchment-lined plate, making sure they are tall rather than flat discs. You must freeze these for at least 60 minutes. If the centers are even slightly soft, they will melt too quickly in the oven and leak through the dough. Patience in this step is the only way to guarantee a successful “explosion” of chocolate when you serve them.
Building the Fudgy Brownie Cookie Base
To get a truly fudgy texture, we use a “fat-on-fat” technique by melting butter and chocolate chips together. This creates a rich, liquid base that coats the flour particles, preventing excess gluten development. The result is a cookie that is dense and moist, rather than light and cakey.
Make sure the melted butter and chocolate mixture has cooled slightly before you add it to your sugars. If the mixture is too hot, it can cook the egg prematurely or melt the sugars too fast, which leads to a greasy cookie. It should be warm to the touch but not steaming.
The Secret to the Shiny Crackled Surface
Once you add the egg and vanilla to your chocolate-sugar mixture, it is time to put in some elbow grease. Whisk vigorously for about two minutes until the batter lightens in color and looks shiny. You are looking for the “ribbon stage,” where the batter falls off the whisk in a thick, slow trail that holds its shape for a second before disappearing.
This aeration is what creates the meringue-like crust. As the cookies bake, the air bubbles expand and the sugar dries out on the surface, forming a thin, crisp shell. If you just lightly stir the egg in, your cookies will have a dull, matte finish and won’t have that satisfying crunch that contrasts so well with the molten center.
Assembly: Encapsulating the Frozen Ganache
When you are ready to assemble, work with only a few frozen ganache discs at a time to keep them from thawing. Take two tablespoons of dough, flatten it into a disc in your palm, and place the frozen ganache right in the center. Fold the edges of the dough up and over the ganache, pinching the seams tightly.
Roll the dough between your palms to create a smooth ball. It is vital that there are no visible cracks or thin spots in the dough. Any weakness in the “hull” of the cookie will act as an escape route for the chocolate lava as it heats up. If you see a gap, patch it with a tiny bit of extra dough before placing it on the baking sheet.
Precision Baking and the Carryover Cooking Phase
Oven calibration is everything for this recipe. You want a hot 350°F environment to set the edges quickly. Bake for exactly 9 to 11 minutes. The cookies should look set on the edges and have a beautiful crackled top, but the center should still look slightly soft and underbaked. This is intentional.
The most important part of the process happens after you pull them out of the oven. Let the cookies rest on the hot baking sheet for at least 7 minutes. This “carryover cooking” allows the outer shell to firm up enough to be handled, while the residual heat finishes melting the frozen core into a liquid state. If you move them too soon, the cookie will collapse and the lava will spill out prematurely.
Troubleshooting Common Lava Cookie Failures
If your cookies suffer from a “blowout” where the chocolate leaks out the side, it usually means the dough wasn’t sealed tightly enough or the ganache wasn’t frozen solid. Next time, ensure the ganache is rock-hard and double-check that the dough ball is perfectly smooth before it goes into the oven.
If the center is solid rather than liquid, you likely overbaked the cookies. Even an extra two minutes can turn a molten center into a solid truffle. Remember that the cookies will continue to “cook” on the hot pan, so pull them out when they still look a little fragile. If the surface is dull, remember to whisk those eggs and sugars longer next time!
Why Flaky Sea Salt Changes the Flavor Profile
A generous sprinkle of flaky sea salt, like Maldon, is the final touch that elevates these from a simple sweet to a gourmet dessert. Salt is a powerful flavor enhancer that suppresses bitterness and balances the intense richness of the Dutch-process cocoa. It provides a sharp, clean contrast to the deep chocolate notes.
Pairing Ideas
Enjoying these salted molten lava brownie cookies? Consider these comforting breakfast treats to complement your sweet indulgence.
- For a delightful morning treat, try these Fluffy Diner-Style Pancakes, offering a soft, pillowy texture.
- If you’re seeking that perfect airy stack, these Fluffy Golden Pancakes provide a wonderfully light bite.
Beyond flavor, the texture of flaky salt adds a delicate crunch that complements the crackled top of the cookie. Avoid using standard table salt, which is too fine and will simply make the cookies taste salty. You want those distinct “pops” of salt that hit your tongue intermittently, cutting through the sugar and making you crave another bite.
Make-Ahead Strategies and Storage Logistics
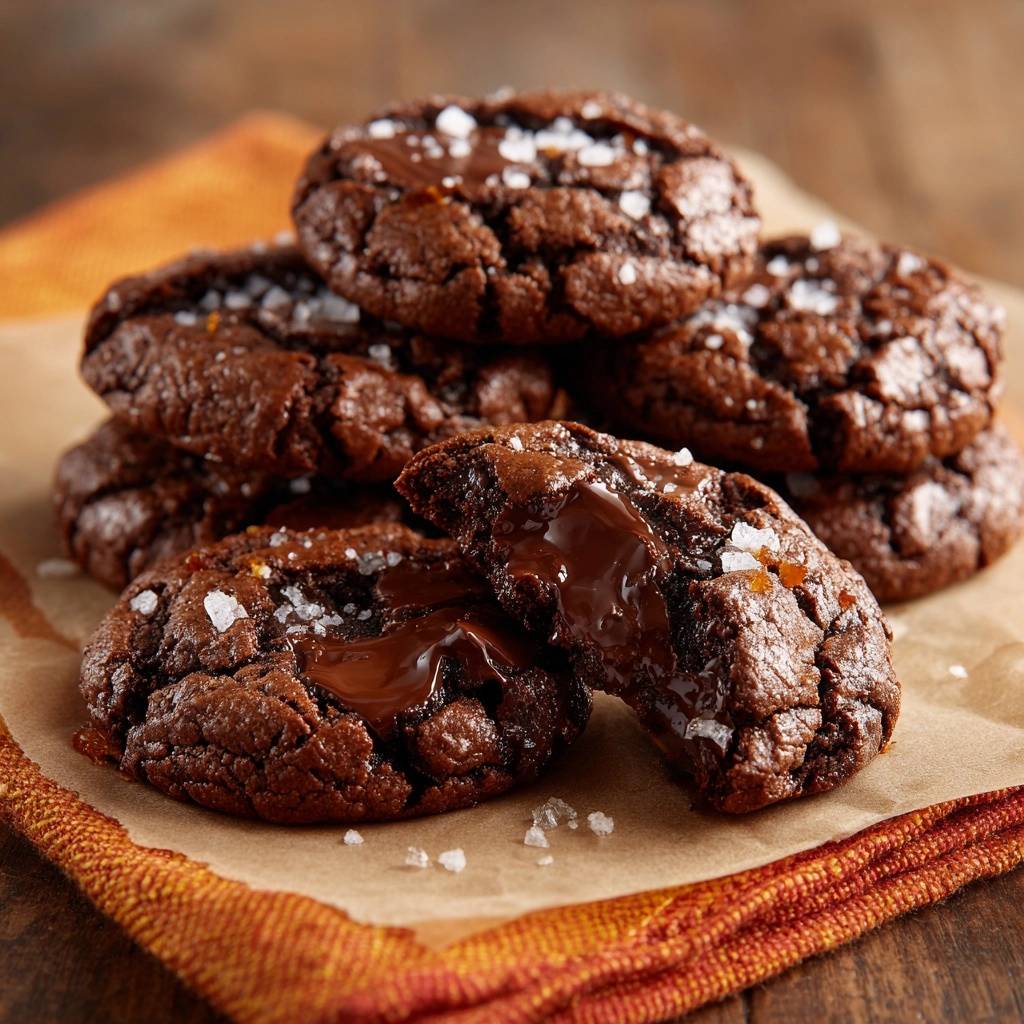
These cookies are fantastic for entertaining because you can do all the hard work in advance. You can assemble the dough balls with the frozen centers and then freeze the entire unbaked ball in a freezer-safe bag. When you are ready for a treat, just bake them straight from the freezer, adding 2-3 minutes to the total baking time.
If you have leftover baked cookies, store them in an airtight container at room temperature for up to two days. To revive the molten center, pop a cookie in the microwave for about 10-15 seconds. This will gently liquefy the ganache again without drying out the brownie exterior. Do not refrigerate them, as the cold air will turn the fudgy base into a hard, crumbly mess.
Expert Tips for Professional Results
Can I use milk chocolate for the lava center?
You can, but it is much trickier to work with. Milk chocolate has a higher sugar content and a lower melting point, which means it is more prone to seizing or leaking out of the cookie. If you choose milk chocolate, ensure you freeze the discs for an extra hour and be extremely diligent about sealing the dough balls to prevent a mess.
If you’re exploring chocolate variations, check out these frosted dark chocolate toffee cookies for another rich option.
Why did my cookies spread too thin and flat?
This usually happens if your melted butter and chocolate mixture was too hot when you added it to the dough, or if your kitchen is very warm. If the dough feels oily or too soft to handle, chill the entire bowl of dough for 15 minutes before you try to wrap it around the frozen ganache. This helps the fats solidify so the cookie holds its shape in the oven.
How do I get my cookies to be perfectly round?
Use the “scooting” trick! Immediately after taking the baking sheet out of the oven, place a large circular glass or a round cookie cutter over a hot cookie. Gently move the glass in a circular motion, “scooting” the edges of the cookie inward. This smooths out any uneven bits and gives you that perfect, bakery-style circle while the dough is still soft.
Can I use a microwave for the whole process?
The microwave is perfect for melting the ganache and the butter-chocolate base, but it cannot replace the oven for the actual baking. The oven provides the dry, circulating heat necessary to create the crackled crust and set the structure of the cookie. A microwave would simply steam the dough, resulting in a tough, rubbery texture without any of the characteristic brownie crunch.
What if I don’t have Dutch-process cocoa?
You can use natural cocoa powder in a pinch, but the cookies will be lighter in color and have a more acidic, sharp chocolate taste. If you make this switch, replace the baking powder with a half-teaspoon of baking soda to account for the extra acid in the cocoa. However, for the best “lava” experience, the Dutch-process is truly worth the trip to the store.
Salted Molten Lava Brownie Cookies
Course: DessertCuisine: AmericanDifficulty: medium12
cookies1
hour10
minutes240
kcal60
MinutesA decadent brownie cookie featuring a fudgy, crackled exterior and a liquid chocolate ganache core. The secret lies in freezing the high-fat ganache centers to ensure a distinct lava flow without a soggy dough interior.
Ingredients
For the Molten Center:
1/2 cup semi-sweet chocolate chips
3 tablespoons heavy cream
(Note: Using pure ganache instead of hazelnut spread ensures the professional “lava” viscosity seen in the image.)
For the Brownie Dough:
1 cup all-purpose flour
1/2 cup unsweetened Dutch-process cocoa powder (for the dark color)
1 teaspoon baking powder
1/4 teaspoon baking soda
1/2 teaspoon salt
1/2 cup unsalted butter, melted and slightly cooled
1/2 cup granulated sugar
1/2 cup packed light brown sugar
1 large egg, room temperature
1 teaspoon vanilla extract
1/2 cup semi-sweet chocolate chips (melted into the butter)
Flaky sea salt for topping
Directions
- Prepare the Lava: In a small microwave-safe bowl, heat the 1/2 cup chocolate chips and heavy cream in 20-second intervals, stirring until smooth. Let it cool slightly, then scoop 12 teaspoon-sized mounds onto a parchment-lined plate. Freeze for at least 1 hour until rock solid.
- Prepare the Dough: Preheat your oven to 350°F (175°C) and line a large baking sheet with parchment paper.
- Melt Chocolate Base: Melt the butter and the remaining 1/2 cup chocolate chips together in the microwave or over a double boiler until smooth. This creates the deep, fudgy “brownie” texture and dark color shown in the image.
- Mix Wet Ingredients: In a large bowl, whisk the melted chocolate/butter mixture with the granulated sugar and brown sugar. Add the egg and vanilla, whisking vigorously for 1-2 minutes until the mixture looks shiny (this creates the crackled top).
- Combine Dry Ingredients: Sift the flour, cocoa powder, baking powder, baking soda, and salt into the wet ingredients. Fold gently with a spatula until just combined. Do not overmix.
- Assemble: Work quickly so the centers stay frozen. Take about 2 tablespoons of dough, flatten it, place a frozen ganache disc in the center, and roll the dough into a ball around it. Ensure there are no cracks.
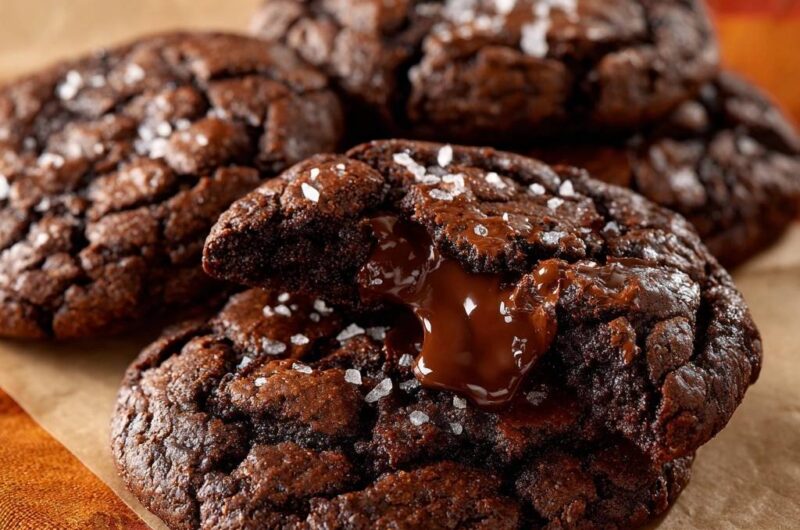
- Bake: Place dough balls 2 inches apart. Bake for 9 to 11 minutes. The cookies will develop a crackled surface and the edges will be set, but the centers should still feel soft.
- Finish: Immediately sprinkle generously with flaky sea salt while the cookies are hot. Let them rest on the baking sheet for at least 5-7 minutes. This resting period is crucial; it allows the outer brownie shell to firm up enough to hold the liquid center without collapsing. Serve warm for the maximum lava effect.
Notes
- Using pure ganache instead of hazelnut spread ensures professional lava viscosity. Resting the cookies for 5 to 7 minutes after baking is crucial to allow the outer shell to firm up.