We have all been there. You pull a tray of Sheet Pan Sausage and Potato Wedges out of the oven, expecting a glorious crunch, only to find a pile of limp, steamed potatoes and greasy onions. It is the ultimate kitchen letdown. The culprit is almost always the “steam trap,” a phenomenon where moisture from the vegetables gets trapped under the food, boiling it rather than roasting it.
This guide is a masterclass in texture management. We are moving past the basic “toss and bake” method to embrace a philosophy of dry heat and surface area. By understanding how to manipulate your oven environment, you can ensure every bite has that coveted golden-brown finish. It is about more than just a recipe; it is about mastering the physics of the sear.
The secret lies in the 425°F threshold. This specific temperature is the magic number for the Maillard reaction, the chemical process that creates those deep, savory flavors and crispy brown crusts. To achieve this, we use a pre-heating technique that turns your baking sheet into a searing tool the moment the food touches the metal. Get ready to change the way you look at one-pan dinners forever.
The Anatomy of a Perfect Sheet Pan Meal
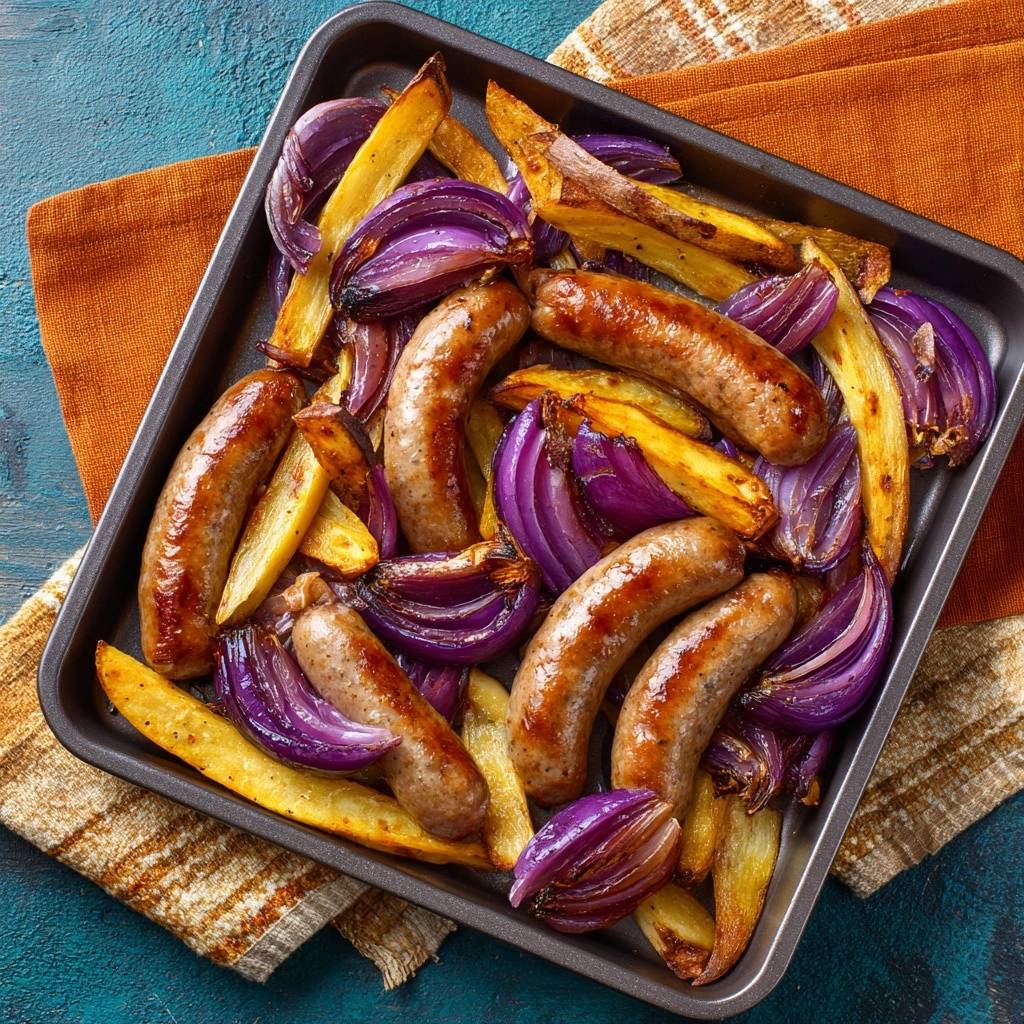
A successful sheet pan dinner relies on a delicate balance of starch and protein. In this dish, the star is the contrast between the snappy, savory sausage casing and the fluffy, cloud-like interior of a perfectly roasted Russet potato. When done correctly, the outside of the potato should shatter slightly when you bite into it, while the sausage remains juicy and plump.
Most people fail because they treat every ingredient the same. However, onions, potatoes, and sausages all release moisture at different rates. By using specific spacing and timing, we avoid the “mush factor.” We want the fat from the beef or poultry sausages to render out and lightly fry the potatoes, creating a cohesive flavor profile that feels indulgent but perfectly executed.
Essential Components for Sheet Pan Sausage and Potato Wedges
Quality ingredients are the foundation of this meal. Since we are using a high-heat roasting method, the chemistry of your produce matters. You want ingredients that can stand up to 425°F without disintegrating or turning into a puddle of liquid. Choosing the right fat and the right starch will determine if your dinner is a success or a soggy mess.
Russet potatoes are non-negotiable here. Their high starch and low moisture content make them the only real candidate for a crispy wedge. If you use a waxy potato, it will simply soften and stay heavy. We also use olive oil for its high smoke point and flavor, ensuring the garlic powder and dried oregano bloom beautifully in the heat without scorching.
Selecting the Right Potato Variety
When you walk down the produce aisle, you might be tempted by the pretty red skins or the buttery Yukon Golds. While those are great for mashing or boiling, they lack the structural integrity needed for high-heat roasting. The Russet potato has a thick skin and a dry, mealy flesh that acts like a sponge for seasoning while the outside crisps up like a french fry.
Because Russets have less water, they don’t create as much steam in the oven. This is vital for maintaining the “wedge” shape. A Yukon Gold might collapse or become gummy at these temperatures, but the Russet holds its form, giving you that perfect hand-held vessel for the savory sausage juices.
Choosing Your Protein: Beef vs. Poultry
Since we are avoiding pork, your best bets are high-quality beef sausages or poultry links like turkey or chicken bratwurst. Look for sausages with a natural-style casing. This casing is what provides the “snap” when it hits the hot pan. If the casing is too thin or synthetic, it might just melt away or become chewy rather than crispy.
Beef sausages offer a richer, deeper flavor that stands up well to the pungent red onions. Poultry sausages are leaner, which means you might need to be a bit more generous with your olive oil to ensure the potatoes get enough fat to crisp up. Whichever you choose, make sure they are raw links rather than pre-cooked, as the rendering process is what flavors the entire tray.
The Science of the Pre-Heated Baking Sheet
This is where the expertise comes in. Most home cooks put their food on a cold pan and slide it into a hot oven. This is a mistake. By the time the pan gets hot enough to sear the food, the vegetables have already started to leak moisture, creating a layer of steam between the potato and the metal. This is why the bottoms of your potatoes often come out pale and wet.
We use the “Sizzle Effect.” By placing an empty rimmed baking sheet in the oven while it preheats, we build up thermal mass. When you drop those oiled potatoes onto the screaming-hot metal, the heat transfer is immediate. The cell walls of the potato cauterize instantly, creating a crust that prevents sticking and stops the potato from absorbing too much oil and becoming greasy.
Step-by-Step: Achieving the Golden-Brown Sear
Preparation is just as important as the cooking itself. You cannot get a crisp sear on a wet potato. After you cut your wedges, you must pat them dry with paper towels. Even a small amount of surface moisture will turn into steam, ruining your chances of a crunch. It is a small step that makes a massive difference in the final texture.
We also use a “Two-Bowl Prep” strategy. Onions are full of water. If you toss them in the same bowl as the potatoes, they will transfer that moisture to the starch. By keeping them separate until the very last second when they hit the pan, you ensure the potatoes stay as dry as possible for that initial sear.
Phase 1: The High-Heat Prep and Seasoning
When seasoning, we opt for garlic powder over fresh minced garlic. Fresh garlic has a high water content and tiny pieces will burn to a bitter crisp at 425°F long before the potatoes are done. The powder distributes evenly and creates a savory “dust” that clings to the oil. The dried oregano should be rubbed between your palms as you sprinkle it to release its oils.
Ensure every single wedge is thinly and evenly coated in the olive oil. You don’t want them dripping, but you don’t want dry spots either. The oil acts as the heat conductor between the pan and the potato. If a spot is dry, it will bake; if it is oiled, it will fry. We want that fried texture for the ultimate mouthfeel.
Phase 2: The Sizzle and Spatial Arrangement
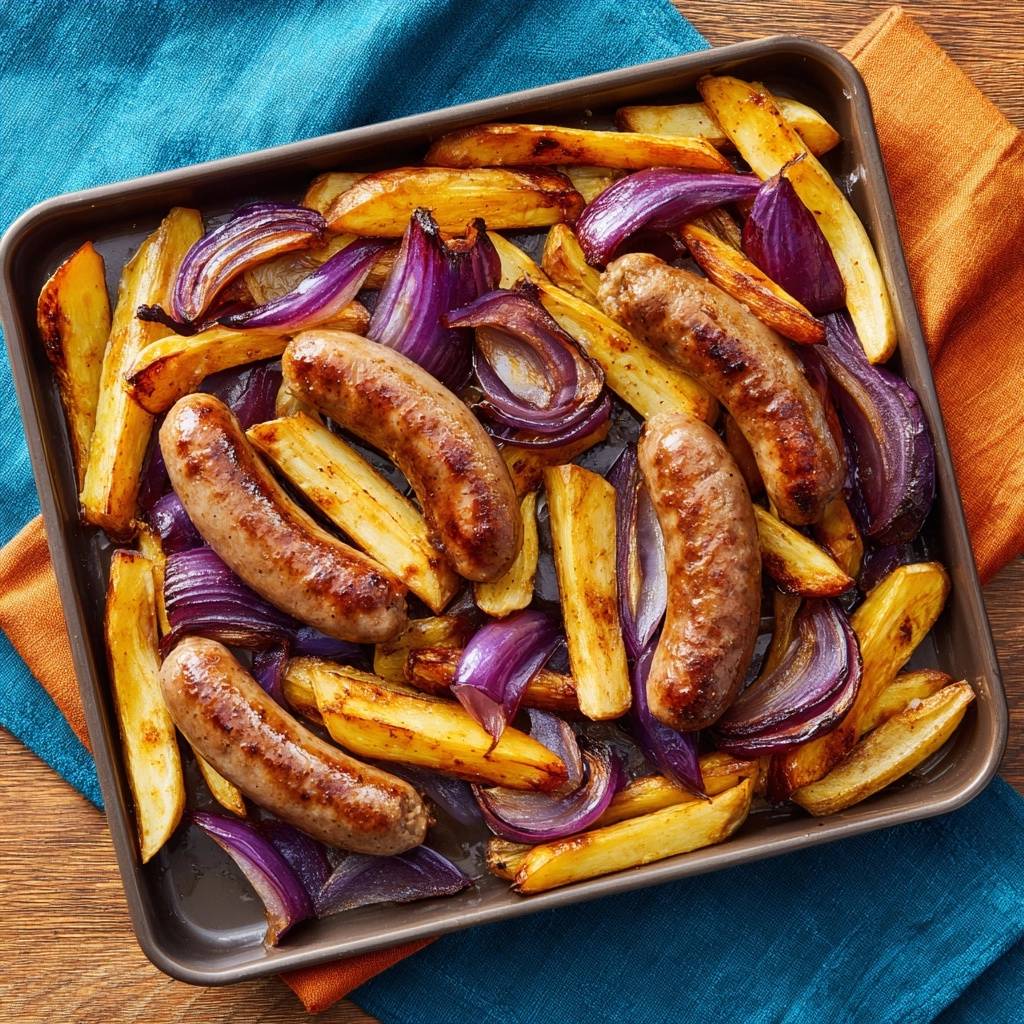
When you pull that hot pan out, work quickly but safely. As you lay the potatoes down, you should hear a distinct sizzle. This is the sound of success. Arrange them in a single layer, ensuring they aren’t overlapping. If you crowd the pan, the air cannot circulate, and you will end up with a tray of steamed vegetables instead of roasted ones.
Leave at least half an inch of space between each wedge. This allows the hot air to flow around the entire surface of the potato. Nestle the sausages and onions in the gaps. You want the sausages to have direct contact with the pan surface so the skins can brown and the fat can render directly onto the tray to help the potatoes along.
For more crispy potato ideas, check out this Cheesy Sausage & Veggie Bake.
Phase 3: The Mid-Point Flip and Rotation
At the 20-minute mark, the bottoms of your potatoes should be a deep golden brown. This is the critical moment. Use a thin metal spatula to flip them. You will notice the onions have become translucent and the sausages are starting to plump up. Flipping now ensures the other side of the wedge gets that same direct-heat treatment.
If your oven has “hot spots,” rotate the pan 180 degrees before putting it back in. This ensures even coloring across the entire batch. You are looking for the onions to start caramelizing at the edges and the sausages to develop a dark, rich color. The aroma in your kitchen at this point should be incredible.
Troubleshooting Common Sheet Pan Failures
If you find your wedges are still limp, it usually means the oven temperature dropped too much or the pan was overcrowded. If this happens, don’t panic. You can turn the heat up to 450°F for the last five minutes, but watch it closely. Another common issue is onions browning too fast. If they look like they are going to burn, simply move them to the center of the pan where it is slightly shielded by the sausages.
Sometimes sausages release a lot of liquid, especially if they were previously frozen. If you see a pool of liquid forming on the pan, carefully tilt the pan and spoon it out, or soak it up with a corner of a paper towel. You want fat on the pan, not water. Removing that excess moisture will save the crispiness of your potatoes.
Equipment: Why the Heavy-Duty Rimmed Sheet Pan Matters
Not all pans are created equal. A thin, cheap cookie sheet will warp the second it hits 425°F, causing your oil and juices to pool in one corner. This leads to uneven cooking and a big mess. You want a heavy-gauge, aluminum half-sheet pan. These are designed to distribute heat evenly and resist warping under high temperatures.
A sturdy pan holds its heat better when you open the oven door. This thermal stability is what keeps the roasting process consistent. When you are looking to crisp up 485 calories of deliciousness per serving, the equipment is your best friend. Invest in a professional-grade rimmed sheet pan; it is the most important tool in a sheet-pan-cook’s arsenal.
Flavor Variations and Herb Substitutions
Once you master the technique, you can play with the flavors. For a “Smoky Mediterranean” vibe, swap the oregano for smoked paprika and a pinch of cumin. The paprika will give the potatoes a beautiful reddish hue and a deep, wood-fired flavor that pairs perfectly with beef sausages. Just remember to keep the ratios the same so you don’t affect the moisture levels.
If you want something brighter, try a “Herby Lemon” version. Keep the garlic and oil, but toss the finished dish with fresh parsley and a squeeze of lemon juice right before serving. Never add lemon juice before roasting, as the acid and moisture will prevent the potatoes from crisping. Adding it at the end provides a fresh “pop” that cuts through the richness of the dish.
Optimal Pairings for Roasted Sausage and Potatoes
This is a hearty, rich meal, so you want something acidic and fresh to balance the plate. A simple arugula salad with a sharp lemon vinaigrette is the perfect companion. The peppery bite of the greens and the hit of acid from the lemon cleanse the palate between bites of savory sausage and salty potatoes.
For a drink pairing, go for something with bubbles and a bit of tartness. A sparkling apple cider or a crisp ginger beer works wonders here. The carbonation helps scrub the palate of the oils, making every bite of the potato wedges feel as fresh as the first. Quick-pickled cucumbers or radishes also provide a great temperature and texture contrast.
Expert Tips for Maximum Crispness
If you want to go to the absolute pro level, check if your oven has a convection setting. Convection circulates the air with a fan, which strips away moisture even faster. If you use convection, drop the temperature to 400°F but keep the time the same. It is like a giant air fryer for your sheet pan.
Also, avoid using parchment paper if you want the best possible sear. While parchment makes cleanup easy, it acts as a barrier between the potato and the hot metal. For the absolute best “Anti-Soggy Bottom” results, oil the pan directly. The direct contact with the aluminum is what creates that restaurant-quality crust that we are all chasing.
Frequently Asked Questions
Can I use sweet potatoes instead of Russets?
Sweet potatoes are much trickier for this specific method. They have a significantly higher sugar content and more moisture than Russets. If you put them in a 425°F oven on a pre-heated pan, the sugars will likely burn before the interior is cooked through. If you must use them, you would need to lower the heat to 375°F and accept a softer texture, as they will never get as crispy as a Russet.
How do I prevent the red onions from burning?
The trick is in the cut. When you slice your red onions, keep the root end intact. This holds the layers together in a thick wedge rather than letting them separate into thin petals. Thin petals will burn in minutes at high heat, but a thick wedge will caramelize on the outside while staying juicy on the inside. Also, placing them between the sausages helps shield them from the most intense direct heat.
What is the best way to reheat leftovers?
Never use the microwave for roasted potatoes or sausages! It will turn the potatoes into rubber and the sausage casings into plastic. Instead, use an air fryer at 350°F for about 5 minutes, or a toaster oven. This re-activates the oils and crisps the skin back up. If you use a standard oven, put them back on a pre-heated tray for 10 minutes to restore that original “just-cooked” texture.
Can I double this recipe on one pan?
No, you should never double a sheet pan recipe on a single tray. Overcrowding is the number one cause of soggy potatoes. If the wedges are touching or overlapping, they will steam each other. If you need to feed more people, use two separate pans on different oven racks. Rotate the pans from top to bottom halfway through the cooking time to ensure they both get even heat from the oven elements.
Why is my sausage casing tough instead of snappy?
Tough casings are usually a sign of overcooking. Once the internal temperature of a beef or poultry sausage passes 160°F, the meat inside begins to shrink and the casing shrivels, becoming leathery. Use a meat thermometer to check the sausages at the 30-minute mark. If they are at temperature, you can remove them and let the potatoes finish for the last few minutes on their own.
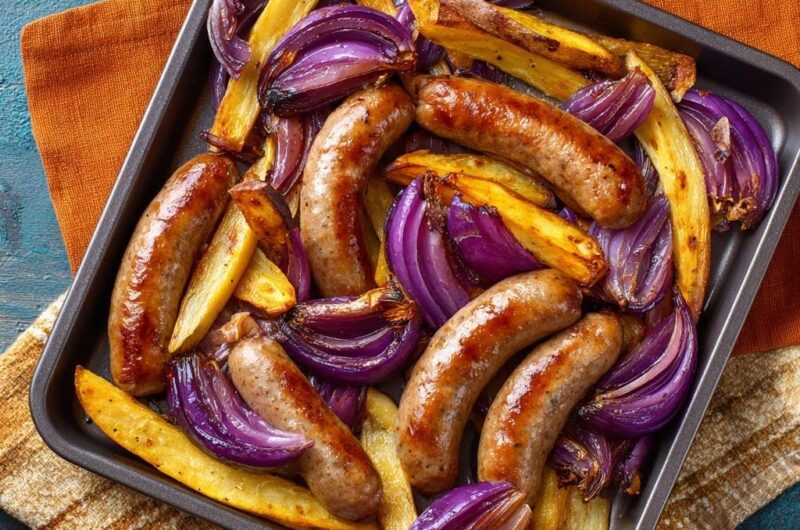
Sausage and Potato
Course: Main CourseCuisine: AmericanDifficulty: easy4
servings10
minutes35
minutes485
kcal45
MinutesA hearty one-pan meal featuring bratwurst or Italian sausages, Russet potato wedges, and red onions. This recipe utilizes a pre-heated pan and specific spacing techniques to achieve a golden-brown sear and avoid the common pitfall of steamed, mushy vegetables.
Ingredients
1 pound high-quality pork or beef sausages (bratwurst or Italian style)
3 large Russet potatoes, cut into thick, long wedges
2 large red onions, cut into thick wedges (root end intact to hold shape)
3 tablespoons olive oil
1 teaspoon garlic powder
1 teaspoon dried oregano
Salt and black pepper to taste
Directions
- Place your empty rimmed baking sheet into the oven and preheat to 425 degrees F (220 degrees C). Heating the pan first is the secret to an instant sear that prevents sticking and ensures the bottom of the potatoes crisp immediately.
- While the pan heats, pat the potato wedges dry with a paper towel. In a large bowl, toss the wedges with 2 tablespoons of olive oil, salt, pepper, garlic powder, and oregano. Ensure every wedge is thinly and evenly coated.
- In a separate bowl, toss the red onion wedges with the remaining tablespoon of oil. Keeping them separate initially prevents the onion moisture from steaming the potatoes during the prep phase.
- Carefully remove the screaming-hot baking sheet from the oven. Immediately arrange the potatoes in a single layer. You should hear a sizzle. Ensure they are spread out; overcrowding causes steaming rather than roasting.
- Nestle the sausages and red onions in the gaps between the potatoes. Ensure the sausages are in direct contact with the pan surface for maximum browning.
- Roast for 20 minutes. Remove the pan and use a spatula to flip the potatoes and rotate the sausages to ensure even coloring on all sides.
- Return to the oven for another 15 minutes or until the potatoes are fork-tender with deep golden-brown edges and the sausages are browned and reach an internal temperature of 160 degrees F.
- Serve immediately while the textures are at their peak.
Notes
- The secret to success is pre-heating the baking sheet and ensuring the potatoes are patted dry to prevent steaming. Keep the root end of the onions intact to help them hold their shape during roasting.