We have all been there. You head to the kitchen with visions of golden, caramelized cubes of squash, only to end up with a pile of mushy, steamed orange squares that fall apart the second your fork touches them. It is a culinary heartbreak that happens because most roasting methods trap moisture instead of releasing it.
The secret to restaurant-quality roasted squash is all about moisture control and surface contact. By using a preheated cast iron skillet and avoiding the “crowding” trap, you create a hard sear that locks in a creamy center while developing a savory crust that actually holds its shape. This isn’t just cooking; it is a lesson in heat management that will change how you look at root vegetables forever.
The real trick to this recipe is the “preheat shock.” Most people put cold vegetables into a cold pan and then slide them into the oven, which leads to sticking and steaming. However, when you drop seasoned squash onto a screaming-hot cast iron surface, the exterior cells dehydrate instantly, creating a structural barrier that keeps the inside fluffy and the outside crisp.
The Physics of Non-Mushy Skillet Roasted Butternut Squash
To understand why this method works, we have to look at the science of evaporation. When squash cooks, it releases water. If you use a standard thin baking sheet, the metal loses heat the moment the cold squash touches it, causing the vegetable to sit in its own juices and steam.
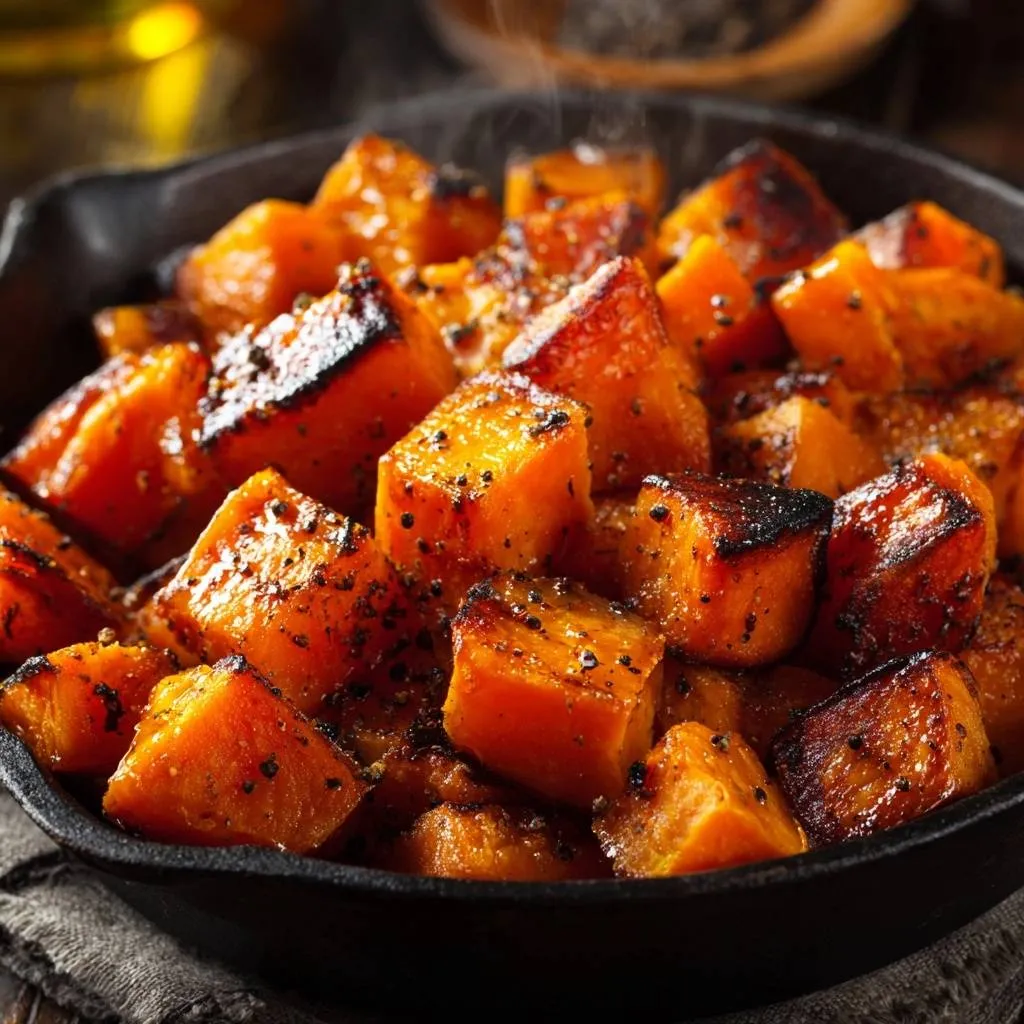
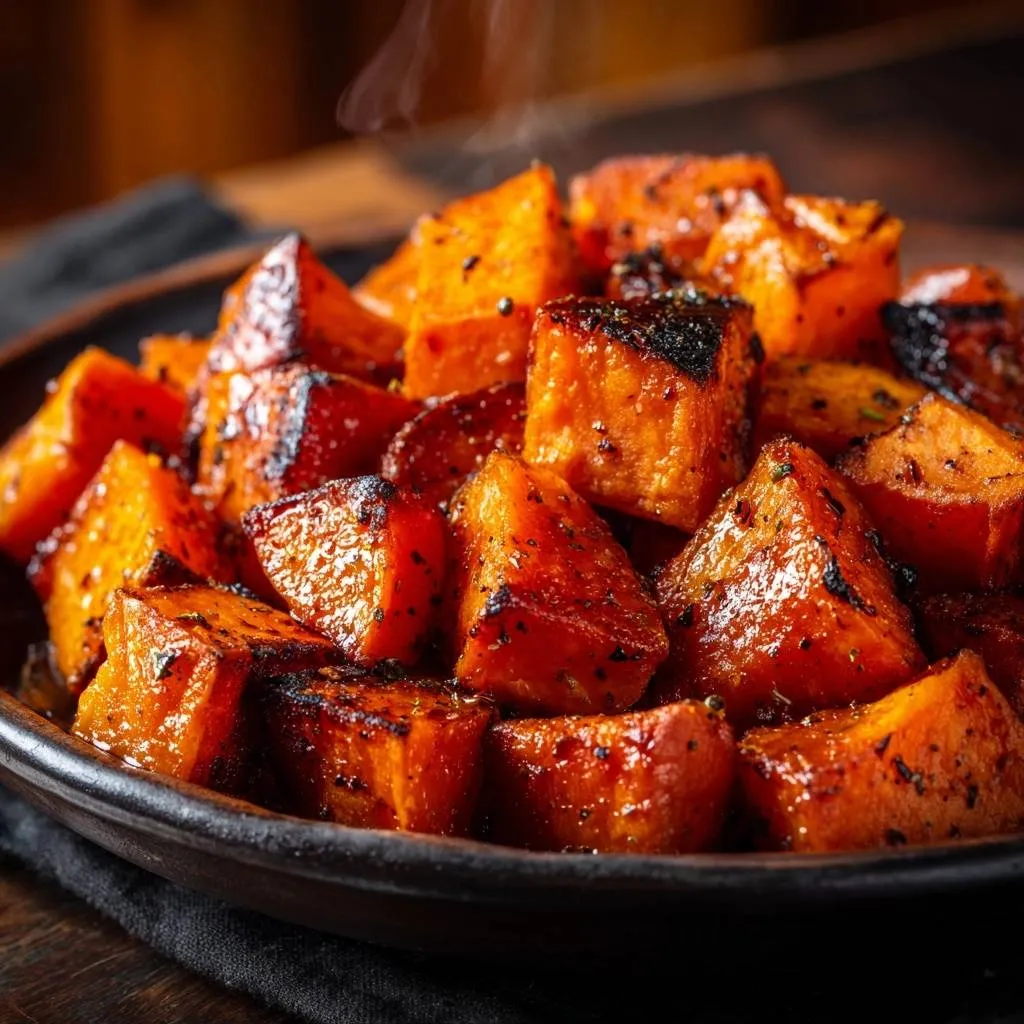
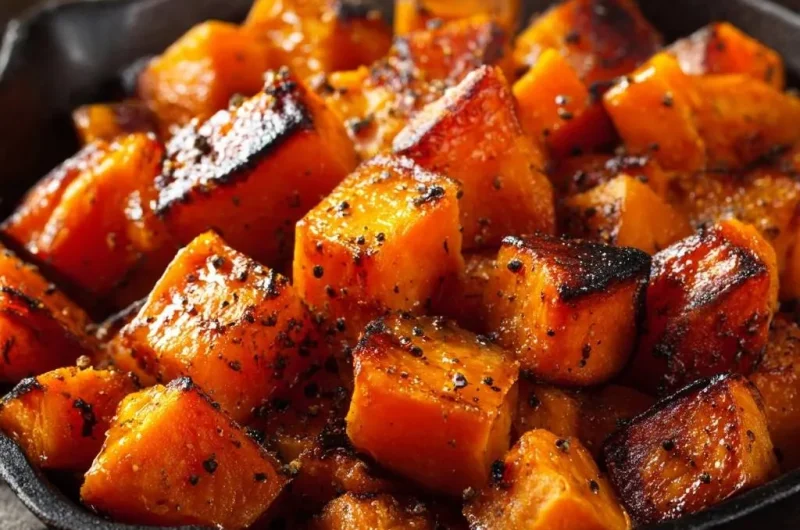
A cast iron skillet, however, possesses immense thermal mass. It holds onto heat like a battery, providing a constant, intense energy source that flashes off moisture the moment it appears. This high-heat environment (425°F) triggers the Maillard reaction, where amino acids and sugars transform into that deep, complex brown crust we crave.
Furthermore, the high sides of a skillet help circulate hot air while the heavy bottom ensures the squash’s natural sugars caramelize rather than just boiling. This creates a structural “shell” around each cube. This shell prevents the interior starch from collapsing into a puree, giving you that perfect contrast of a crispy exterior and a melt-in-your-mouth center.
Essential Components for High-Heat Roasting
Success starts with your fat choice. I always recommend avocado oil or a high-heat vegetable oil for this recipe. Extra virgin olive oil has a low smoke point and can turn bitter or even acrid when subjected to a 425°F preheated skillet. Avocado oil stays stable, allowing the natural sweetness of the squash to shine through without any burnt aftertaste.
Texture is just as important as flavor, which is why I use coarsely cracked black pepper. Unlike fine table pepper, large cracks of peppercorn provide a physical “crunch” and visible flecks that make the dish look professional. It adds a rustic, earthy heat that cuts right through the richness of the squash.
Smoked paprika is my secret weapon for color. While it adds a subtle wood-fired aroma, its primary job here is to provide a deep, brick-red hue. This ensures your squash looks deeply roasted and appetizing even before the honey glaze hits the pan. It gives the illusion of a long, slow roast in half the time.
Finally, we have the “Honey Delay” strategy. If you toss the squash in honey at the beginning, the sugars will carbonize and turn black long before the squash is tender. By waiting until the final five minutes, you allow the honey to bubble and lacquer the cubes without burning, resulting in a glossy, sticky finish that is sweet rather than bitter.
Selecting the Right Squash for Searing
When you are at the store, look for a squash that feels heavy for its size. This indicates a high moisture content inside, which will keep the center creamy while the outside crisps up. Avoid any squash with soft spots or deep bruises, as these areas will turn to mush regardless of your technique.
Check the skin texture as well. You want a matte, dull finish rather than a shiny one. A shiny coat often means the squash was picked too early and hasn’t had time to develop its full sugar content. A “cured” squash with a hard, matte rind will always yield a deeper flavor and better caramelization in the skillet.
Oil Selection and Smoke Point Realities
I cannot stress enough how important the smoke point is when working with cast iron. Because we are preheating the pan in a 425°F oven, the surface of the metal will be incredibly hot. If you use butter or unrefined oils, they will smoke and fill your kitchen with a burnt smell before the food even hits the pan.
Stick to oils with a smoke point above 400°F. Grapeseed oil is another fantastic alternative if you don’t have avocado oil on hand. These neutral oils act as a heat conductor, ensuring every millimeter of the squash cube that touches the iron gets perfectly seared without any off-flavors from oxidized fats.
Prepping the Squash for Maximum Surface Contact
Uniformity is your best friend in the kitchen. If your cubes are different sizes, the small ones will burn into charcoal while the large ones remain raw and crunchy in the middle. Aim for 1-inch cubes, which is the “Goldilocks” size—large enough to stay creamy, but small enough to cook through quickly.
When cutting, try to create as many flat edges as possible. Instead of random shapes, aim for clean squares. The more flat surface area you have touching the hot cast iron, the more “crust” you get to enjoy. I like to use a sharp chef’s knife to trim the rounded edges first, creating a block that is much easier to cube evenly.
Step-by-Step: Achieving the Perfect Skillet Sear
Phase 1: The Cold Prep and Coating
Before you even think about oil, make sure your squash cubes are dry. If they are wet from rinsing, pat them down with a paper towel. Moisture on the surface of the vegetable will create steam, which is the enemy of a good sear. I use the “dry-bowl” method, tossing the cubes vigorously with the oil and spices until every side is glistening.
You want an emulsified coating where the spices are suspended in the oil. This ensures that the garlic powder and smoked paprika don’t just clump in one spot. When you toss them well, the oil acts as a glue, holding the seasoning against the squash so it stays put when it hits the hot pan.
Phase 2: The Preheated Skillet Shock
This is the moment of truth. Carefully pull that hot skillet out of the oven—remember, the handle will be dangerously hot! When you pour the squash in, you should hear a loud, aggressive sizzle immediately. This is the “Sizzle Test.” If it’s quiet, your pan wasn’t hot enough, and you risk the squash sticking to the iron.
Work quickly but safely. Spread the cubes out so they aren’t overlapping. If you hear a hiss instead of a sizzle, that is the sound of steam escaping, which means the pan is too crowded. If you have too much squash for one skillet, do not force it. Use a second pan or roast in batches to maintain that dry, high-heat environment.
Phase 3: The Undisturbed Roast
Now comes the hardest part: leave it alone. For the next 15 to 20 minutes, do not shake the pan, do not stir, and do not peek more than necessary. This undisturbed contact is what builds the crust. Every time you move the squash, you break the heat cycle and prevent the sugars from browning properly.
At the molecular level, the squash is undergoing a transformation. The side touching the metal is dehydrating and browning, while the ambient heat of the oven is softening the interior. If you flip them too early, the squash will tear because it hasn’t had time to “release” naturally from the seasoned surface of the cast iron.
For a similar approach to keeping proteins moist, check out this juicy seared turkey loin.
Phase 4: The Honey Glaze and Final Char
Once the bottoms are dark golden brown, it is time for the finish. Drizzle your honey or maple syrup over the top and give them a gentle toss with a thin metal spatula. The honey will hit the hot pan and begin to bubble and foam almost instantly. This is exactly what you want.
Slide the pan back into the oven for a final 5 to 7 minutes. This short window allows the honey to reduce into a thick glaze that clings to the charred edges. Keep a close eye on it here; there is a fine line between perfectly caramelized and burnt. You are looking for the edges to look slightly “lacquered” and dark.
Troubleshooting Common Roasting Obstacles
The most common mistake is “Crowded Pan Syndrome.” If your cubes are touching each other, they will release moisture into the gaps, creating a steam pocket. This results in the dreaded mushy squash. If you see liquid pooling in the bottom of your skillet, you have too much in the pan. Remove some immediately or increase the heat.
If your squash feels stuck to the pan when you try to flip it, it usually means it isn’t done yet. Caramelized sugars naturally release from cast iron once they have formed a solid crust. Give it another two minutes and try again. If it still sticks, your pan might need a better seasoning, or you didn’t use enough oil to coat the cubes.
Flavor Variations and Savory Swaps
If you want to branch out, try the “Herbalist” profile. Add woody herbs like rosemary or thyme, but wait until the final 10 minutes of roasting. If you add them at the start, the high heat will turn them into bitter, burnt needles. Adding them later allows their oils to infuse the squash without scorching.
For those who like a bit of a kick, the “Heat Seeker” version is fantastic. Toss in a teaspoon of red pepper flakes or a dollop of harissa paste along with the honey. The spicy-sweet combination is addictive and pairs beautifully with the earthy flavor of the butternut squash.
If you want something more exotic, go for the “Earthbound” profile. Use cumin and ground coriander instead of garlic powder. This gives the dish a North African vibe that is incredible when served alongside roasted lamb or over a bed of lemon-infused couscous.
Optimal Pairings for Roasted Butternut Squash
This squash is a powerhouse side dish that plays well with many flavors. Because it is quite sweet and rich, it pairs perfectly with bitter greens. Try serving it over a bed of massaged kale or arugula tossed in a sharp lemon vinaigrette. The acidity of the greens cuts right through the honey glaze.
It also excels alongside roasted poultry. The savory notes of a roast chicken or turkey are elevated by the caramelized edges of the squash. For a vegetarian feast, toss the roasted cubes with hearty grains like farro or quinoa, adding some toasted walnuts for extra crunch and a sprinkle of salty feta cheese.
Equipment: Why Cast Iron is Non-Negotiable
While you can use a stainless steel pan, it simply doesn’t have the same heat retention as cast iron. Stainless steel cools down too quickly when the food hits it. Non-stick pans are even worse for this application because they cannot safely be preheated to 425°F without damaging the coating, and they don’t promote browning well.
The “seasoning” on a cast iron skillet—that layer of polymerized oil—acts as a natural non-stick surface that loves high heat. It helps the squash release easily once the crust has formed. Plus, the skillet can go straight from the oven to the table, keeping the squash piping hot while you eat.
Make-Ahead Strategies and Reheating for Crispness
If you have leftovers, whatever you do, stay away from the microwave. The microwave is the death of crispy squash; it will turn your beautiful cubes into a soggy mess in seconds. Instead, store them in an airtight container in the fridge for up to four days.
To reheat, use a dry skillet over medium heat on the stovetop. Toss the cubes gently until they are warmed through and the exterior crisps back up. An air fryer also works wonders for this—just three minutes at 350°F will restore that “just-roasted” texture perfectly.
Expert Tips for Professional Results
I always keep a bench scraper handy when I’m prepping squash. It makes transferring the cubes from the cutting board to the bowl much faster and keeps your workspace clean. Also, avoid using parchment paper in the skillet. While it makes cleanup easy, it acts as an insulator and prevents the squash from getting that direct-contact sear from the iron.
If you want to try a different look, you can use this same method for “Squash Steaks.” Cut the neck of the squash into thick rounds instead of cubes. They take a few minutes longer to cook, but they provide a massive amount of surface area for caramelization and look stunning on a dinner plate.
Is it necessary to peel the squash?
For butternut squash, peeling is highly recommended. Unlike delicata or honeynut squash, the skin on a butternut is thick, tough, and often waxy. It doesn’t soften much during roasting and can create an unpleasant “papery” texture that distracts from the creamy interior. A good Y-peeler makes quick work of it.
Can I use frozen butternut squash cubes?
I strongly advise against using frozen squash for this specific high-heat method. When squash is frozen, the ice crystals damage the cell walls. As it thaws in the hot pan, it releases a massive amount of water all at once. This guarantees your squash will steam and turn into a pile of mush rather than searing.
What if I don’t own a cast iron skillet?
If you don’t have cast iron, use your heaviest rimmed baking sheet. Place it on the lowest rack of the oven during the preheat to get it as hot as possible. You may need to extend the roasting time by 5 minutes, as a baking sheet won’t hold heat quite as efficiently as a heavy skillet.
How do I prevent the honey from burning?
The key is the “Late Addition” rule. Only add the honey when the squash is already 90% cooked. Look for visual cues: the honey should bubble vigorously and look like a thick syrup. If you see wisps of dark smoke or the honey turns black instantly, your pan is too hot; pull it out and toss the squash immediately to distribute the heat.
Why is my squash still sticking to the pan?
Sticking is almost always caused by trying to move the squash too early. This is known as the “Release Point.” The squash needs time to form a dry, browned crust. Once that crust is solid, it will naturally detach from the pan. If it’s sticking, leave it alone for another two or three minutes and try again with a thin spatula.
Butternut Squash
Course: Side DishCuisine: AmericanDifficulty: easy4
servings10
minutes25
minutes165
kcal35
MinutesA restaurant-quality roasted squash recipe that uses a preheated cast iron skillet to create a hard sear. By controlling moisture and avoiding crowding, these squash cubes maintain their shape and develop a deep, savory crust.
Ingredients
1 large butternut squash, peeled and cut into 1-inch cubes
2 tablespoons avocado oil or high-heat vegetable oil
1 teaspoon kosher salt
1 teaspoon coarsely cracked black pepper (for visible texture)
1/2 teaspoon garlic powder
1 tablespoon honey or maple syrup
1/2 teaspoon smoked paprika (optional, for deep color)
Directions
- Place a large cast iron skillet on the middle rack of your oven and preheat to 425 degrees Fahrenheit. Heating the pan first is the essential step to prevent sticking and ensure the squash starts searing the second it hits the metal.
- In a large bowl, toss the squash cubes with the oil, salt, cracked pepper, garlic powder, and optional paprika. Ensure every cube is lightly coated. Do not add the honey yet, as the sugar will burn before the squash is tender.
- Carefully remove the hot skillet from the oven. Pour the squash into the pan in a single layer. If the cubes are overlapping, they will steam instead of roast. Use a second pan if necessary to ensure space between the pieces.
- Roast for 15 to 20 minutes without touching them. This undisturbed contact with the hot iron is what builds that deep, non-mushy crust.
- Remove the pan and drizzle the honey over the squash. Use a spatula to gently flip the cubes, ensuring the honey coats the seared surfaces.
- Return to the oven for another 5 to 7 minutes until the edges are charred and caramelized, and the centers are fork-tender. Serve immediately in the skillet while the exterior is at its crispest.
Notes
- Do not add the honey at the beginning of the roasting process to prevent burning. Ensure the skillet is preheated and the squash is in a single layer to avoid steaming.