Stop settling for soggy, gummy rice skillets that lack texture and depth. Most home cooks struggle with one-pan meals because the rice ends up as a mushy pile of starch rather than distinct, fluffy grains. This guide transforms that frustration into a restaurant-quality experience by focusing on the “toast and rest” method.
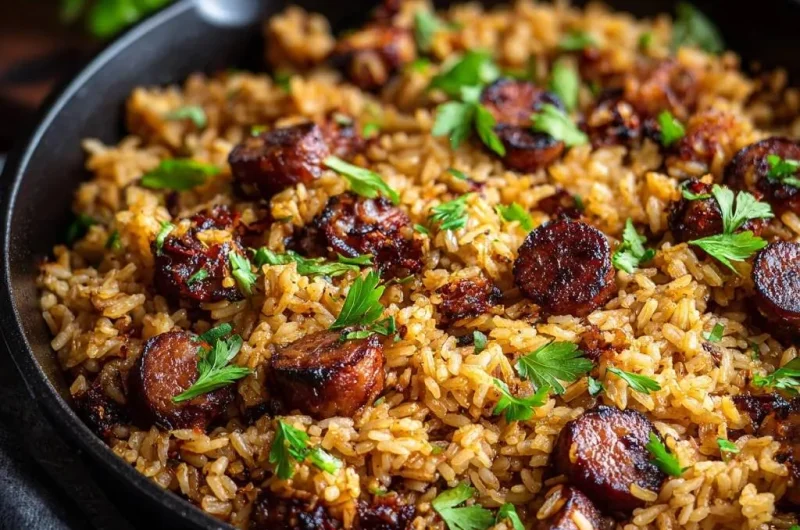
We’re moving away from the standard “boil and hope” strategy to a more intentional, technique-driven approach. By understanding how grain separation and the Maillard reaction work together, you’ll create a Skillet Sausage and Rice that boasts a deep golden color and a perfect bite every single time.
The secret to this success lies in a precise liquid-to-rice ratio and a specific toasting phase. I’ve found that reducing the standard broth amount slightly and frying the dry grains in sausage drippings creates a protective barrier. This barrier prevents the rice from over-hydrating, ensuring your dinner has a sophisticated texture instead of a porridge-like consistency.
The Science of Non-Mushy Skillet Rice
Achieving the perfect rice texture isn’t luck; it’s chemistry. When you cook rice, the starch molecules—specifically amylopectin—can easily gelatinize and turn sticky if they’re agitated or over-hydrated. In this recipe, we intentionally do NOT wash the rice. While washing removes surface starch to prevent sticking in a steamer, we actually need that starch to remain on the grain so it can be toasted in fat.
When you stir dry rice into hot olive oil and rendered sausage fat, you’re performing a technique similar to making pilaf or risotto. This fat coating acts as a waterproof shield for the exterior of the grain. Therefore, as the beef broth simmers, the liquid penetrates the grain slowly and evenly. This prevents the outside from turning into mush before the center is fully cooked.
Furthermore, this toasting process initiates the Maillard reaction. This is the same chemical reaction that makes seared steak taste better than boiled meat. By browning the starch on the surface of the rice, you develop nutty, complex flavor compounds that you simply cannot get from boiling alone. It changes the profile of the dish from a simple side to a robust, savory centerpiece.
Why Long-Grain White Rice is Essential
Not all rice is created equal, especially when it comes to skillet meals. Long-grain white rice is the superior choice here because it contains a higher percentage of amylose. This specific type of starch helps the grains stay separate and firm after cooking. Short-grain varieties, like those used for sushi or pudding, are high in amylopectin, which makes them naturally sticky and soft.
If you try to use a medium-grain or parboiled variety, you’ll notice a significant difference in the “snap” of the grain. Long-grain rice provides that elegant, fluffy finish that absorbs the savory beef broth without losing its structural integrity. It’s the backbone of a successful one-pan meal.
The Role of the Maillard Reaction in Flavor
The Maillard reaction is your best friend in the kitchen when you want to build “umami” or savory depth. In this skillet, it happens twice. First, when you sear the beef sausage rounds, the proteins and sugars on the surface brown and caramelize. This creates a flavorful crust that stands up to the moisture of the rice.
Second, as you toast the rice in the leftover sausage fat, those browned bits (known as the fond) get picked up by the grains. This ensures that every single bite of rice tastes like the sausage itself. You aren’t just eating rice with sausage on top; you’re eating rice that has been fundamentally transformed by the savory essence of the meat.
Essential Components for Skillet Sausage and Rice
Every ingredient in this skillet serves a functional purpose beyond just flavor. For instance, using beef broth instead of water is a non-negotiable for me. Water provides moisture, but beef broth provides a foundation of salt, marrow-like richness, and color. It acts as a seasoning agent that penetrates the very core of the rice grains.
For a similarly satisfying result with rich gravy, try our classic Salisbury steak.
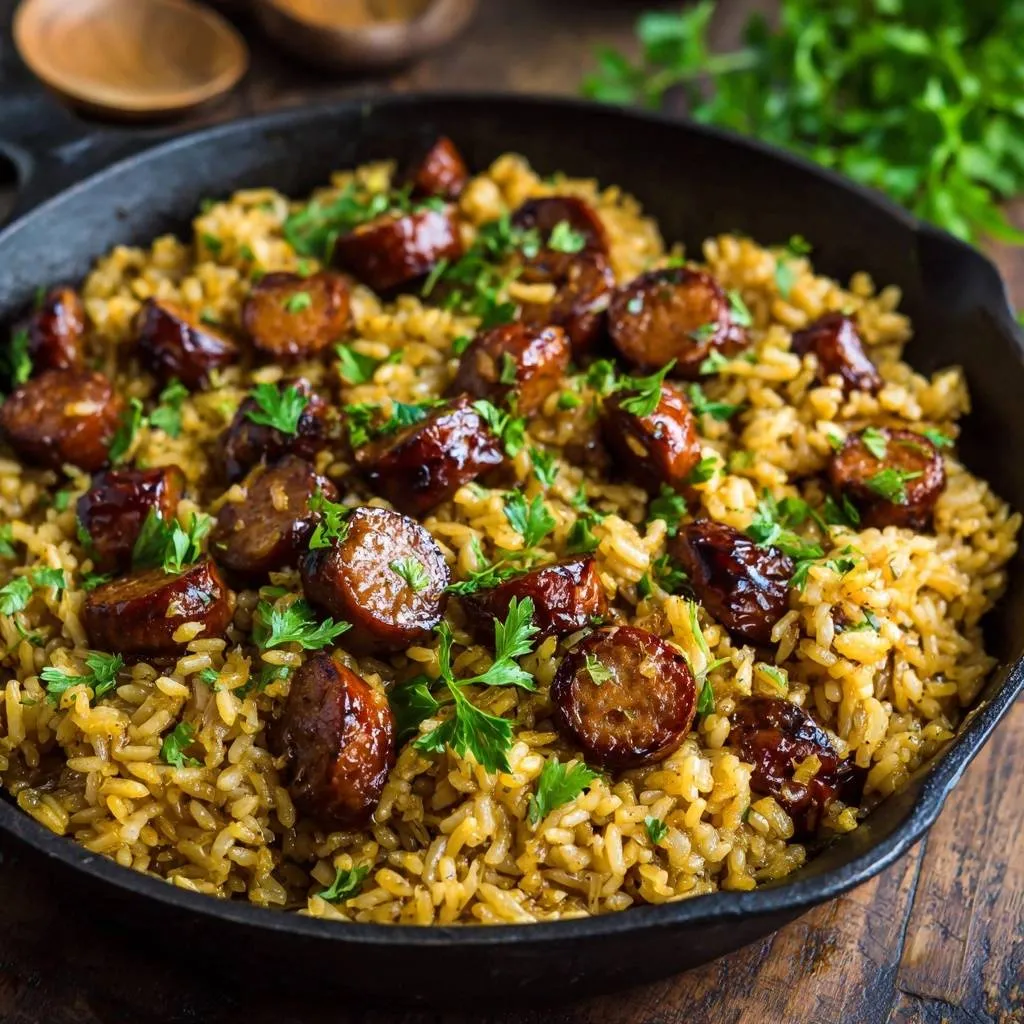
Worcestershire sauce is another heavy hitter in this recipe. While it might seem like a small addition, it acts as a “secret” browning agent. The fermented anchovies and tamarind in the sauce provide a massive umami boost that complements the smoked beef sausage perfectly. It also helps darken the liquid, giving the finished dish a rich, mahogany hue that looks incredibly appetizing.
Finally, don’t overlook the importance of the fat. We use a combination of olive oil and the rendered fat from the sausage. This fat is the vehicle for all the spices. When you toast your garlic and onion powders in the fat before adding the liquid, you “bloom” the spices, which intensifies their aroma and ensures they are evenly distributed throughout the entire skillet.
Selecting the Best Smoked Beef Sausage
The quality of your sausage will dictate the overall success of the dish. I always recommend a high-quality smoked beef sausage with a natural casing. You want a sausage that has a distinct “snap” when you bite into it. This texture provides a wonderful contrast to the tender rice.
Look for a variety that is fully cooked but still has a high enough fat content to render out into the pan. That rendered fat is liquid gold—it’s what we use to toast the rice. Avoid sausages with too many fillers or “mechanically separated” meats, as these tend to release excess water rather than clean fat, which can interfere with the toasting process.
Pantry Spices and Flavor Enhancers
Our spice blend is designed to be earthy and aromatic. Smoked paprika is the star here, providing a subtle wood-fired flavor that mimics the smokiness of the sausage. Garlic and onion powders are essential because they dissolve into the broth, ensuring every grain is seasoned without the risk of burning fresh aromatics during the high-heat toasting phase.
Always be mindful of your salt. Since beef broth and smoked sausage both contain significant sodium, I suggest using kosher salt and tasting as you go. If your broth is particularly salty, you might not need the full half-teaspoon. Cracked black pepper adds a necessary bite that cuts through the richness of the beef fat.
Step-by-Step: Searing and Toasting Techniques
This is where the magic happens. To get this right, you need to be attentive for the first ten minutes. Once the lid goes on, you can relax, but the preparation of the sausage and rice requires your full focus. You’re building layers of flavor that will define the final result.
Start by heating your skillet until the oil is shimmering. If the pan isn’t hot enough, the sausage will steam instead of sear. You want to hear a loud sizzle the moment that meat hits the surface. This high heat is what creates the crispy edges that make the sausage so satisfying to eat.
Phase 1: Rendering Fat and Searing Sausage
Place your sausage rounds in a single layer. If you crowd the pan, the temperature will drop, and you’ll lose that beautiful browning. Let them sit undisturbed for at least three minutes. You’re looking for a deep, dark brown color—almost a char—on both sides.
Once they’re seared, remove them to a plate. You’ll notice a layer of brown film on the bottom of the pan. Do not wipe this out! This is the “fond,” and it is packed with concentrated sausage flavor. This is the base upon which we will build our rice.
Phase 2: The Critical Rice Toasting Stage
Add your dry rice directly into that hot fat. You need to stir constantly here. At first, the rice will look translucent. After about two minutes, it will turn an opaque, chalky white. Keep going. You are waiting for that third stage: a toasted golden brown.
You’ll know it’s ready when the kitchen starts to smell like toasted nuts or popcorn. This physical change in the grain is what prevents the mush. By the time you add the spices for those last 30 seconds, the rice should be beautifully bronzed and ready to absorb the broth without falling apart.
Phase 3: Deglazing and the Simmer Secret
When you pour in the beef broth and Worcestershire sauce, the pan will hiss and steam. Use your wooden spoon to vigorously scrape the bottom of the skillet. This deglazing process releases all those browned bits into the liquid, turning it into a flavorful gravy that the rice will soak up.
Once it hits a rolling boil, give it one final stir and then stop. Turn the heat to the lowest setting and cover it tightly. The “No Peeking” rule is absolute. Every time you lift the lid, you release the steam pressure required to cook the grains evenly. Trust the process and let the steam do its job for the full 15 to 17 minutes.
Avoiding Common One-Pan Rice Mistakes
The most common mistake is heat management. If your “low” setting is still too hot, the liquid will evaporate before the rice is tender, leading to scorched bottoms and crunchy tops. If you suspect your stove runs hot, you might need to move the skillet to a smaller burner for the simmering phase.
Another pitfall is using a lid that doesn’t fit properly. If steam is escaping from the sides, your rice will never reach the right texture. If your lid is loose, you can place a piece of aluminum foil over the skillet before putting the lid on to create a tighter seal. This traps every drop of moisture where it belongs.
Managing Skillet Hot Spots
Electric stovetops are notorious for hot spots. If you notice one side of your skillet is bubbling more vigorously than the other, gently rotate the pan 180 degrees halfway through the cooking time. However, do this quickly and without removing the lid to maintain that internal temperature.
Cast iron is excellent for heat distribution, but it still takes time to level out. By starting with a well-preheated pan and then dropping to a very low simmer, you allow the heavy metal to radiate heat evenly across the entire surface, ensuring no grain is left behind.
The Importance of the Five-Minute Rest
I cannot stress this enough: do not eat the rice the second the timer goes off. When the heat is turned off, the moisture in the pan is still settling. Letting the skillet sit covered for five minutes allows the grains to firm up and the remaining steam to redistribute.
This rest period is what makes the rice “fluffable.” If you dig in too early, the rice will be wet and sticky. After five minutes, you can take a fork and easily separate the grains. It’s the difference between a home-cooked meal and a professional-grade dish.
Optimal Equipment: Why Cast Iron Wins
A 12-inch cast iron skillet is the gold standard for this recipe. Cast iron has incredible heat retention, which means once it gets hot, it stays hot. This is vital for the toasting phase where you need consistent, high heat to brown the rice quickly without burning it.
Furthermore, the heavy lid of a cast iron skillet (or a heavy Dutch oven lid) creates a superior seal compared to thin stainless steel. This weight holds the steam inside, creating a pressurized environment that cooks the rice perfectly. If you use a non-stick pan, you’ll likely find that the rice doesn’t toast as well and the flavor isn’t as deep.
Flavor Variations and Ingredient Swaps
While this beef-forward version is a classic, you can easily adapt it. If you want a “dirty rice” vibe, you can add finely diced bell peppers, celery, and onions (the holy trinity) after searing the sausage. Just sauté them for a few minutes before adding the rice to ensure they soften properly.
For an even heartier meal, consider the Hearty Beef and Potato Stew.
You can also swap the beef broth for a vegetable or chicken base if that’s what you have on hand, though you’ll lose some of that deep color. Regardless of what you add, always maintain the 1:1.5 rice-to-liquid ratio. If you add watery vegetables like zucchini, you may even need to reduce the broth by a tablespoon or two to compensate for the extra moisture.
What to Serve with Skillet Sausage and Rice
Since this dish is quite rich and savory, it pairs beautifully with something bright and acidic. A vinegar-based coleslaw or a simple cucumber salad provides a refreshing crunch that cleanses the palate between bites of the hearty sausage and rice.
What else to try?
Round out your meal with these complementary dishes.
- For a smooth and comforting addition, consider these creamy mashed potatoes with rich gravy.
- Add a touch of sweetness and savory depth with these glazed pearl onions, which offer a delightful contrast.
Roasted green beans with a squeeze of lemon or a side of steamed broccoli also work well. You want a side dish that doesn’t compete with the skillet for attention but rather provides a fresh contrast to the deep, toasted flavors of the main meal.
Storage, Reheating, and Food Safety
Rice is a high-risk food for bacterial growth if left at room temperature for too long. As soon as dinner is over, transfer any leftovers to an airtight container and get them into the fridge. It will stay fresh and delicious for up to three days.
To reheat, avoid the microwave if possible, as it can make the rice rubbery. Instead, put the rice back in a skillet with a splash of water or broth. Cover it and heat over medium-low. The steam will revive the grains and the sausage will stay juicy. If you must use a microwave, cover the bowl with a damp paper towel to keep the moisture locked in.
Expert Troubleshooting and Technical Tips
Can I use brown rice instead?
You can, but it requires significant adjustments. Brown rice has the bran layer intact, which means it needs more liquid and a much longer cook time (usually 40-45 minutes). You would need to increase the broth to about 4 cups for 2 cups of rice and be very careful not to burn the bottom of the pan during the extended simmer.
Why is my rice sticking to the bottom?
This usually happens if the heat was too high during the simmering phase or if the pan wasn’t properly deglazed. Make sure you really scrape those browned bits off the bottom when you add the liquid. If it still sticks, your “low” setting might be too powerful; try using a heat diffuser or a smaller burner next time.
Can I add frozen vegetables?
Yes, but timing is everything. Add frozen peas or corn during the last 2 minutes of the “rest” period. The residual steam is plenty to heat them through without overcooking them or adding too much extra water to the rice. Avoid adding them at the beginning, or they will turn the rice mushy.
My broth is low-sodium; how much extra salt do I need?
If you are using a low-sodium or unsalted broth, you will likely need to double the salt in the recipe. Start with one full teaspoon of kosher salt. Taste the liquid right before you put the lid on; it should taste slightly saltier than you want the final dish to be, as the rice will absorb and mellow that saltiness.
What if I don’t have a tight-fitting lid?
The foil-seal method is your best friend. Take a large piece of heavy-duty aluminum foil and crimp it tightly over the edges of the skillet, then place whatever lid you have on top of the foil. This creates an airtight seal that mimics a heavy cast iron lid and ensures your rice cooks through perfectly without drying out.
Skillet Sausage and Rice
Course: Main CourseCuisine: AmericanDifficulty: easy4
servings10
minutes25
minutes540
kcal35
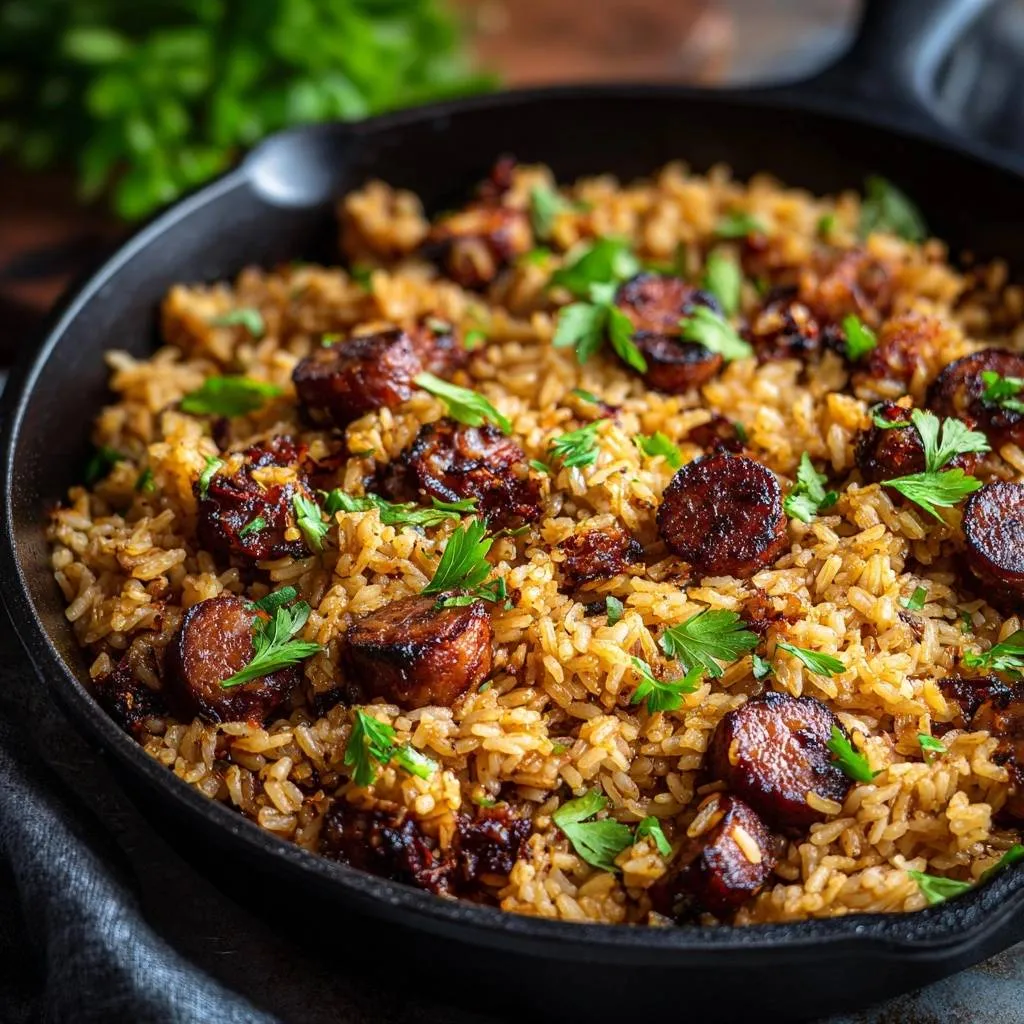
MinutesA restaurant-quality one-pan meal that solves the problem of soggy rice. By toasting dry long-grain rice in sausage drippings and using a precise liquid ratio, this recipe delivers separate, firm grains and deep savory flavor in just 35 minutes.
Ingredients
1 pound smoked beef sausage, sliced into 1/2-inch rounds
2 cups long-grain white rice, unwashed (to preserve starch for toasting)
3 cups beef broth (reduced from 3.5 to ensure firm grains)
2 tablespoons olive oil
1 tablespoon Worcestershire sauce (for the deep color shown in the image)
1 teaspoon garlic powder
1 teaspoon onion powder
1/2 teaspoon smoked paprika
1/2 teaspoon kosher salt (adjust based on broth saltiness)
1/2 teaspoon cracked black pepper
Fresh flat-leaf parsley, roughly chopped for garnish
Directions
- Heat the olive oil in a large 12-inch cast iron skillet over medium-high heat. Add the sliced sausage in a single layer. Sear for 3-4 minutes per side until deeply browned and slightly crispy.
- Remove the sausage from the pan and set aside on a plate, leaving the rendered fat and browned bits in the skillet.
- Add the dry rice directly into the hot skillet. Stir constantly for 4-5 minutes. The rice should transition from translucent to opaque white, and finally to a toasted golden brown. This step is the absolute key to preventing mushy rice.
- Stir in the garlic powder, onion powder, smoked paprika, salt, and pepper. Toast the spices with the rice for 30 seconds until fragrant.
- Pour in the beef broth and Worcestershire sauce. Use a wooden spoon to scrape the bottom of the pan (deglazing) to release the flavorful browned bits into the liquid. Bring to a rolling boil.
- Once boiling, stir once, then immediately turn the heat down to the lowest possible setting. Cover the skillet with a tight-fitting lid. Simmer for 15-17 minutes. Do not lift the lid or stir during this time.
- Turn off the heat. Let the skillet sit, undisturbed and covered, for an additional 5 minutes. This allows the remaining steam to finish the grains without making them wet.
- Remove the lid and fluff the rice with a fork. Gently fold the crispy sausage back into the rice. Garnish generously with fresh parsley and serve immediately directly from the skillet.
Notes
- The ‘toast and rest’ method is essential. Do not wash the rice beforehand, as the surface starch helps with the toasting process. Ensure the lid is tight-fitting to trap steam during the final rest.