Few things in the culinary world are as disappointing as a beef stew where the meat is chewy and the sauce is thin. You expect a bite that melts away, but instead, you’re left with stringy fibers that require far too much effort to eat. This frustration usually stems from rushing the process or using the wrong heat level, which turns a potential masterpiece into a tough chore.
The secret to achieving that dark, velvety glaze and fork-tender texture is all about the low and slow braising technique. By searing the meat first to develop a deep Maillard crust and then simmering it in a rich, flour-thickened base, you transform the beef. This method ensures the sauce becomes a glossy gravy that clings to every morsel of meat and vegetable.
For even more tender beef, explore the technique behind braised beef short ribs.
I’ve found that the absolute key to success is patience and a heavy-bottomed pot. The secret is to never let the liquid reach a rolling boil once the meat is submerged. If you see large bubbles breaking the surface, your heat is too high, and you’ll end up with dry meat regardless of how long it cooks. Keep it at a bare simmer for the best results.
For even more melt-in-your-mouth tenderness, explore these slow-braised beef short ribs.
The Science of Collagen and Low-Temperature Braising
When you’re making Slow Braised Beef and Carrots, the cut of meat you choose makes or breaks the dish. Beef chuck roast is the undisputed king of the braise because it’s packed with connective tissue and collagen. While these elements make the meat tough when grilled like a steak, they are the “secret sauce” of a successful slow cook.
As the beef simmers, a magical transformation happens between 160°F and 180°F. At this specific temperature range, the tough collagen begins to break down and melt into gelatin. This gelatin doesn’t just soften the meat; it seeps into the braising liquid, giving your gravy that luxurious, lip-smacking mouthfeel that water-based sauces lack.
However, you must avoid the temptation to turn up the heat to “speed things up.” If the braising liquid reaches a full boil at 212°F, the muscle fibers in the beef will contract violently. This squeezes out all the internal moisture, leaving you with meat that is technically “cooked” but feels dry and stringy on the tongue. A gentle, barely-there simmer is the only way to keep those fibers relaxed and juicy.
Essential Components for a Rich Braising Liquid
The quality of your liquid determines the depth of your final sauce. I always recommend using a high-quality beef bone broth rather than a standard shelf-stable stock. Bone broth has a higher protein and gelatin content, which naturally aids in thickening the sauce and provides a much more robust, savory foundation.
Tomato paste is another non-negotiable ingredient here. It provides an intense hit of umami and a subtle acidity that balances the richness of the beef fat. Additionally, using whole pearl onions instead of diced yellow onions is a game-changer. Pearl onions hold their structural integrity over three hours, becoming sweet, tender little flavor bombs rather than dissolving into the sauce.
Selecting and Preparing the Beef Chuck
When you’re at the butcher counter, look for a chuck roast with plenty of white “marbling” throughout. You want to cut the beef into large 2-inch cubes. While this might seem big, the meat will shrink slightly as it cooks, and larger chunks are less likely to overcook and become mushy.
Don’t be tempted to trim away every bit of fat from the cubes. While you should remove any thick, silver-colored skin, the internal fat is essential. It renders down during the three-hour simmer, basting the meat from the inside out and adding incredible flavor to the surrounding gravy.
The Role of Aromatics and Thickening Agents
Dried thyme and bay leaves provide the classic “Sunday dinner” aroma that defines this dish. These herbs are hardy enough to withstand the long cook time without losing their punch. They infuse the liquid with earthy notes that cut through the heavy savory flavors of the beef.
The three tablespoons of all-purpose flour are equally vital. When you stir the flour into the butter and rendered fat, you’re creating a roux. This ensures that the fat and broth stay emulsified, preventing that greasy layer of oil that often sits on top of poorly made stews.
Phase One: Achieving the Maillard Reaction
Before the beef ever touches the pot, you must pat it completely dry with paper towels. This is the most important rule of browning. If the surface of the meat is wet, it will create a pocket of steam in the pan, which prevents the Maillard reaction from occurring. You want a sear, not a steam.
Heat your oil until it’s shimmering but not smoking. Sear the beef in batches, giving each piece enough space to breathe. If you crowd the pan, the temperature will drop, and the meat will start to grey and release its juices. You are looking for a dark, mahogany-colored crust on all sides. This crust is where the deepest flavor of the dish is born.
Phase Two: Building the Flavor Base and Roux
Once the beef is set aside, lower the heat and add your butter, carrots, and pearl onions. Sautéing the vegetables in the leftover beef fat allows them to pick up those savory browned bits. The onions should become slightly translucent, and the carrots will start to soften at the edges.
When you add the tomato paste, cook it for about two minutes until it shifts from a bright red to a deep brick red. This “toasts” the paste, removing the metallic tang of the can and developing a sweeter, more complex flavor. Sprinkle the flour over the top and stir constantly. You want to cook the flour for about two minutes to remove the raw grain taste before adding any liquid.
Phase Three: Deglazing and the Long Simmer
Now comes the deglazing. As you pour in the broth and optional wine, use a wooden spoon to scrape the bottom of the pot. Those dark bits stuck to the bottom are called “fond,” and they are concentrated flavor gold. They will dissolve into the liquid, instantly turning it into a rich, dark brown sauce.
Return the beef to the pot and ensure the lid fits tightly. A tight seal is crucial because it prevents the liquid from evaporating away. It creates a moist, pressurized environment that forces the heat into the center of the beef cubes, gently coaxing the fibers to let go and soften over the next few hours.
Troubleshooting Common Braising Obstacles
If you reach the three-hour mark and the meat still feels a bit “bouncy” or rubbery when you press it with a fork, it simply needs more time. This is the “Patience Rule.” Every piece of meat is different, and some chuck roasts have more stubborn connective tissue than others. Give it another 30 minutes; it will eventually give in.
On the flip side, if your sauce looks too thin after the meat is tender, don’t panic. Simply remove the lid, turn the heat up slightly to a medium simmer, and let it reduce for 10 minutes. The flavors will concentrate, and the sauce will thicken into a glossy glaze. Just be careful not to over-reduce, or it may become too salty.
Optimal Side Dishes for Slow Braised Beef and Carrots
To truly appreciate the velvety gravy, you need a starch that can act as a sponge. High-fat creamy mashed potatoes are the gold standard here. The buttery, smooth texture of the potatoes provides a perfect contrast to the chunky beef and carrots, and the gravy pools beautifully in the center of the mash.
Complement Your Braised Beef
Round out your meal with some comforting accompaniments that play well with slow-cooked beef.
- For a fresh, creamy counterpoint to the rich beef, consider the creamy herb and pea potato salad.
- To soak up all the delicious braising liquid, prepare a batch of creamy garlic mashed potatoes and gravy.
If you aren’t in the mood for potatoes, buttered egg noodles are a fantastic alternative. Their wide surface area catches the sauce effectively. For a simpler approach, a thick slice of toasted sourdough bread is perfect for mopping up every last drop of the braising liquid from the bottom of your bowl.
Make-Ahead Strategies and Storage Standards
This is one of those rare dishes that actually tastes better the next day. As the beef sits in the sauce overnight, the flavors continue to meld and mature. If you’re making this ahead of time, let it cool completely at room temperature before covering and placing it in the fridge to prevent condensation from thinning the sauce.
For freezing, place the cooled beef and carrots in an airtight container, ensuring they are completely covered by the gravy to prevent freezer burn. When you’re ready to eat, thaw it in the fridge overnight. Reheat it slowly on the stovetop over low heat, adding a splash of broth if the sauce has thickened too much in the cold.
Expert Tips for Enhancing the Final Glaze
Before you serve, always perform a final taste test. Sometimes a long simmer can dull the salt levels, so a final pinch of cracked black pepper or sea salt can wake the flavors back up. If the sauce feels a bit “heavy,” a teaspoon of balsamic vinegar can provide a subtle acidic lift that brightens the whole dish.
For a truly professional finish, try the “monter au beurre” technique. Stir in a single tablespoon of cold, unsalted butter right before serving. As the cold butter melts into the hot sauce, it creates an incredibly glossy, silk-like sheen that makes the dish look like it came straight out of a high-end bistro kitchen.
Frequently Asked Questions
Can I use a different cut of meat like Round Roast?
I don’t recommend using Round Roast or Sirloin for this recipe. Those cuts are much leaner and lack the collagen found in chuck roast. If you braise them for three hours, they will become incredibly dry, tough, and “woody” because there is no fat or connective tissue to melt and keep the meat moist.
What is the best substitute for the red wine?
If you prefer not to use wine, simply replace the half-cup of wine with an equal amount of extra beef bone broth. To mimic the depth and acidity that wine provides, add a tablespoon of Worcestershire sauce or a teaspoon of balsamic vinegar to the liquid. This ensures the sauce remains complex and dark.
How do I prevent the carrots from becoming mushy?
The key is the size of the cut. By cutting the carrots into thick 1-inch chunks, you ensure they have enough density to survive the long simmer. Smaller slices or coins would disintegrate into the sauce. Carrots are quite hardy, so as long as they are chunky, they will stay tender but intact.
Can this recipe be adapted for a Slow Cooker?
Yes, you can use a slow cooker, but you shouldn’t skip the stovetop steps. You must still sear the beef and make the roux with the vegetables and flour in a pan first. Once the base is built, transfer everything to the slow cooker and cook on “Low” for 6 to 8 hours. Skipping the sear will result in a pale, flavorless stew.
Why is my gravy greasy instead of velvety?
Greasy gravy usually happens if the flour wasn’t properly incorporated into the fat or if the beef had an excessive amount of exterior fat that wasn’t trimmed. You can fix this by using a spoon to skim the oil off the top. Next time, ensure your flour-to-fat ratio is correct to keep the sauce emulsified.
Braised Beef and Carrots
Course: Main CourseCuisine: AmericanDifficulty: medium4
servings20
minutes3
hours580
kcal180
MinutesA foolproof method for transforming tough beef chuck into melt-in-your-mouth perfection. By searing the meat to develop a Maillard crust and simmering in a flour-thickened bone broth base, this recipe ensures a velvety sauce and tender texture every time.
Ingredients
2 pounds beef chuck roast, cut into large 2-inch cubes
3 large carrots, peeled and cut into thick 1-inch chunks
1 cup whole pearl onions, peeled
3 cups high-quality beef bone broth
1/2 cup dry red wine (optional, for depth of color)
2 tablespoons tomato paste
3 tablespoons all-purpose flour
2 tablespoons vegetable oil
2 tablespoons unsalted butter
1 teaspoon dried thyme
2 bay leaves
Salt and freshly cracked black pepper to taste
4 cups creamy mashed potatoes (prepared with butter and cream) for serving
Directions
- Pat the beef cubes completely dry with paper towels. This is the critical first step to preventing tough meat; surface moisture creates steam instead of a sear. Season generously on all sides with salt and pepper.
- Heat the oil in a heavy-bottomed Dutch oven over medium-high heat. Sear the beef in batches, ensuring you do not crowd the pan. Brown each side for 3-4 minutes until a dark, mahogany crust forms. Remove the beef and set aside.
- Lower the heat to medium and add the butter. Add the whole pearl onions and carrots. Sauté for 5 minutes until the onions are slightly translucent. Stir in the tomato paste and cook for 2 minutes until it turns a deep brick red.
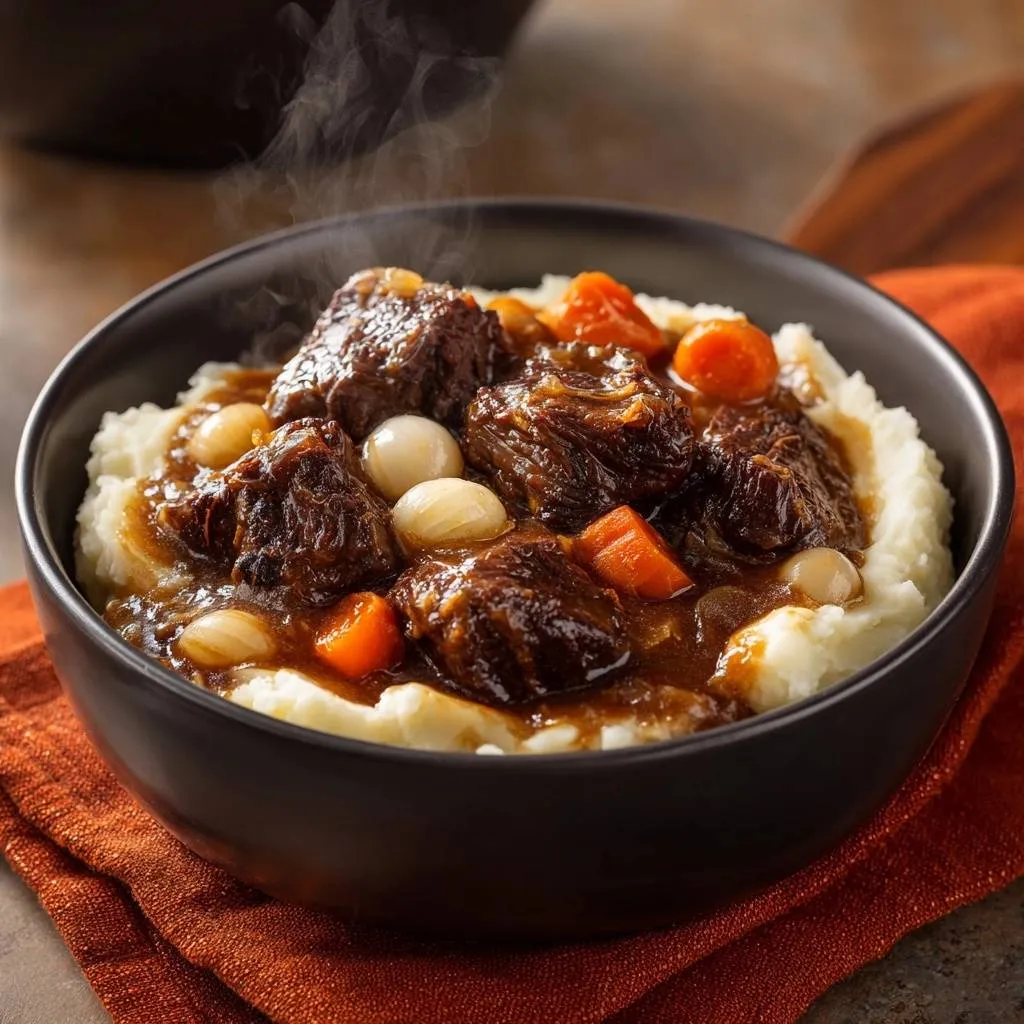
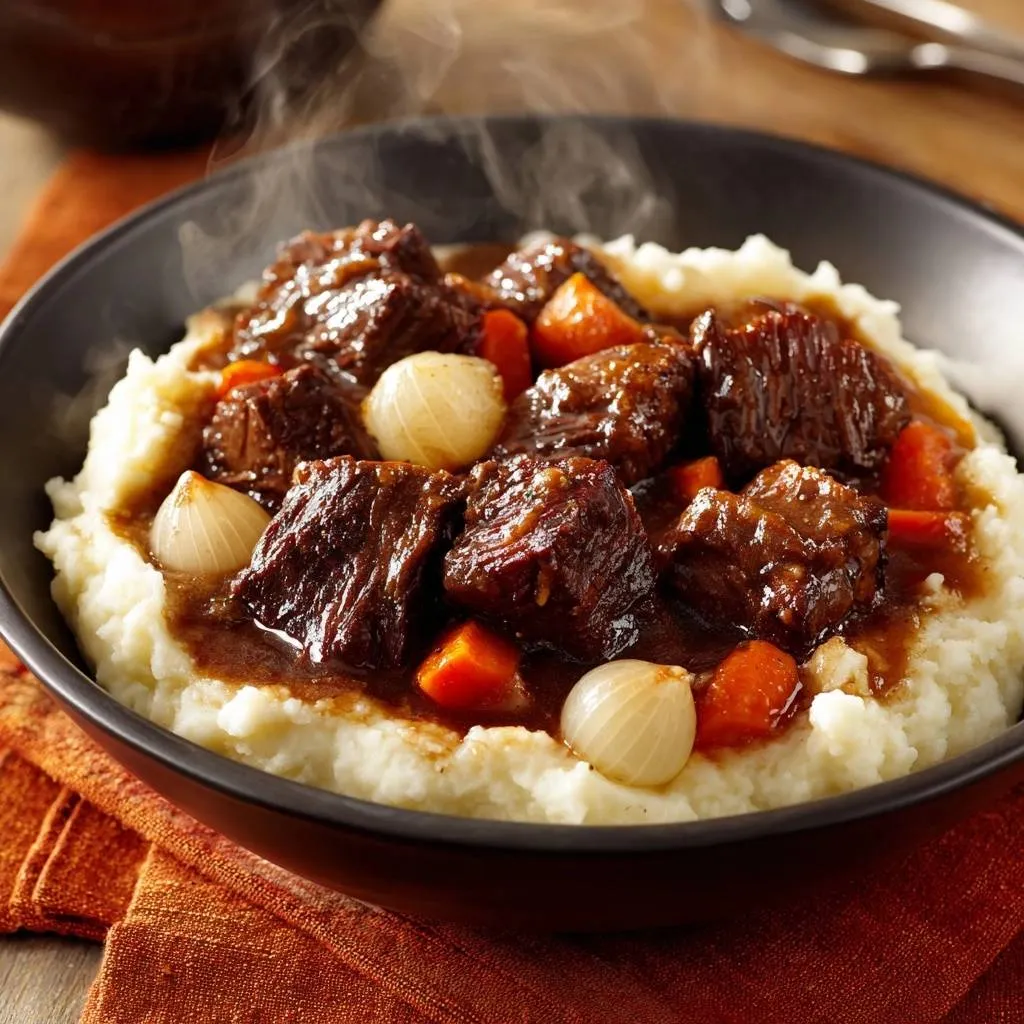
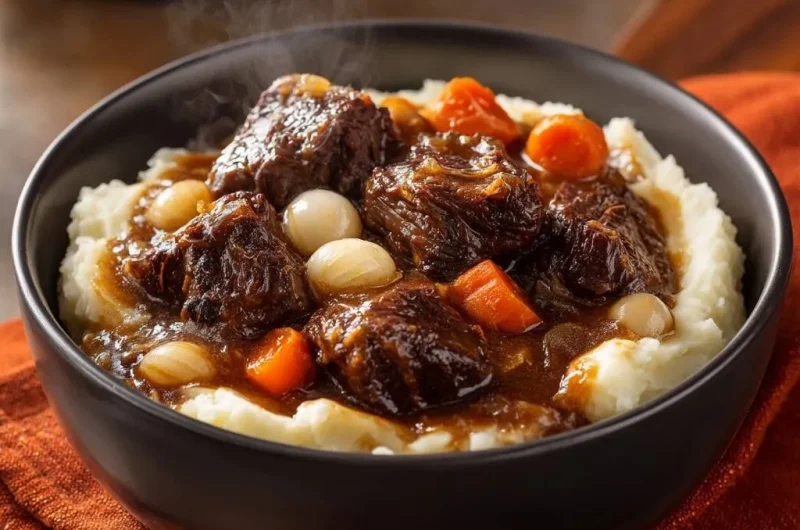
- Sprinkle the flour over the vegetables and stir constantly for 1-2 minutes. This creates a roux that will ensure the thick, glossy gravy consistency seen in the image.
- Slowly pour in the red wine (if using) and beef broth while scraping the bottom of the pot with a wooden spoon to release the “fond” (browned bits), which provides the deep color and flavor.
- Return the beef and any accumulated juices to the pot. Add the thyme and bay leaves. Bring the liquid to a very gentle simmer, then immediately reduce the heat to the lowest setting.
- Cover with a tight-fitting lid. Simmer on low for 3 to 3.5 hours. Do not boil the meat, as high heat toughens the proteins. The beef is done when it is dark, glazed, and pulls apart effortlessly with a fork.
- Remove the bay leaves. Taste the sauce and add salt or pepper if needed. Serve the hot beef, carrots, and onions over a generous bed of creamy mashed potatoes, ladling the thickened gravy over the top so it pools in the center.
Notes
- The secret to preventing tough meat is patting the beef dry before searing and ensuring the liquid never reaches a hard boil during the 3-hour simmer.