You’ve likely been there before. You spend hours hovering over a pot, anticipating a rich, savory meal, only to bite into a piece of beef that feels like a rubber band. It’s the ultimate kitchen heartbreak. When you’re craving a bowl of Slow Braised Beef and Peppers, you aren’t just looking for food; you’re looking for that specific, soul-warming tenderness that only comes from a perfect braise.
This dish represents the intersection of rustic home cooking and precise culinary technique. By understanding how heat interacts with muscle fiber, you can turn a humble, affordable cut of meat into something that rivals the finest bistro fare. We’re going to move past the “set it and forget it” mentality and focus on the small, intentional steps that guarantee success every single time.
The secret to ending the “tough meat” cycle starts with moisture control. Most home cooks toss damp meat into a lukewarm pan, which effectively steams the beef instead of searing it. If you don’t get a hard, dark crust on that beef in the first five minutes, you’re leaving all the flavor on the table. Always pat your beef cubes bone-dry with paper towels before they ever touch the oil.
The Science of Tenderness: Why Chuck Roast Reigns Supreme
When you’re at the butcher counter, the chuck roast is your best friend for a long simmer. This cut comes from the shoulder of the cow, an area that does a lot of heavy lifting. Because those muscles work hard, they’re packed with connective tissue called collagen. If you were to grill a chuck steak like a ribeye, it would be nearly inedible because collagen is incredibly tough when cooked quickly.
However, when you subject that collagen to low, steady heat over several hours, a beautiful transformation occurs. Around the 160°F to 180°F mark, the collagen begins to melt. It doesn’t just disappear; it turns into gelatin. This gelatin coats the individual muscle fibers, providing that “melt-in-your-mouth” silkiness and giving the sauce a rich, lip-smacking body that water or broth alone can’t provide.
For similarly tender results with beef, explore slow-braised beef short ribs.
High heat is the enemy of this process. If the liquid in your pot is boiling violently, the muscle fibers will contract and squeeze out all their moisture, leaving the meat dry and stringy. You need to maintain a “lazy bubble”—a very gentle simmer—to allow the collagen to break down without toughening the protein. Patience truly is an ingredient in this recipe.
Essential Components for Slow Braised Beef and Peppers
Quality starts with the prep. When you’re cutting your beef, aim for 2-inch cubes. This might seem large, but meat shrinks as it cooks. A larger cube provides enough surface area for a great sear while ensuring the center stays succulent during the three-hour journey. If the pieces are too small, they’ll overcook and disintegrate into the sauce before the peppers even hit the pot.
The aromatic base, often called a mirepoix, consists of yellow onions and carrots. Yellow onions are preferred here because they have a higher sugar content than white onions, which leads to better caramelization. As they melt down, they provide a structural sweetness to the sauce. The carrots add an earthy depth and a bit of texture that holds up well against the heavy beef.
Red bell peppers are the star of the show toward the end. I choose red peppers specifically for their ripeness and natural sugars. While green peppers can be slightly bitter, red peppers soften into a jammy sweetness that cuts through the savory richness of the beef broth. They provide a bright pop of color that makes the final dish look as good as it tastes.
The Role of Acidity: Balsamic Vinegar as a Catalyst
Balsamic vinegar is the “secret weapon” in this braise. Beyond adding a complex, tangy flavor, the acetic acid in the vinegar acts as a natural tenderizer. It helps weaken the stubborn protein bonds in the beef, accelerating the breakdown of those tough fibers. It’s a subtle touch that makes a massive difference in the final texture.
Furthermore, the vinegar is essential for deglazing. After you sear the beef, the bottom of your pot will be covered in dark, stuck-on bits called “fond.” This is concentrated umami. When you pour in the balsamic, it bubbles up and loosens those bits, allowing you to scrape them back into the sauce. Never wash that pot mid-way; that brown crust is where the magic lives.
Choosing the Right Broth and Aromatics
While a homemade beef stock is always the gold standard, a high-quality, low-sodium store-bought broth works perfectly well here. Using low-sodium broth gives you total control over the salt levels, which is vital since the sauce will reduce and concentrate as it simmers. You can always add salt, but you can’t take it away once the sauce has thickened.
For the herbs, dried thyme is actually superior to fresh in this specific application. Fresh herbs are delicate and lose their punch after thirty minutes of heat. Dried thyme is more stable; its oils release slowly over the three-hour cook time, ensuring the woody, floral notes are present in every spoonful. Combined with the tomato paste, which we brown until it’s a deep brick red, you create a flavor profile that is incredibly deep and layered.
The Foundation: Searing for Maximum Maillard Reaction
The Maillard reaction is a chemical reaction between amino acids and reducing sugars that gives browned food its distinctive flavor. To achieve this, your pan must be hot and your meat must be dry. If there is any moisture on the surface of the beef, the heat of the oil will go toward evaporating that water instead of browning the meat. You’ll end up with grey, boiled-looking beef.
Work in batches. It’s tempting to throw all two pounds of beef in at once to save time, but this is a mistake. Crowding the pan drops the temperature instantly and releases too much steam. Sear the meat in two or three groups, giving each cube enough space to breathe. You’re looking for a dark, mahogany crust on at least two sides of every piece of beef.
Step-by-Step: Executing the Perfect Braise
Once your beef is seared and set aside, it’s time to build the flavor layers. Don’t rush the vegetables. You want the onions to become translucent and the carrots to just start softening. This usually takes about six to eight minutes. If the pan looks dry, add a tiny splash of broth to keep things moving without burning.
Building the Flavor Base with Aromatics
When you add the garlic and tomato paste, stay close to the stove. Garlic burns in a heartbeat, turning bitter and ruining the whole pot. Stir it constantly for just sixty seconds. You’ll know it’s ready when the tomato paste shifts from a bright red to a dark, rusty “brick” color. This process, known as pinçage, removes the raw metallic taste from the paste and replaces it with a mellow sweetness.
The Low-Simmer Phase: Patience as an Ingredient
After you’ve deglazed the pan and returned the beef to the pot, bring the liquid to a simmer. As soon as you see the first few bubbles, turn the heat down to your lowest setting. Cover the pot with a heavy, tight-fitting lid. If your lid is loose, place a piece of parchment paper or foil over the pot before putting the lid on to create a better seal. This keeps the moisture inside, essentially basting the meat as it cooks.
For even more tender results with beef, consider trying slow braised beef short ribs.
Timing the Peppers for Texture and Color
The biggest mistake people make with this dish is adding the peppers too early. If you simmer a bell pepper for two hours, it will turn into a grey, mushy skin that disappears into the sauce. By waiting until the last 20 to 30 minutes, the peppers soften just enough to be tender while retaining their vibrant red color and a slight structural bite. This contrast in texture makes the dish feel fresh rather than heavy.
Troubleshooting Common Braising Obstacles
If your timer goes off and the meat is still tough, don’t panic. Every cow is different, and some cuts simply need more time. Do not turn up the heat! Just put the lid back on and give it another 30 minutes. Braising is a “done when it’s done” process. The meat should yield easily when pressed with the back of a spoon.
If your sauce feels too thin, the cornstarch slurry is your best friend. Mix equal parts cornstarch and cold water, then whisk it into the simmering sauce. It will thicken almost instantly into a glossy glaze. If the sauce is too salty, you can add a splash of water or a pinch of sugar to balance the flavors. Some chefs even drop in a peeled potato for ten minutes to soak up excess salt, though prevention is always easier.
Optimal Pairings: Beyond the Mashed Potato Well
While a “well” of creamy mashed potatoes is the classic way to serve this, you have plenty of other options. Wide egg noodles, like Pappardelle, are fantastic because the broad surface area of the pasta catches the thick sauce and the bits of beef. The chewiness of the noodle provides a nice contrast to the soft meat.
Round Out Your Meal
To complement your slow braised beef and peppers, consider these chicken dishes.
- For a lighter option, try the Garlic Herb Grilled Chicken Salad, featuring bright, fresh flavors.
- If you prefer a heartier salad, the Grilled Chicken Kale and Cabbage Power Salad offers satisfying textures and nutrients.
For a more rustic feel, try serving the beef over creamy polenta. The corn flavor pairs beautifully with the sweetness of the red peppers. If you want to keep it simple, a thick slice of toasted sourdough bread is all you really need. Use the bread to mop up every last drop of that balsamic-infused gravy. The acidity of the sourdough cuts through the richness of the chuck roast perfectly.
Make-Ahead Strategies and Storage Logistics
Here is a pro tip: this dish actually tastes better the next day. As the beef sits in the sauce overnight in the fridge, the flavors continue to marry and penetrate deep into the meat. The starches in the sauce also stabilize, creating an even silkier mouthfeel when reheated. If you’re hosting a dinner party, making this 24 hours in advance is a brilliant move.
When storing, let the pot cool down significantly before putting it in the refrigerator. Placing a piping hot pot in the fridge can raise the internal temperature of the appliance, which isn’t safe for your other food. Transfer the beef and peppers into an airtight glass container to prevent the sauce from picking up any “fridge smells.”
Freezing and Reheating Without Drying Out the Beef
This recipe freezes beautifully for up to three months. To freeze, place the cooled beef and sauce in a heavy-duty freezer bag and squeeze out as much air as possible. This prevents freezer burn. When you’re ready to eat, thaw it in the fridge overnight.
To reheat, avoid the microwave if possible. The microwave tends to heat unevenly and can make the beef feel rubbery. Instead, place the beef and peppers in a small saucepan over low heat. Add a tablespoon or two of beef broth or water to loosen the sauce. Cover the pan and let it warm through slowly until it’s steaming. This preserves the integrity of the fibers and keeps the peppers from turning to mush.
Customizing Your Slow Braised Beef and Peppers
Once you master the base technique, you can start playing with the flavors. For a smoky version, add a teaspoon of smoked paprika when you add the tomato paste. This gives the dish a deep, campfire-like aroma that pairs incredibly well with the red peppers. It’s a simple swap that changes the entire mood of the meal.
If you want a more garden-forward version, you can add sliced leeks and celery along with the onions. This creates a more complex aromatic base. You could even toss in some halved cremini mushrooms during the last hour of cooking. They’ll soak up the beef juices like little sponges, adding another layer of savory goodness to the bowl.
Final Presentation: The Art of the Garnish
Don’t underestimate the power of the garnish. After three hours of braising, the dish is very brown and very rich. A heavy handful of fresh Italian parsley isn’t just for looks; the bright, grassy flavor of the herb cuts through the fat and refreshes your palate between bites. It provides a necessary “high note” to the deep “bass notes” of the beef.
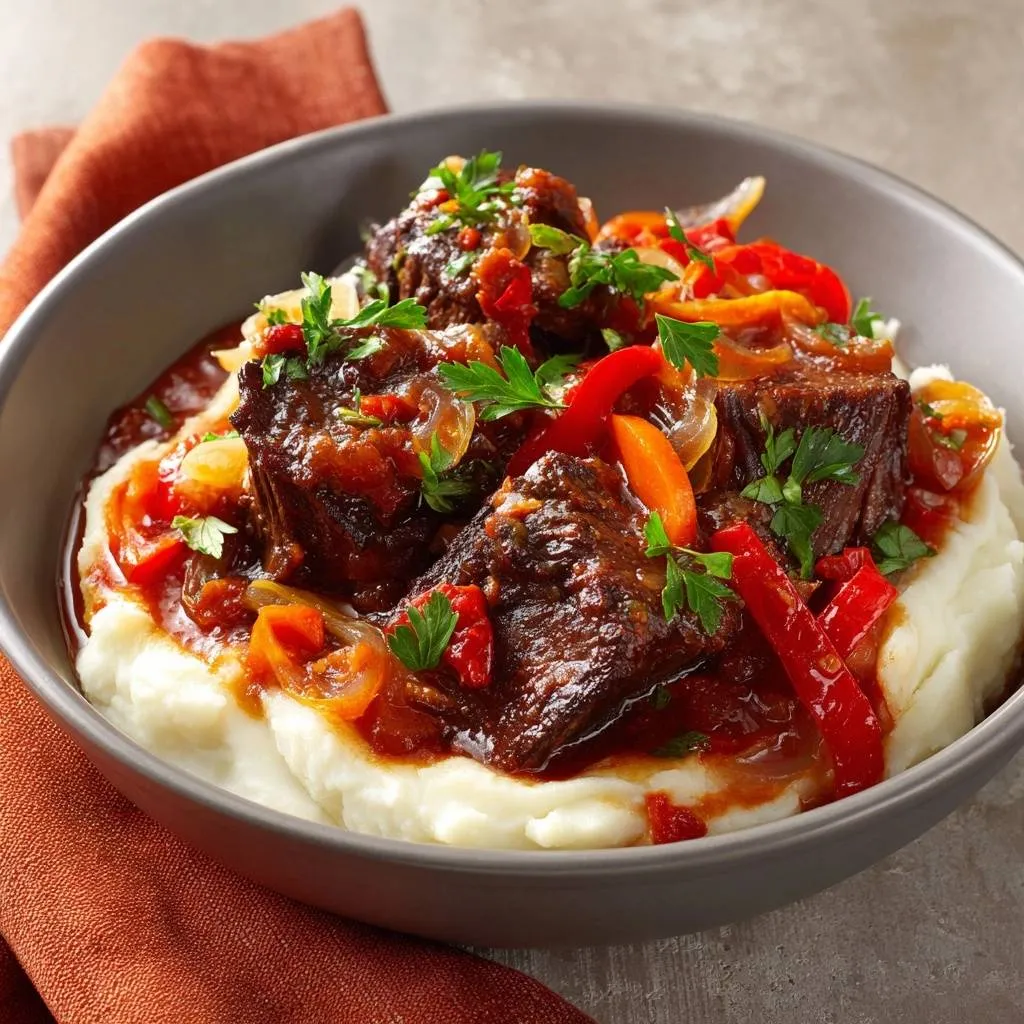
When plating, think about height. Start with a generous base of your chosen starch, then use a ladle to place the beef and peppers right in the center. Make sure you get plenty of that glossy sauce over the top. The contrast between the vibrant red peppers, the dark beef, and the bright green parsley creates a “skyscraper” effect that looks like it came straight out of a professional kitchen.
Frequently Asked Questions
How do I store leftovers and can I freeze this?
Store leftovers in an airtight container in the refrigerator for up to 4 days. This dish freezes exceptionally well because the sauce protects the meat from freezer burn. Place it in a freezer-safe bag or container for up to 3 months. For the best results, thaw in the refrigerator overnight before reheating on the stovetop over low heat.
Why is my beef still tough after 3 hours of cooking?
If the beef is tough, it almost always means it needs more time, not more heat. Every cut of meat has a different amount of connective tissue. If the collagen hasn’t fully melted into gelatin yet, the meat will feel chewy. Simply put the lid back on and continue simmering on low for another 30 minutes. Also, ensure you aren’t boiling the meat, as high heat causes the proteins to tighten and become dry.
Can I use a different cut of meat if I can’t find chuck roast?
Yes, you can substitute chuck roast with other “stewing” cuts like bottom round, brisket, or beef shanks. The key is to look for a cut with visible marbling and connective tissue. Avoid lean cuts like sirloin or filet mignon for this recipe; they don’t have enough fat or collagen to survive a long braise and will become extremely dry and tough.
What can I use if I don’t have balsamic vinegar?
If you’re out of balsamic, red wine vinegar is the best substitute. It provides the necessary acidity to tenderize the meat and deglaze the pan. If you use red wine vinegar, you might want to add a teaspoon of brown sugar to mimic the natural sweetness found in balsamic vinegar. Apple cider vinegar also works in a pinch, though it will slightly alter the flavor profile.
My sauce is too thin, how can I fix it?
The easiest way to thicken the sauce is with a cornstarch slurry. Mix 1 tablespoon of cornstarch with 1 tablespoon of cold water until smooth, then stir it into the simmering pot. Let it cook for 2 minutes to activate the starch. Alternatively, you can remove the lid during the last 30 minutes of cooking to allow some of the liquid to evaporate, which naturally concentrates and thickens the sauce.
Can I make this in a slow cooker instead of a Dutch oven?
Yes, you can. However, you should still perform the searing and sautéing steps in a pan on the stove first. Once you’ve deglazed the pan with the vinegar, transfer everything to the slow cooker. Cook on the “Low” setting for 7 to 8 hours. Add the peppers during the last 45 minutes of the slow cooker cycle to ensure they don’t overcook.
Braised Beef
Course: Main CourseCuisine: AmericanDifficulty: medium4
servings20
minutes3
hours540
kcal180
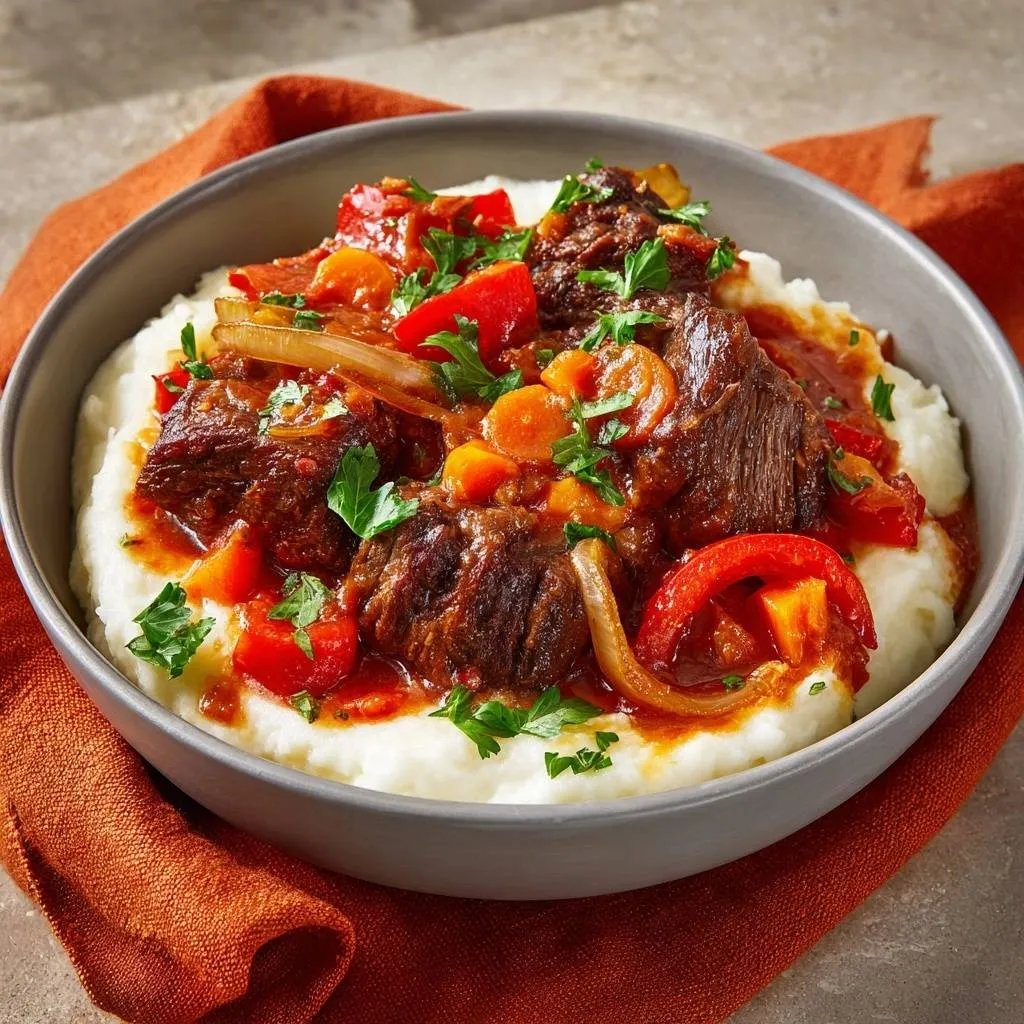
MinutesA foolproof recipe for beef stew that eliminates tough meat using a specific searing technique and natural acid tenderizers. The beef is slow-cooked for three hours until it melts on the tongue, served over creamy mashed potatoes with vibrant peppers.
Ingredients
2 pounds beef chuck roast, cut into 2-inch cubes
2 tablespoons vegetable oil
1 large yellow onion, sliced into thin half-moons
2 large red bell peppers, sliced into thick strips
3 medium carrots, sliced into thin rounds
3 cloves garlic, minced
2 tablespoons tomato paste
2 cups beef broth
1 tablespoon balsamic vinegar
1 teaspoon dried thyme
1 tablespoon cornstarch mixed with 1 tablespoon cold water (optional slurry)
Salt and black pepper to taste
4 cups prepared creamy mashed potatoes
1/2 cup fresh Italian parsley, roughly chopped for garnish
Directions
- The secret to avoiding tough meat starts with the sear. Pat the beef cubes completely dry with paper towels. Season generously with salt and pepper.
- Heat the oil in a heavy-bottomed Dutch oven over medium-high heat. Do not crowd the pan. Sear the beef in batches until a deep, dark brown crust forms on all sides. Remove the beef and set aside.
- Lower the heat to medium. Add the onions and carrots. Sauté for 6-8 minutes until the onions are softened and slightly caramelized. Add the garlic and tomato paste, stirring for 1 minute until the paste turns a deep brick red.
- Pour in the balsamic vinegar and use a wooden spoon to scrape up all the brown bits (fond) from the bottom of the pot. This acidity is the key to breaking down tough muscle fibers during the braise.
- Return the beef and any accumulated juices to the pot. Add the beef broth and thyme. The liquid should partially submerge the meat.
- Bring to a gentle simmer, then reduce heat to the lowest setting. Cover with a tight-fitting lid. To solve the tough meat problem, you must maintain a very low simmer for 2.5 hours. High heat tightens the proteins; low heat allows the collagen to melt into gelatin.
- After 2.5 hours, add the red bell pepper strips to the pot. Stir them in, replace the lid, and cook for an additional 20-30 minutes. This ensures the peppers are tender and vibrant (as seen in the image) rather than disintegrated.
- Once the beef is fork-tender, check the sauce consistency. If you prefer a thicker glaze to sit atop the potatoes, stir in the cornstarch slurry and simmer for 2 minutes.
- To serve, create a wide well in a bowl of creamy mashed potatoes. Ladle the beef, peppers, and carrots into the center. Garnish heavily with fresh chopped parsley to match the visual presentation.
Notes
- The key to avoiding tough meat is maintaining a very low simmer; high heat tightens the proteins while low heat ensures a melt-in-your-mouth texture.