Few things in the culinary world are as frustrating as spending hours on a beef stew only to have the meat turn out dry, stringy, or stubbornly chewy. We’ve all been there, staring at a beautiful pot of food that just didn’t cross the finish line of tenderness. The secret to avoiding this heartbreak isn’t just about the time spent on the stove; it’s about mastering the delicate art of the braise.
Slow-Braised Beef Short Ribs represent the pinnacle of comfort food, transforming a humble, hardworking cut of beef into something so soft it practically melts when it hits your tongue. This isn’t just a simple stew where everything is tossed into a pot. It’s a technique-driven process that relies on controlled temperatures and a deep understanding of how heat interacts with protein. When done correctly, you’re rewarded with a glossy, mahogany sauce and beef that yields to the slightest pressure of a fork.
The magic happens when we move beyond the “boil it until it’s done” mentality. By using a heavy Dutch oven and a low-temperature oven finish, we create an environment where the beef can relax. You’re looking for that specific moment where the fat has rendered and the sauce has thickened into a rich reduction. It’s a dish that fills your home with a savory, wine-rich aroma, promising a meal that feels like a warm hug on a cold evening.
The Science of Succulent Slow-Braised Beef Short Ribs
To understand why this recipe works, we have to look at the biology of the cow. Short ribs come from the lower portion of the rib cage, an area full of connective tissue and collagen. If you were to grill this cut like a steak, it would be nearly impossible to chew. However, when subjected to low, moist heat over several hours, a beautiful chemical transformation occurs.
During the braising process, the tough collagen fibers slowly break down and turn into gelatin. This gelatin doesn’t just make the meat tender; it actually coats the muscle fibers, providing a succulent, “fatty” mouthfeel even if the meat itself is lean. This is why short ribs are the undisputed king of the braise. They have the perfect ratio of meat to connective tissue to ensure a silky result every single time.
Many home cooks make the mistake of boiling their beef on the stovetop at 212°F. While this is fast, the aggressive bubbling causes the muscle fibers to contract violently, squeezing out their internal juices like a wrung-out sponge. By moving the pot to a 300°F oven, the liquid stays just below a simmer. This gentle environment allows the collagen to melt without traumatizing the meat, ensuring the moisture stays exactly where you want it—inside the beef.
Why Connective Tissue Requires Low and Slow Heat
Think of a ribeye steak as a delicate silk fabric and a short rib as a heavy-duty canvas. You can’t treat them the same way. High heat is the enemy of tough cuts because it hardens the “silver skin” and gristle before they have a chance to soften. Low heat acts as a key that slowly unlocks those tough structures. As the internal temperature of the meat hovers around 160°F to 180°F for an extended period, the transformation into fork-tender perfection becomes inevitable.
Essential Components for a Rich Braising Liquid
The liquid you choose is just as important as the meat itself. For this recipe, we use beef bone broth rather than standard shelf-stable stock. Bone broth is simmered for much longer, meaning it’s packed with natural gelatin. This gives your final sauce a “lip-smacking” quality and a natural thickness that flour alone can’t replicate. If you can’t find bone broth, look for a high-quality stock that jiggles when it’s cold.
Acidity is the other crucial pillar of a great braise. A dry red wine, such as a Cabernet Sauvignon or a Merlot, provides the necessary tannins and acid to cut through the richness of the beef fat. It balances the palate and adds a complex, dark-fruit undertone to the sauce. Don’t worry about the intensity; as the wine reduces by half, the sharp edges mellow out into a smooth, savory base.
Selecting the Right Cut: Bone-In vs. Boneless
You’ll often find both bone-in and boneless short ribs at the butcher counter. Bone-in ribs offer a bit more depth because the marrow seeps into the sauce, but they can be bulky and harder to sear evenly. For this specific recipe, I prefer large 2.5-inch boneless chunks. They allow for a more uniform sear on all sides and make serving much easier. Look for pieces with heavy “marbling”—those white flecks of fat within the red meat—as these will be the most flavorful.
Aromatics and the “Holy Trinity” of Flavor
We build our flavor foundation with yellow onions and carrots. The onions provide a savory sweetness, while the carrots add an earthy note that survives the long cook time. Fresh thyme is non-negotiable here. Dried thyme often becomes dusty and bitter during a three-hour braise, but fresh sprigs release their oils slowly, infusing the beef with a bright, woodsy aroma that lifts the entire dish.
Phase One: The Maillard Reaction and Searing
The most important rule of braising is this: moisture is the enemy of the sear. Before the beef ever touches the pan, you must pat it completely dry with paper towels. If the surface is wet, the heat of the oil will turn that water into steam. Steamed meat turns grey and rubbery. Dry meat, however, undergoes the Maillard reaction—a chemical dance between amino acids and sugars that creates a dark, flavorful crust.
Heat your olive oil until it shimmers and just starts to send up a tiny wisp of smoke. When you drop the beef in, you should hear a loud, aggressive sizzle. If it’s quiet, your pan isn’t hot enough. Let the beef sit undisturbed for 3-4 minutes per side. You aren’t cooking the meat through; you are simply “painting” it with flavor by creating that deep brown crust.
Batch Cooking: Avoiding the Crowded Pan
Patience is a virtue when searing. If you crowd all 2.5 pounds of beef into the pot at once, the temperature of the oil will plummet. The meat will start releasing juices, and suddenly you’re boiling your beef in its own liquid. Work in two or even three batches. Give each chunk of beef at least an inch of “personal space” so the steam can escape and the crust can form properly.
Phase Two: Building the Foundation with Fond
After you remove the browned beef, you’ll notice dark, stuck-on bits at the bottom of your Dutch oven. In the culinary world, we call this “fond,” and it is pure gold. Don’t wash it away! This is where the concentrated essence of the beef lives. When you add your onions and carrots, their natural moisture will start to loosen these bits, incorporating them into the vegetables.
Adding the tomato paste is the next critical step. You want to sauté it for about two minutes until the color shifts from a bright red to a dark, brick-like hue. This “toasting” of the paste removes the metallic tin-can taste and replaces it with a rich, umami sweetness. Once you stir in the flour, you’ve created a light roux that will ensure your sauce has body and shine later on.
Deglazing Techniques for a Glossy Reduction
Now comes the deglazing. Pour in your red wine and use a wooden spoon to vigorously scrape the bottom of the pot. You’ll see the liquid turn dark as it picks up all that flavorful fond. Let the wine bubble away until it has reduced by about half. This concentrates the sugars and ensures the alcohol flavor cooks off, leaving behind only the deep, fruity essence of the grapes.
Phase Three: The Oven Braise and Temperature Control
Once you’ve added your broth and returned the beef to the pot, it’s time for the “low and slow” magic to begin. Ensure your lid fits tightly. If you suspect your lid isn’t airtight, you can place a piece of parchment paper or aluminum foil over the pot before pressing the lid down. This creates a seal that prevents the braising liquid from evaporating, which would leave your meat high and dry.
For a similar experience with rich flavor, explore this slow-simmered beef stew.
The 300°F oven provides a surround-heat effect that a stovetop burner simply can’t match. On the stove, the heat only comes from the bottom, creating “hot spots” that can scorch the sauce. In the oven, the heat is even and gentle. Over the next three hours, the liquid will barely tremble, slowly coaxing the beef into a state of total surrender.
Monitoring Tenderness Without Piercing the Meat
Around the three-hour mark, it’s time to check your progress. Don’t just look at the clock; look at the meat. Take a plain dinner fork and press it into a chunk of beef. If the fork slides in and out with zero resistance, or if the meat starts to flake apart with a gentle twist, you’re done. If there is any “bounce” or “tug” felt on the fork, put the lid back on and give it another 30 minutes. You can’t rush perfection.
The Secret to Velvety Yukon Gold Mash
While the beef is the star, the potatoes are the supporting actor that makes the whole show work. I always recommend Yukon Gold potatoes for this dish. Unlike Russets, which are starchy and fluffy, Yukon Golds have a natural waxiness and a buttery yellow color. They create a mash that is dense, velvety, and strong enough to hold up under the weight of the heavy braising sauce.
The goal is a mash that feels like silk. By using plenty of unsalted butter and heavy cream, you create an emulsion that mimics the richness of the beef. It provides a neutral, creamy base that balances the intense, salty, and acidic notes of the red wine reduction. It’s the ultimate vehicle for soaking up every last drop of that glossy sauce.
The Steam-Dry Method for Better Absorption
Here is a pro tip: after you drain your boiled potatoes, put them back into the hot, empty pot for two minutes over very low heat. Shake the pot gently. You’ll see steam rising off the potatoes—this is excess water escaping. By “steam-drying” them, you make room in the potato cells to absorb more butter and cream. This results in a much more flavorful mash that isn’t watery or bland.
Troubleshooting Your Slow-Braised Beef Short Ribs
If you pull your pot out of the oven and the sauce looks thin like water, don’t panic. Simply remove the beef and carrots to a plate and set the pot on the stovetop over medium-high heat. Let the liquid boil for 5-10 minutes. As the water evaporates, the natural gelatins and the small amount of flour we added will thicken the sauce into a glaze that beautifully coats the back of a spoon.
On the flip side, if your meat is still tough after three hours, the answer is almost always “more time.” People often think they’ve overcooked the beef when it’s tough, but with a braise, toughness usually means the collagen hasn’t finished melting yet. Give it more time at a low temperature, and it will eventually give in. You can’t overcook a braise into toughness; you can only overcook it until it completely falls apart into shreds.
Fixing an Overly Salty or Acidic Sauce
Sometimes, if your broth was particularly salty or your wine very acidic, the final reduction can taste a bit “sharp.” If it’s too salty, add a splash of water or a little more cream to the potatoes to balance the bite. If it’s too acidic, a tiny teaspoon of honey or brown sugar can work wonders. The sugar neutralizes the acid without making the dish taste sweet, bringing everything into perfect harmony.
Make-Ahead Strategies and Storage
Braised dishes are famous for tasting even better the next day. As the dish sits in the fridge, the flavors continue to marry and the beef absorbs even more of the seasoned liquid. If you’re hosting a dinner party, I actually recommend making this a day in advance. It takes the stress out of the evening and results in a superior flavor profile.
When cooling the dish, let it sit at room temperature for about 30 minutes before moving it to the fridge. Do not leave it out for hours, as the thick sauce can trap heat and encourage bacteria growth. Once chilled, the fat will rise to the top and solidify into a white layer. You can easily scrape this off and discard it for an even cleaner, more refined sauce when you’re ready to eat.
Reheating Without Drying Out the Beef
Avoid the microwave at all costs when reheating short ribs. The high-frequency waves will turn your tender beef into rubber in seconds. Instead, place the beef and sauce in a pan on the stovetop over low heat. Add a tablespoon or two of water or broth to loosen the sauce, cover it, and let it warm through gently. This preserves the texture and keeps the meat moist.
Expert Tips for Professional Presentation
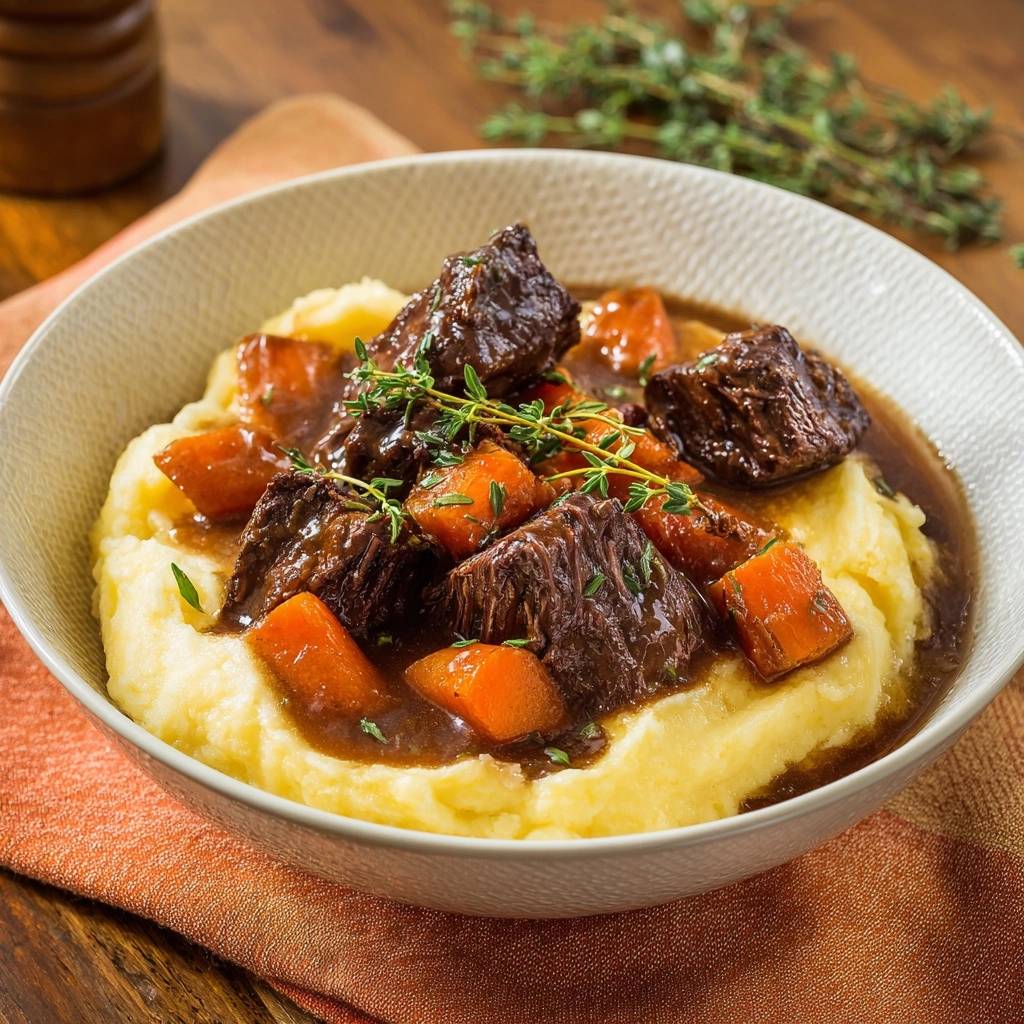
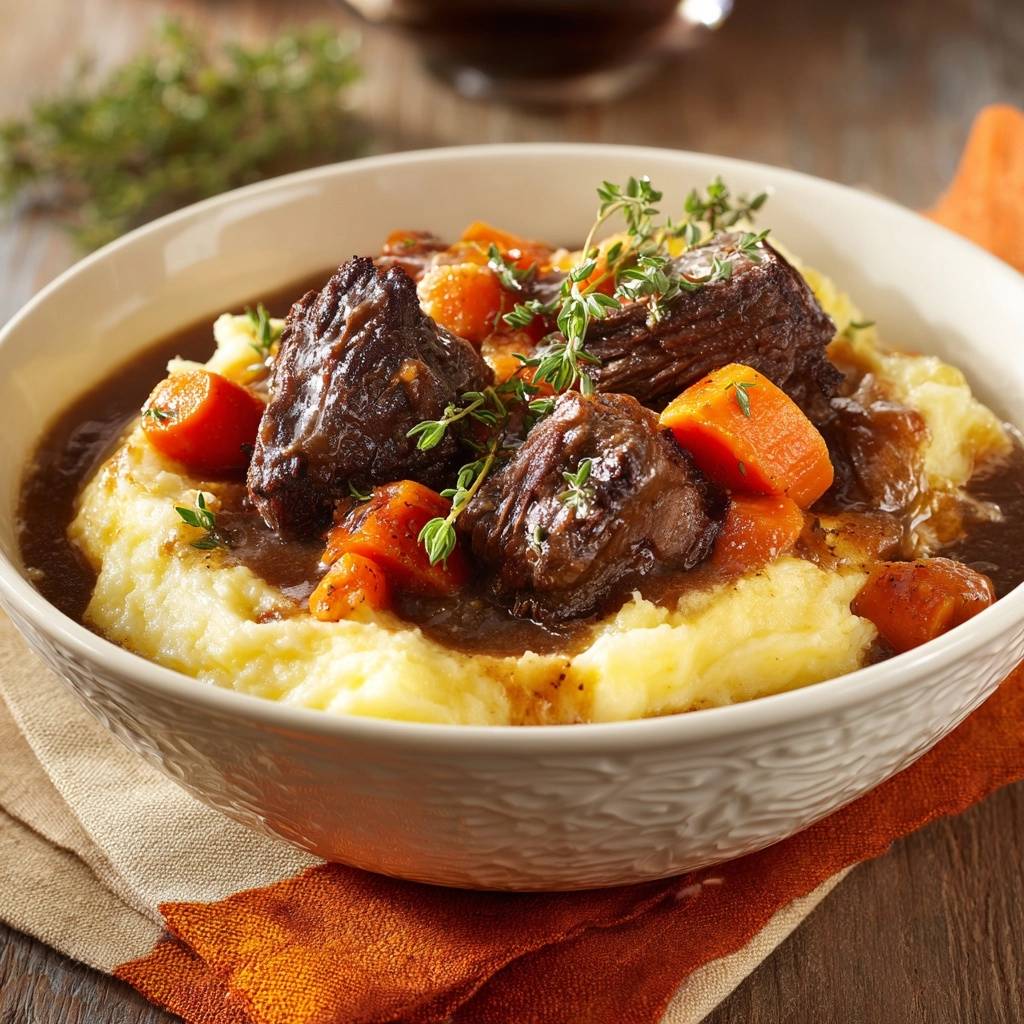
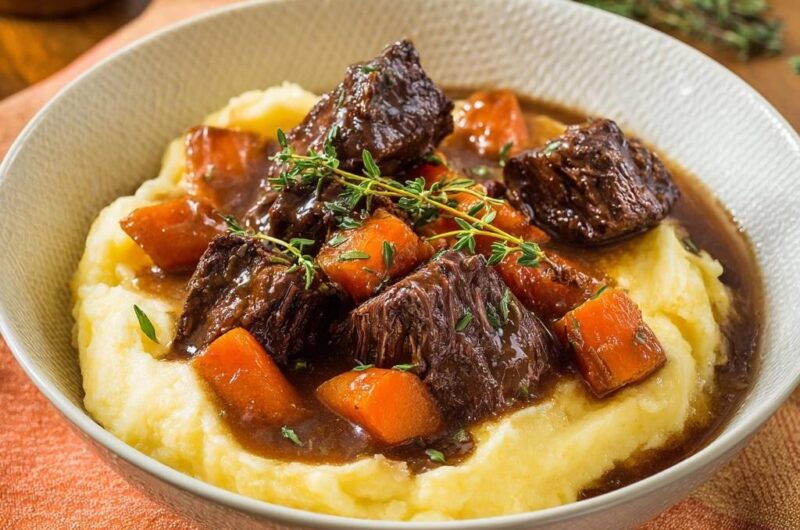
To serve this like a pro, don’t just plop the food on a plate. Use a shallow bowl and create a wide “well” or “nest” with your mashed potatoes. Spoon the beef and carrots into the center, then generously ladle the dark sauce over the top so it fills the well. The contrast of the bright orange carrots and the green thyme against the dark, glistening sauce is visually stunning. It looks exactly like the high-end bistro meal it is.
Frequently Asked Questions
Can I make these in a Slow Cooker?
Yes, you can, but you must still perform the searing and deglazing steps in a pan first. Transfer everything to the slow cooker and cook on “Low” for 7-8 hours. Note that slow cookers don’t allow for evaporation, so you may need to reduce the beef broth by about half a cup to prevent the sauce from being too watery.
What is a non-alcoholic substitute for Red Wine?
If you prefer not to use wine, substitute the two cups of wine with an equal amount of beef broth mixed with two tablespoons of balsamic vinegar and a tablespoon of pomegranate juice. This provides the acidity and the deep color needed to mimic the complexity of a wine-based braise.
Why is my braising liquid greasy?
Short ribs are a fatty cut, and that fat renders out during the long cook. The easiest way to fix this is to use a large metal spoon to skim the clear oil off the top of the sauce before serving. Alternatively, making the dish a day ahead allows you to lift the solidified fat off the top once it has been refrigerated.
Can I use frozen beef for this recipe?
You can, but the beef must be completely thawed in the refrigerator before you start. If the meat is even slightly frozen in the center, it will release too much moisture during the searing phase, preventing that crucial Maillard crust from forming and potentially making the meat tough.
How do I thicken the sauce without more flour?
If you want a thicker sauce without adding more flour, you can use a “beurre manié.” Mash together equal parts softened butter and flour into a paste, then whisk small bits of it into the simmering sauce at the very end. The butter adds a professional gloss while the flour thickens the liquid instantly.
Beef Short Ribs
Course: Main CourseCuisine: AmericanDifficulty: medium4
servings20
minutes3
hours720
kcal180
MinutesA foolproof method for transforming tough beef into fork-tender perfection using a temperature-controlled braise, red wine, and bone broth.
Ingredients
2.5 pounds beef chuck or boneless short rib, cut into large 2.5-inch chunks
3 large carrots, peeled and cut into thick 1-inch oblique chunks
1 large yellow onion, diced
2 cups dry red wine (Cabernet or Merlot)
3 cups beef bone broth
3 tablespoons tomato paste
2 tablespoons all-purpose flour (for thickening)
2 tablespoons olive oil
1.5 teaspoons kosher salt
1 teaspoon cracked black pepper
6 sprigs fresh thyme (plus extra for garnish)
2 bay leaves
4 large Yukon Gold potatoes
1/2 cup heavy cream
6 tablespoons unsalted butter
Directions
- Pat the beef chunks completely dry with paper towels. This is the first step to preventing tough meat; moisture on the surface creates steam, which prevents the Maillard reaction. Season generously with salt and pepper.
- Heat olive oil in a heavy-bottomed Dutch oven over medium-high heat. Sear the beef in batches, ensuring you do not crowd the pan. Brown each side for 3-4 minutes until a deep, dark crust forms. Remove beef and set aside.
- Reduce heat to medium. Add the diced onion and carrots to the pan drippings, sautéing for 5 minutes. Stir in the tomato paste and cook for 2 minutes until it turns a deep brick red. Sprinkle the flour over the vegetables and stir for 1 minute to cook out the raw flour taste.
- Pour in the red wine to deglaze the pan, scraping the bottom vigorously to release the “fond” (browned bits). Let the wine simmer and reduce by half.
- Slowly whisk in the beef bone broth. Return the beef and any accumulated juices to the pot. Add the thyme sprigs and bay leaves. The liquid should submerge the meat by about three-quarters.
- To solve the toughness issue, cover the pot with a tight-fitting lid and transfer to a 300°F (150°C) oven. Do not boil the meat on the stovetop, as aggressive high heat tightens the proteins. The gentle, consistent 300°F heat allows the collagen to melt into gelatin over 3 to 3.5 hours.
- While the beef braises, peel and quarter the potatoes. Boil in salted water until tender (about 15-20 minutes). Drain and let steam dry for 2 minutes. Mash with butter and heavy cream until perfectly smooth and velvety.
- After 3 hours, check the beef. It should yield easily to a fork with no resistance. Remove the thyme stems and bay leaves. If the sauce needs more body, simmer on the stovetop for 5-10 minutes until it coats the back of a spoon.
- Serve by creating a wide well of mashed potatoes in a shallow bowl. Spoon the beef, carrots, and plenty of the dark reduction into the center. Garnish with fresh thyme sprigs as shown in the image.
Notes
- Ensure the beef is patted completely dry before searing to achieve a proper crust. Use a tight-fitting lid to maintain moisture during the long oven braise.